Key highlights
- Choose the right theme-building path based on your goal, skill level and site complexity.
- Protect your site with backups and staging before editing theme files or publishing changes.
- Build a child theme when you need safe code-level edits without risking parent theme updates.
- Test SEO, page speed, mobile usability, forms, cart and checkout before launching a new theme.
- Improve conversions by making sure CTAs, add-to-cart buttons and key revenue paths work after every theme change.
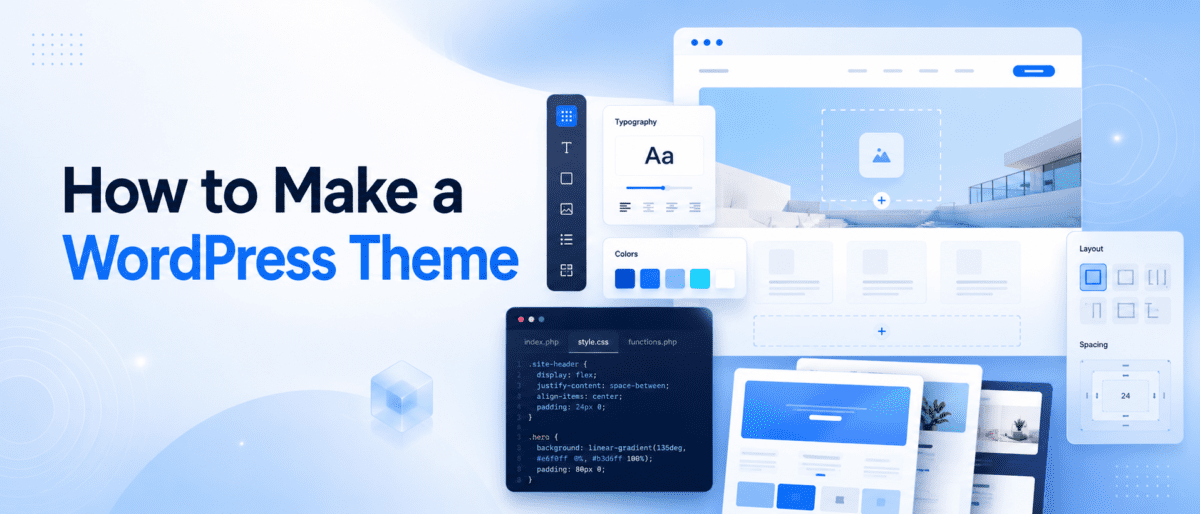
Your WordPress theme affects more than how your site looks. It can influence how fast pages load, how users move through your site and whether key actions like form submissions, add-to-cart clicks and checkout work smoothly.
In this guide, you’ll learn how to make a WordPress theme, choose between a child theme and a custom build and test your site before launch.
Quick TL;DR: How to make a WordPress theme
| Goal | Best option |
|---|---|
| Change colors, fonts or layout | Customize existing theme |
| Make code-level edits safely | Create a child theme |
| Build a full custom design | Create a custom theme from scratch |
| Avoid coding | Use a theme builder or expert help |
The right option depends on your coding comfort, site complexity and how much control you need. But before editing theme files, back up your site and test changes on staging.
Need a safe place to test theme changes? Bluehost gives you the tools to build, edit and manage your site with more confidence. Explore our WordPress hosting plans before making live theme updates.
What is a WordPress theme and how does it work?
A WordPress theme is a set of HTML code overlaid on the source code that creates the theme framework for a WordPress site. Because a theme isn’t part of the source code, it can be changed or modified without affecting the structure of the site itself. The theme files create a template that’s used to establish the look and layout of the entire website in a unified way so that all pages and posts share features such as the same colors, backgrounds and fonts.
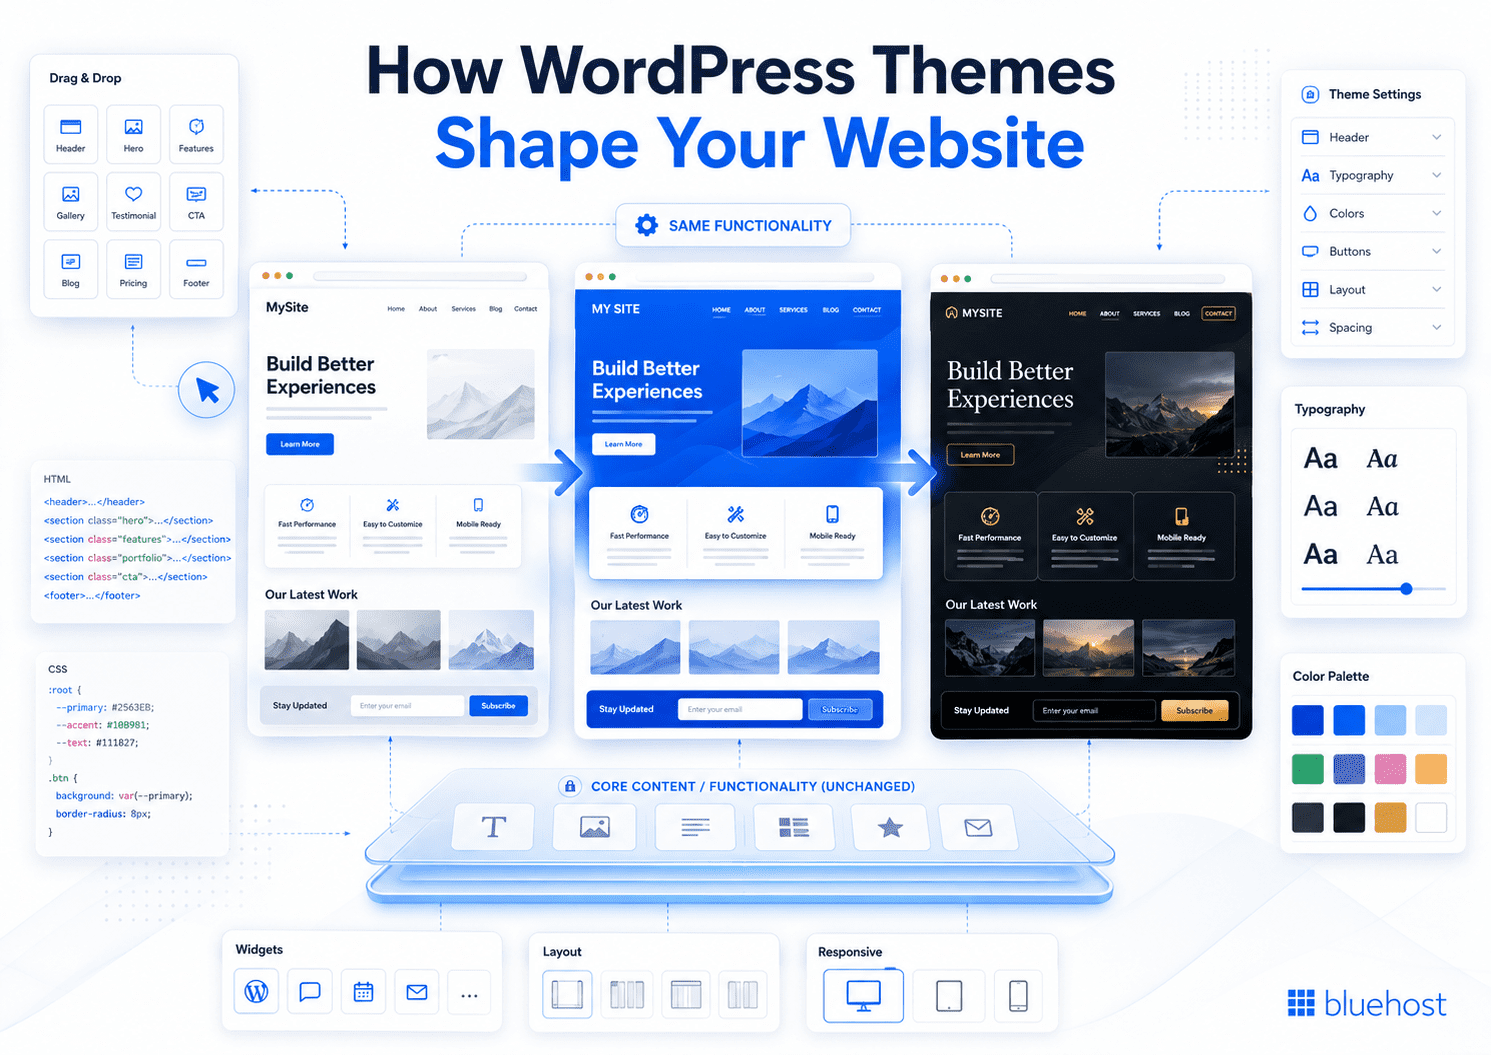
When a user installs a WordPress theme, the theme features are automatically added to the site. If that theme doesn’t appeal, it can be replaced simply by choosing another one. Not all themes share the same features and layout, so when changing a WordPress theme, it might be necessary to reconfigure some parts of the page structure, such as the way widgets are displayed. Likewise, some plugins might not work or work the same way when a theme is changed.
Also read: WordPress Architecture: Tips, Plugins & Best Practices 2026
Custom WordPress theme vs child theme: Which is better for your website?
Before you start building, decide whether you need a full custom WordPress theme or a child theme. Both can change how your site looks and works, but they are not the same.
Use a child theme when you want safer edits
- Best for: Editing an existing theme without losing changes during parent theme updates
- Skill level: Intermediate
- Risk level: Medium
- Check before publishing: Layout, menus, forms, mobile design, SEO settings and checkout flow
- Best for most site owners: Keeps the parent theme intact while allowing custom changes
Use a custom WordPress theme when you need full control
- Best for: Building a unique site design from scratch with custom templates, layout and functionality
- Skill level: Advanced
- Risk level: High
- Check before publishing: Page templates, speed, mobile usability, structured data, forms, cart and checkout
- Best for complex sites: Makes sense when an existing theme cannot support your design, performance or functionality needs

For most site owners, a child theme is the safer starting point. It lets you make custom changes while keeping the parent theme intact.
A custom WordPress theme makes sense when you need a fully unique design, custom templates or performance control that an existing theme cannot provide. It takes more planning, testing and development work.
Quick recommendation: If your site supports sales, leads or bookings, use staging and test every conversion path before publishing either option.
Get expert WordPress support with Bluehost today.
Before you start: Back up and test safely
Before you edit theme files, create a safe version of your site to work on and avoid testing directly on your live website.
Start with these steps:
| Step | What to do | Why it matters |
|---|---|---|
| 1. Create a full website backup | Back up your WordPress files, theme files, plugins, uploads and database before making changes. | Gives you a rollback option if the theme update breaks the site. |
| 2. Use staging or local development | Make theme changes in a test environment instead of the live website. | Lets you preview and fix issues before users see them. |
| 3. Save current theme settings | Take screenshots or notes of your header, footer, menus, widgets, homepage layout, colors and fonts. | Helps you compare the before and after version and restore key design elements. |
| 4. Review important pages | Check your homepage, blog posts, landing pages, product pages, contact page and checkout flow before editing. | Establishes what should still work after the theme change. |
| 5. Test revenue paths | Test add to cart, cart page, checkout, payment flow, lead forms, booking forms and newsletter signups. | Protects purchases, add-to-cart actions and lead generation. |
| 6. Check SEO basics | Confirm page titles, meta descriptions, headings, internal links, image alt text, schema and indexable pages still work. | Prevents theme changes from hurting organic visibility. |
| 7. Test on mobile | Check menus, buttons, forms, images and checkout steps on mobile devices. | Mobile layout issues can reduce clicks, conversions and engagement. |
| 8. Keep a rollback plan | Know how to restore the previous version before publishing changes. | Reduces downtime if something breaks after launch. |
Theme changes can affect more than design and navigation. They can impact SEO, page speed, mobile usability, forms, add-to-cart buttons and checkout. Before publishing changes, use a backup and staging environment so you can test your theme safely and keep your site ready for visitors and customers.
Option 1: Customize an existing WordPress theme
Use this option if you only need simple visual changes and do not need to edit theme code.
| What to update | Where to update it | Best for |
|---|---|---|
| Logo | Site Editor or Customizer | Branding updates |
| Colors | Site Editor or Customizer | Matching brand style |
| Fonts | Site Editor, Customizer or theme settings | Improving readability |
| Menus | Appearance settings or Site Editor | Navigation updates |
| Header and footer | Site Editor, Customizer or theme settings | Layout and CTA improvements |
Avoid editing parent theme files directly. If the theme gets updated later, those direct edits can be overwritten. For code-level changes, use a child theme instead. WordPress recommends child themes when you want to customize an existing theme without directly changing the parent theme’s files.
Need simple design changes? Start with a WordPress setup that gives you backups, support and staging in one place.
Option 2: Create a WordPress child theme
Use a child theme when you want to safely customize an existing WordPress theme with your own CSS, template changes or functions. A child theme keeps your customizations separate from the parent theme, so parent theme updates are less likely to remove your changes.
| Step | What to do |
|---|---|
| 1. Create a child theme folder | Add a new folder inside /wp-content/themes/. Use a clear name, such as yourtheme-child. |
2. Add style.css | Create a style.css file with the child theme name and parent theme template name. |
3. Add functions.php | Create a functions.php file for loading styles and adding small custom functions. |
| 4. Enqueue parent theme styles | Load styles through functions.php, not outdated @import guidance. WordPress recommends using wp_enqueue_style() for loading stylesheets. |
| 5. Activate the child theme | Go to Appearance > Themes and activate the child theme on your staging site first. |
| 6. Test the site | Check layout, menus, forms, cart, checkout, mobile design and page speed before publishing. |
Short example for style.css:
/*
Theme Name: Your Theme Child
Template: parent-theme-folder-name
*/
Short example for functions.php:
<?php
add_action( 'wp_enqueue_scripts', 'child_theme_styles' );

function child_theme_styles() {
    wp_enqueue_style( 'parent-style', get_parent_theme_file_uri( 'style.css' ) );
    wp_enqueue_style( 'child-style', get_stylesheet_uri() );
}
Note: Back up your site before activating a child theme.
Option 3: Build a custom WordPress theme from scratch
Build a custom theme from scratch if you need full control over design, templates, layout and performance. This path is best for developers or site owners working with expert help.
| Step | What to do |
|---|---|
| 1. Set up a local or staging environment | Do not build or test a new theme on the live site. |
| 2. Create a theme folder | Add a new folder inside /wp-content/themes/. |
3. Add style.css | Add the theme header and main stylesheet. WordPress uses style.css as the main stylesheet for a theme. |
4. Add index.php | Create the fallback template file for your theme. |
5. Add functions.php | Use this file for theme features, scripts, styles and custom functions. |
6. Add header.php | Build the opening HTML, site header and navigation area. |
7. Add footer.php | Build the footer, closing layout and scripts. |
| 8. Add template files | Add files for pages, posts, archives, search results and 404 pages as needed. |
| 9. Add the WordPress loop | Display posts and page content dynamically. |
| 10. Add navigation | Add navigation menus that are easy to use and crawl. |
| 11. Add theme support features | Add support for logos, featured images, title tags and editor styles where needed. |
| 12. Add CSS and responsive styles | Make the theme work across desktop, tablet and mobile. |
| 13. Test accessibility | Check headings, contrast, keyboard navigation and form labels. |
| 14. Test Core Web Vitals | Keep CSS, JavaScript, fonts and images lightweight. |
| 15. Test forms, cart and checkout | Confirm every revenue path still works. |
| 16. Publish after QA | Push live only after design, SEO, speed and conversion checks pass. |
Minimum starter structure:
your-custom-theme/
  style.css
  index.php
  functions.php
  header.php
  footer.php
WordPress theme structure can include folders for templates, parts, patterns, styles and assets, depending on how advanced the theme is.
Also read: Best Free WordPress Themes: 65 Handpicked for Any Niche
Build your WordPress theme the safe way
A custom WordPress theme gives you more control over your site’s design, layout and performance. But when your website supports real-time business activity, direct live edits can create avoidable downtime or errors.
Before you build or publish a new theme, decide which path fits your site:
| Your goal | Best next step |
|---|---|
| Make small design changes | Customize your existing theme |
| Edit theme files safely | Create a child theme |
| Build a fully custom layout | Create a custom WordPress theme |
| Protect sales, forms and SEO | Test on staging before launch |
| Avoid coding or reduce risk | Get expert WordPress help |
For most business websites, the right decision is simple: start with a backup, test the theme on staging and publish only after checking SEO, speed, forms, cart and checkout.
If you want more control without risking your live site, choose a WordPress hosting plan that supports safe site updates, staging and expert help when needed.
SEO checklist for custom WordPress themes
Before publishing a custom WordPress theme, make sure the theme can be crawled, indexed and understood by search engines. A design update should not break existing rankings, metadata or internal links.
Use this checklist before pushing the theme live:
- Use one clear H1 per template.
- Keep title tags editable for every page and post.
- Keep meta descriptions editable for every page and post.
- Use a clean heading structure: H1, then H2s, then H3s where needed.
- Use semantic HTML for the header, navigation, main content, article sections and footer.
- Make internal links crawlable with standard HTML links.
- Add breadcrumb support where it improves navigation.
- Support image alt text for featured images, inline images and product images.
- Keep important content visible in the HTML instead of hiding it behind unnecessary JavaScript.
- Make all page, post, archive and product templates mobile-friendly.
- Test page speed before and after the theme change.
- Preserve schema markup where the existing site already uses it.
- Make sure blog posts, pages, categories, tags and archive pages are indexable where needed.
- Check that canonical tags point to the correct URLs.
- Confirm the XML sitemap includes the final live URLs.
- Check that redirected URLs point to the correct destination.
- Test key templates in Google Search Console after publishing.
After changing your theme, check that your SEO settings, metadata and internal links still work. Use an SEO tool, Yoast or Bluehost SEO services if you need help reviewing the site before launch.
Conversion checklist before publishing theme changes
Theme changes can directly affect revenue if they break CTAs, checkout, forms or mobile layouts. Before publishing a new WordPress theme, test every step a visitor takes before becoming a lead or customer.
Use this checklist before publishing theme changes:
- Test all add-to-cart buttons.
- Test the cart page.
- Complete a full checkout test.
- Test the payment flow from checkout to confirmation.
- Test lead forms.
- Test contact forms.
- Test mobile CTAs across key pages.
- Check navigation to hosting, pricing, support and product pages.
- Confirm CTA buttons are visible on desktop and mobile.
- Confirm layout shifts do not move CTA buttons while the page loads.
- Confirm popups, sticky headers or banners do not block CTAs.
- Confirm product cards, pricing tables and plan comparison sections display correctly.
- Confirm confirmation pages and thank-you messages load correctly.
- Confirm analytics events still track CTA clicks, add to cart, checkout and purchase.
- Compare page speed before and after the theme update.
- Keep a rollback option ready before launch.
Also read: WordPress Block Patterns: 2026 Guide for Gutenberg Users
When should you get expert help?
Building or editing a WordPress theme is manageable for small design changes. Get expert help when the theme affects revenue, SEO, performance or core site functionality.
Consider expert WordPress help if:
- You need a fully custom design, not just color, font or layout changes.
- You are editing PHP template files such as , , , or
functions.php. - Your site has checkout, cart, booking, lead form or contact form functionality.
- Your site already generates sales, leads, bookings or signups.
- You are not comfortable testing code changes before publishing.
- You need to preserve SEO rankings, metadata, schema, internal links and page speed.
- You are changing templates that affect important product, service, pricing or landing pages.
- You need the site to stay fast, mobile-friendly and stable after the theme update.
- You do not have a rollback plan if the new theme breaks layout or functionality.
For revenue-driving websites, consider expert WordPress design support before the theme goes live.
WordPress theme best practices for a safer launch
Follow these best practices to keep your theme clean, stable and search-friendly:
- Keep changes off the live site until the theme is fully tested.
- Use a child theme for edits to an existing theme.
- Keep code lightweight by removing unused CSS, scripts and fonts.
- Use responsive design so layouts work on desktop, tablet and mobile.
- Follow WordPress coding standards for cleaner, easier-to-maintain files.
- Make navigation simple so users and search engines can reach key pages.
- Keep CTAs visible on important pages without blocking content.
- Test before launch for SEO, speed, forms, checkout and mobile usability.
- Update safely by keeping backups and a rollback plan ready.
- Review performance after publishing to catch ranking, speed or conversion issues early.
Final thoughts
Learning how to make a WordPress theme gives you more control over your website’s design, performance and user experience. Whether you are building a custom blog, business website or client project, a well-optimized theme can improve site speed, SEO and overall usability.
If you want to simplify the process, start with a reliable WordPress hosting platform that supports fast performance, secure hosting and beginner-friendly tools. Bluehost gives you everything needed to build, customize and launch your WordPress website from one place.
Ready to build your WordPress website?
Get started with fast hosting, built-in WordPress tools, free domain registration and themes designed for performance and scalability. Explore our WordPress hosting plans now.
FAQs
A WordPress theme controls your website’s design, layout, colors, typography and overall appearance. It helps determine how your pages, blog posts and navigation look and function without changing your site’s core content.
Yes, you can make basic theme changes without coding by using the WordPress Site Editor, Customizer or a theme builder. For a fully custom WordPress theme, you usually need HTML, CSS, PHP and basic WordPress development knowledge.
A basic WordPress theme usually needs style.css and . Most custom themes also include functions.php, header.php, footer.php, single.php, page.php and template files for archives, posts or custom layouts.
Use a child theme if you want to safely customize an existing theme without losing changes during updates. Build a custom theme if you need full control over the design, layout, templates and performance.
Yes, changing your theme can affect SEO if it changes headings, metadata, internal links, schema, page speed, mobile layout or indexability. Before publishing, check title tags, meta descriptions, headings, URLs, canonicals, structured data and Core Web Vitals.
Yes. A theme change can break add-to-cart buttons, checkout pages, lead forms, contact forms, booking forms or mobile CTAs. Always test the full conversion path on staging before publishing the theme live.
Test the theme on a staging site first. Check page layouts, mobile design, navigation, forms, add-to-cart buttons, checkout, payment flow, page speed, SEO settings and analytics tracking before moving the theme to the live site. With Bluehost WordPress hosting, you can safely test design changes on a staging environment before publishing them to your live website, helping reduce downtime, broken layouts and customer-facing issues.
Hire a WordPress developer if you need a fully custom design, are editing PHP templates, have checkout or lead forms, need to preserve SEO and speed or are not comfortable testing code changes before launch. Need expert help? Bluehost Full Service + SEO includes custom WordPress design, SEO support and ongoing website management in one solution.
A custom WordPress theme is better when you need unique design, cleaner code, specific templates or better control over performance. A premade theme is better when you need a faster, lower-cost setup and only basic design changes.
Back up your site, use staging, save current theme settings, test key pages and keep a rollback plan. For revenue-driving sites, test checkout, forms, payment flow and mobile CTAs before publishing changes. Check out our tutorial to make theme changes safely.
Yes, a custom theme can improve conversions if it makes pages faster, easier to navigate and clearer for users. Focus on visible CTAs, simple layouts, fast load times, mobile usability and working checkout or lead forms.

Write A Comment