 ChatGPT,
 Claude,
 Gemini,
 Grok — all four for
Bluehost AI Builder: How to Get an API Key from Postmark
Postmark is an email delivery service that lets your Bluehost AI Builder app send email notifications. It is a built-in provider in the AI Builder, so you do not need to create a custom API connection. You only need a Postmark Server API Token, which is what Postmark calls the API key your app uses.
This article walks you through creating a Postmark account and server, verifying your sending domain, requesting account approval, copying your Server API Token, and adding it to your app. Postmark's dashboard changes over time, so if a screen looks different, check Postmark's Support Center for the latest steps.
If you prefer using Resend, another built-in email provider in AI Builder, see the Bluehost AI Builder: How to Get an API Key from Resend article.
Before You Start
Make sure you have the following:
- An active Bluehost account with access to the AI Builder.
- An app that has already been created in the AI Builder.
- A *domain you own, with access to its DNS settings. The steps below use a domain managed in your Bluehost Portal.
- Access to an inbox on that domain to receive test emails.
Note: *Use a domain that is not connected to your AI Builder site or app, such as one used for your business email. Make sure you manage its DNS through your Bluehost Portal or another DNS provider.
Step 1: Create a Postmark Account
- Go to postmarkapp.com and create an account.
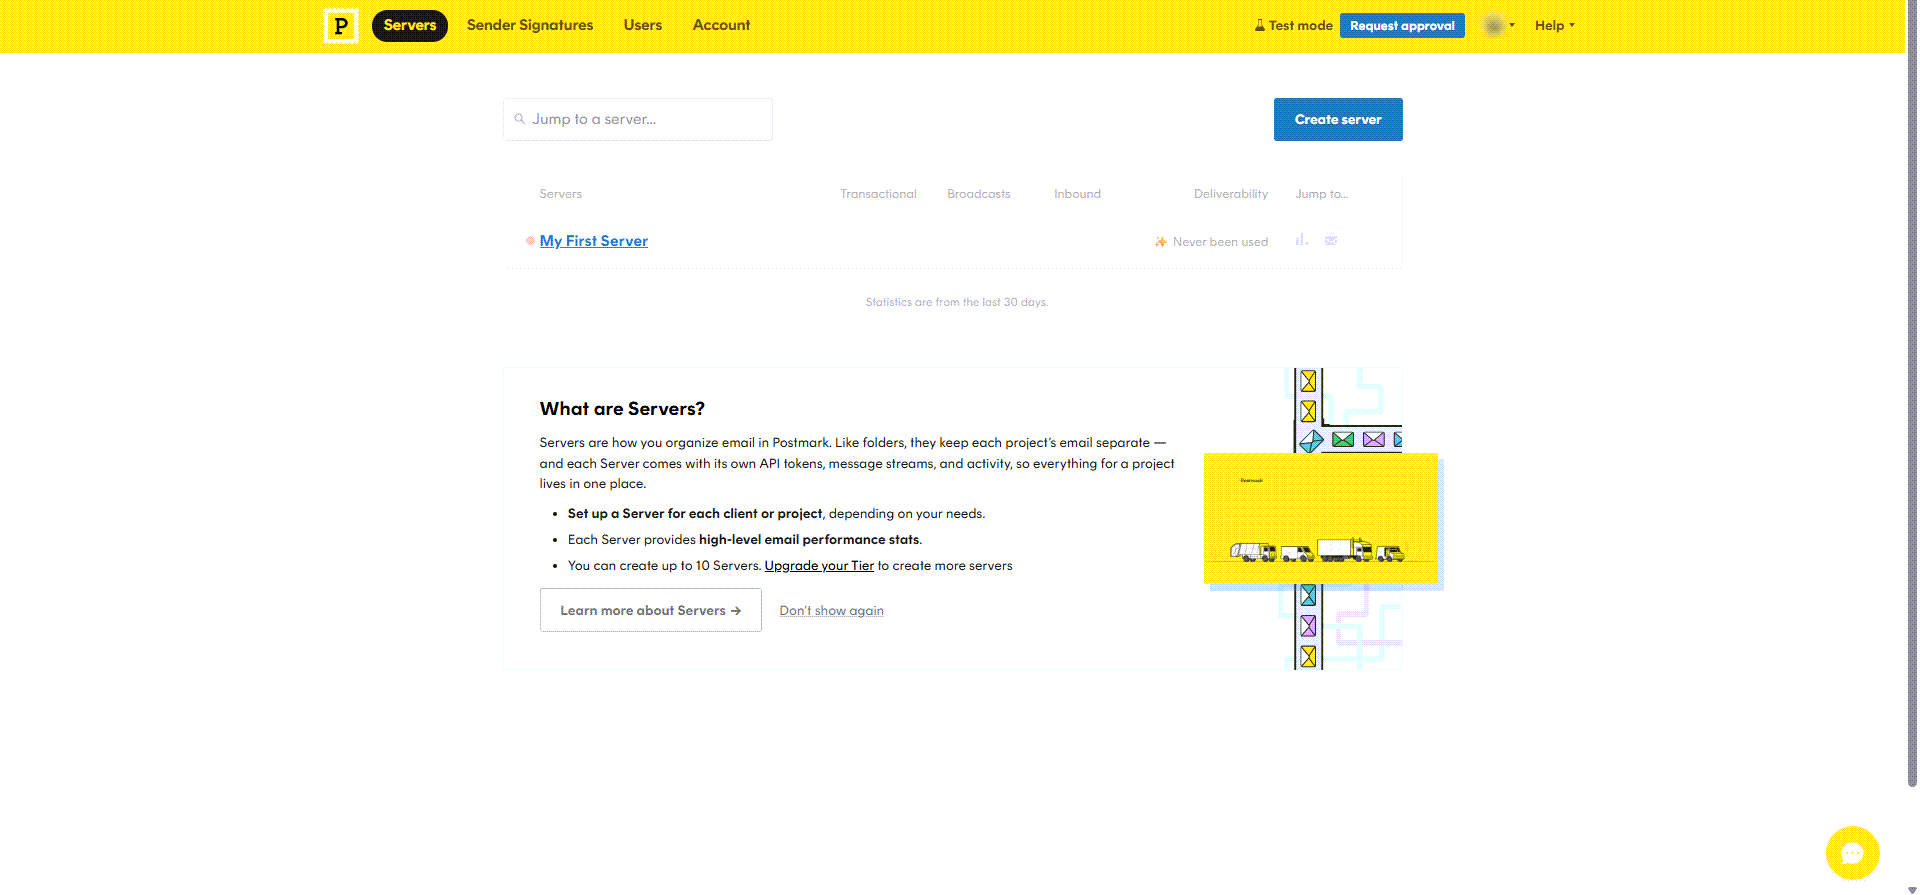
- Review Postmark's plans to confirm which one fits your sending needs. Postmark offers a free plan with a monthly sending limit. For current plans, pricing, and limits, see Postmark’s pricing page.
Note: New Postmark accounts start in test mode. Until Postmark approves your account, you can only send email to addresses on domains you've verified. You'll request approval in Step 6.
Step 2: Create a Server
Postmark issues API tokens per server, so you need a server before you can get a token.
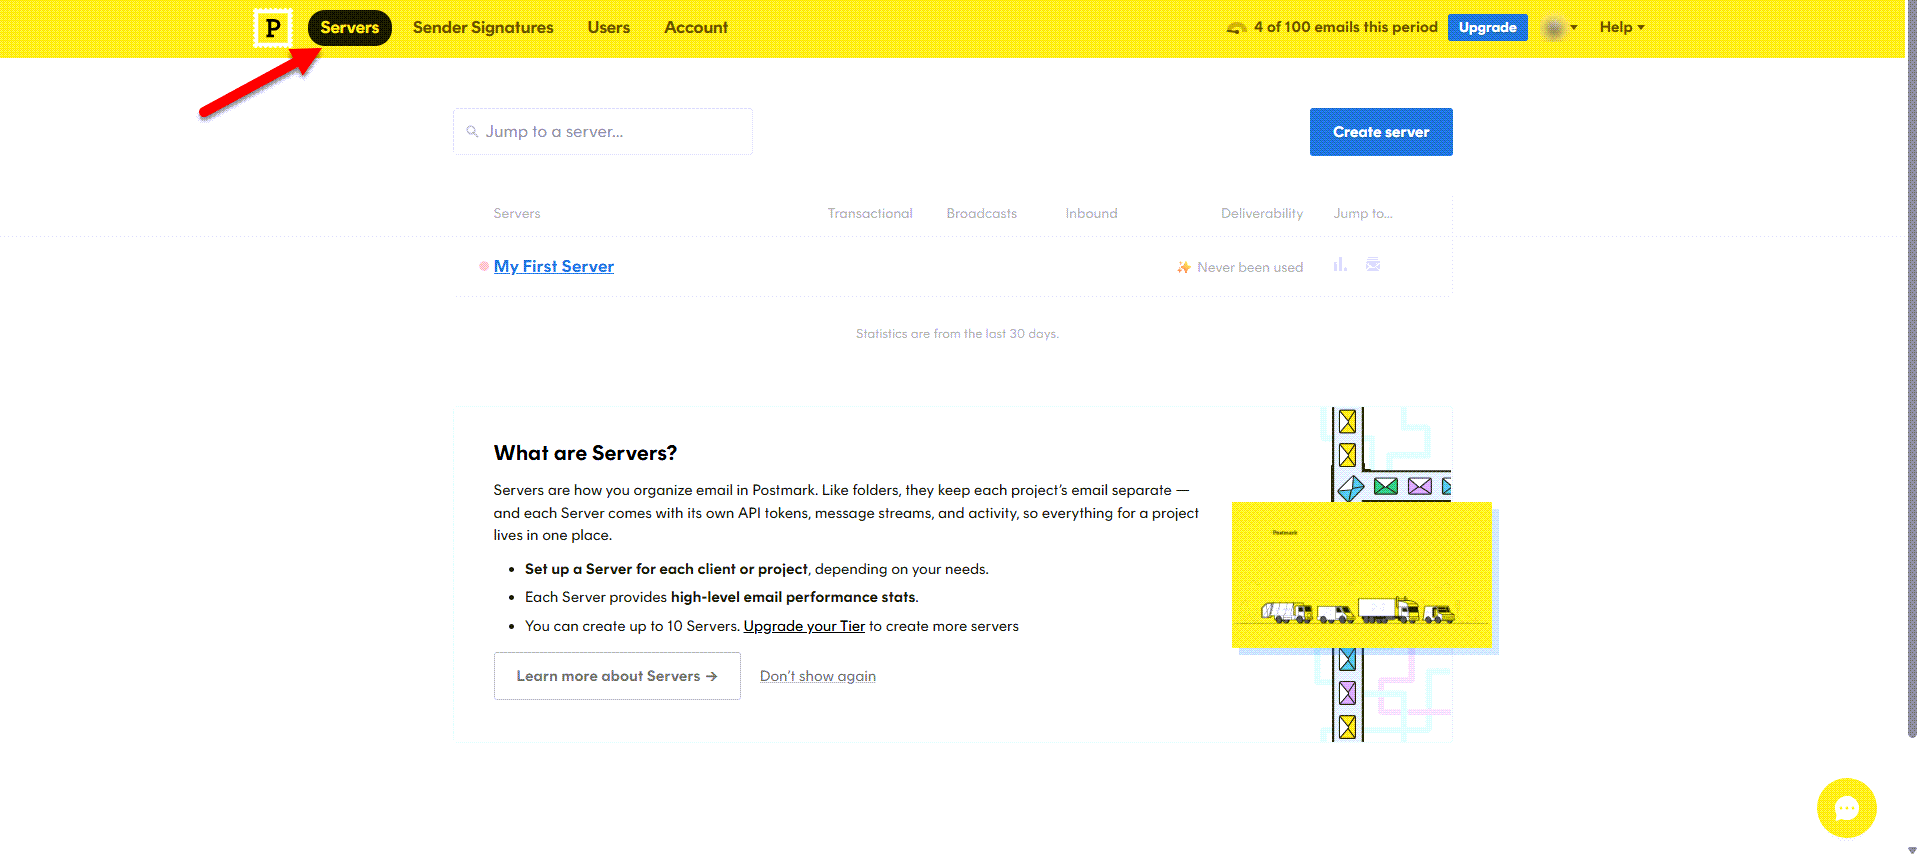
- In the Postmark dashboard, go to Servers and create a new server.
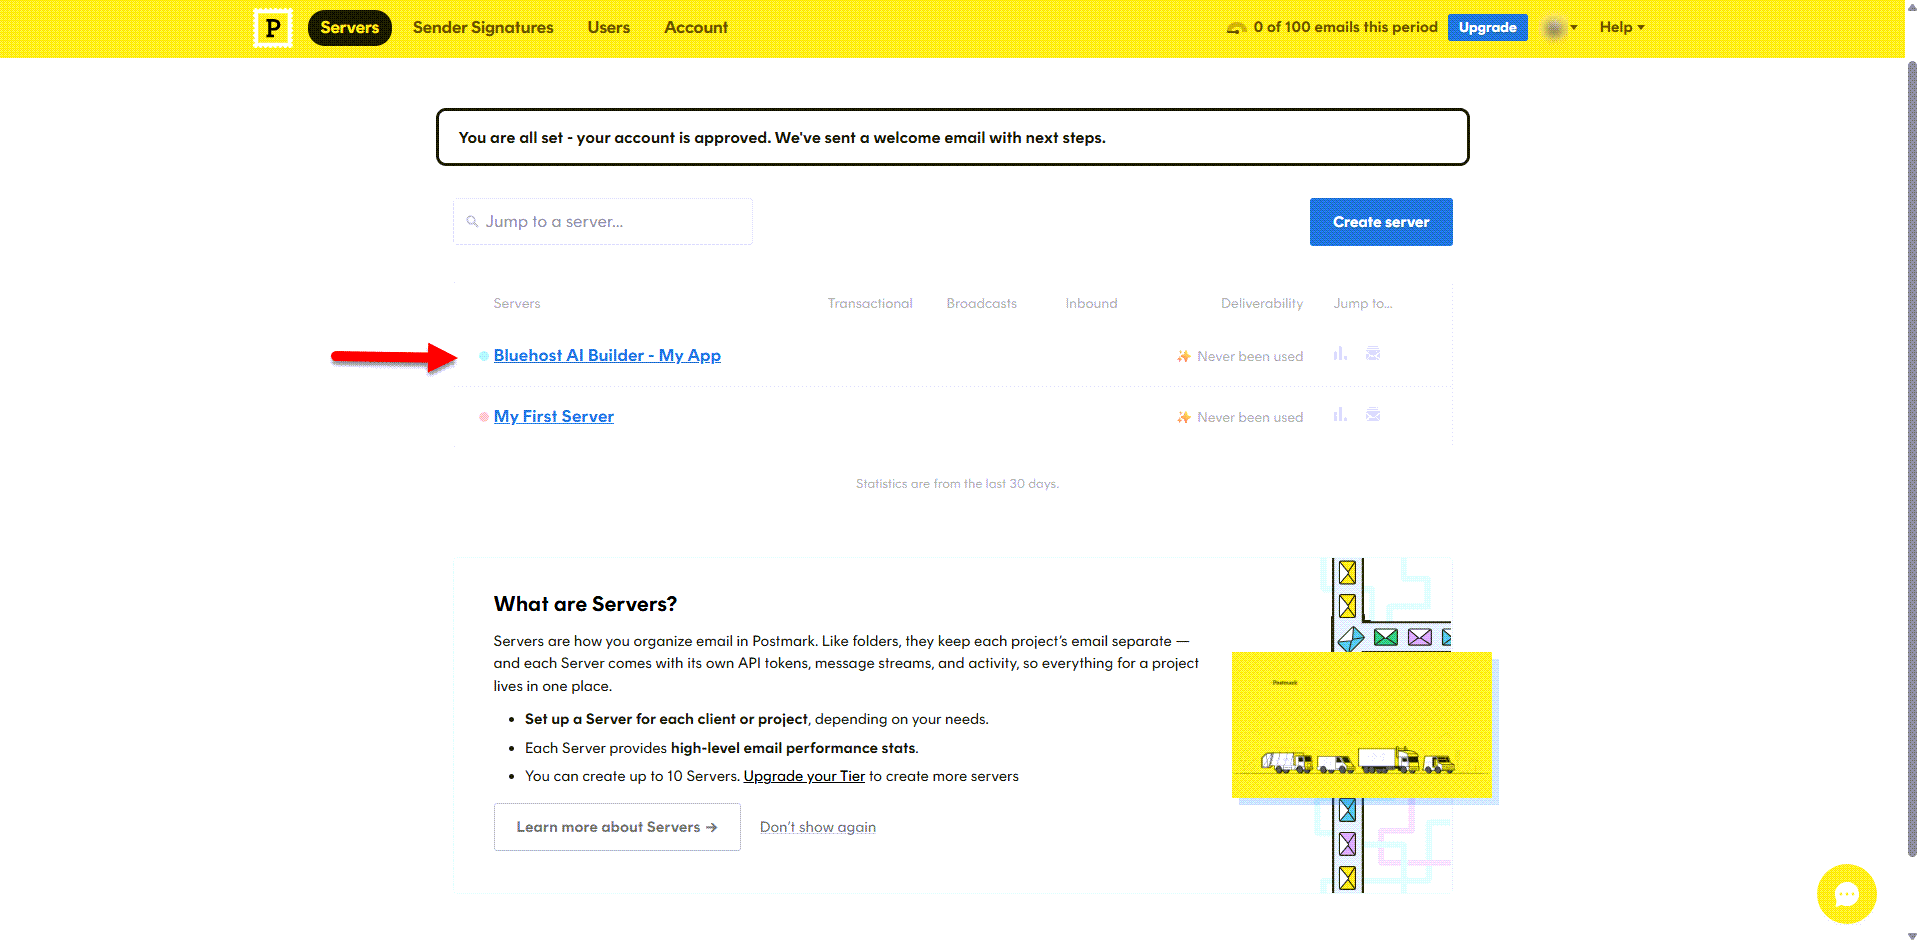
- Enter a name that identifies your app, such as
Bluehost AI Builder - My App.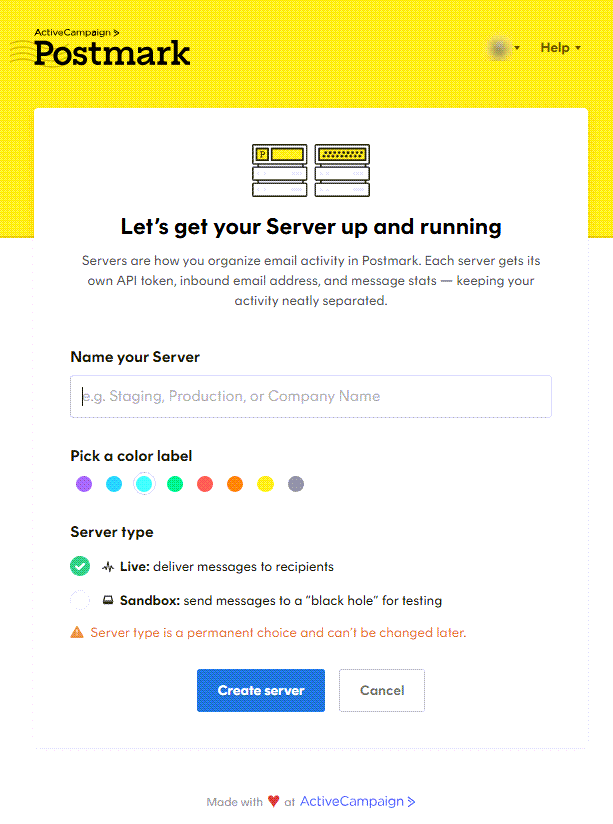
- Select Live as the server type.
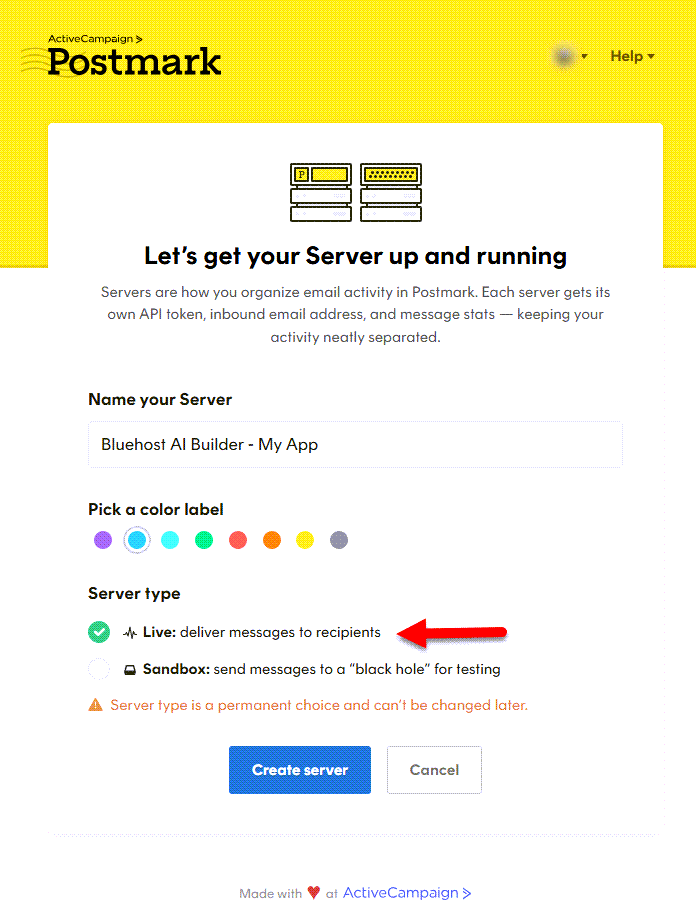
- Create the server.
- Your server is now created. Click Back to Postmark.
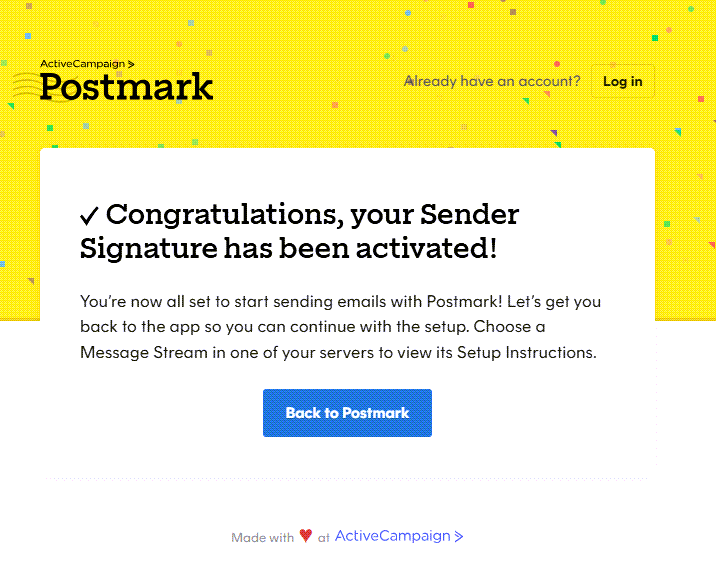
Tip: A Sandbox server doesn't deliver messages to real recipients. Choose Live so your app's emails reach your visitors.
Step 3: Add Your Domain in Postmark
Postmark needs to verify that you own the domain from which your app will send emails.
- In the Postmark dashboard, go to Sender Signatures.
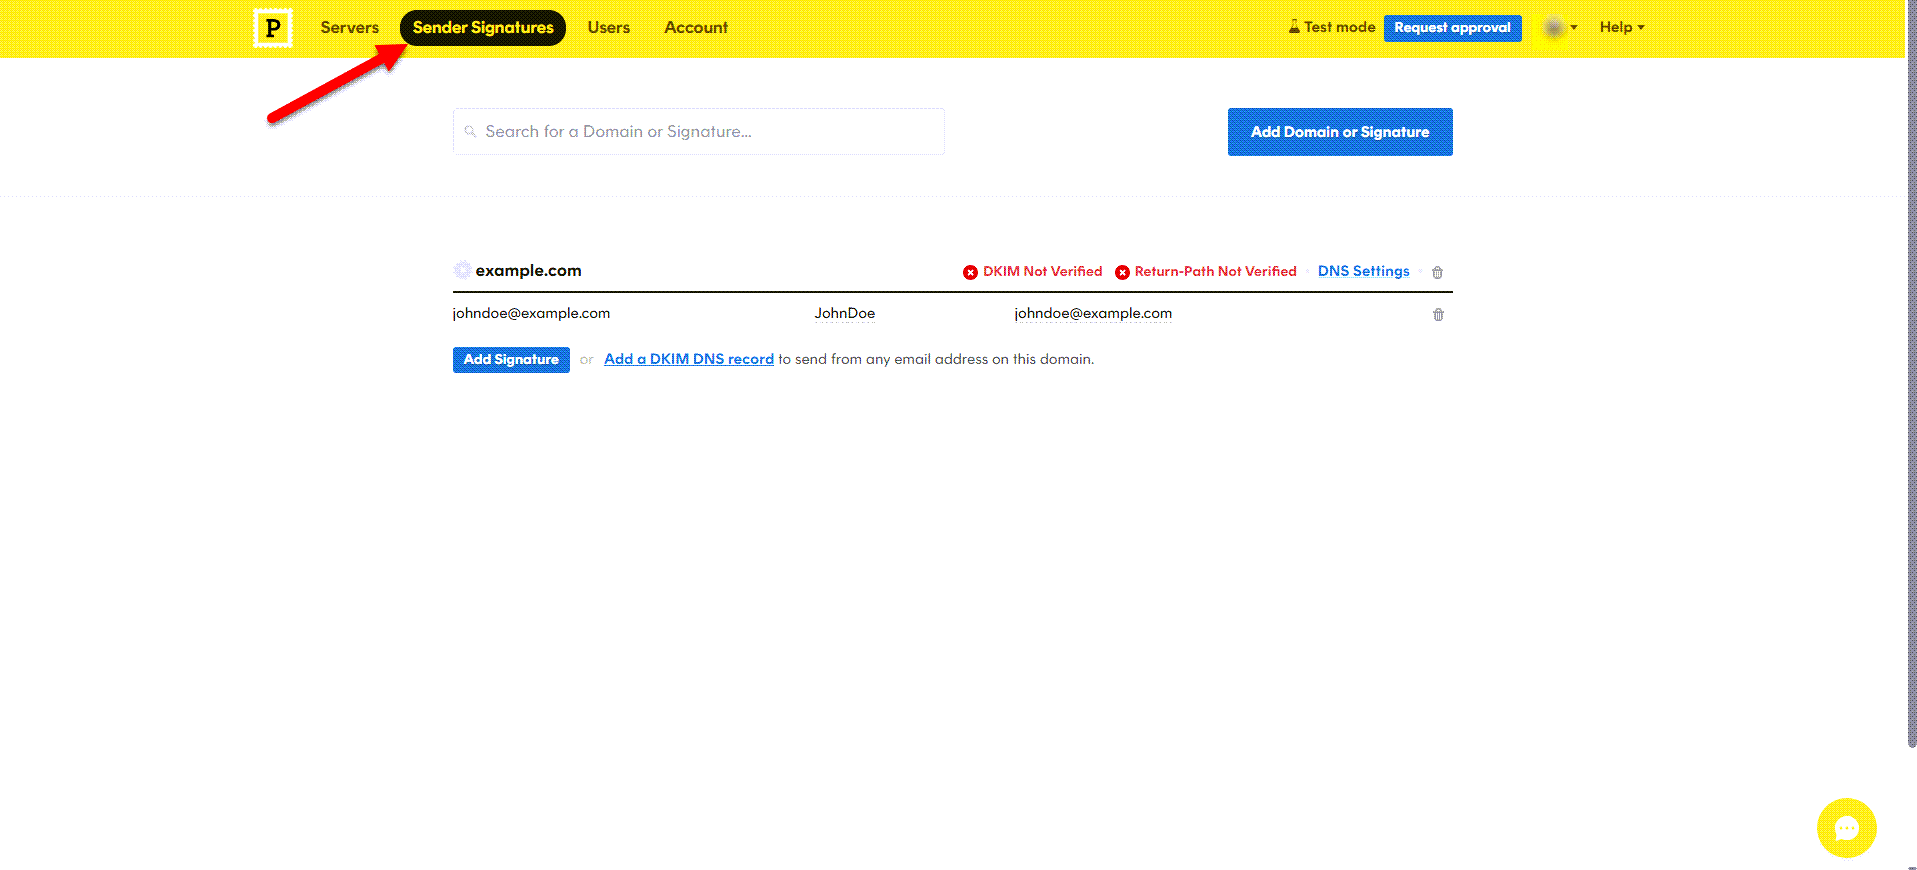
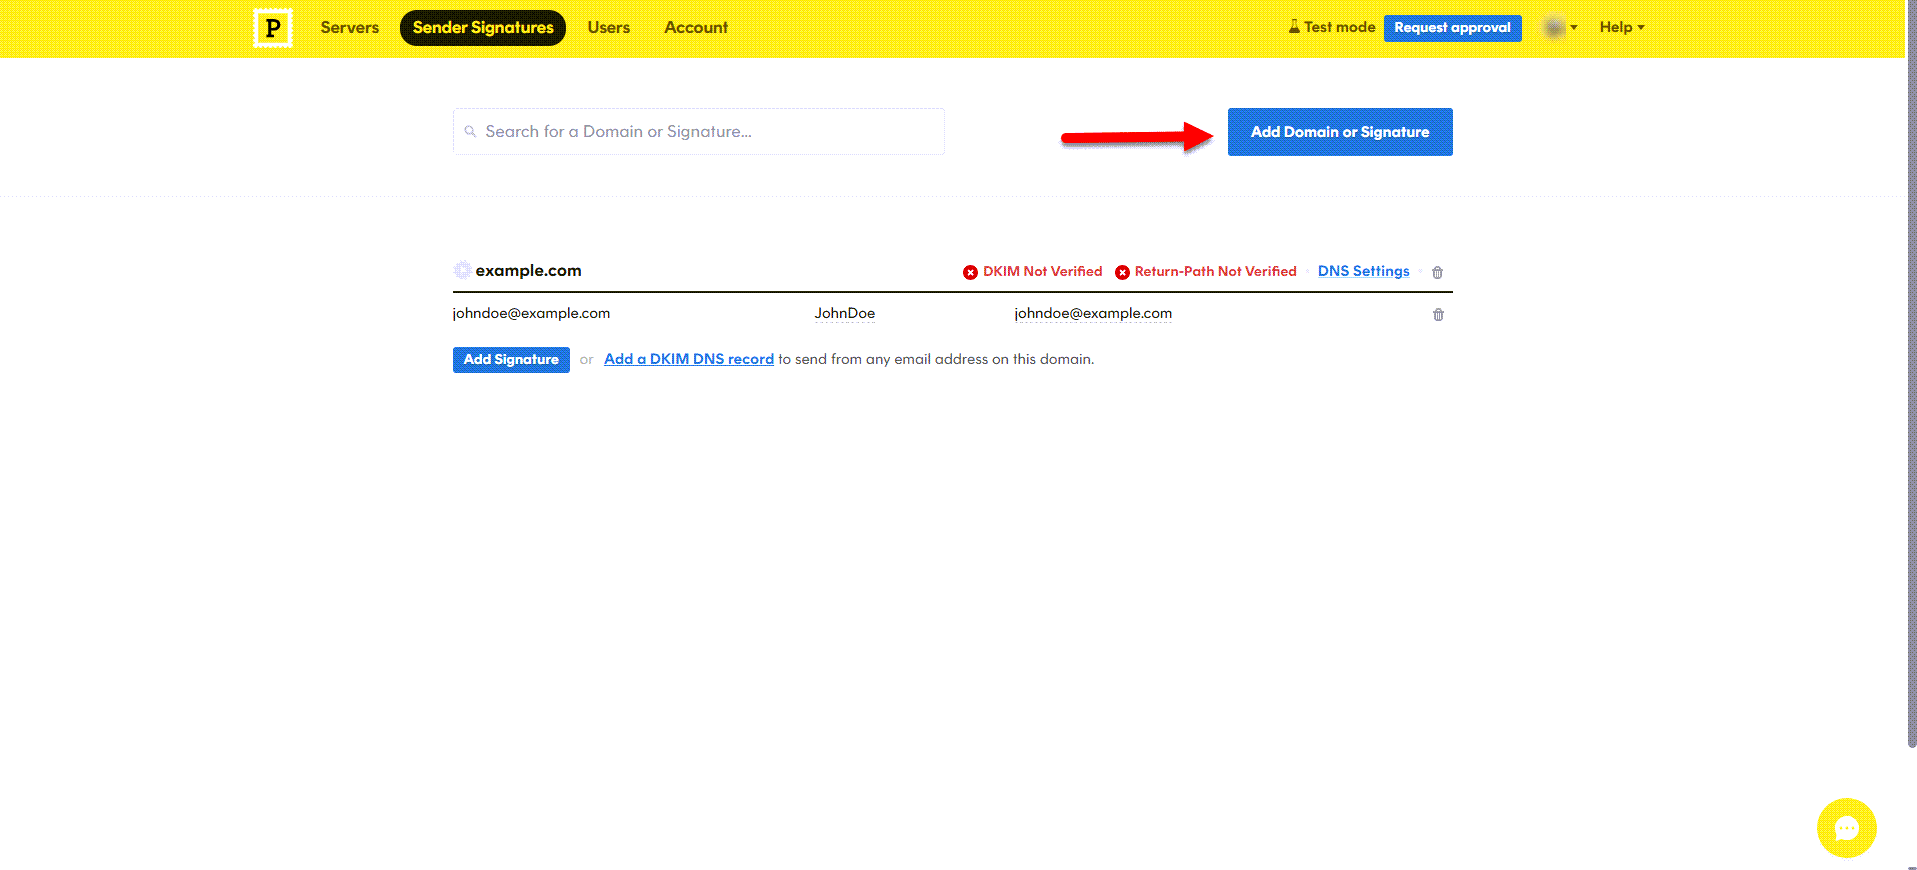
- Click Add Domain or Signature and enter your domain name.
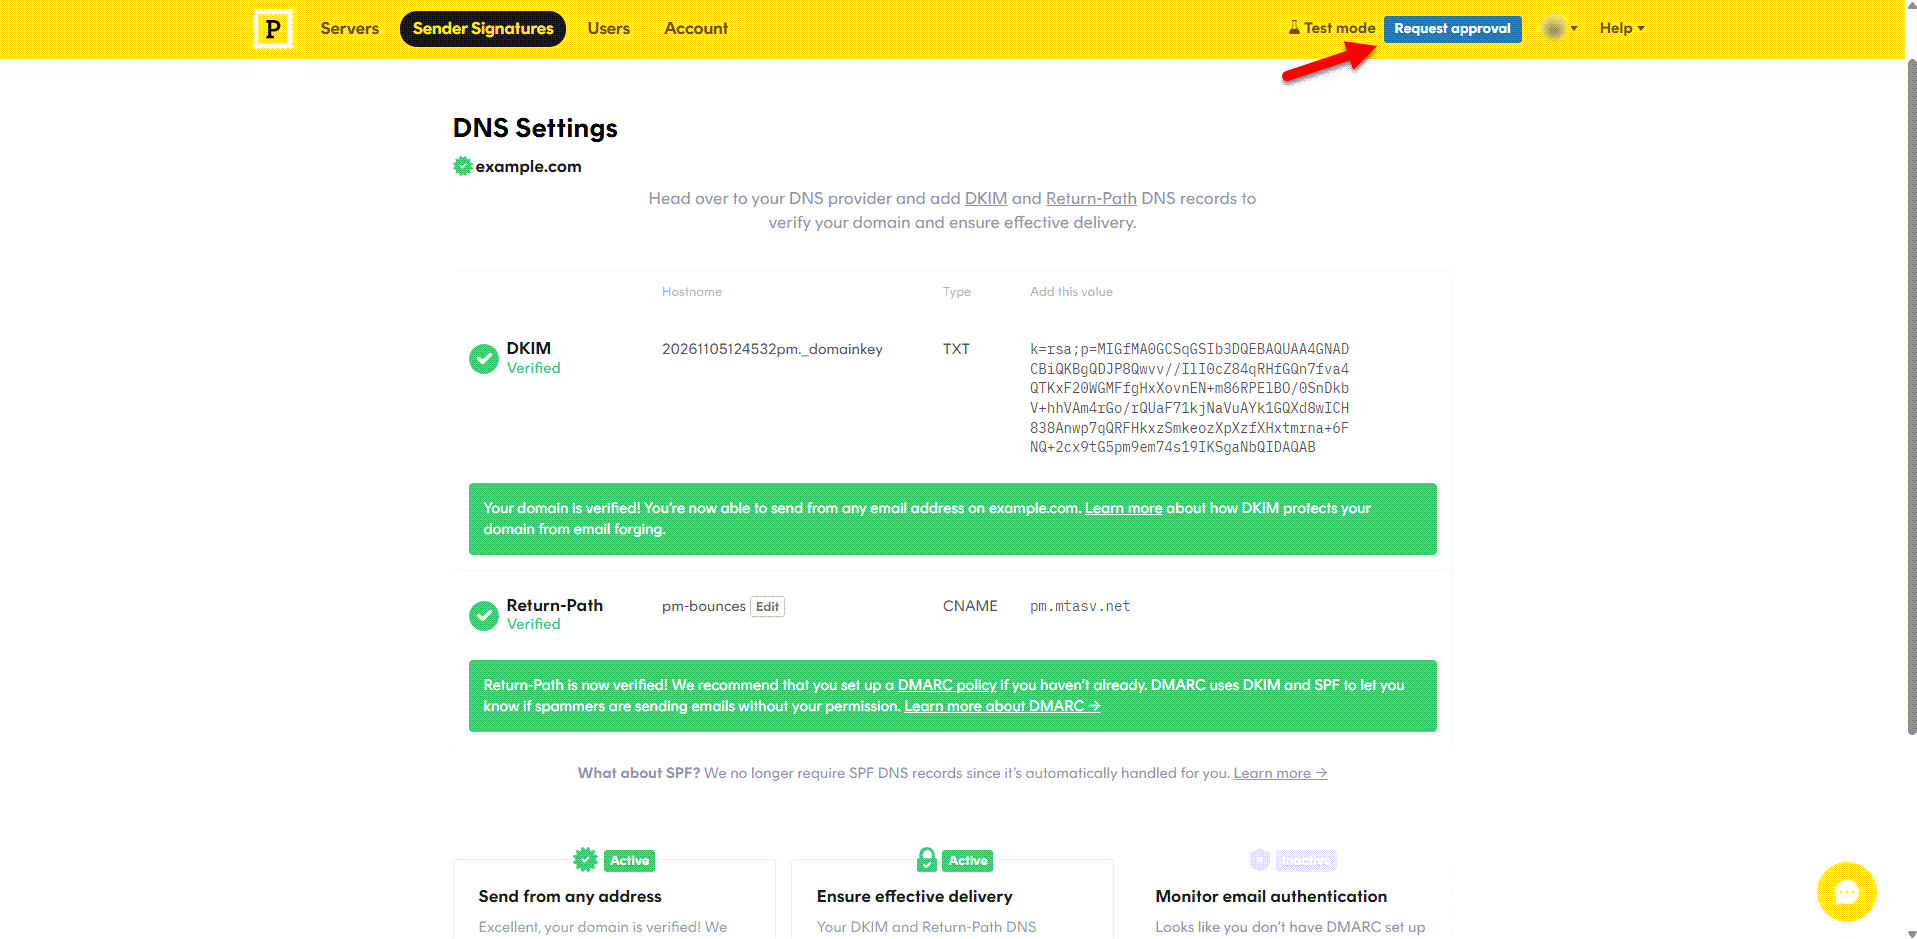
- Open the domain's DNS Settings. Postmark lists two records: a DKIM record (TXT) and a Return-Path record (CNAME).
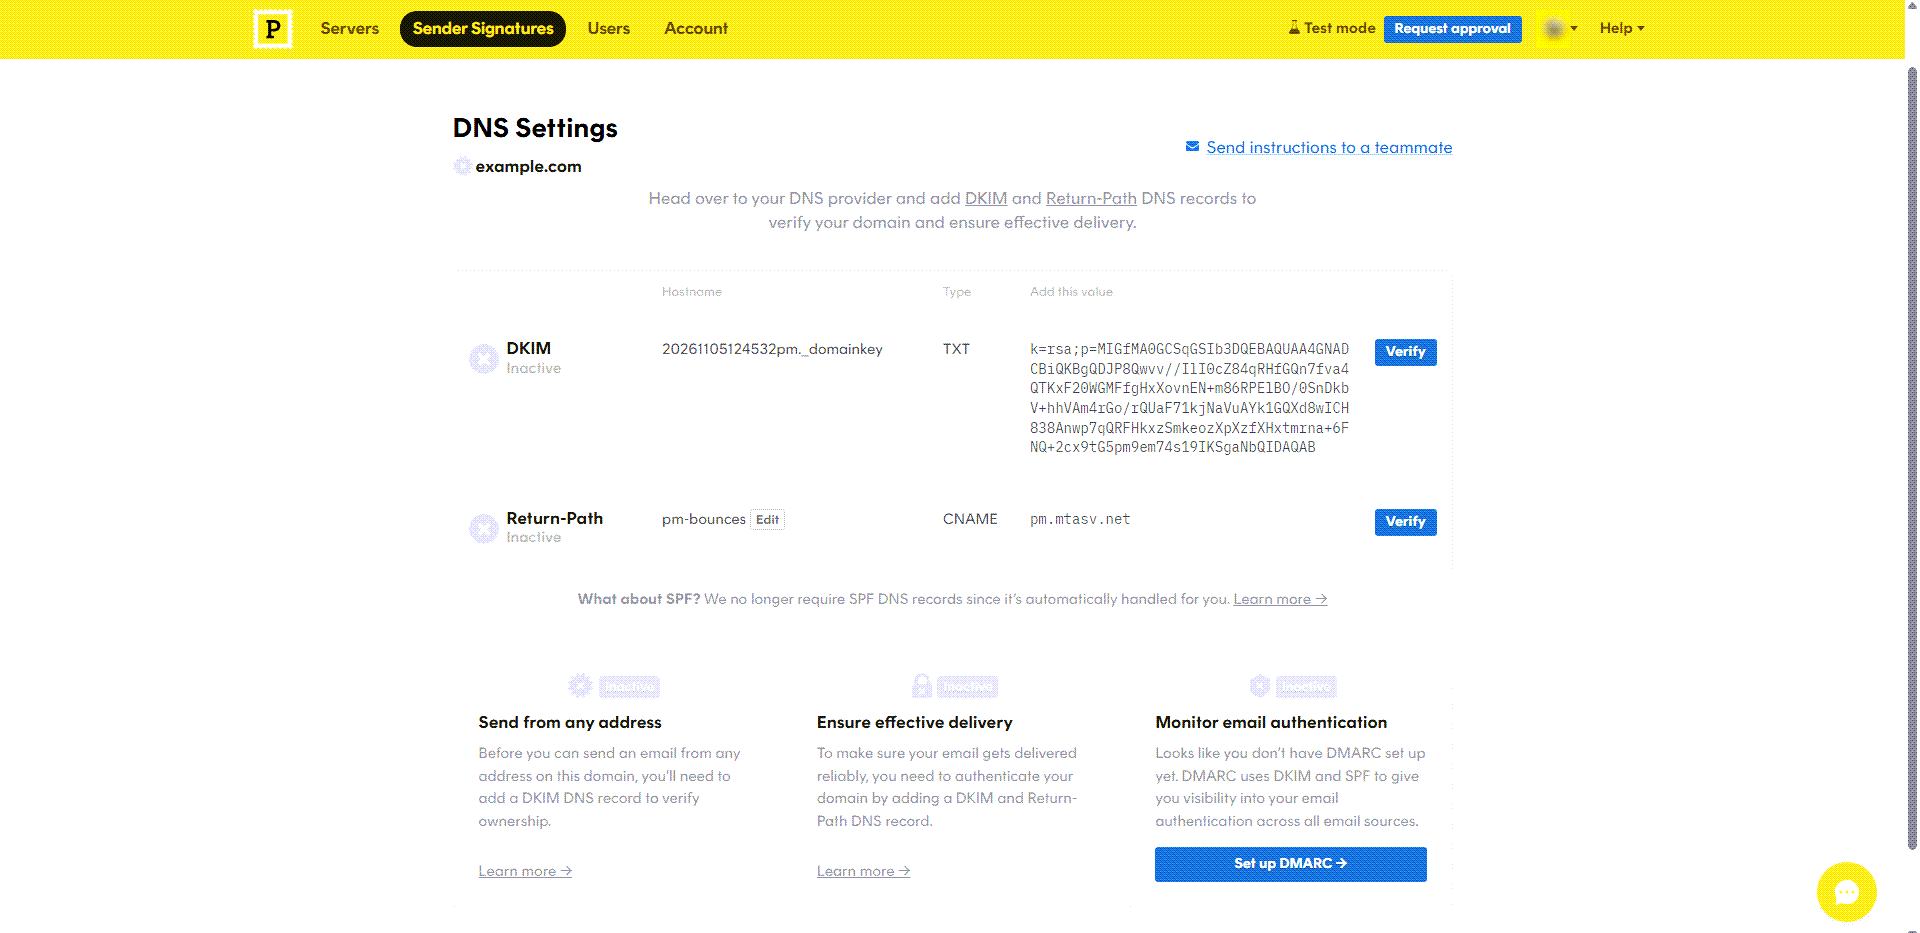
- Keep this page open. You will copy these values into Bluehost in the next step.
Tip: If you only need to send from one email address, you can add a single sender signature instead. Postmark sends a confirmation email to that address. Verifying the full domain is recommended for better deliverability. See Postmark's guide on how to verify a domain.
Step 4: Add Postmark's DNS Records in Bluehost
- Log in to your Bluehost Portal.
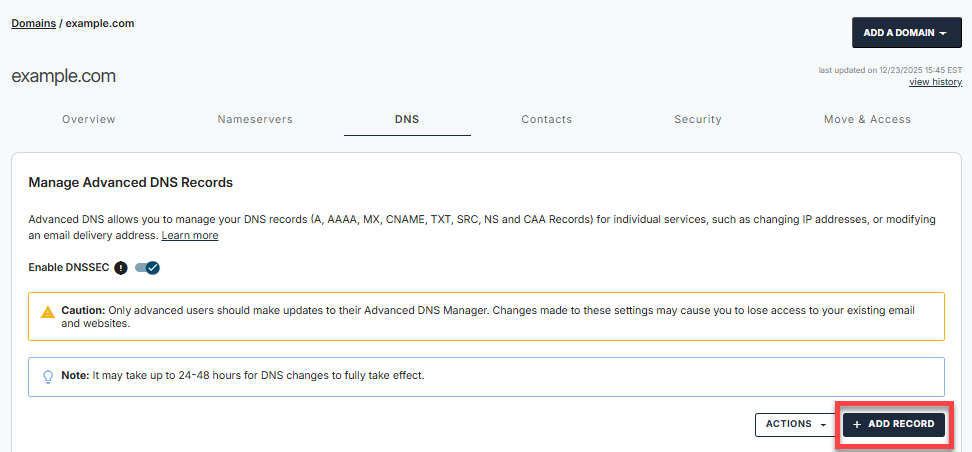
- Click Domains in the left-hand menu, then navigate to your domain's DNS tab.
- In the Manage Advanced DNS Records section, click + Add Record.
- Choose Single record, then select the record type that matches the first record in Postmark.
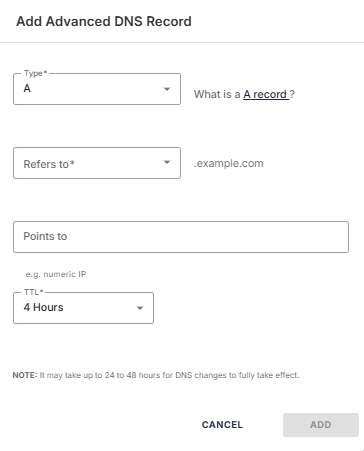
- Copy the Name and Content values from Postmark and paste them into the matching Bluehost fields.
- Click Add.
- Repeat Steps 4–6 for each record Postmark lists.
Tip: Copy and paste each value instead of typing it. The records must match exactly what Postmark generated.
Note: If your domain's DNS is managed somewhere other than Bluehost, add the records at that provider instead.
Step 5: Verify Your Domain in Postmark
- Return to your domain's DNS Settings page in Postmark.
- Click Verify next to the DKIM record, then next to the Return-Path record.
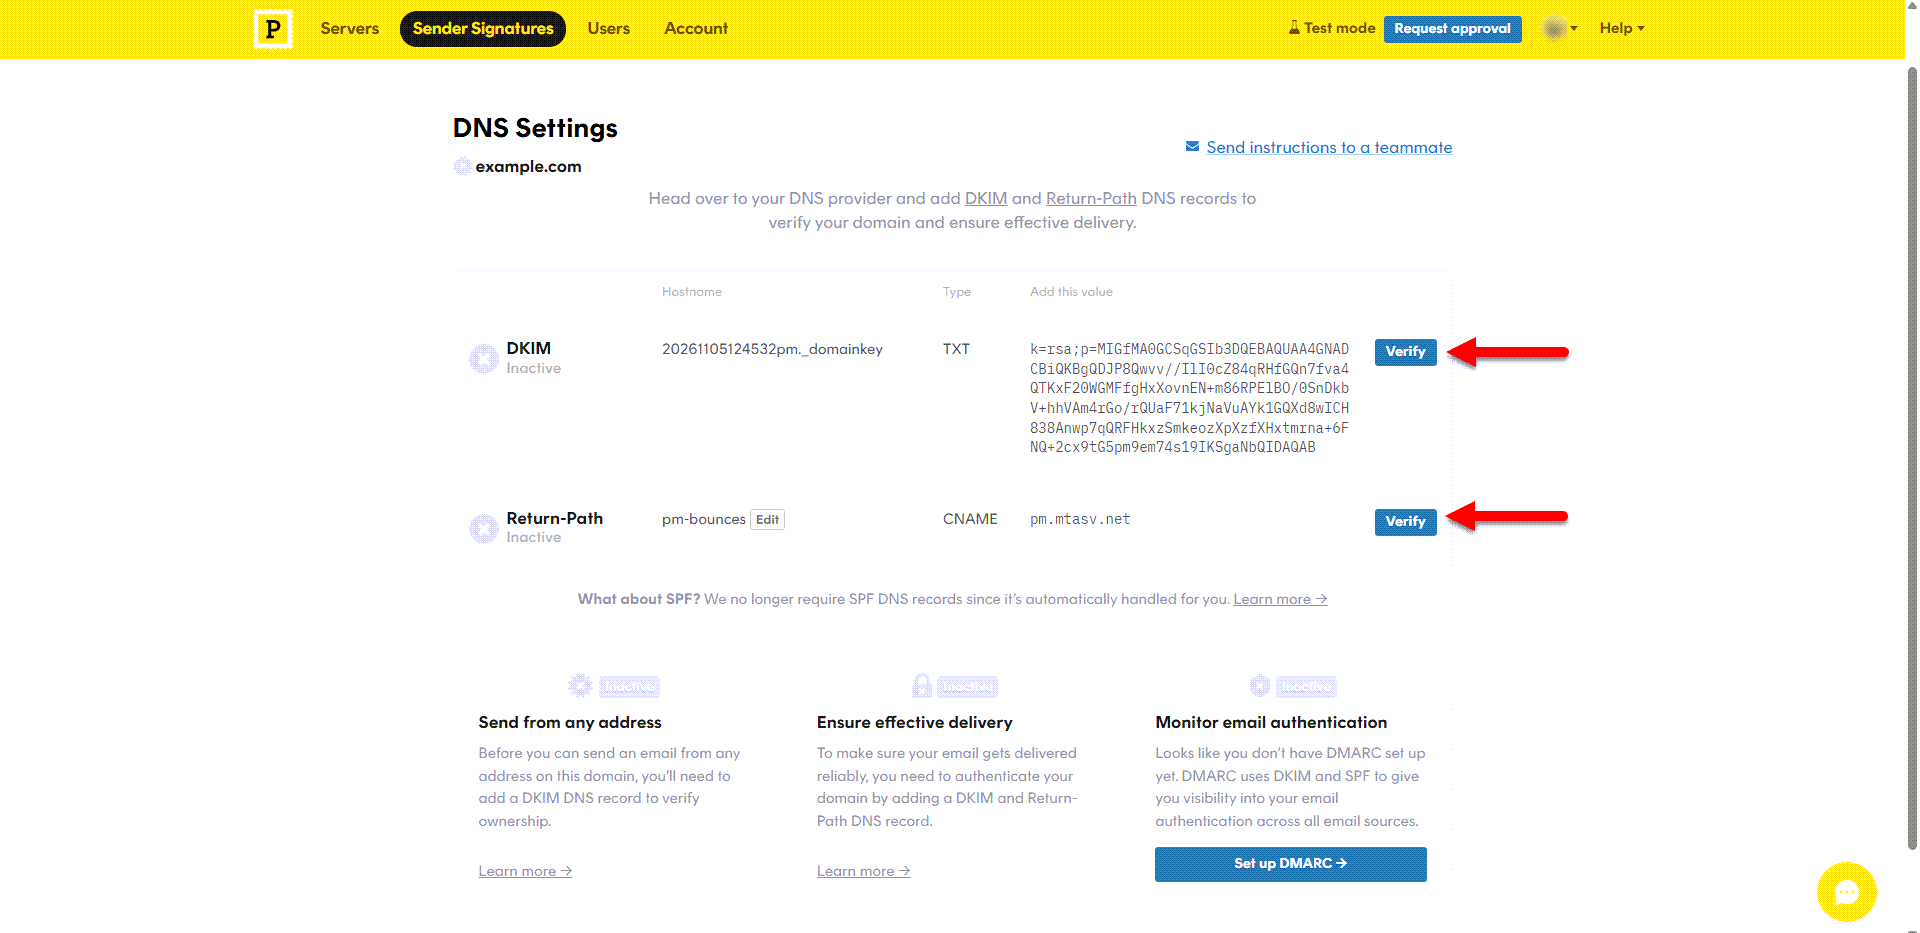
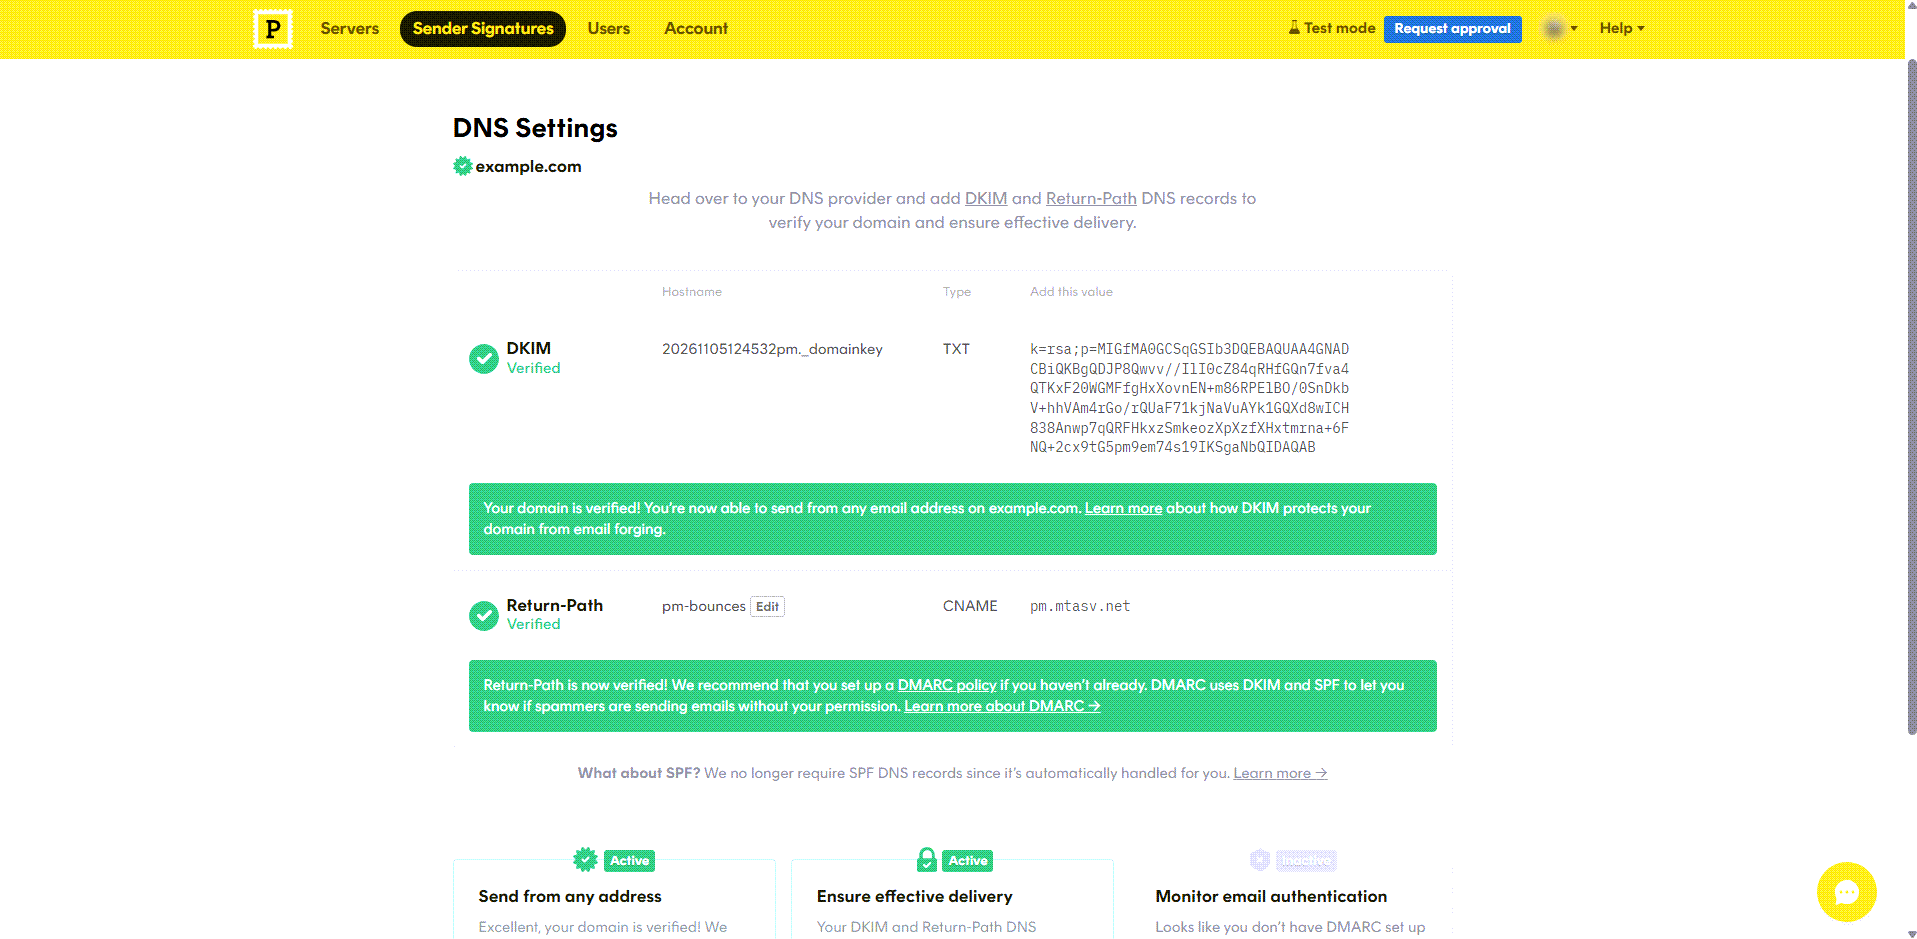
- DNS changes can take some time to take effect. When a record is verified, a green checkmark appears next to it.
If a record won't verify, see Postmark's guide on what to do if your DKIM record won't verify.
Step 6: Request Account Approval
Until your account is approved, Postmark only delivers email to addresses on your verified domains. Emails to anyone else, including your app's visitors, won't arrive.
- In the Postmark dashboard, click Request approval.
- Fill out the form about how you plan to use Postmark, then click Request approval at the bottom of the page.
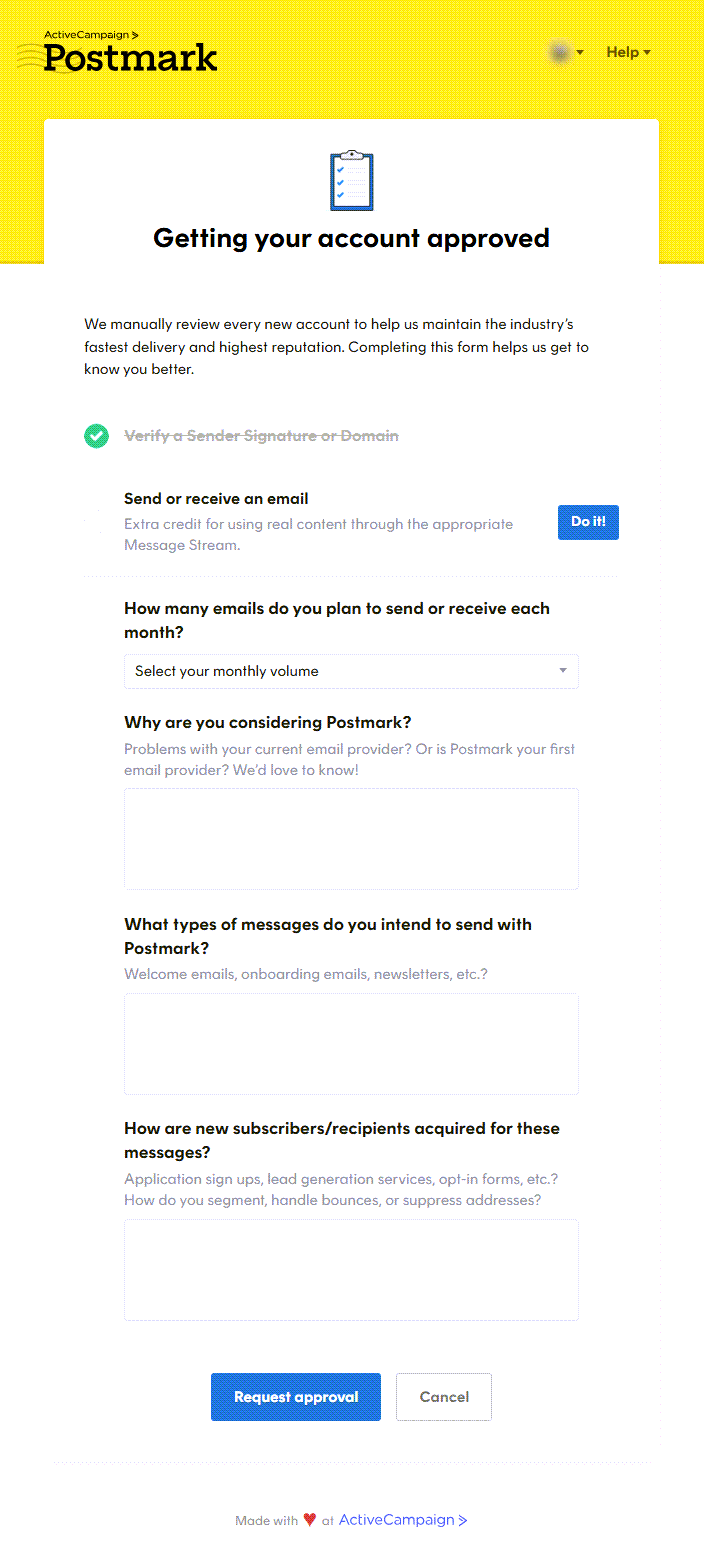
For more information, see Postmark's guide on how the account approval process works.
Step 7: Copy Your Server API Token
- In the Postmark dashboard, go to Servers and open the server you created in Step 2.
- Click the API Tokens tab.
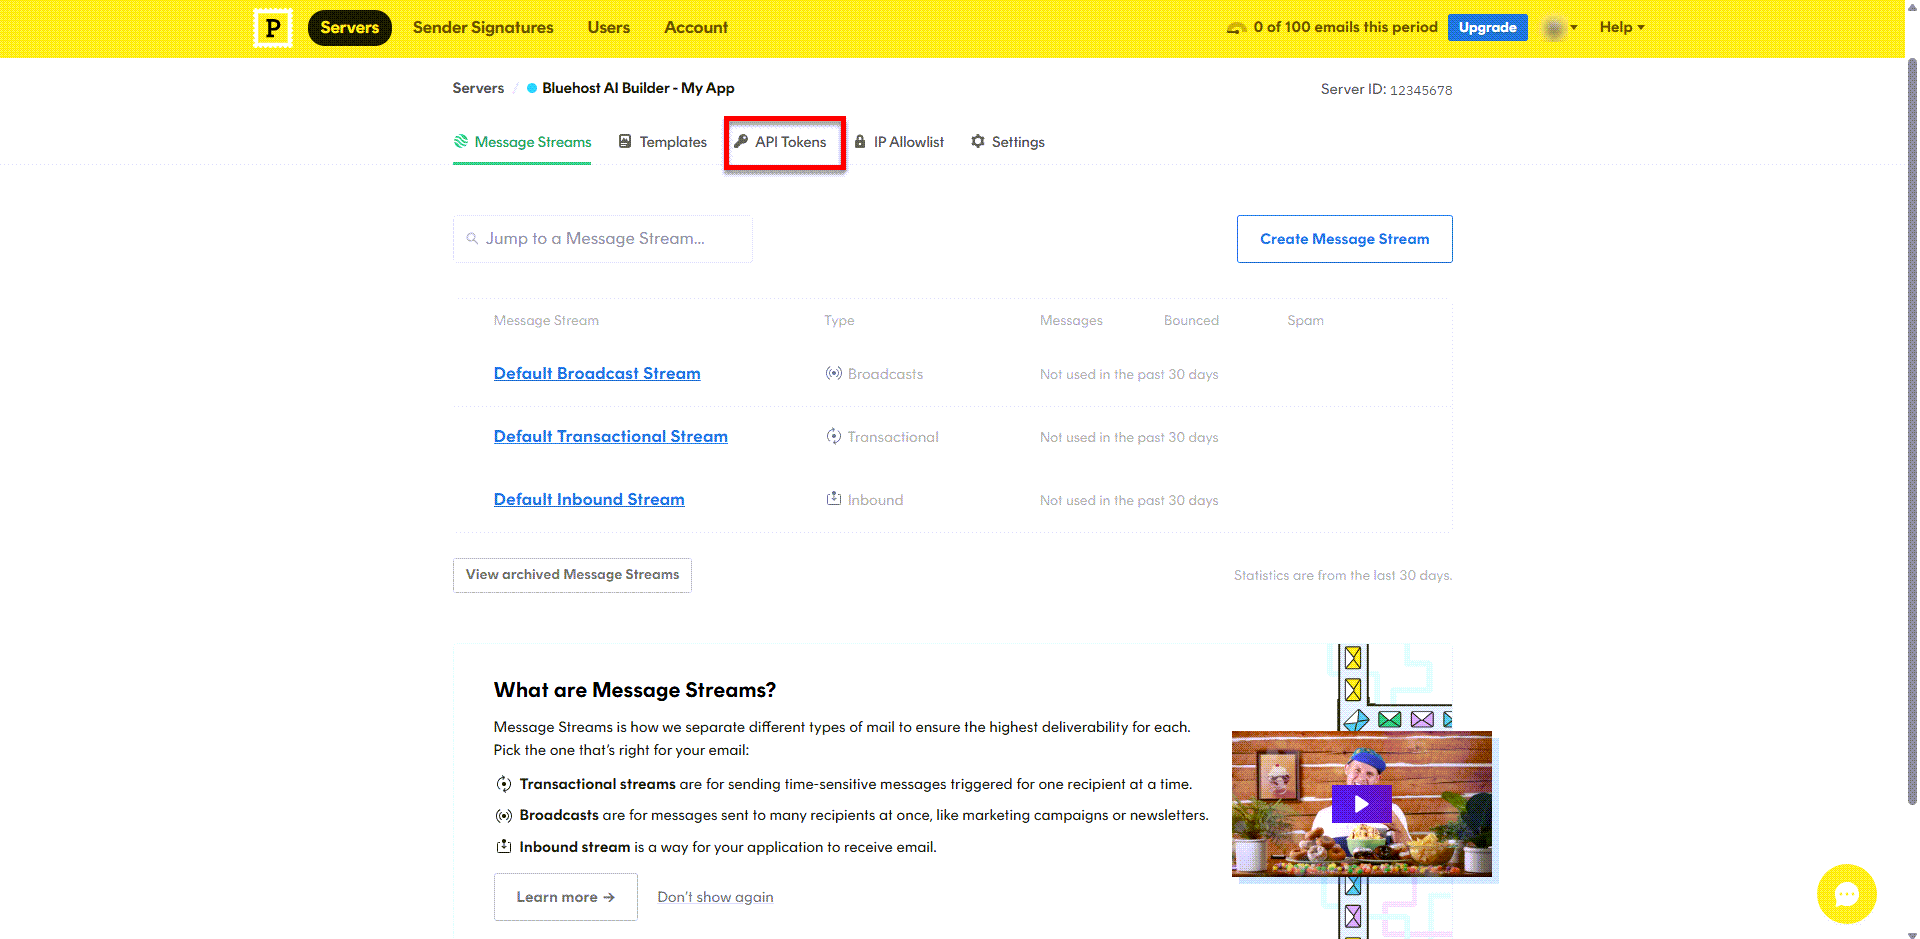
- Copy the Server API Token.
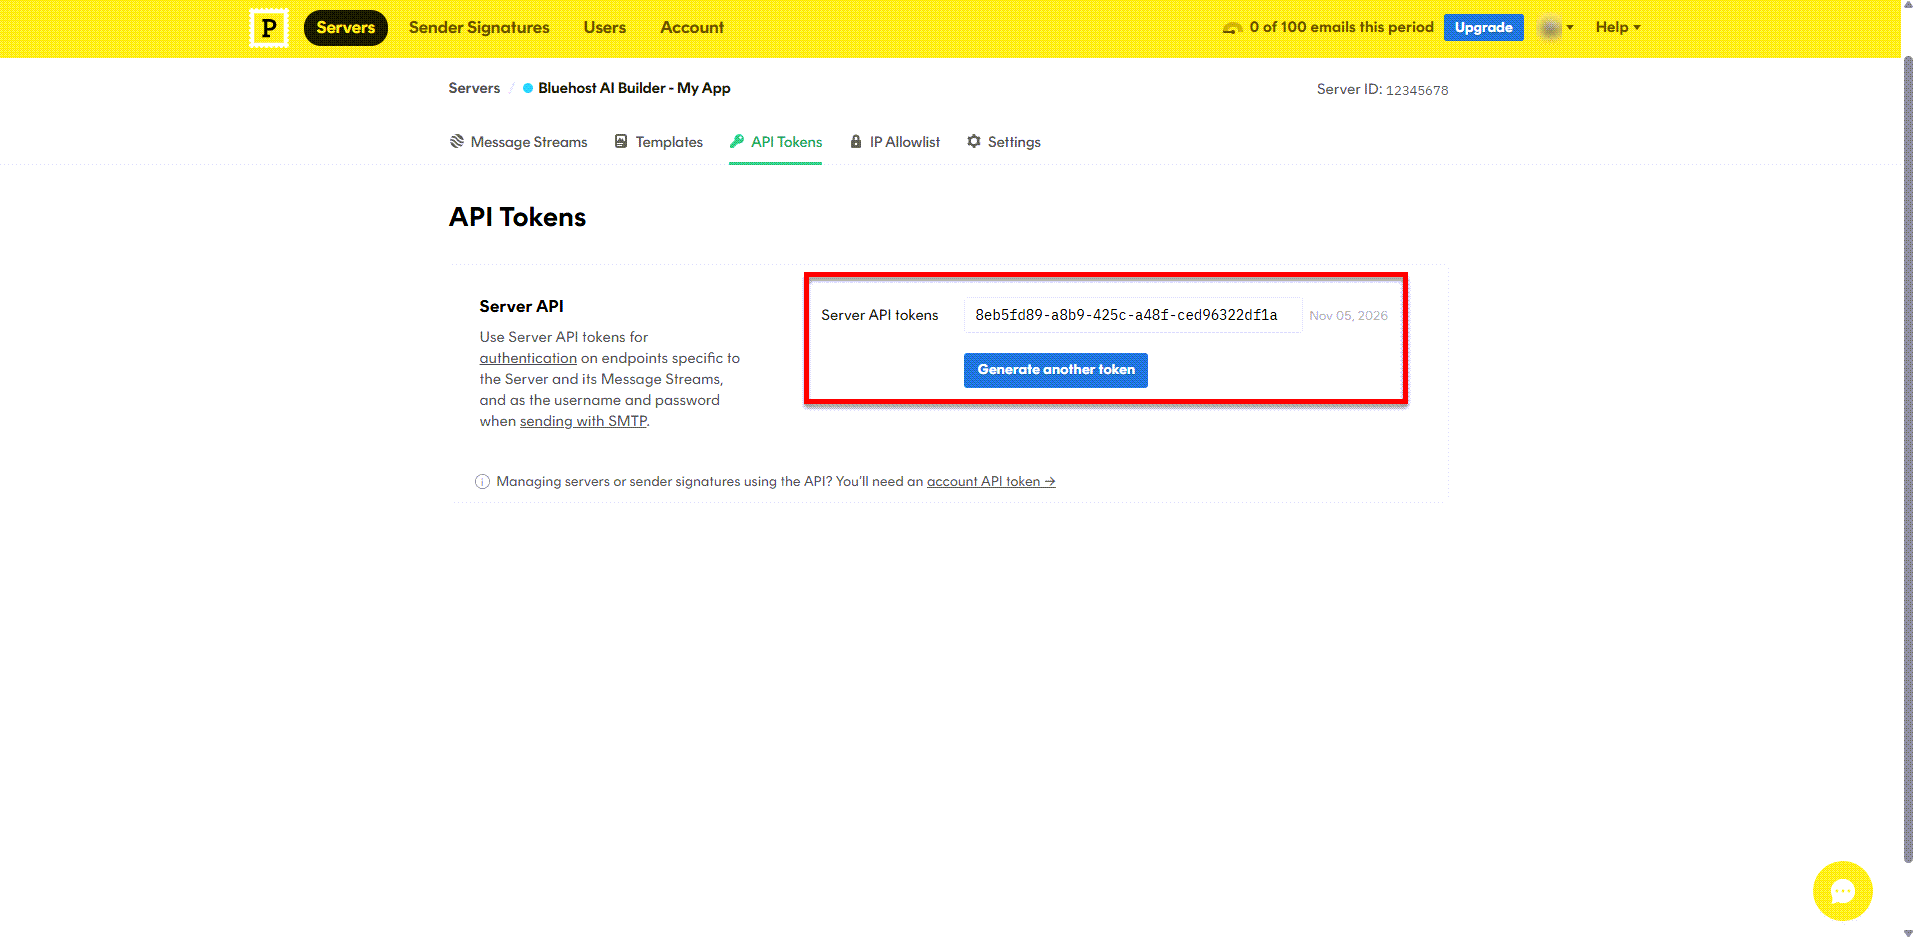
Important: Anyone with your Server API Token can send email from your Postmark server. Never paste the token into the AI Builder chat, a prompt, or your app's page text.
Step 8: Add the Server API Token to Your App
- Log in to your Bluehost Portal.
- Click AI Builder in the left-hand menu.
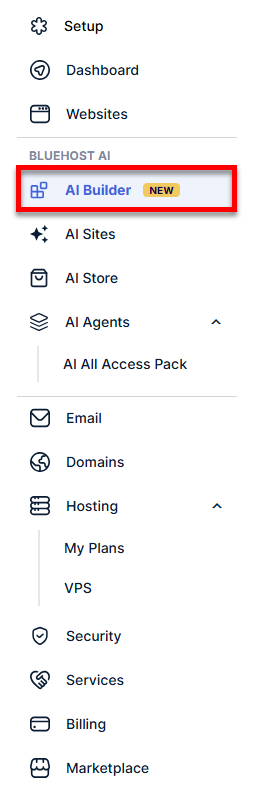
- Open the app you want to connect.
- In your app, click the Settings (gear) icon.
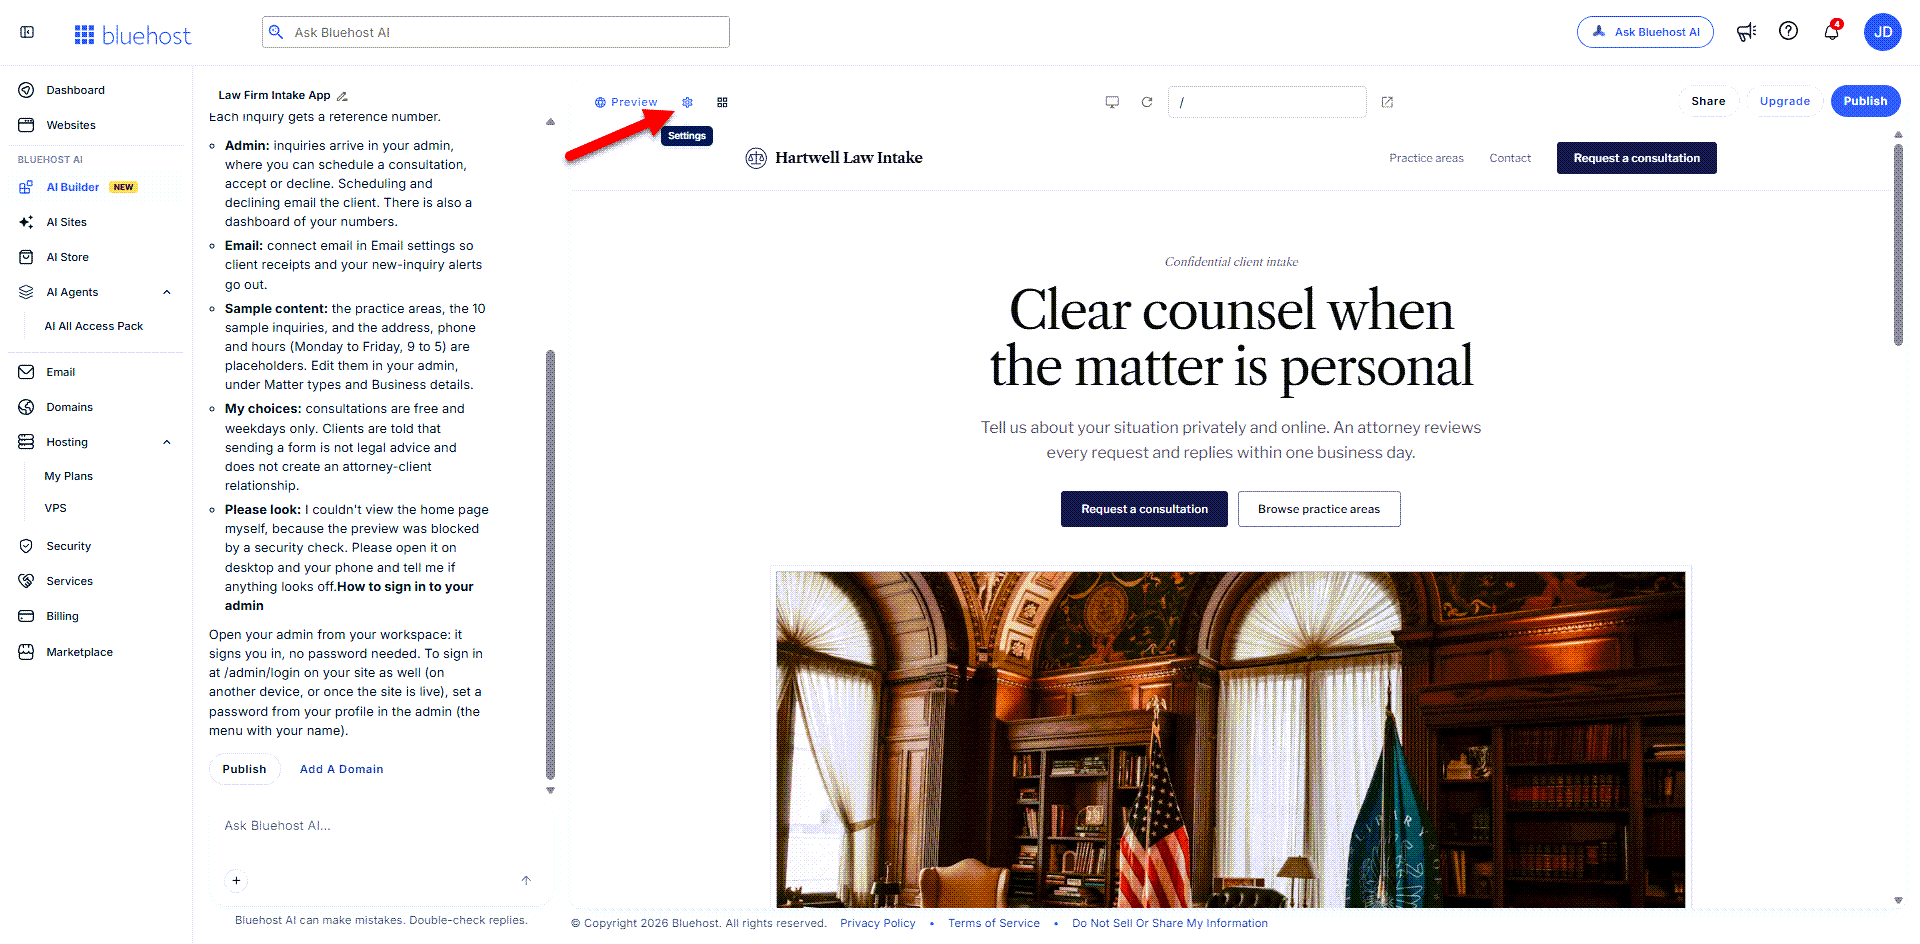
- Click Email notifications.
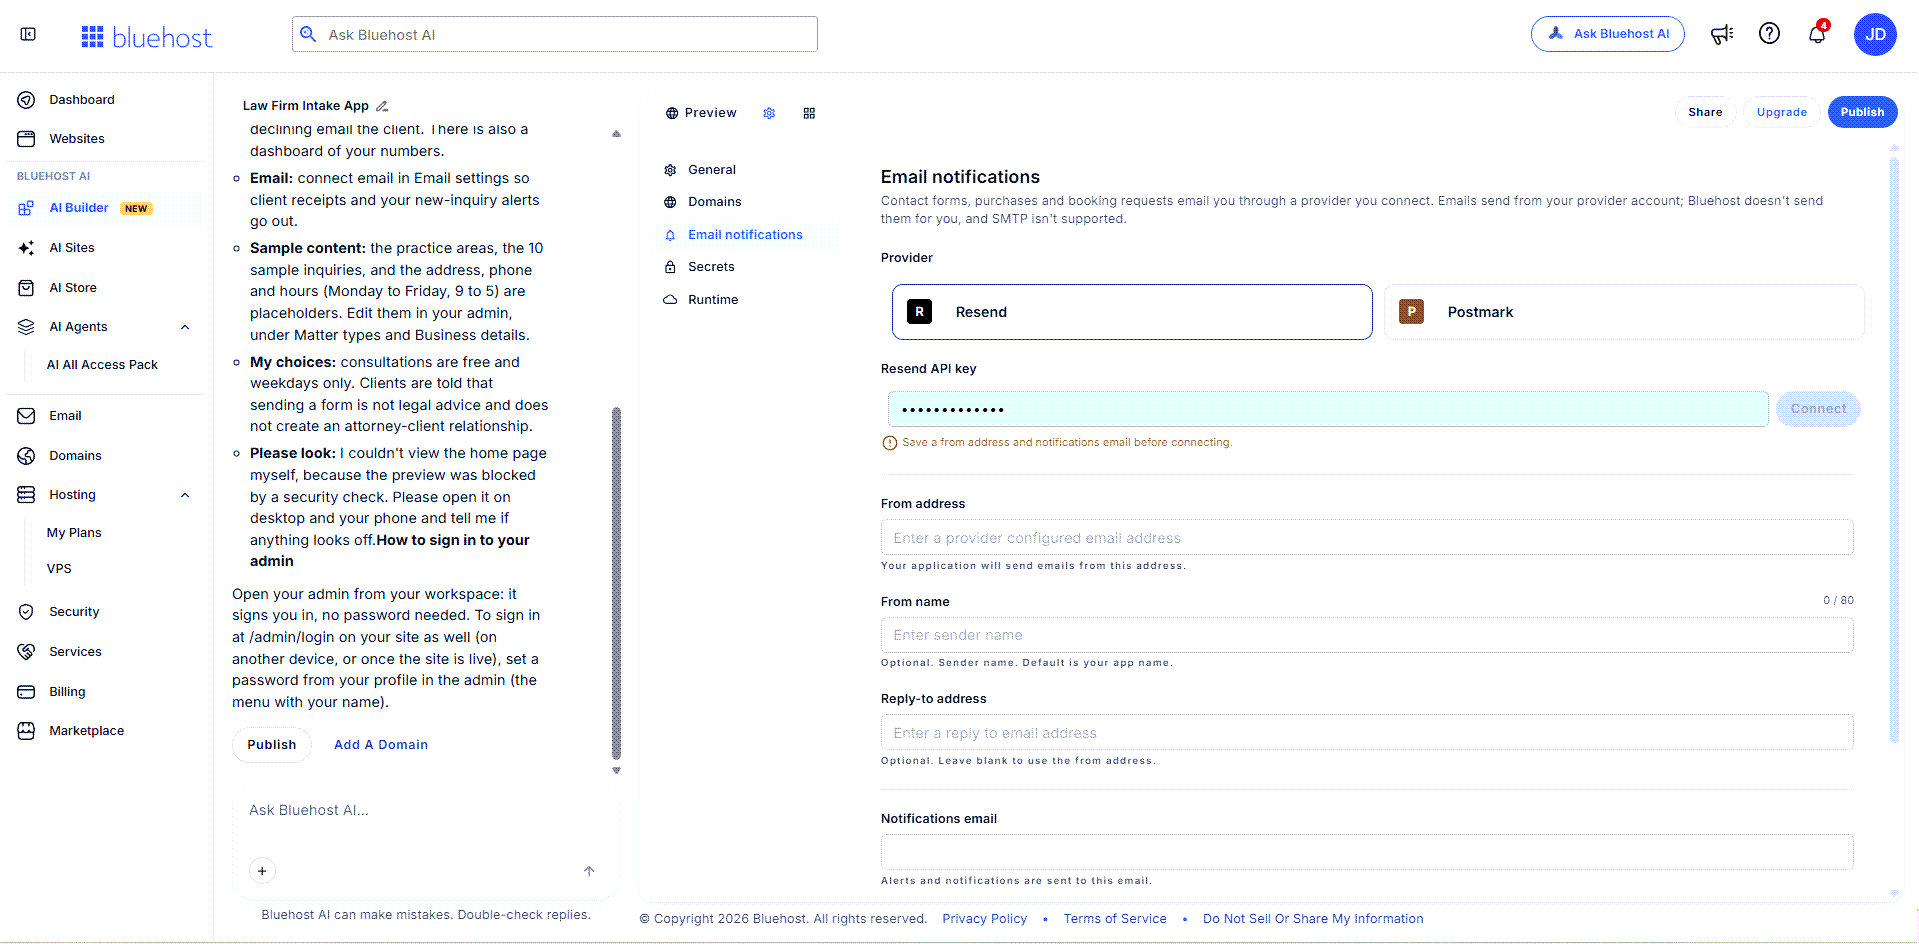
- Under Provider, click Postmark.
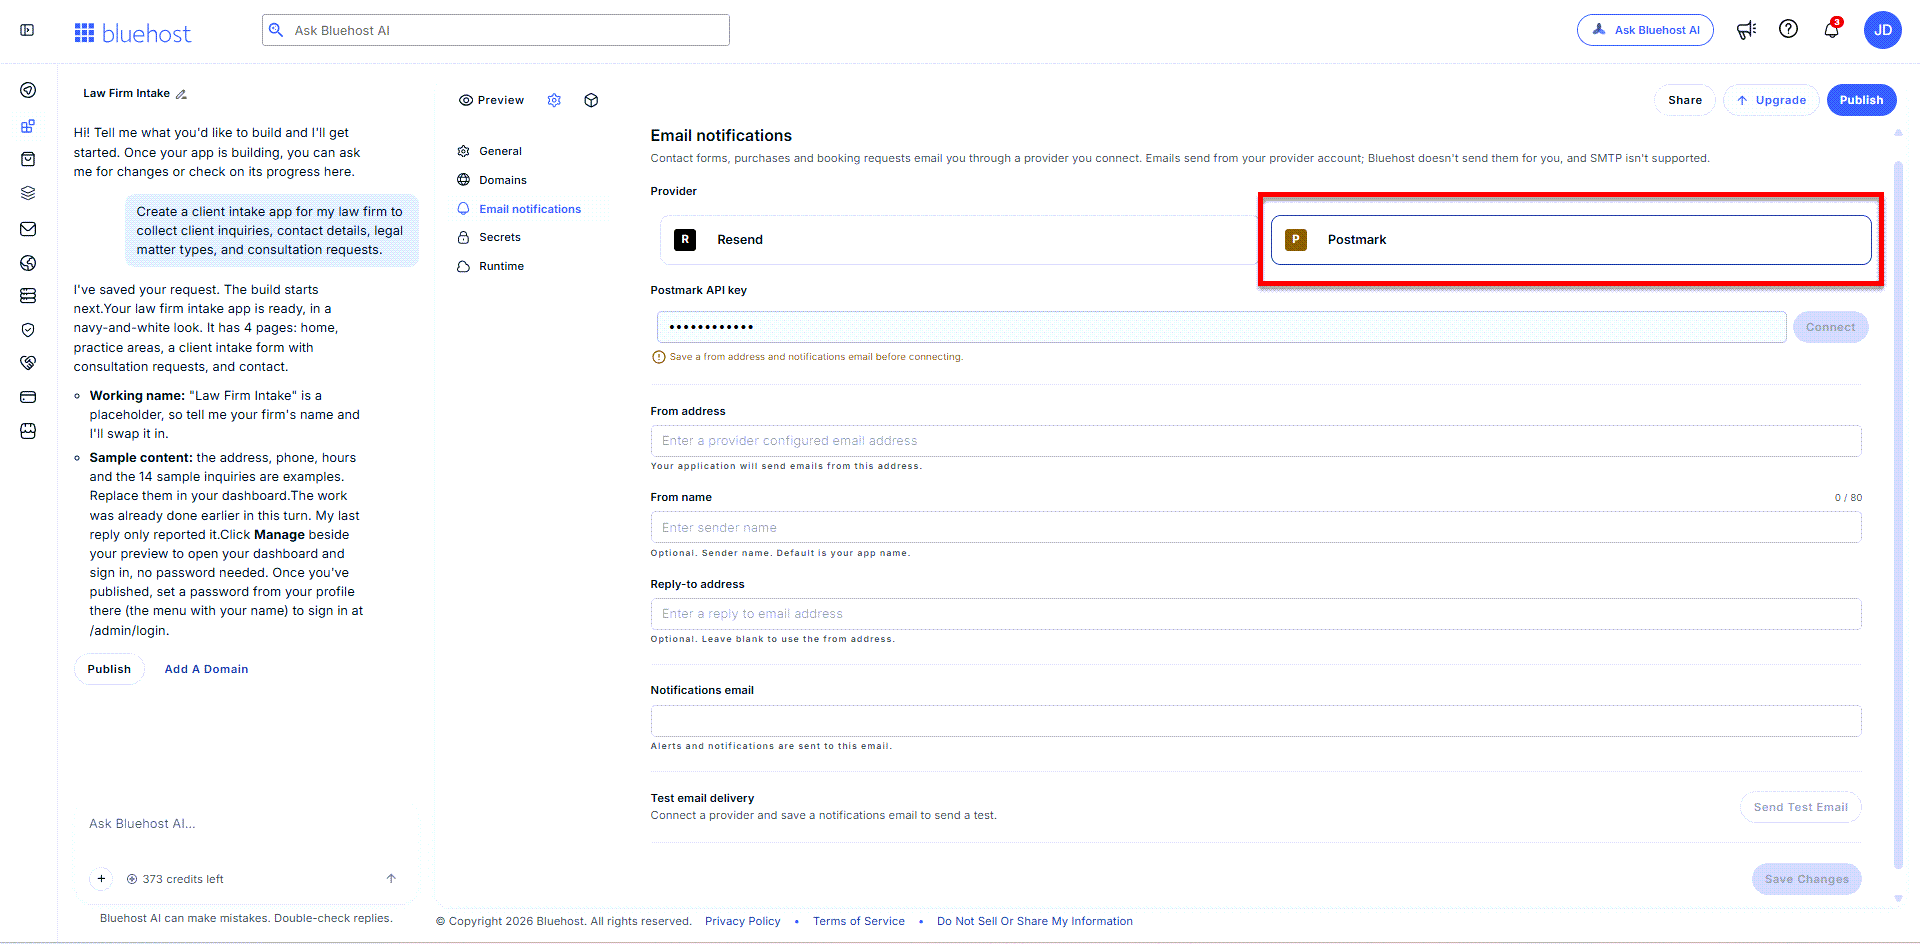
- Paste your Server API Token into the Postmark API key field.
- Fill out the fields:
- From address (required). Use an address on the domain you verified in Step 5.
- From name (optional)
- Reply-to address (optional)
- Notifications email (required)
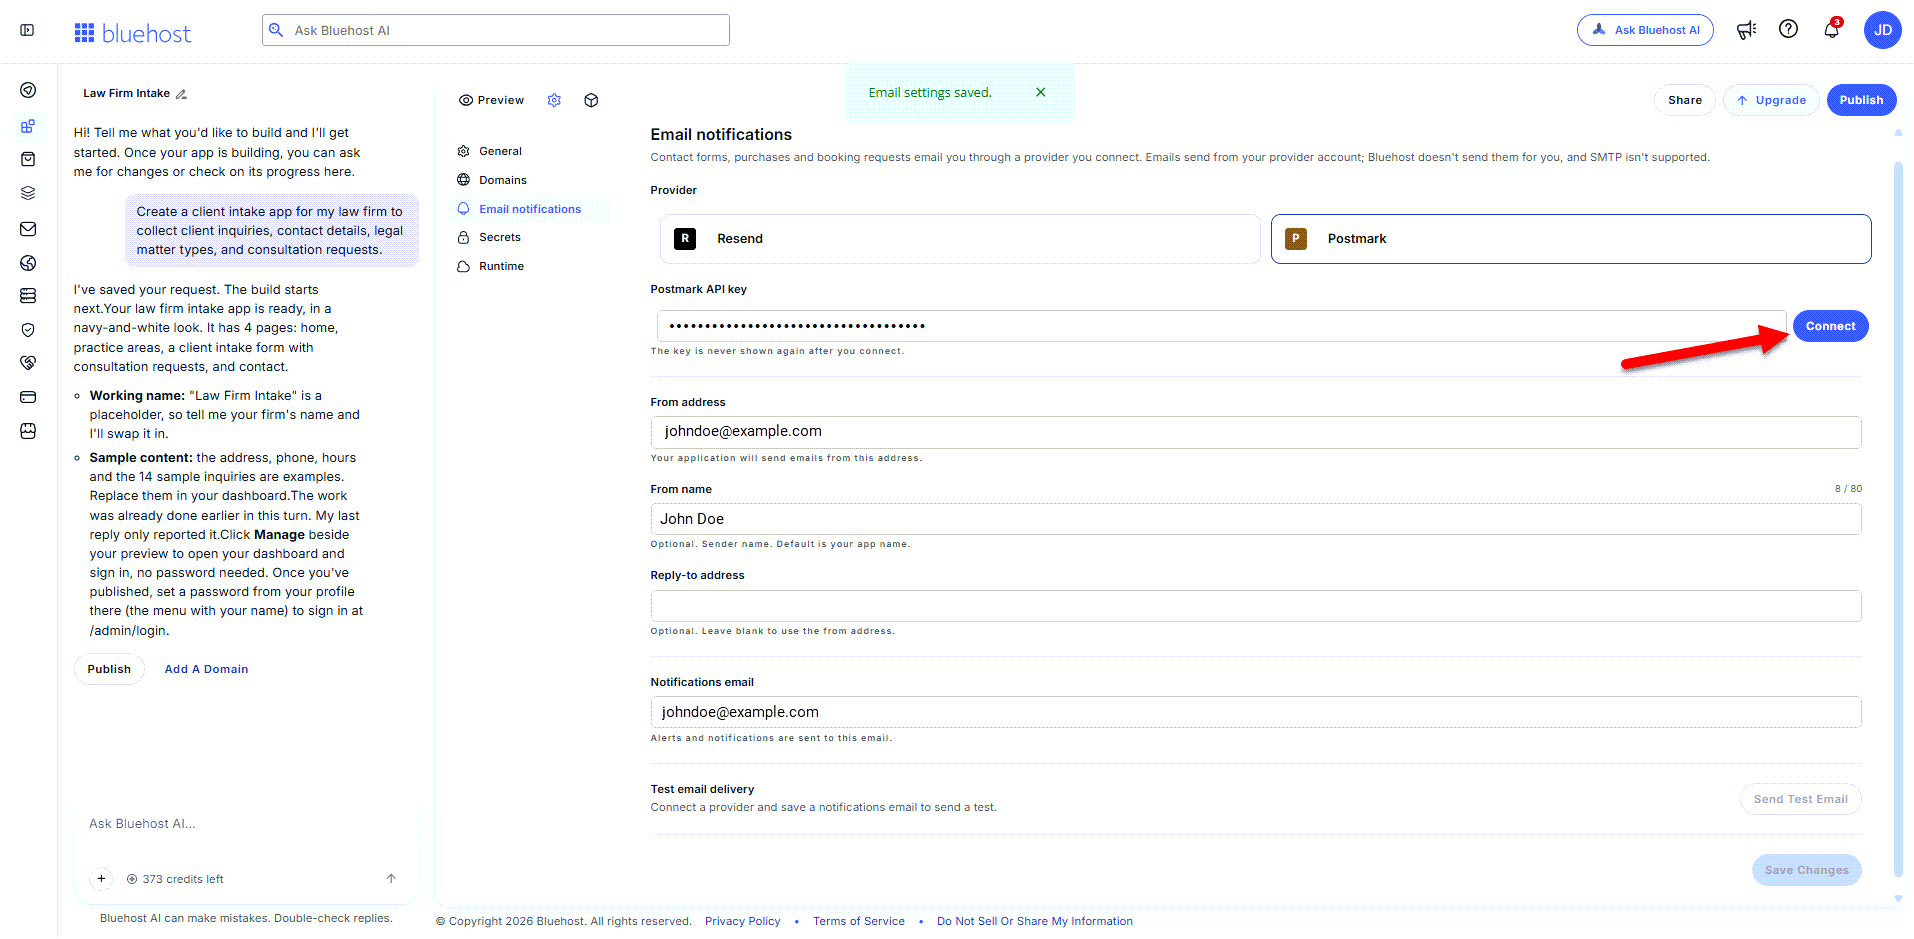
- Click Save Changes.
- After saving the email settings, click Connect next to the Postmark API Key field.
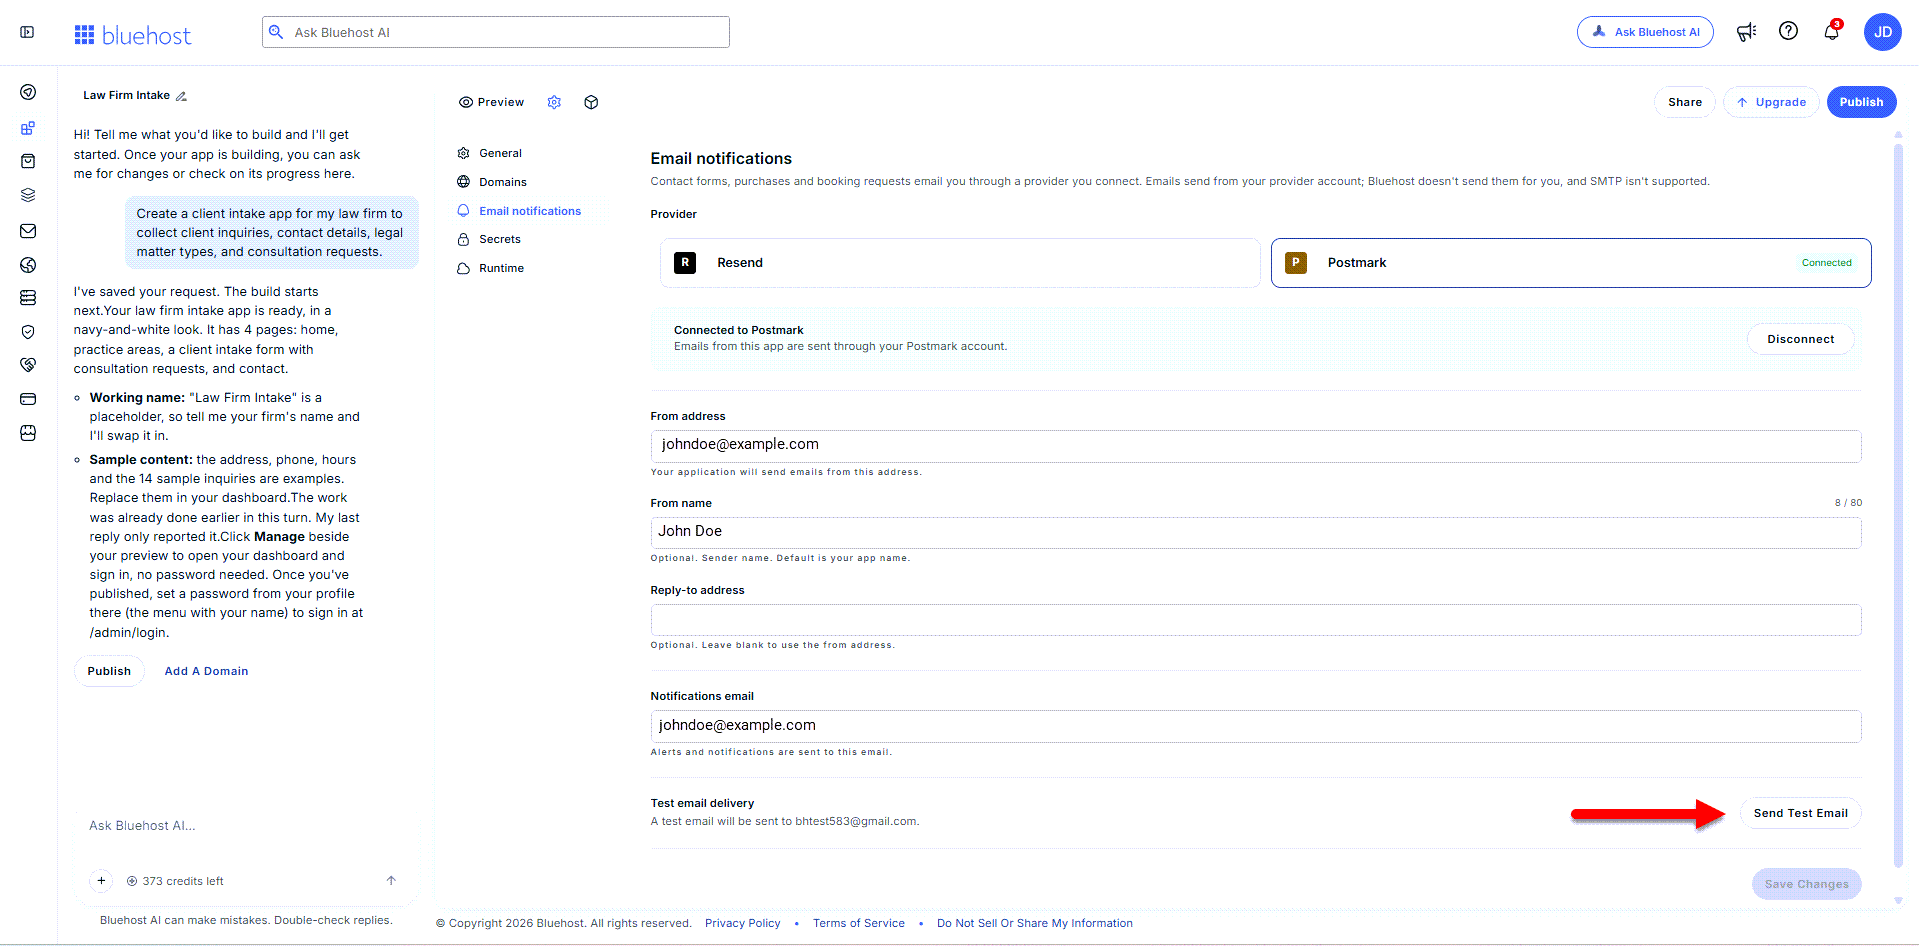
- Once connected, click Send Test Email to make sure it works.
- A prompt will appear showing that the test email was successful.
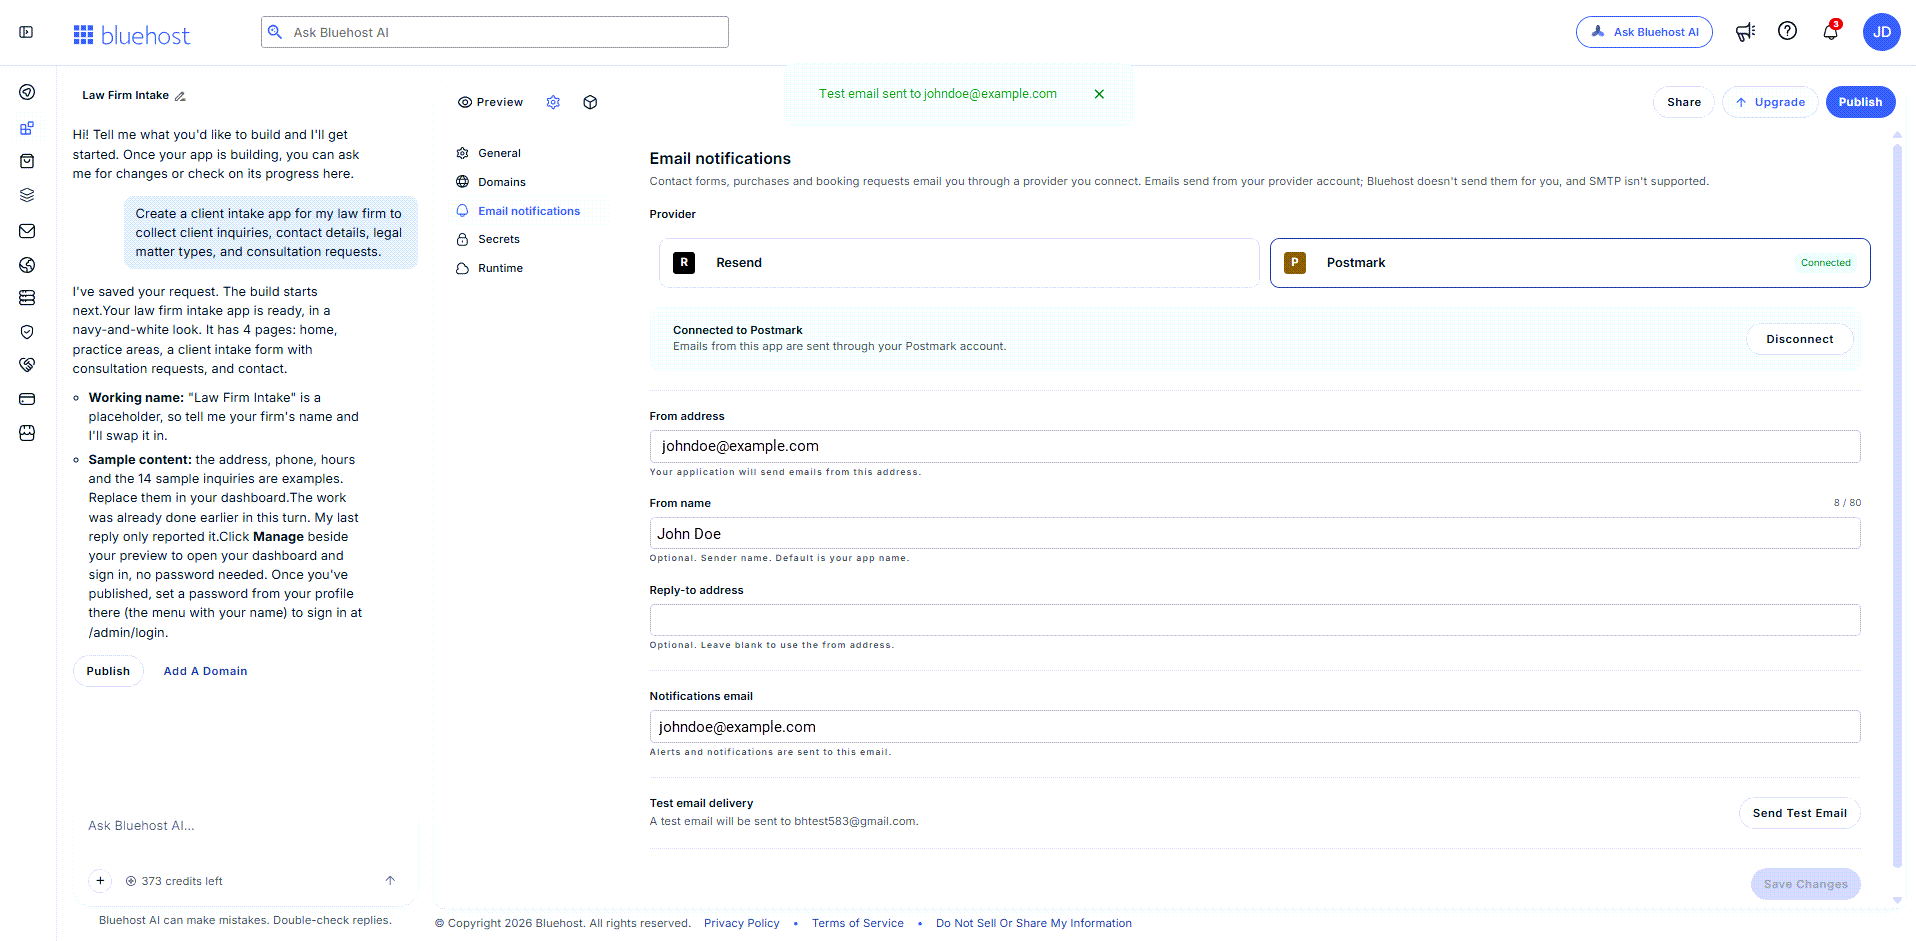
- Open the inbox you entered as your Notifications email, and check your Spam or Junk folder too. If you received the email, your app is now connected to Postmark.
Note: If your account isn't approved yet, use a Notifications email on your verified domain. Test emails to other addresses won't arrive until Postmark approves your account.
Next Step: Send Emails From Your App
To set up which emails your app sends and when, see Bluehost AI Builder: How to Set Up Email Notifications.
Emails Aren't Arriving?
Check these common causes:
- Your account is still in test mode. Until Postmark approves your account, emails only reach addresses on your verified domains. Check the status of your approval request in the Postmark dashboard.
- Your domain isn't verified. Make sure the DKIM and Return-Path records show a green checkmark on your domain's DNS Settings page.
- Your server type is Sandbox. Sandbox servers don't deliver to real recipients. Use a Live server.
- You used the wrong token. Make sure you copied the Server API Token from your server's API Tokens tab, not the Account API Token.
What to Do If an API Key is Compromised
If your Server API Token was pasted into a chat, shared, or seen by someone else, replace it right away.
- In the Postmark dashboard, open your server and click the API Tokens tab.
- Generate a new token.
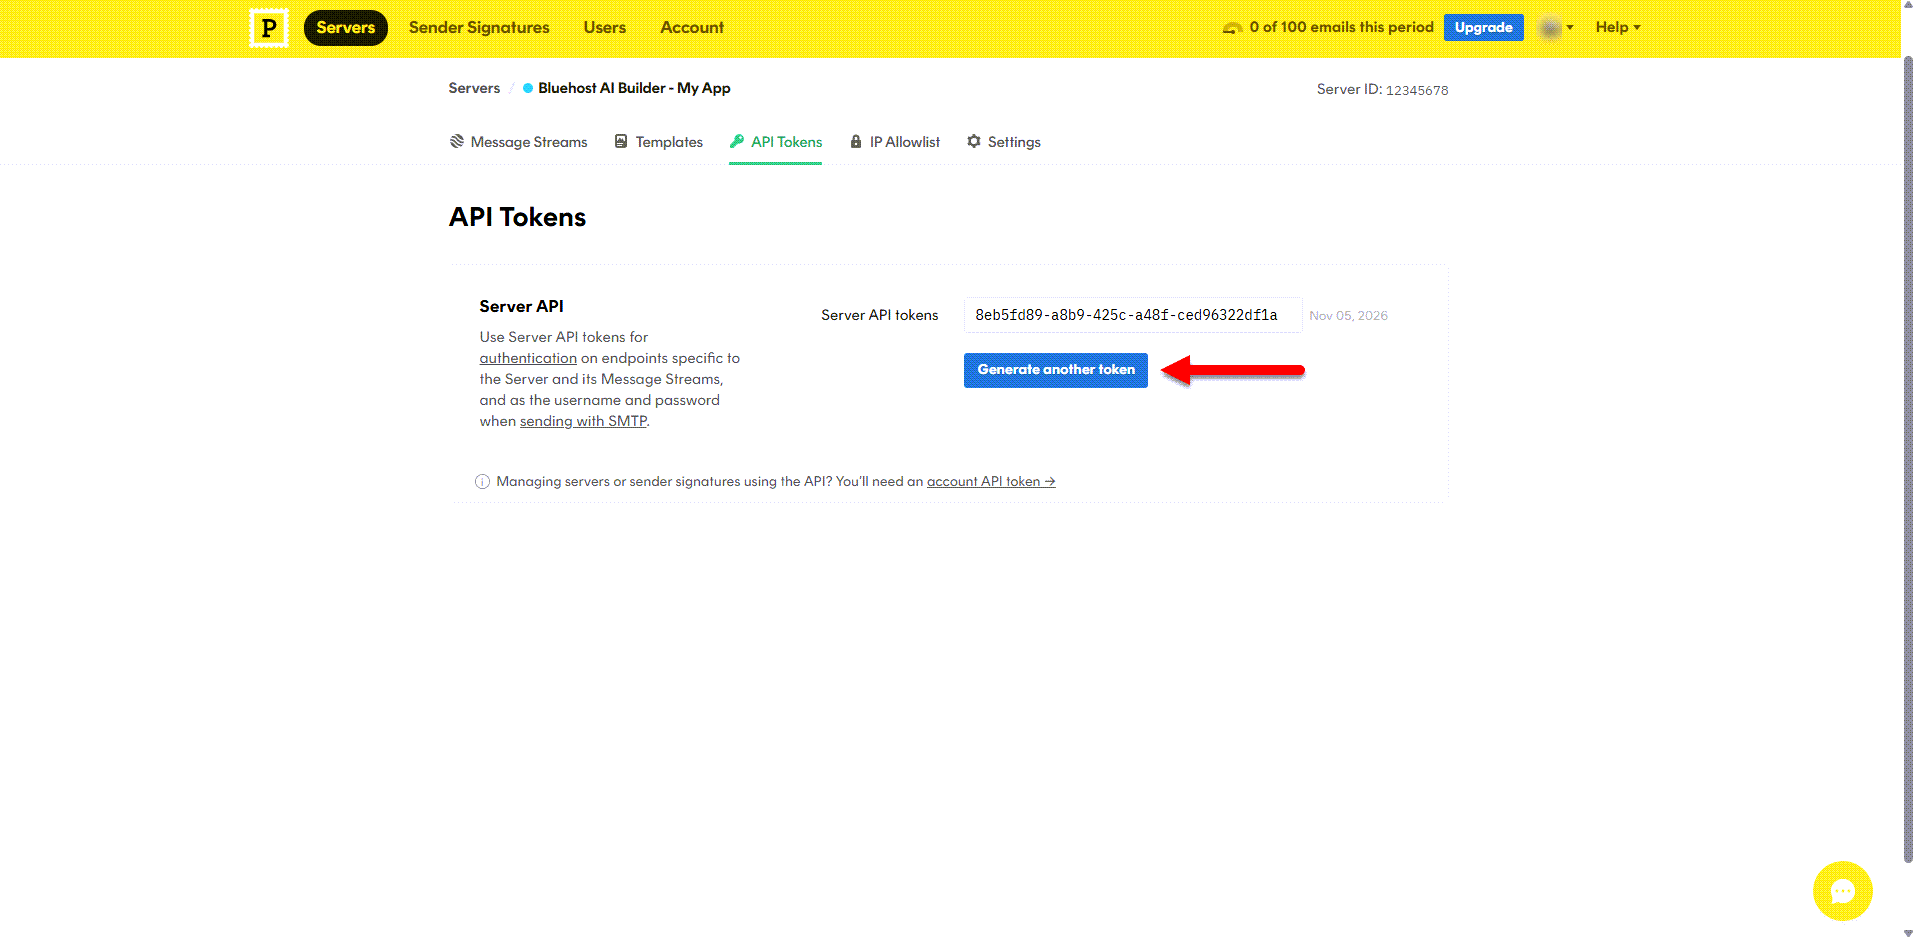
- Delete the exposed token.
- Add the new token in the AI Builder under Settings > Email notifications. If you also stored the token in the Secrets tab, update the secret there too.
- Once done, click Connect and send a test email. See Step 8 above.
For general guidance on exposed keys, see the What To Do If a Key is Exposed section of the Bluehost AI Builder: Working with APIs and External Data Sources article.
Summary
Learn how to connect Postmark to your Bluehost AI Builder app to send email notifications. This article walks you through creating a Postmark account and server, verifying your sending domain, obtaining a Server API Token, connecting Postmark in the AI Builder, testing email delivery, and troubleshooting common email issues. It also explains how to replace a compromised API key to keep your app secure.
If you need further assistance, Bluehost Chat Support is available 24 hours a day, 7days a week while Bluehost Phone Support is available 7 days a week from 7 am-12 midnight EST.
- Chat Support - While on our website, you should see a CHAT bubble in the bottom right-hand corner of the page. Click anywhere on the bubble to begin a chat session.
- Phone Support -
- US: 888-401-4678
- International: +1 801-765-9400
You may also refer to our Knowledge Base articles to help answer common questions and guide you through various setup, configuration, and troubleshooting steps.