 ChatGPT,
  Claude,
  Gemini,
  Grok — all four for
 Bluehost AI Store: Activate and Access the WooCommerce Plugin
If you're using Bluehost AI Store to manage your online business, you can access WooCommerce features to manage products, orders, customers, payments, and store settings. Bluehost AI Store uses WooCommerce to power your store while providing a simple, AI-powered dashboard to manage everything in one place.
This article provides an overview of WooCommerce and explains how to access it from your AI Store. For a quick walkthrough, watch the short video below:
If you're new to AI Store, see the following articles to learn more about its features and offerings and to guide you through each step of the setup and management process.
What is WooCommerce?
WooCommerce is a popular WordPress eCommerce platform that lets you create and manage an online store. It provides tools to manage products, payments, shipping, orders, and more from one place.
Bluehost AI Store simplifies store management with an AI-powered dashboard where you can manage products, orders, payments, shipping, customers, and store performance, while WooCommerce powers your store behind the scenes.
Activate WooCommerce with Bluehost AI Store
Once your AI Store website has been generated, WooCommerce is automatically installed and activated, allowing you to manage your products, orders, customers, payments, and store settings.
Enable or Disable WooCommerce through the Websites Tab
- Log in to your Bluehost Portal.
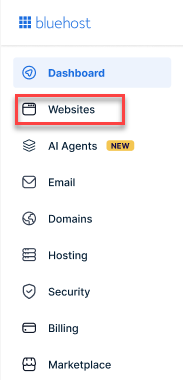
- Click the Websites tab in the left-hand menu.
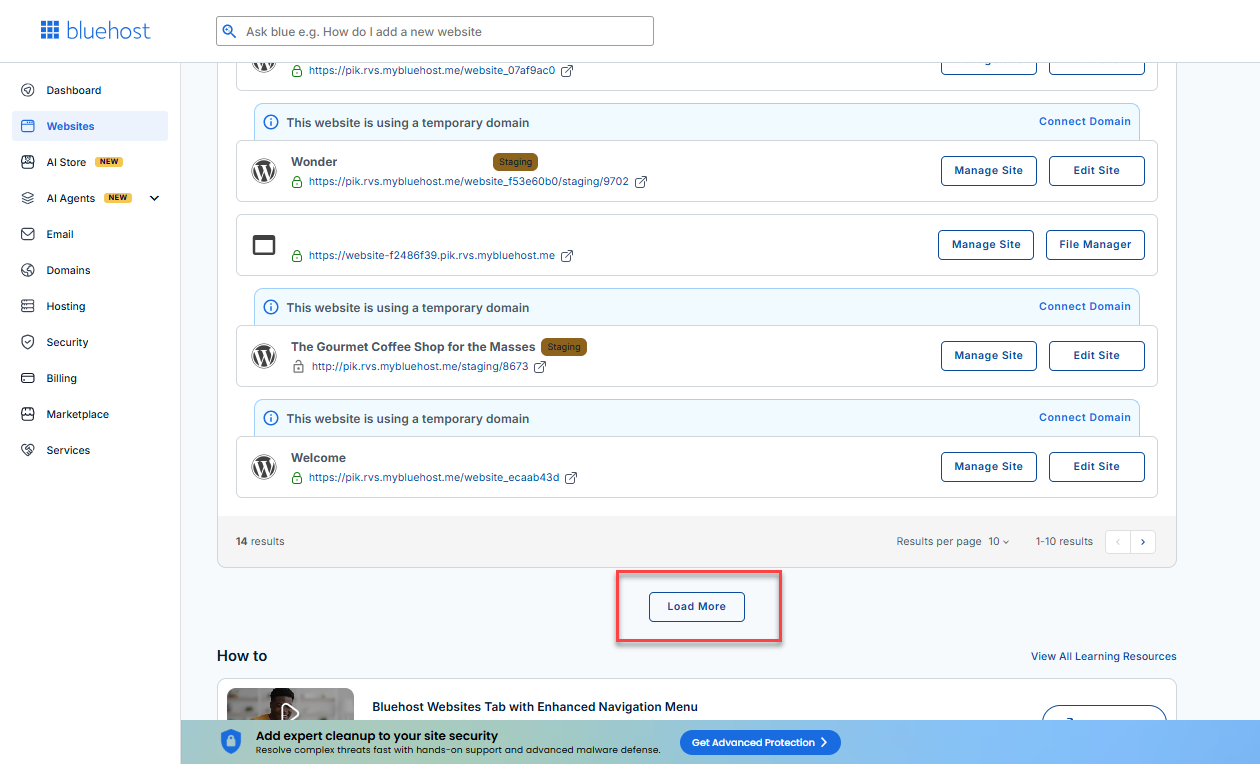
- Locate your Sell Online plan. If you have multiple websites, scroll down and click the Load More link.
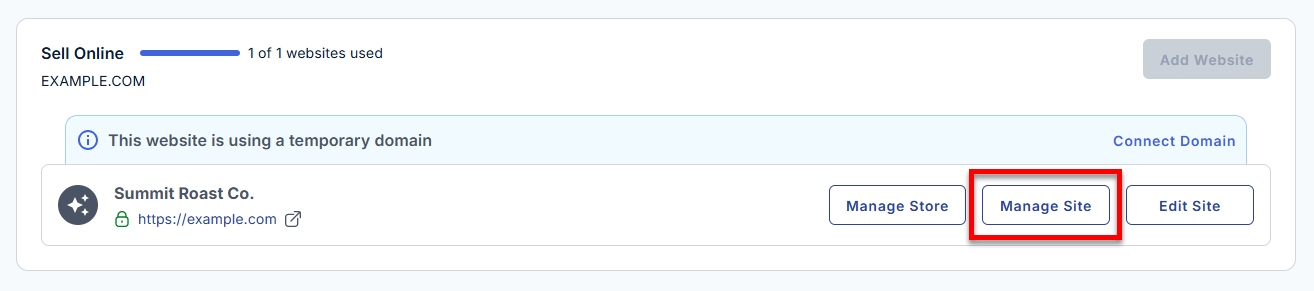
- Click the Manage Site button next to your site.
- On the website management page, click the Plugins tab.
- The plugins installed in your AI Store will be listed under this tab, including WooCommerce.
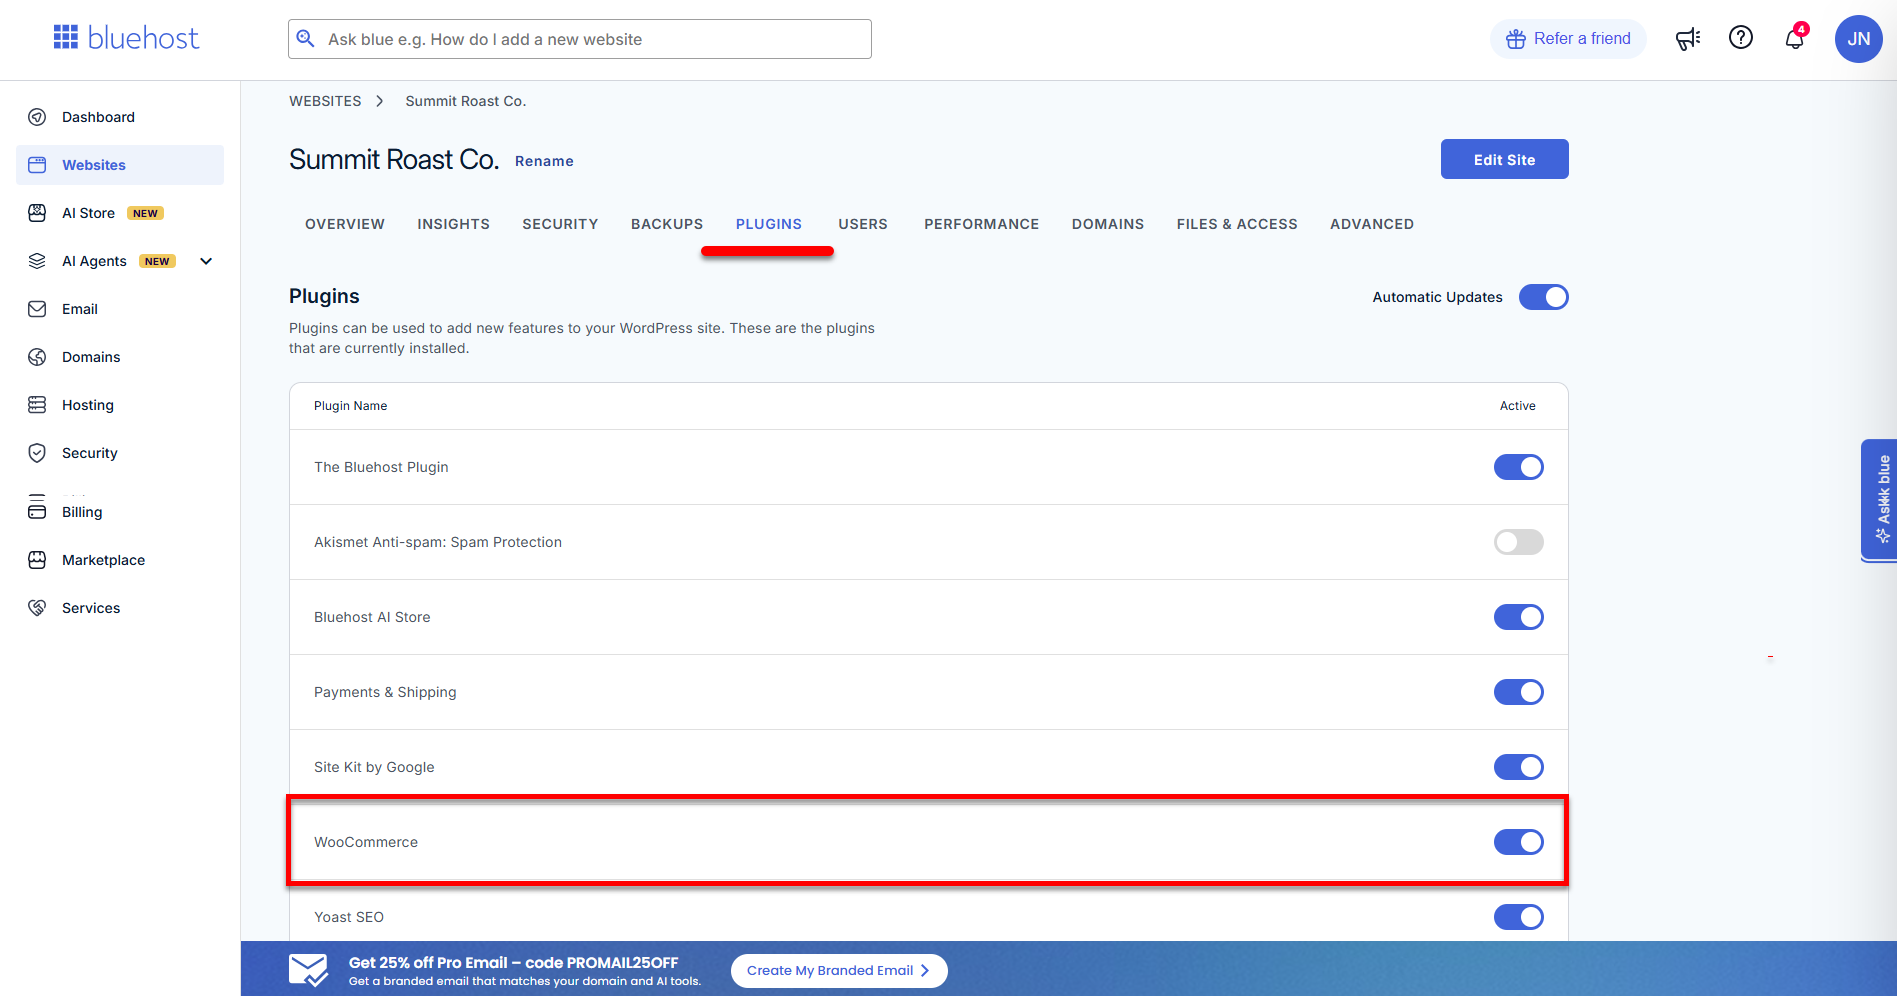
- You can use the toggle to enable or disable WooCommerce.
If you need to go to the AI Store editor, click the Edit Site button in the upper-right corner.
Access WooCommerce through the AI Store Dashboard
Follow these steps to access your WooCommerce dashboard from AI Store.
- Log in to your Bluehost Portal.
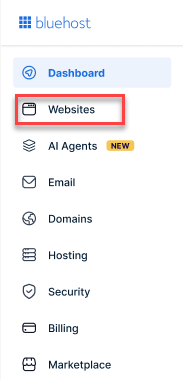
- Click Websites in the left-hand menu.
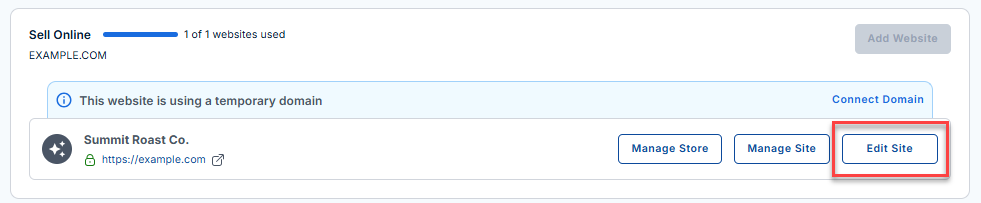
- Locate your Sell Online plan. If you have multiple websites, you need to scroll down and click the Load More link.
- Navigate to the website you want to update, then click Edit Site.
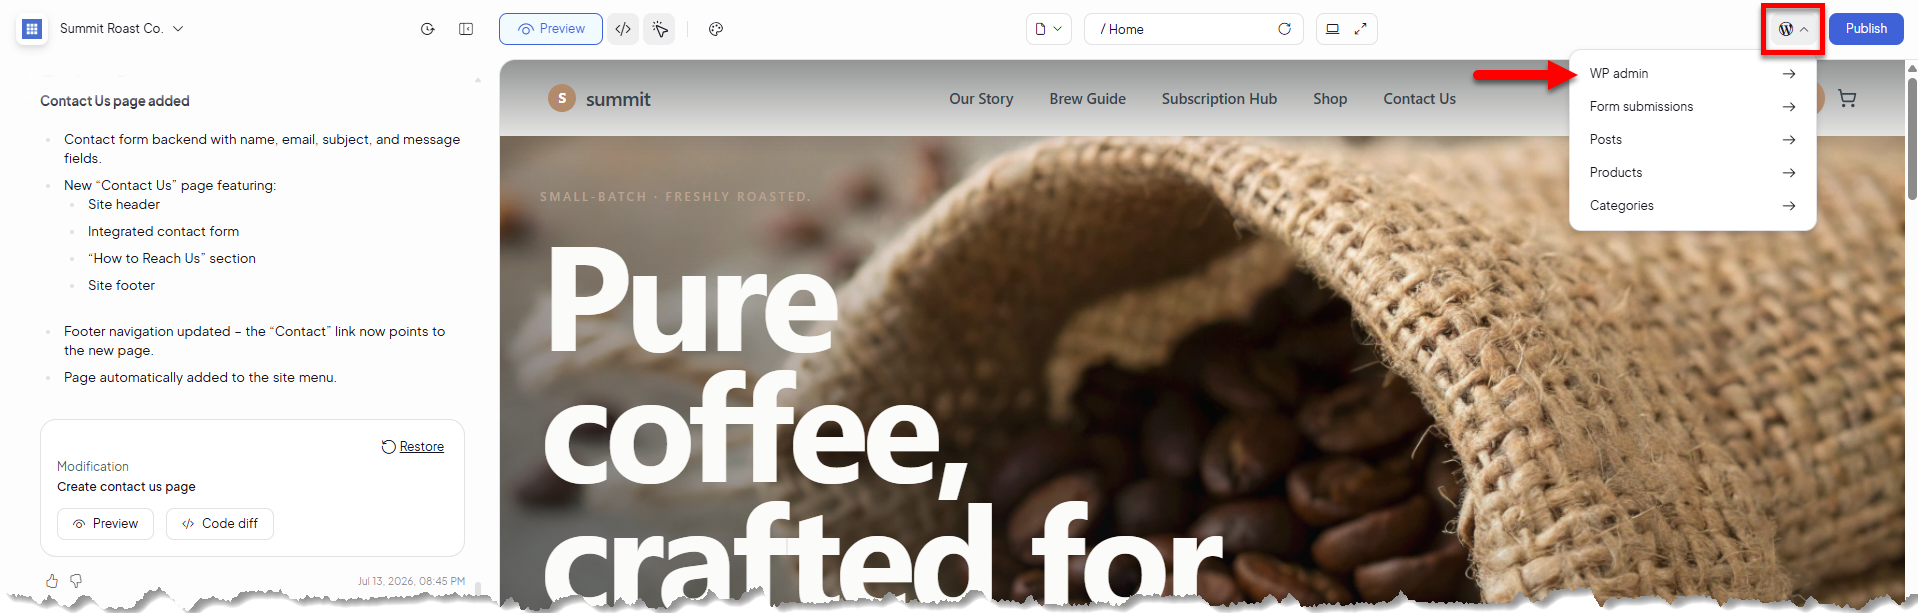
- In the Editor, click the WordPress icon located in the upper-right corner, then select WP admin.
- The WordPress dashboard will open in a new tab.
To help keep your AI-generated website secure and running smoothly, access to certain WordPress Admin features is limited. You won't be able to install, deactivate, or delete plugins, or install and switch themes. These safeguards are in place to protect your website's performance, functionality, and design, ensuring everything continues to work as intended.
- Click WooCommerce in the left menu.
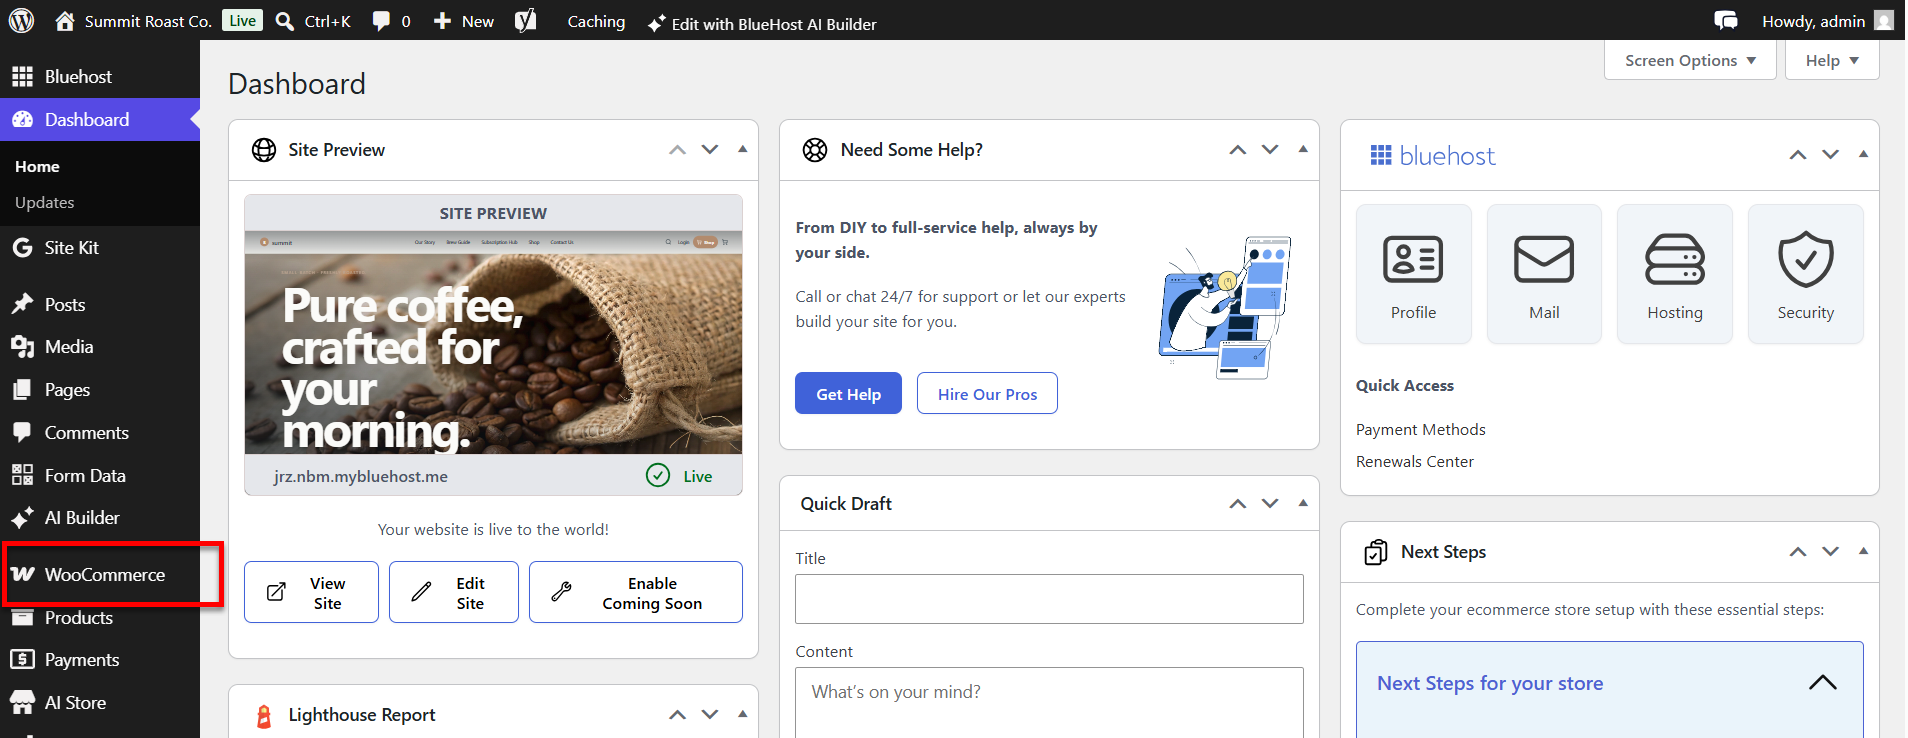
- The WooCommerce Home page will open, displaying store setup tasks, notifications, and performance insights.
Complete the Store Setup Tasks
At the top of the WooCommerce Home page, you'll see the Things to do next section. This checklist helps you configure and optimize your store by completing the recommended setup tasks.
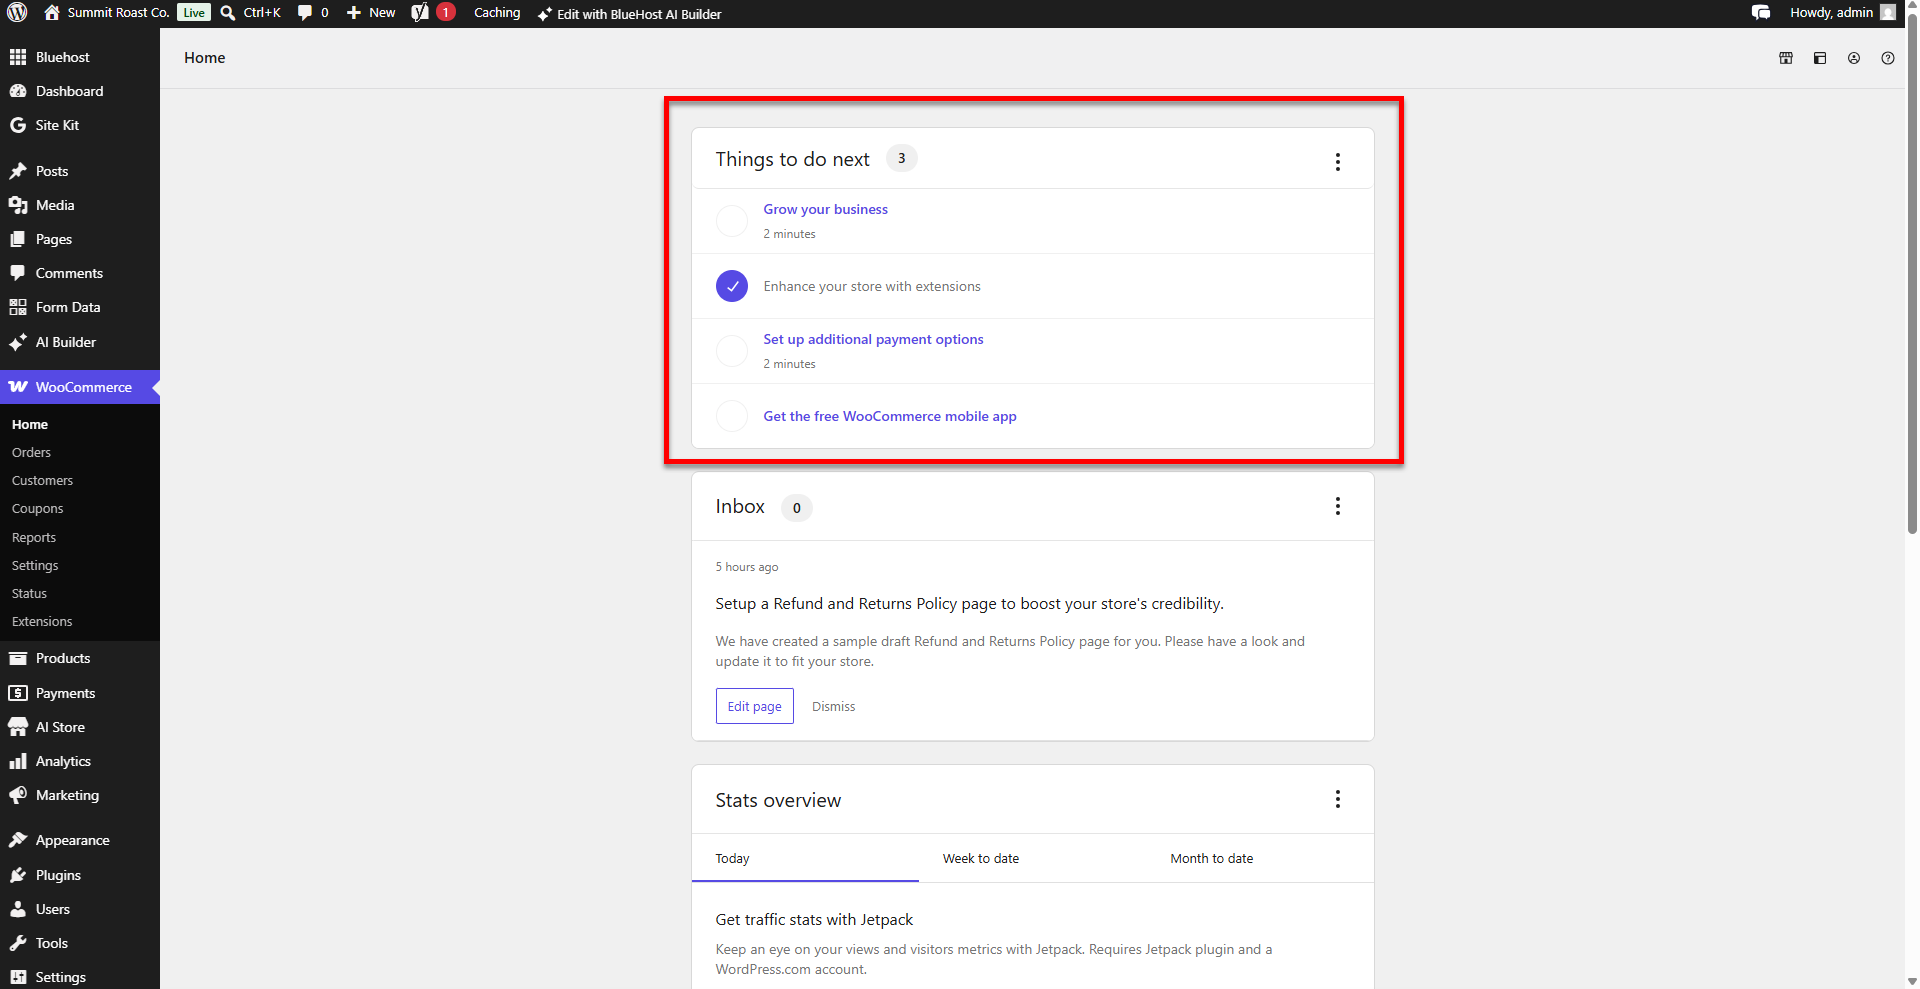
Checklist 1: Grow Your Business
In the Grow your business section, you have the opportunity to expand your store's reach by adding marketing and customer engagement tools to your store.
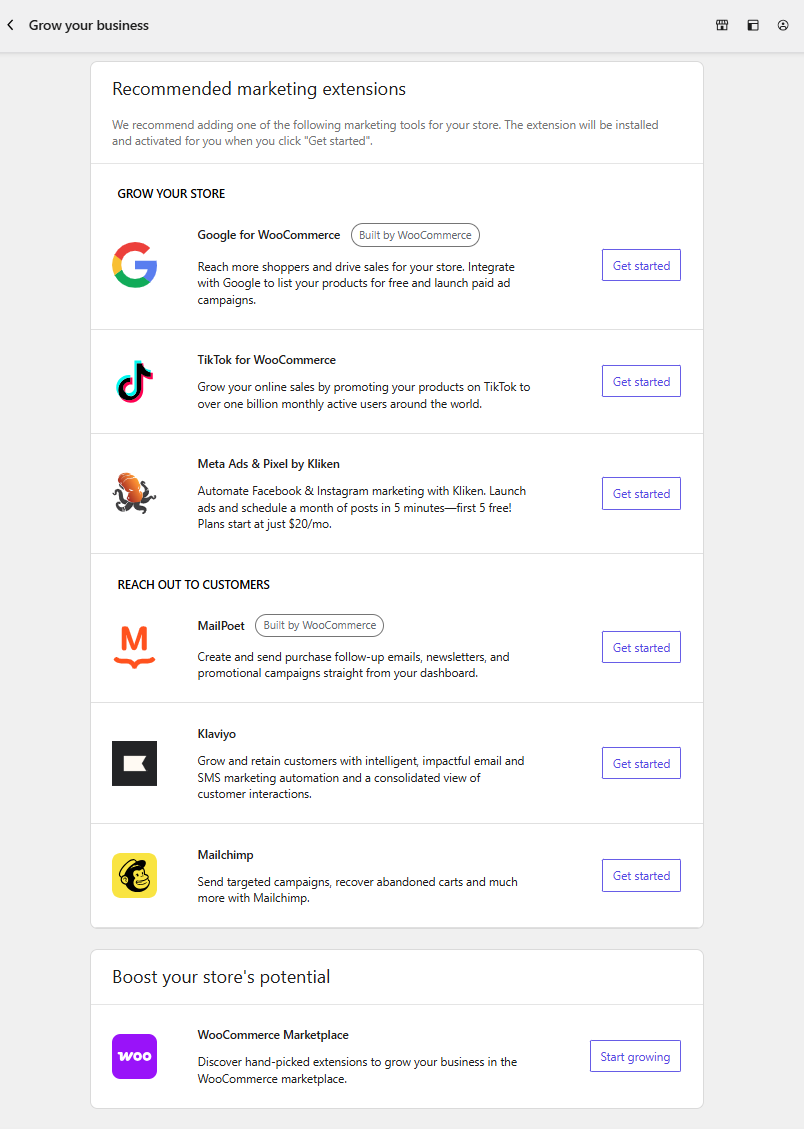
Recommended Marketing Extensions
- Google for WooCommerce - Sync your products with Google so you can create shopping campaigns.
- TikTok for WooCommerce - Promote your products with TikTok audiences and track campaign performance.
- Meta Ads & Pixel - Connect your store to Facebook and Instagram for advertising and conversion tracking
- MailPoet, Klaviyo, and Mailchimp - Create email marketing campaigns, newsletters, and customer follow-up emails.
Click Get Started to install and activate the selected extensions.
- WooCommerce Marketplace - Provides access to additional extensions and integrations that can improve your store's functionality, such as for marketing and advertising, payment processing, shipping, analytics, and customer engagement.
Click Start Growing to explore available extensions.
Checklist 2: Enhance Your Store with Extensions
The Enhance your store with extensions section lets you browse the WooCommerce Marketplace for tools and integrations that can add features, automate tasks, improve the customer experience, and help grow your business.
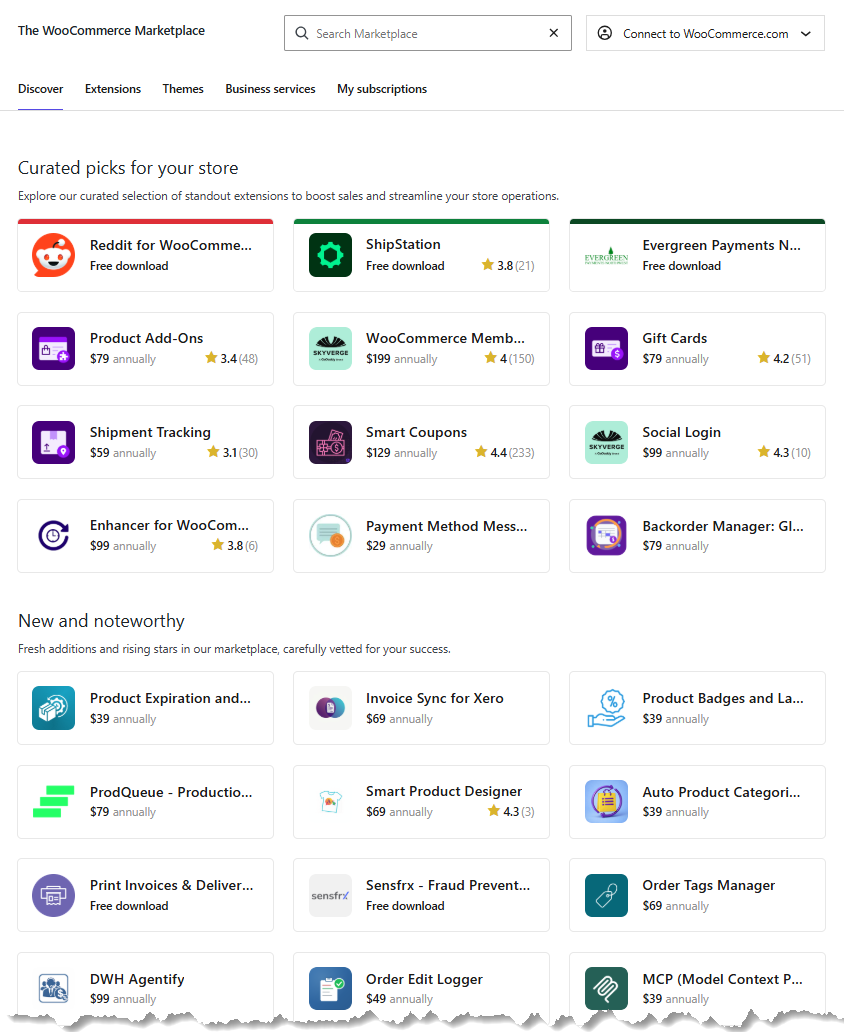
Checklist 3: Set Up Additional Payment Options
The Set up additional payment options section lets you add more payment methods for your customers, making checkout easier and more convenient.
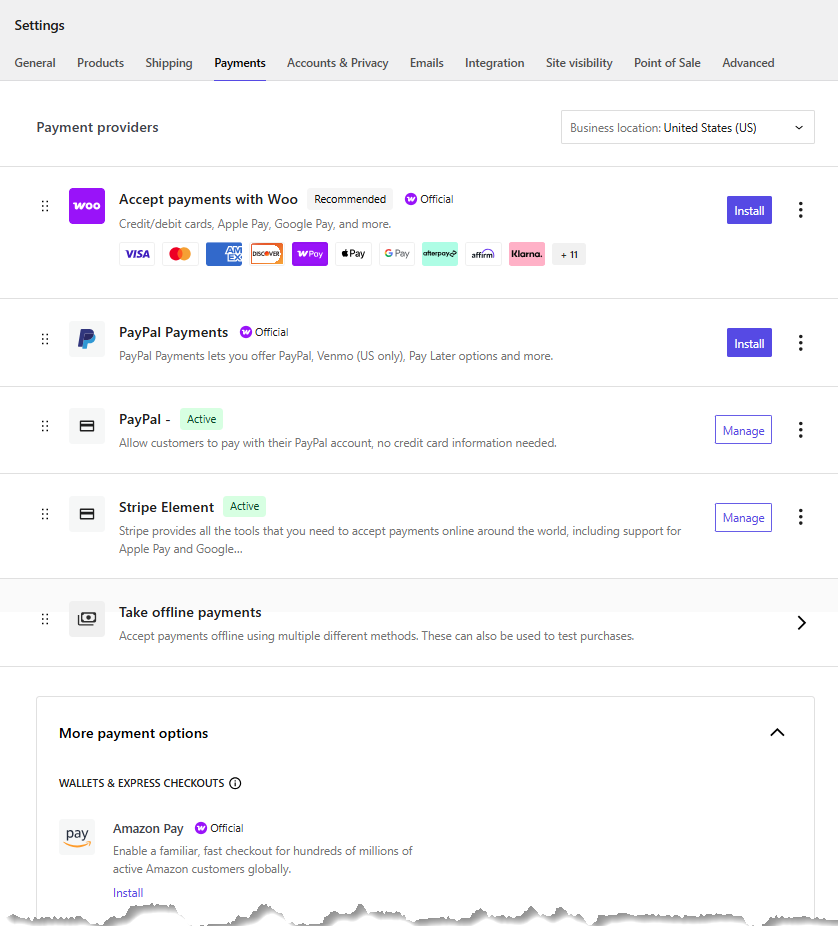
Available Payment Providers
WooCommerce supports a variety of payment solutions, including:
- Woo Payments – Accept major credit and debit cards, Apple Pay, Google Pay, and other popular payment methods.
- PayPal – Allow customers to pay using PayPal and supported PayPal services.
- Stripe – Accept online payments worldwide and support digital wallets such as Apple Pay and Google Pay.
- Amazon Pay – Enable customers to check out using their Amazon account credentials.
This section displays the payment methods currently active in your Bluehost Portal and AI Store. Currently, Stripe is the only payment method supported in AI Store, but additional payment options may be added in the future.
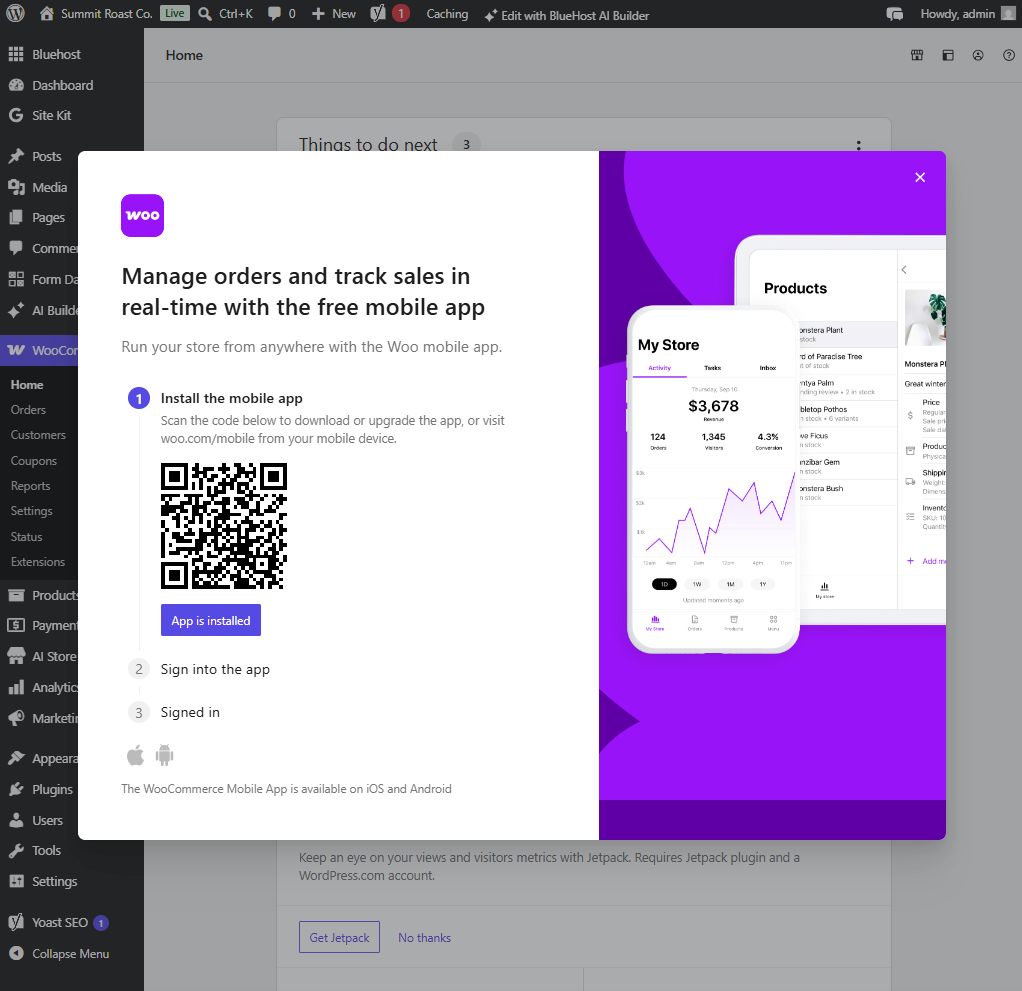
Checklist 4: Get the Free WooCommerce Mobile App
The WooCommerce mobile app lets you manage your Bluehost AI Store from your mobile device. You can track sales, manage orders, and monitor your store anytime, anywhere.
Check Notifications in Your Inbox
The Inbox section provides important recommendations and updates for your store.
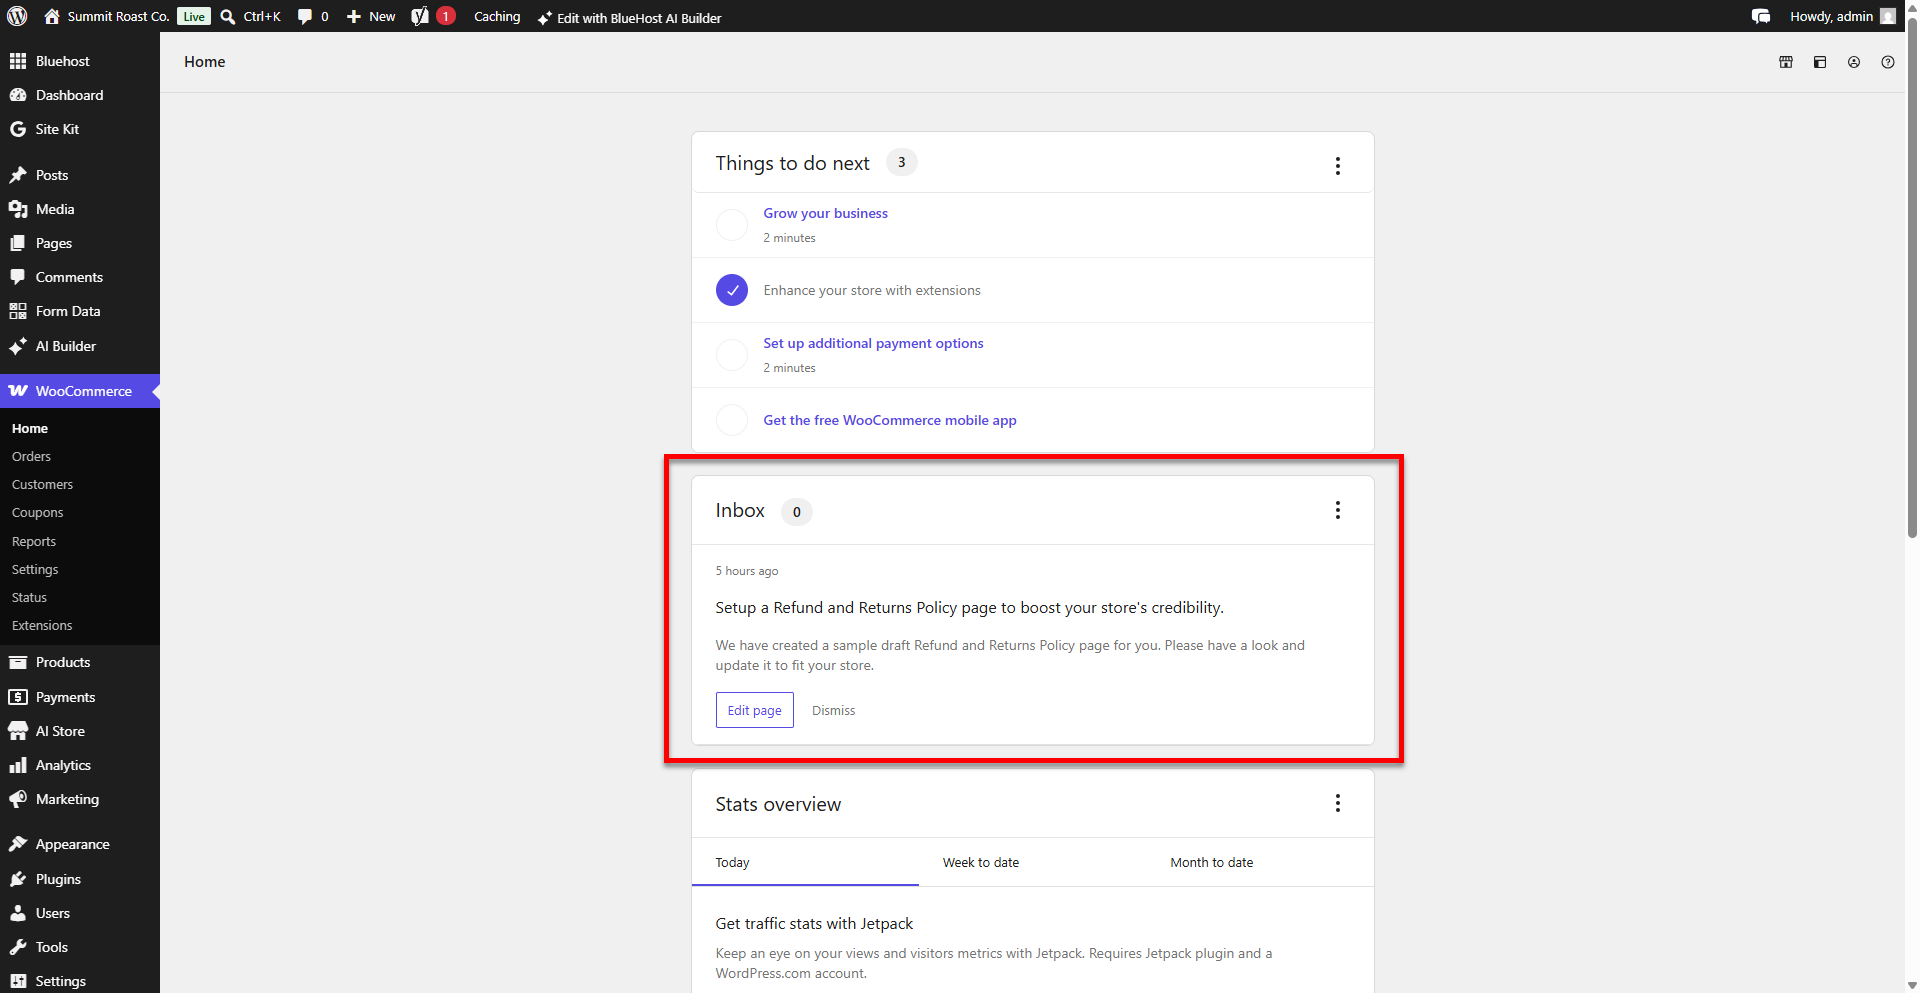
Click the Edit Page button if you need to update your store content.
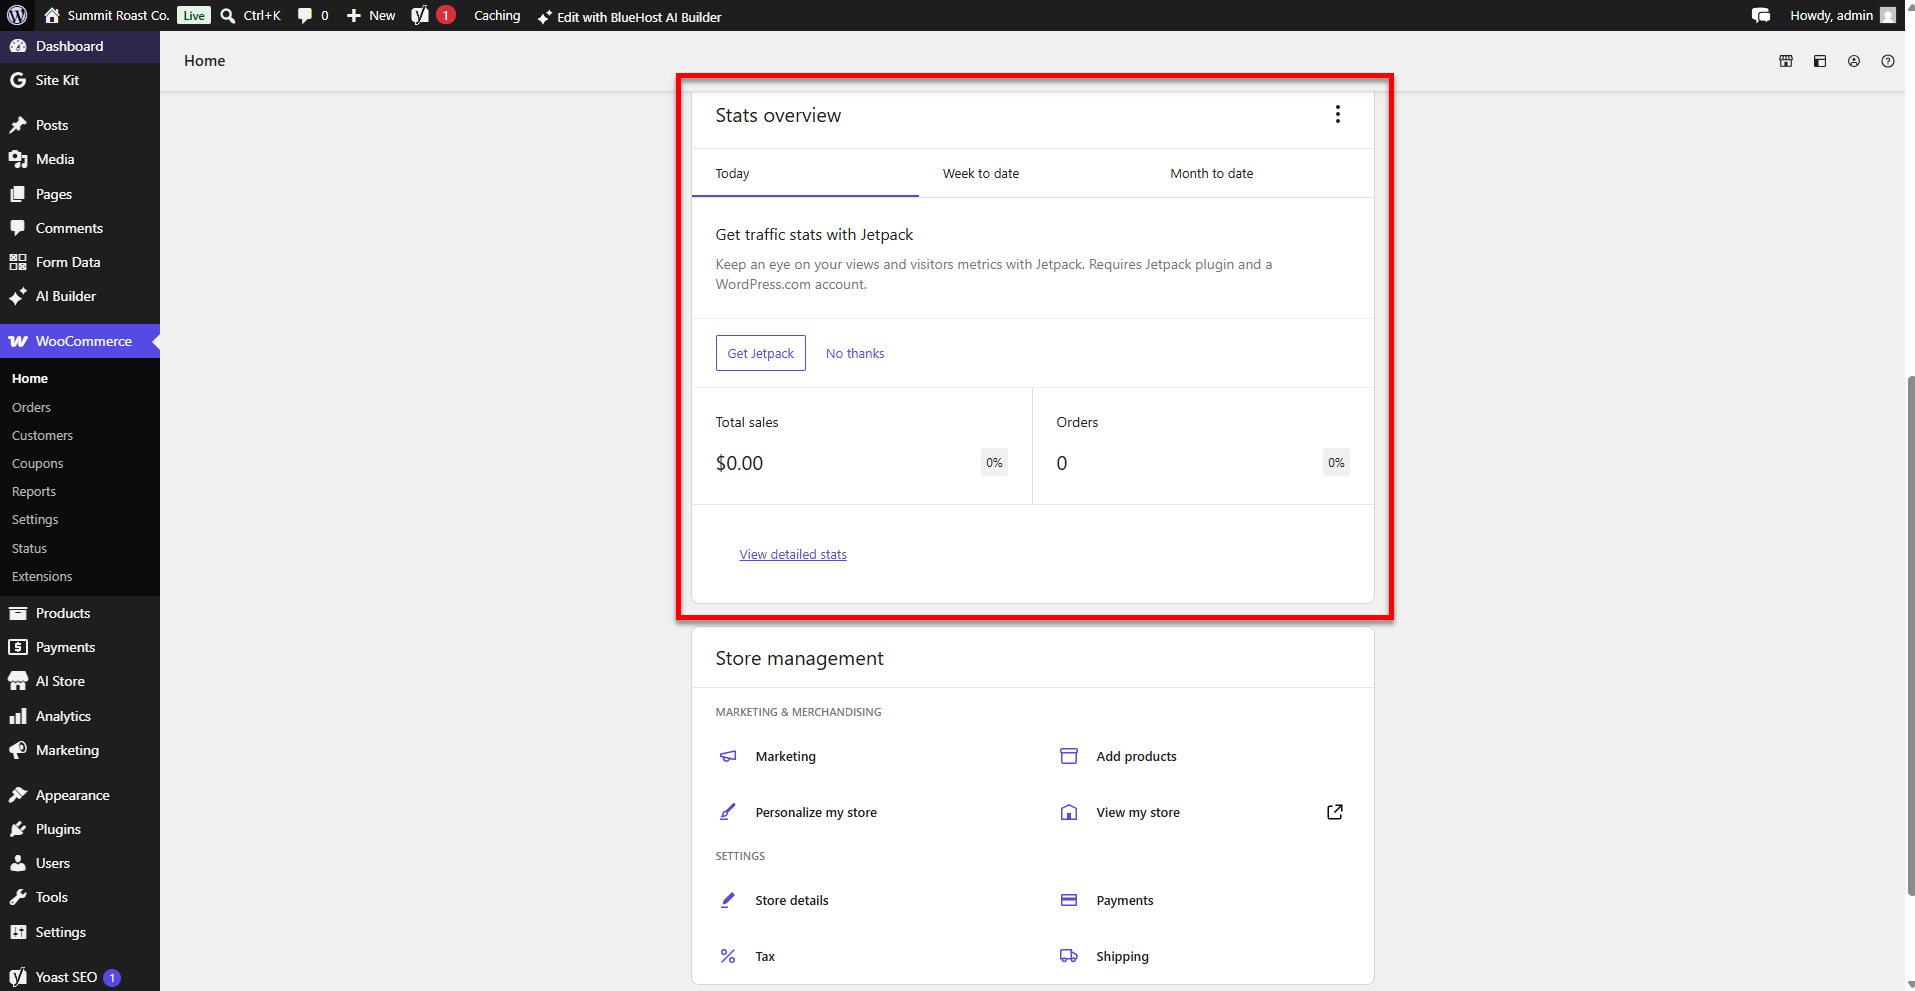
Review Your Stats Overview
The Stats Overview section displays your store's performance and activity. This section helps you monitor sales and order trends over different time periods.
Store Management
The Store Management section provides quick access to WooCommerce tools for managing products, store settings, payments, and marketing.
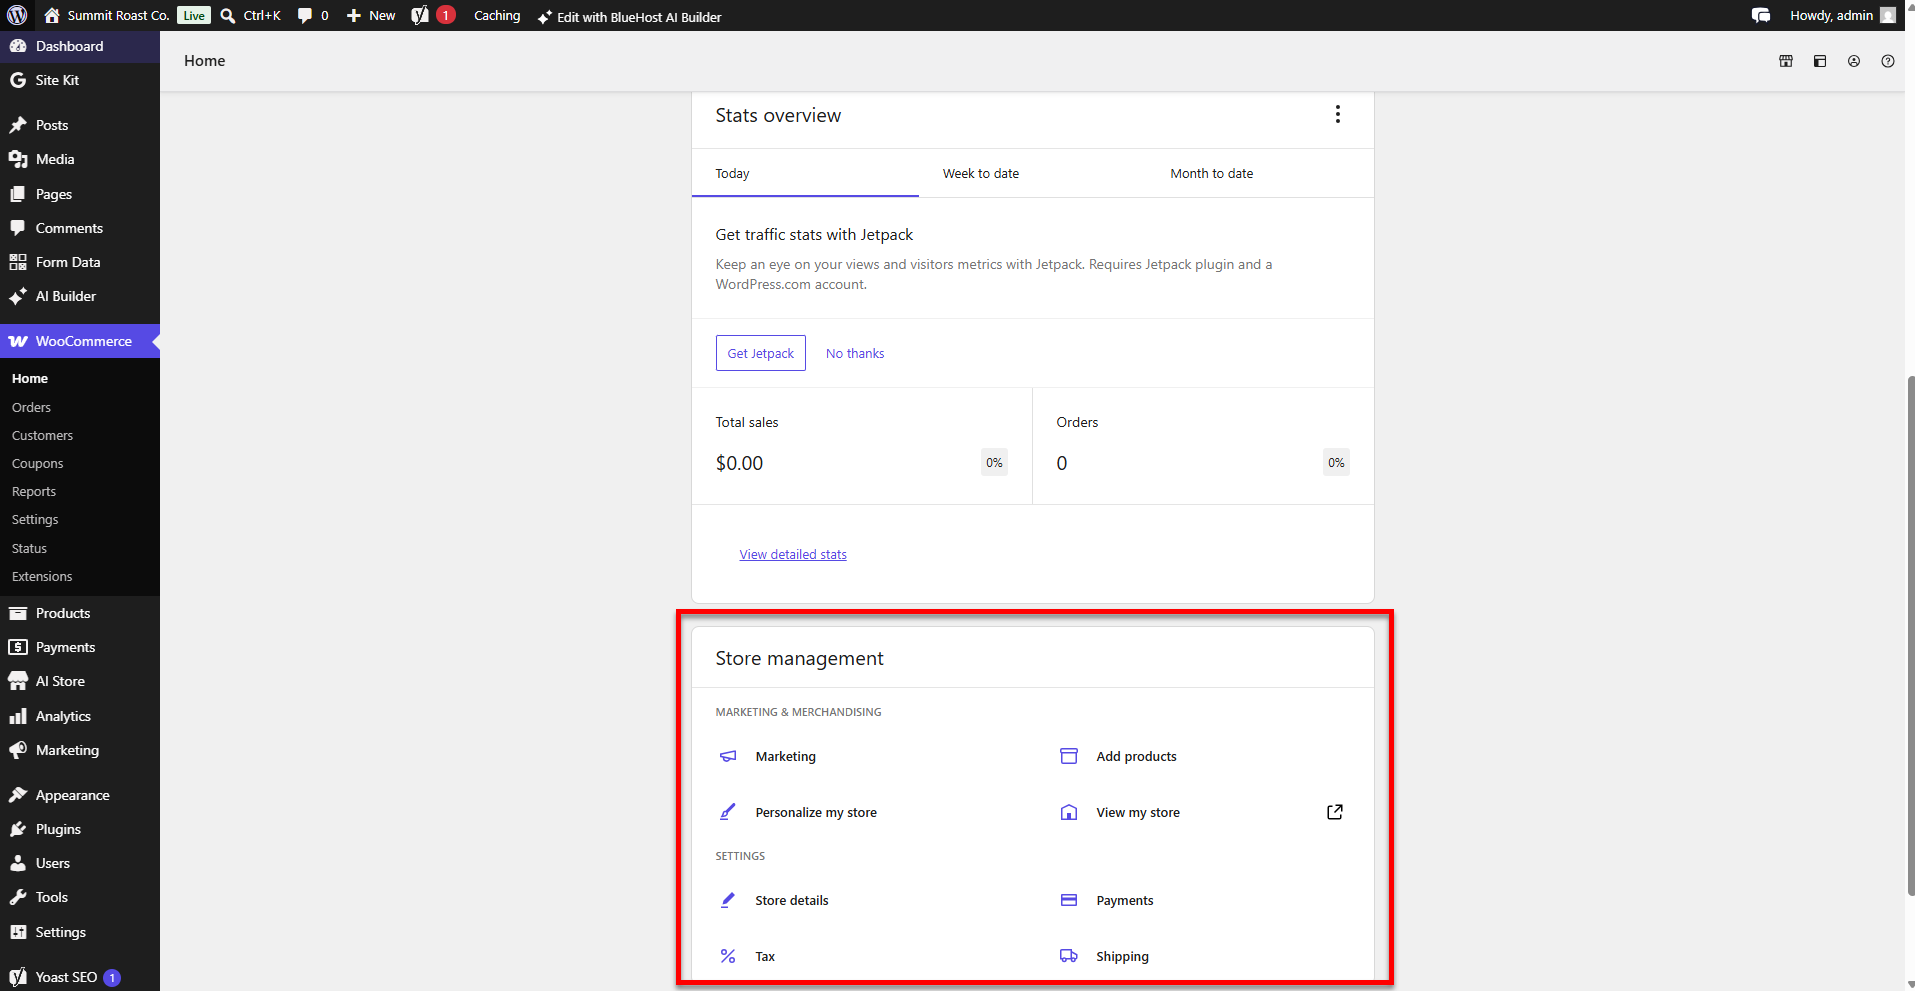
To switch back to your AI Store editor, click Edit with Bluehost AI Builder in the top menu.
Visit the Bluehost AI Store: Setting Up the AI Store Dashboard article to learn more about the AI Store dashboard setup.
Summary
WooCommerce powers your Bluehost AI Store and lets you manage products, orders, customers, payments, and store settings. This article explains how to access and activate WooCommerce from the Bluehost Portal or AI Store dashboard. It also covers key features, including store setup tasks, marketing tools, extensions, payment options, the mobile app, notifications, performance reports, and store management tools.
If you need further assistance, Bluehost Chat Support is available 24 hours a day, 7days a week while Bluehost Phone Support is available 7 days a week from 7 am-12 midnight EST.
- Chat Support - While on our website, you should see a CHAT bubble in the bottom right-hand corner of the page. Click anywhere on the bubble to begin a chat session.
- Phone Support -
- US: 888-401-4678
- International: +1 801-765-9400
You may also refer to our Knowledge Base articles to help answer common questions and guide you through various setup, configuration, and troubleshooting steps.