 ChatGPT,
  Claude,
  Gemini,
  Grok — all four for
Bluehost AI Store: Setting Up the AI Store Dashboard
Once you start using the Bluehost AI Store, you gain access to the AI Store Dashboard, your central hub for setting up and managing your online store. The onboarding checklist explained in this article helps you create store pages, add products, configure taxes and shipping, connect payments, and prepare your online store for your customers.
Watch the video below for a quick walkthrough of the AI Store dashboard setup process.
New to Bluehost AI? With the Bluehost AI 14-day free trial, you can create either an online store or a non-eCommerce website. To learn more, see the Build Your Website and Storefront with Bluehost AI Free Trial article.
Looking for guidance on your AI Store journey? Visit the Bluehost AI Store: Customer Journey Guide article.
What is the AI Store Dashboard?
The AI Store Dashboard is the central hub for your online store. It serves as the control center where you can manage products, customers, discounts, shipping, payments, sales channels, and orders, giving you everything you need to launch and run your online store.
Instead of navigating through multiple, disconnected settings, each tab in the Dashboard groups related tasks together. For example, all shipping-related settings are located in the Shipping tab, while payment methods and payment processing settings can be managed in the Payments tab. This organized layout makes it easier to find the tools you need and efficiently manage your store.
Need help getting started with the AI Store? See Bluehost AI Store: Getting Started with AI Store Free Trial.
Ready to upgrade to the Sell Online plan and publish your website? Visit the Bluehost AI Store: Upgrade to Sell Online to Publish Your Website for the step-by-step instructions.
The "Set Up Your Store" Onboarding Checklist
The Set up your store section in your AI Store Dashboard is designed to help you get started quickly. Think of it as your personal setup checklist, guiding you through the essential tasks needed to prepare your store for launch and making sure nothing important gets missed along the way.
Where to Find the Store Setup Checklist
- Access your AI Store Dashboard through the Bluehost Portal. See the Bluehost AI Store: Accessing the Bluehost AI Store article.
- In the Dashboard tab, you will see the Set up your store card.
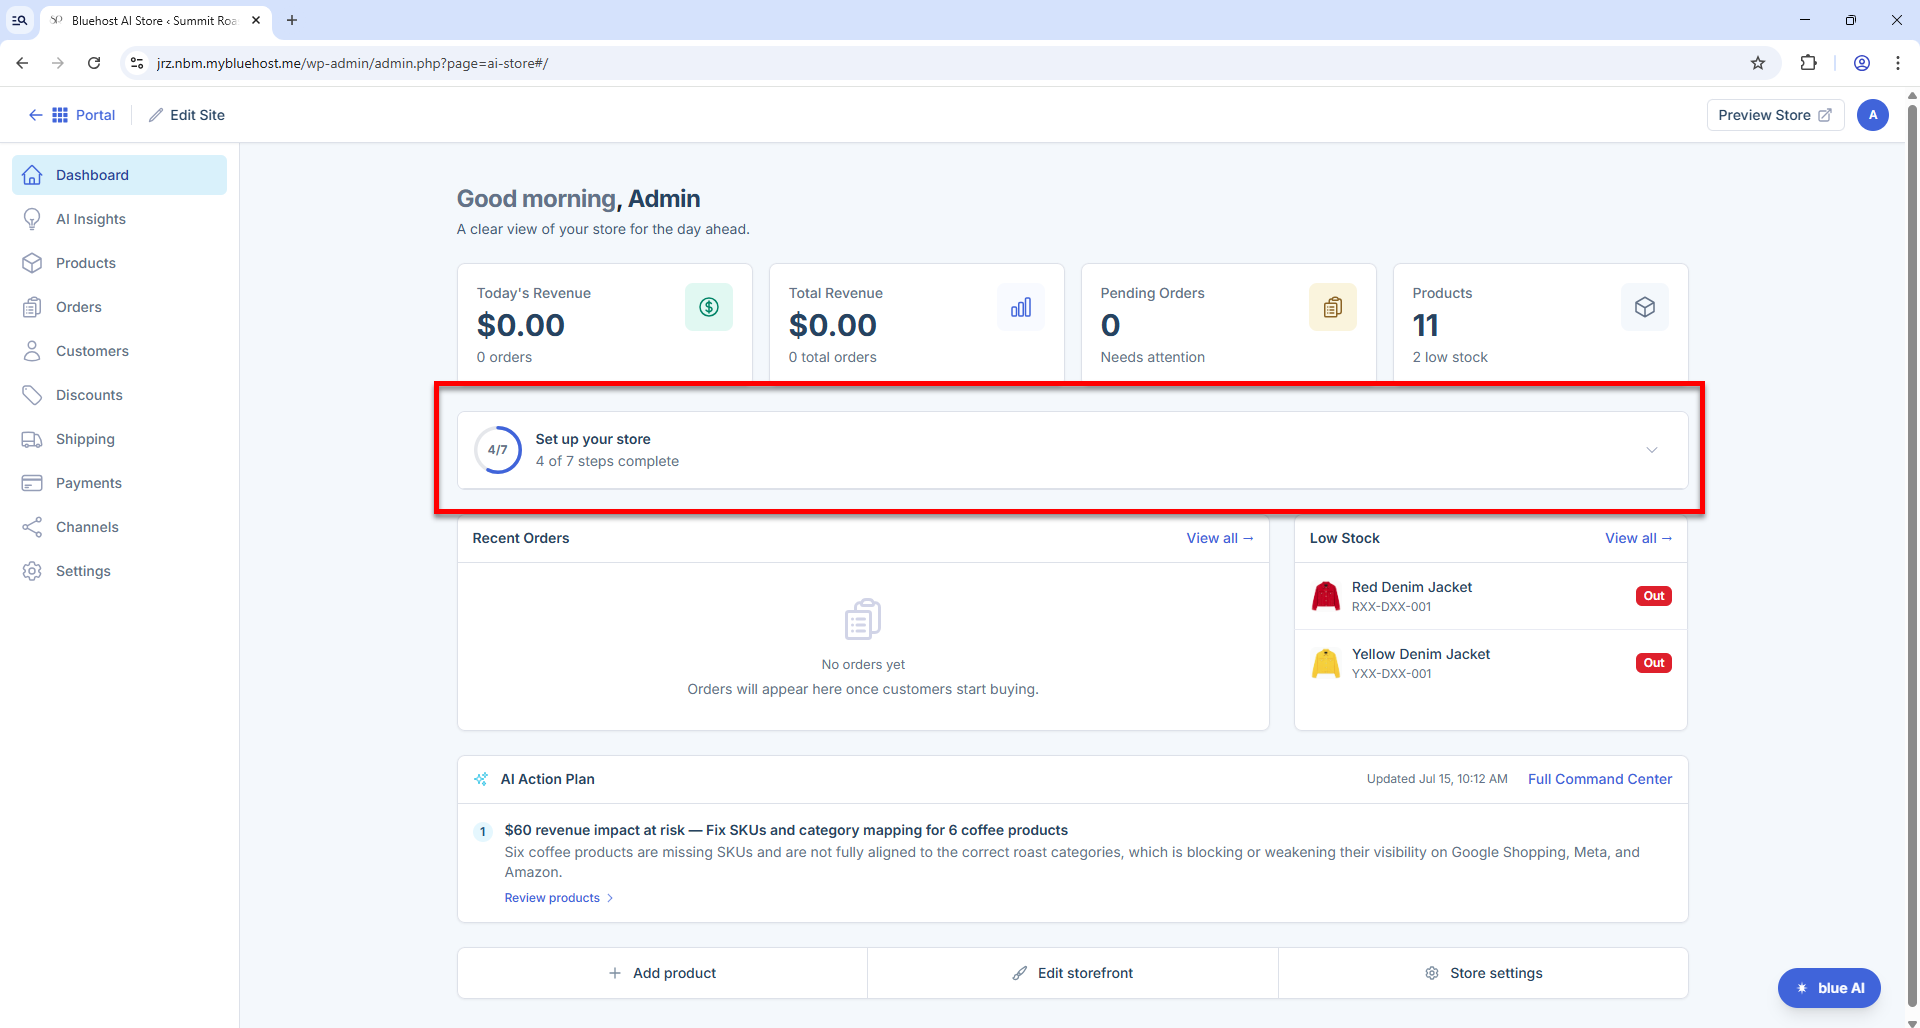
- Click to expand and view the full onboarding checklist.
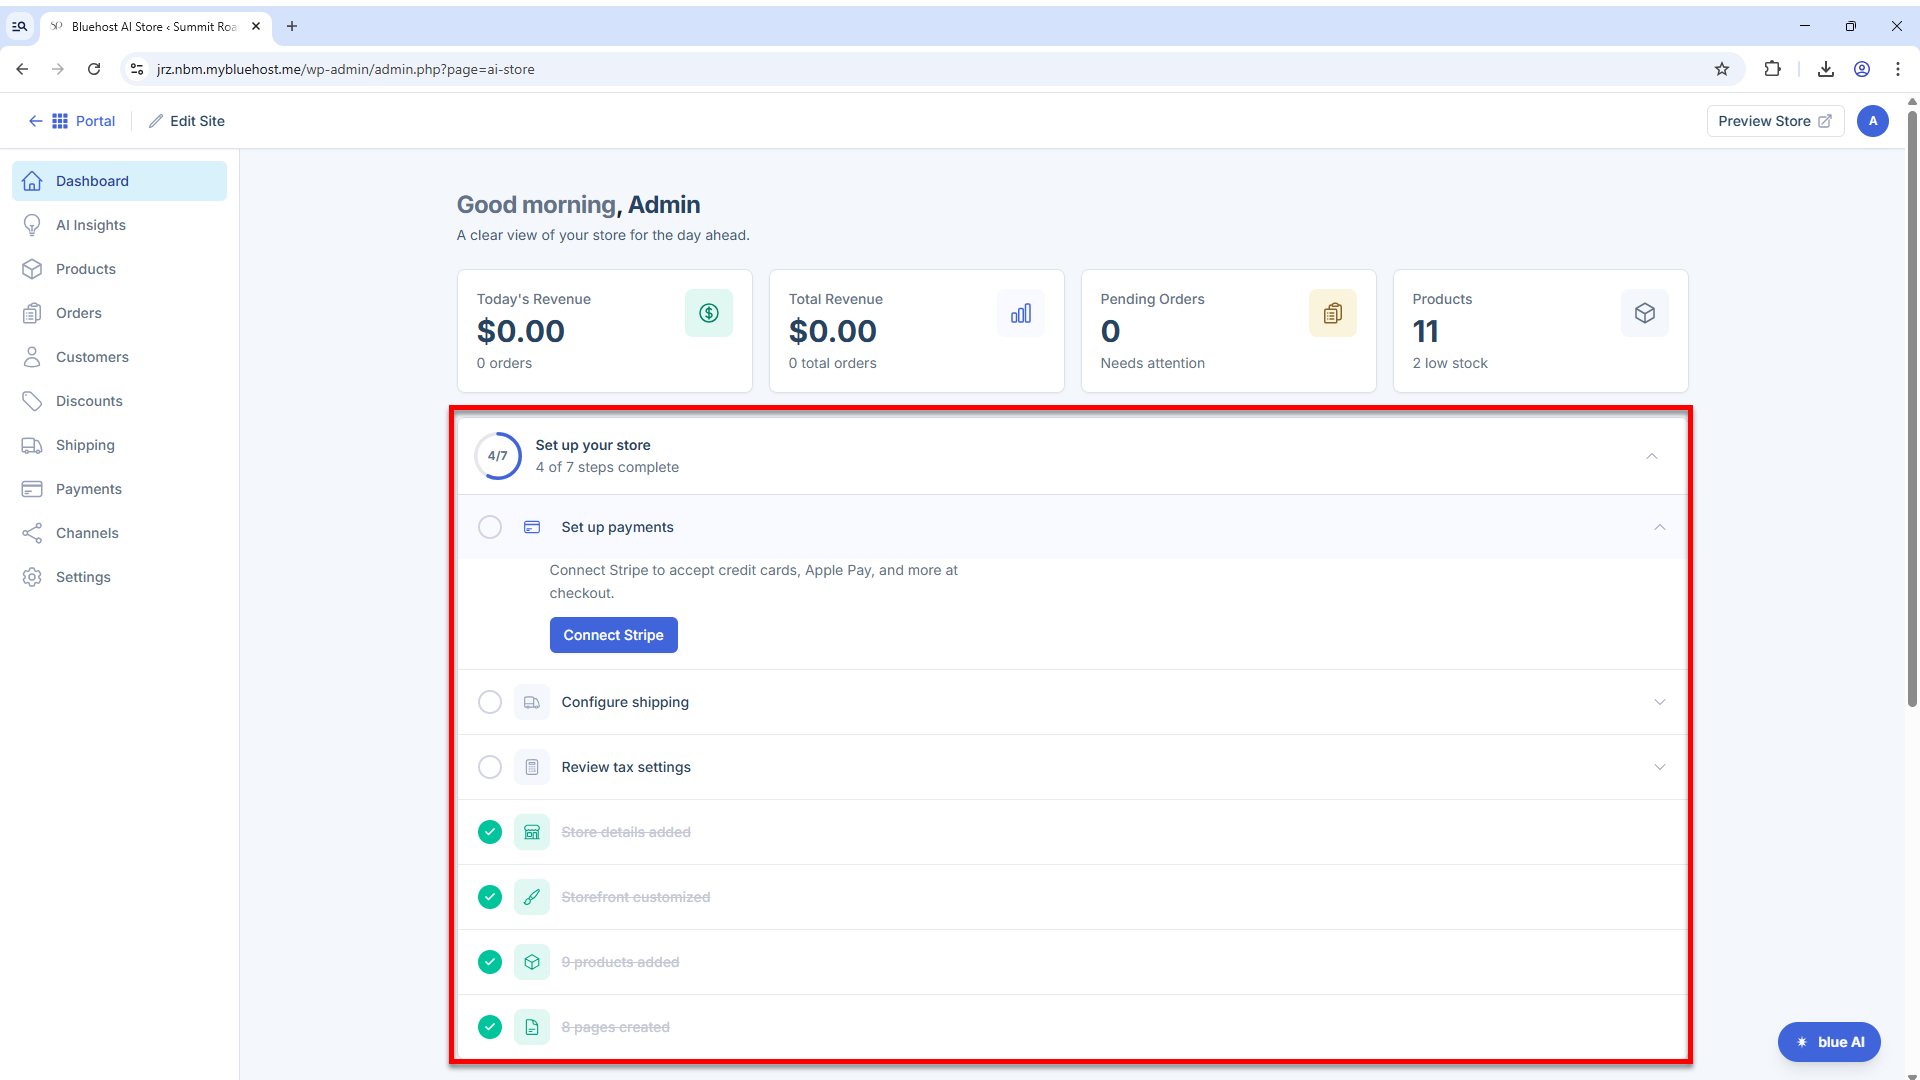
- Complete each checklist item to track your progress as you set up your online store.
The onboarding checklist remains on your Dashboard until all setup steps are completed, allowing you to easily pick up where you left off. It covers the essential building blocks needed to set up and launch your online store:
Step 1: Create Pages
Website pages provide important information that customers expect to find when shopping online.
Recommended actions: Create key pages (see below) for your website to help customers find important information, build trust in your business, and ensure compliance with legal requirements.
- About Us
- Contact Us
- Frequently Asked Questions (FAQ)
- Privacy Policy
- Terms and Conditions
- Return and Refund Policy
- Shipping Information
To learn how to create pages, visit the Bluehost AI Store: Editing the AI Store Website article.
Step 2: Add Your Products
Products are the heart of your store. Before you start selling, make sure your product catalog is complete and up to date.
Recommended actions:
- Create product listings
- Add product titles and descriptions
- Upload high-quality product images
- Set prices
- Manage inventory levels
- Organize products into categories or collections
To learn more about adding products to your online store through the Products tab, visit the following articles:
Step 3: Customize Your Storefront
Customize your storefront to reflect your brand and create a positive first impression. Consistent branding helps customers recognize and trust your business.
Recommended actions:
- Upload your store logo
- Add a favicon
- Choose brand colors and fonts
- Customize homepage content
- Update navigation menus
- Add promotional banners or featured sections.
To configure your online store general settings, visit the Bluehost AI Store: Settings Tab article.
Step 4: Add Your Store Details
Your store details are the foundation of your online business and are used across your store, customer communications, and order management activities.
Recommended actions:
- Enter your store name
- Add your business address
- Provide contact information (email and phone number)
- Set your preferred currency
- Configure your business information
Keeping your store details accurate helps with customer trust, order processing, taxes, and shipping.
To add your business name, address, contact information, and currency, refer to our Bluehost AI Store: Settings Tab article.
Step 5: Review Tax Settings
Tax settings ensure that applicable taxes are calculated correctly during checkout. Correct tax configuration helps maintain compliance and prevents unexpected charges for both your business and customers.
Recommended actions:
- Configure tax regions
- Set tax rates as required
- Review tax collection settings
- Verify tax calculations
Regularly review your tax requirements for the regions where you sell to ensure continued compliance.
To learn how to configure your tax regions and rates in the Payments tab, please visit the Bluehost AI Store: How to Set Up Taxes article.
Step 6: Configure Shipping
Shipping settings determine how products reach your customers and what shipping charges apply. Clear shipping options reduce customer uncertainty and improve the overall purchasing experience.
Recommended actions:
- Create shipping zones
- Add shipping methods
- Set shipping rates
- Configure free shipping rules
- Define delivery expectations
Provide accurate delivery estimates and consider offering free shipping thresholds to encourage larger orders.
To set up shipping zones and rates from the Shipping tab, check out the following support articles.
Step 7: Set Up Payments
Connecting a payment provider enables your customers to complete purchases securely.
Recommended actions:
- Connect your payment gateway (such as Stripe)
- Verify your business information
- Configure accepted payment methods
- Test the checkout experience
A reliable payment setup helps customers pay easily and complete their purchases.
To connect a payment gateway from the Payments tab, please visit the Bluehost AI Store: How to Connect Stripe article.
Because the onboarding checklist links directly into the relevant dashboard tab for each task, it's the fastest way for new store owners to move from an empty store to a fully configured, launch-ready one.
Other Dashboard Tabs
The onboarding checklist covers the essentials for launching your store, while additional dashboard tabs support growth as your business expands. Explore the featured articles for each tab to learn more about its features and functionality.
- AI Insights tab - Provides AI-generated recommendations with prioritized daily and weekly tasks, and offers product performance insights, such as sales potential, discoverability, and operational scores, with direct access to listings via the pop-out icon.
- Orders tab - Shows all orders by status, along with customer information and total revenue.
- Customers tab - Allows users to view their existing customers. Users can also create new customer profiles or edit existing ones.
- Discounts tab - Create, manage, and track discount codes, including active and expired discounts.
- Channels tab - Allows users to connect their online store to platforms like Meta and Google Merchant Center, with more sales channels planned for future release.
Summary
The AI Store Dashboard's onboarding checklist is the fastest way to take your online store from set up to launch. You can use this article as your starting point, then follow the article links above to each onboarding checklist step's dedicated guide for step-by-step instructions.
If you need further assistance, Bluehost Chat Support is available 24 hours a day, 7days a week while Bluehost Phone Support is available 7 days a week from 7 am-12 midnight EST.
- Chat Support - While on our website, you should see a CHAT bubble in the bottom right-hand corner of the page. Click anywhere on the bubble to begin a chat session.
- Phone Support -
- US: 888-401-4678
- International: +1 801-765-9400
You may also refer to our Knowledge Base articles to help answer common questions and guide you through various setup, configuration, and troubleshooting steps.