 ChatGPT,
  Claude,
  Gemini,
  Grok — all four for
 Professional Email: How to Create Inbox Rules and Filters
Inbox rules and filters help you automatically organize incoming emails in Professional Email. You can create rules to move messages to specific folders, mark emails as read, star important messages, or filter emails from specific senders and domains. Rules can be created from an existing email or manually from your mailbox settings.
Before you begin
A rule consists of two parts:
- Condition - The criteria Professional Email uses to identify matching emails (for example, sender, recipient, subject, or domain).
- Action - What happens to emails that match the condition, such as moving them to a folder, marking them as read, or forwarding them.
Log In to Professional Email Webmail
Option 1: Use the Login to Webmail Button
- Log in to your Bluehost Portal.
- From the left-hand navigation menu, click on the Email tab.
- Optional: In Professional Email, if multiple plans are listed, click Manage for the plan you want to use.
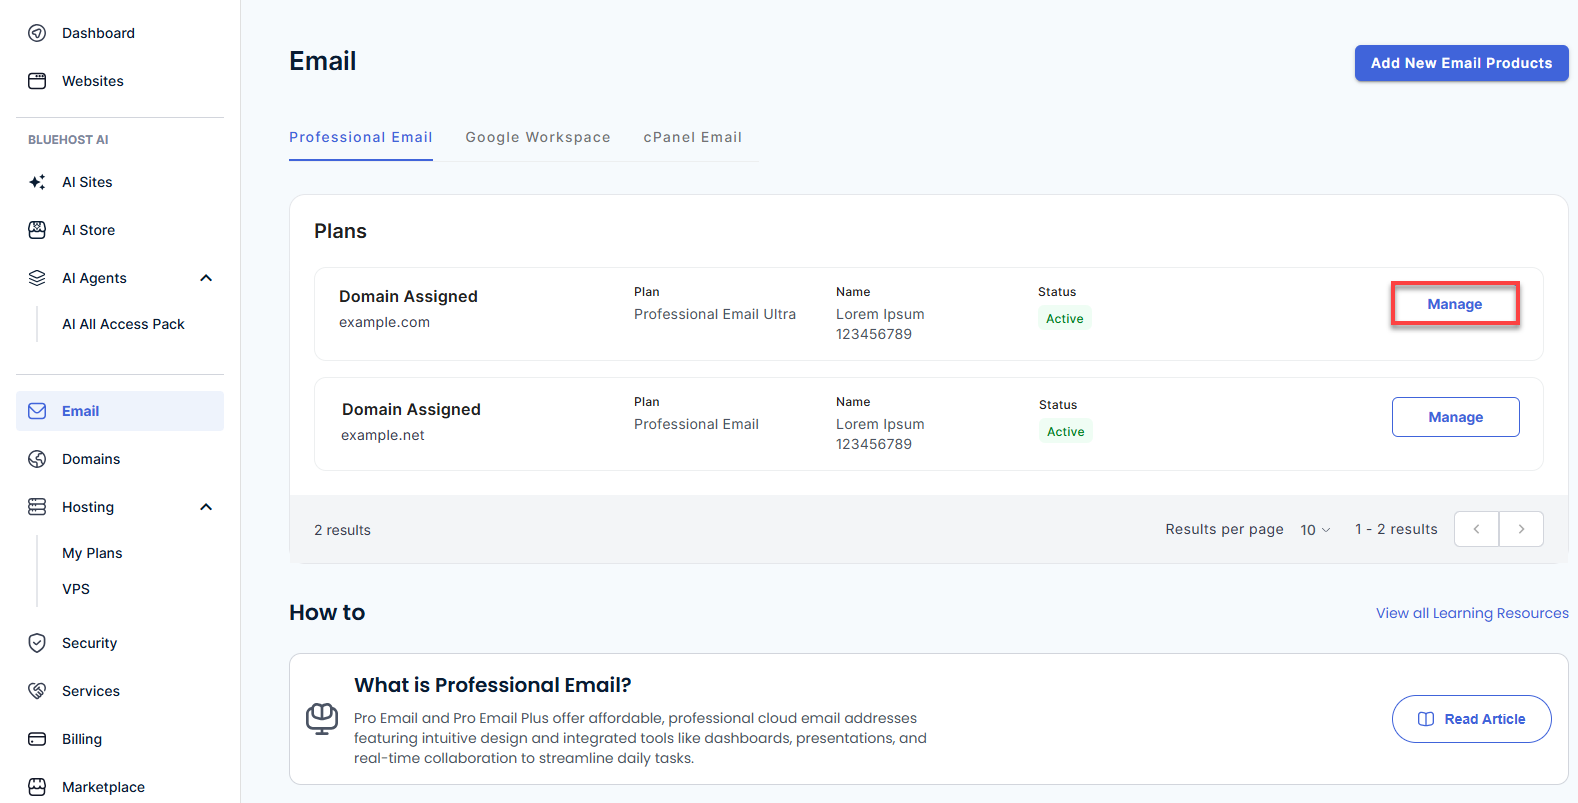
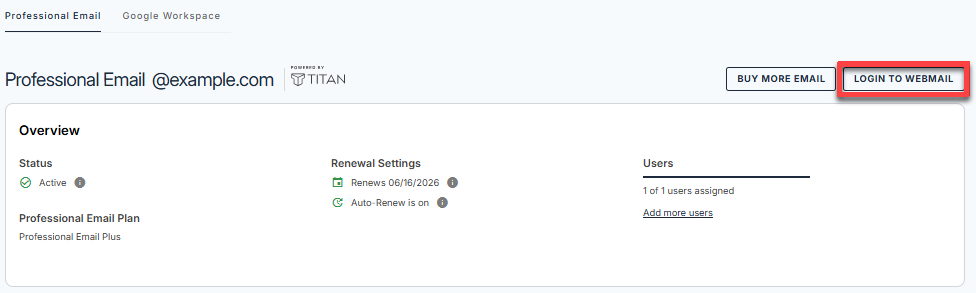
- You’ll be automatically redirected to the Email Management page, where you can manage your email settings and subscriptions.
- Select the Login to Webmail button.
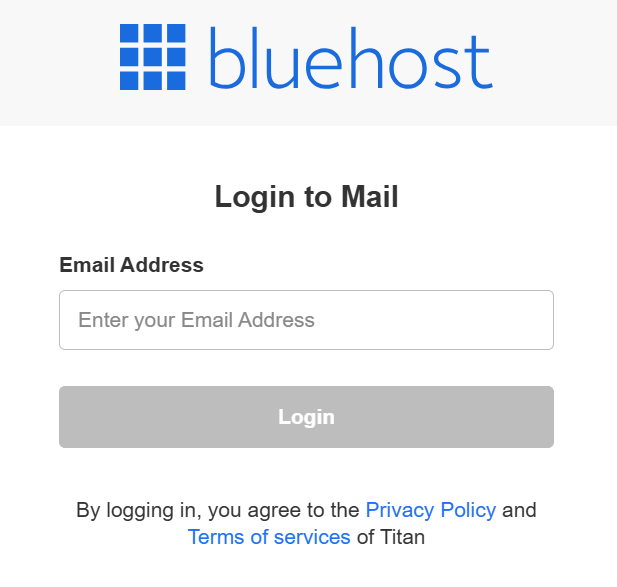
- Enter your Professional Email username and password.
Option 2: Use the Direct Login Link
- Go to the Professional Email login page.
- Enter your Professional Email username and password.
Create a Rule From an Existing Email
Creating a rule from an existing email is the quickest way to automate how similar messages are handled.
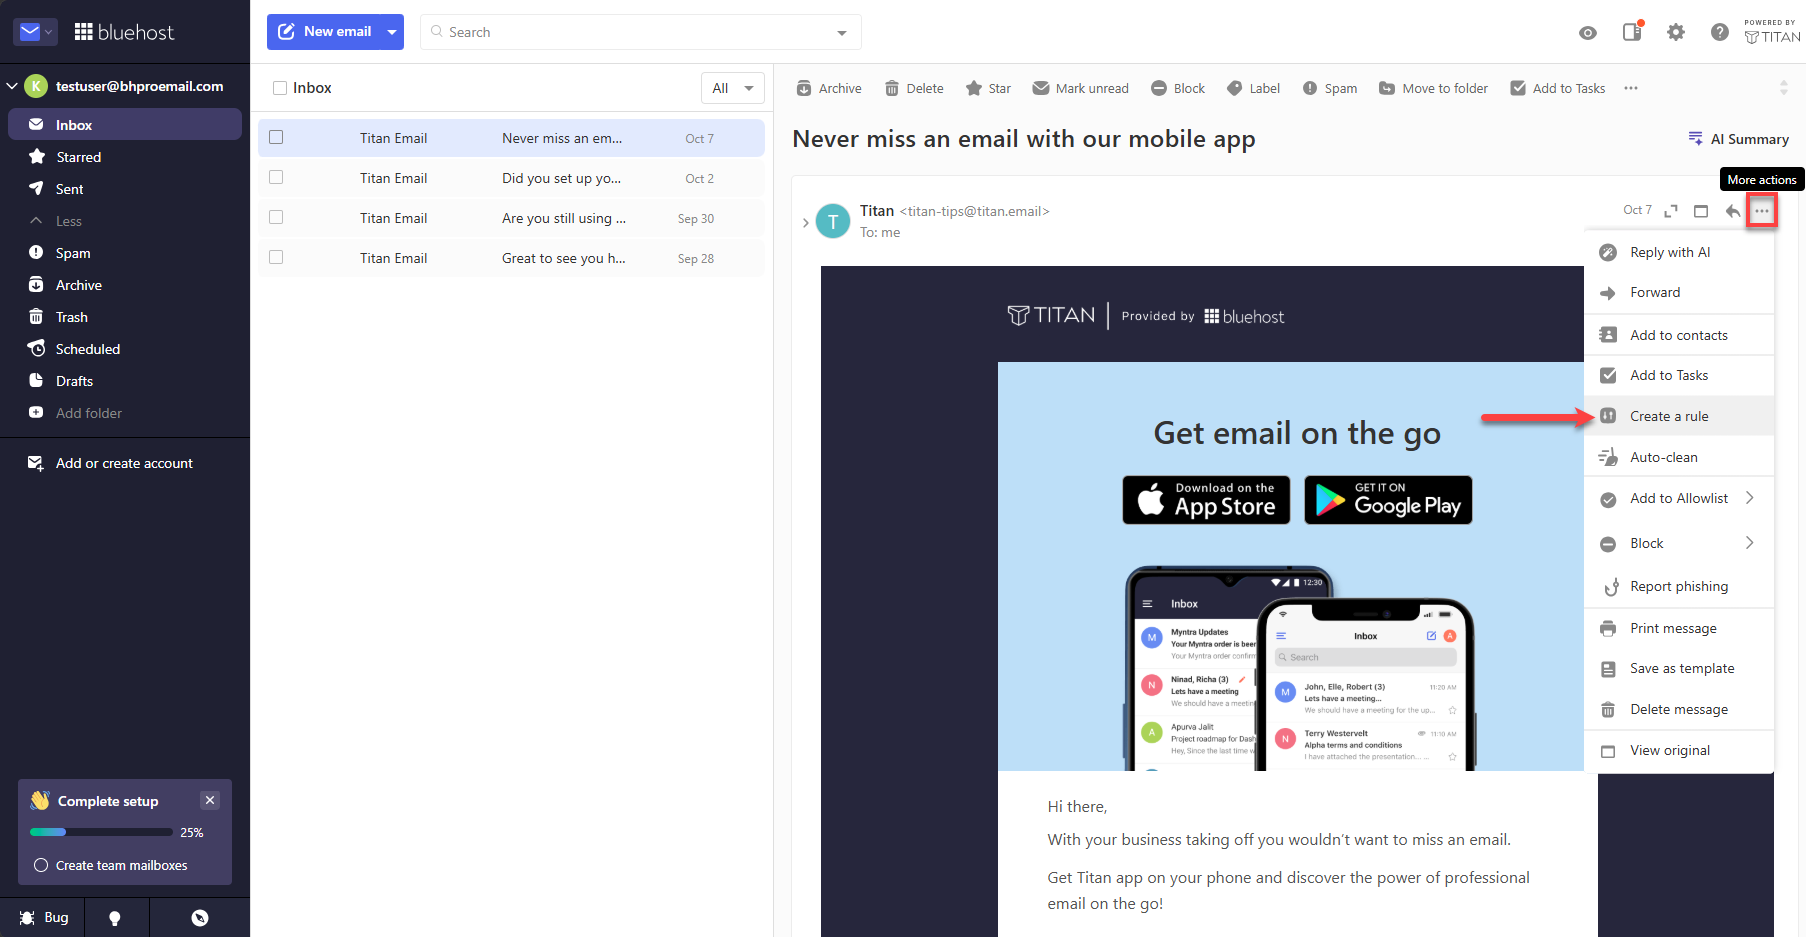
- In your webmail, open the email you want to create a rule for.
- Click the More actions (…) menu, then select Create a rule.
- Review the prefilled fields:
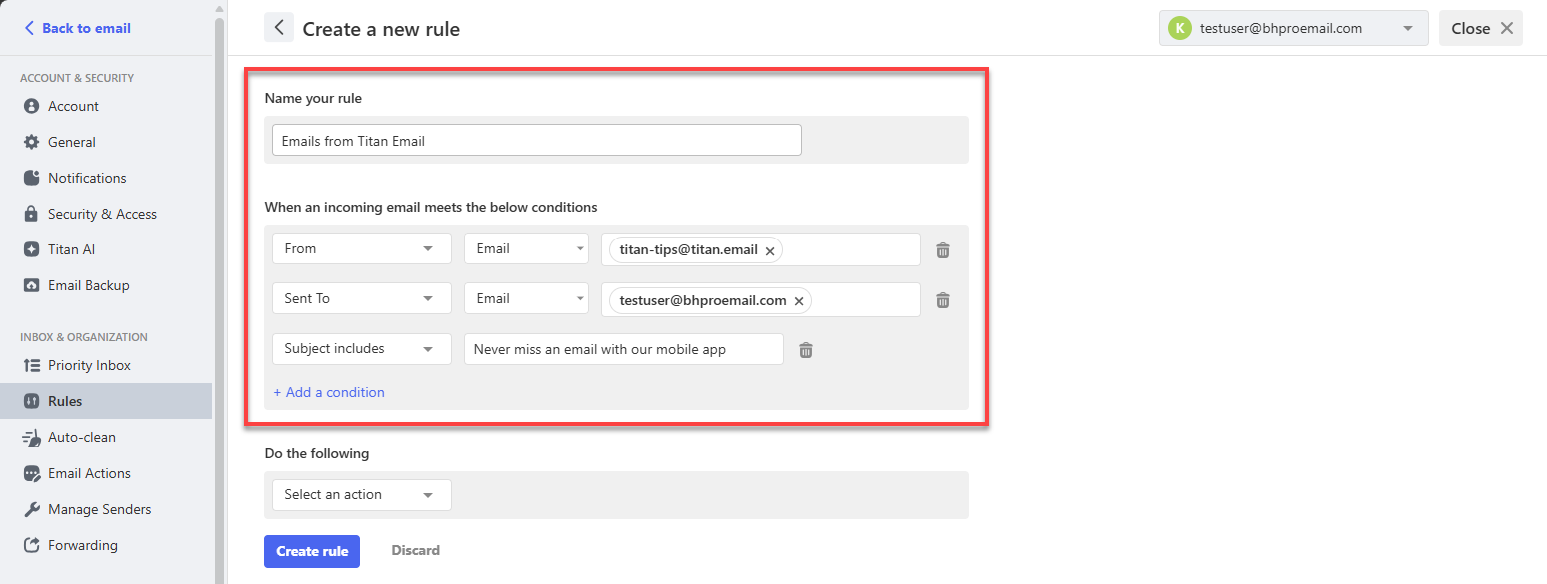
- Name your rule
- Enter a descriptive name for the rule.
- When an incoming email meets the below conditions
- From - Match emails from a specific sender.
- Sent To - Match emails sent to a specific recipient.
- Subject includes - Match emails containing specific text in the subject line.
- Optional: Click Add a condition to include additional criteria.
- CC to me - Match emails where your address is included in the CC field.
- Subject/body includes - Match emails containing specific text in the subject line or message body.
- Has attachment - Match emails that include attachments.
- Name your rule
- Modify any field as needed.
Tip: You can combine multiple conditions to create more targeted rules. For example, you can create a rule that applies only to emails from a specific sender that contain certain words in the subject line.
- Under Do the following, click Select an action and choose one of the following:
Note: A single rule can include multiple actions. For example, you can automatically forward an email to another address and mark the message as read at the same time.
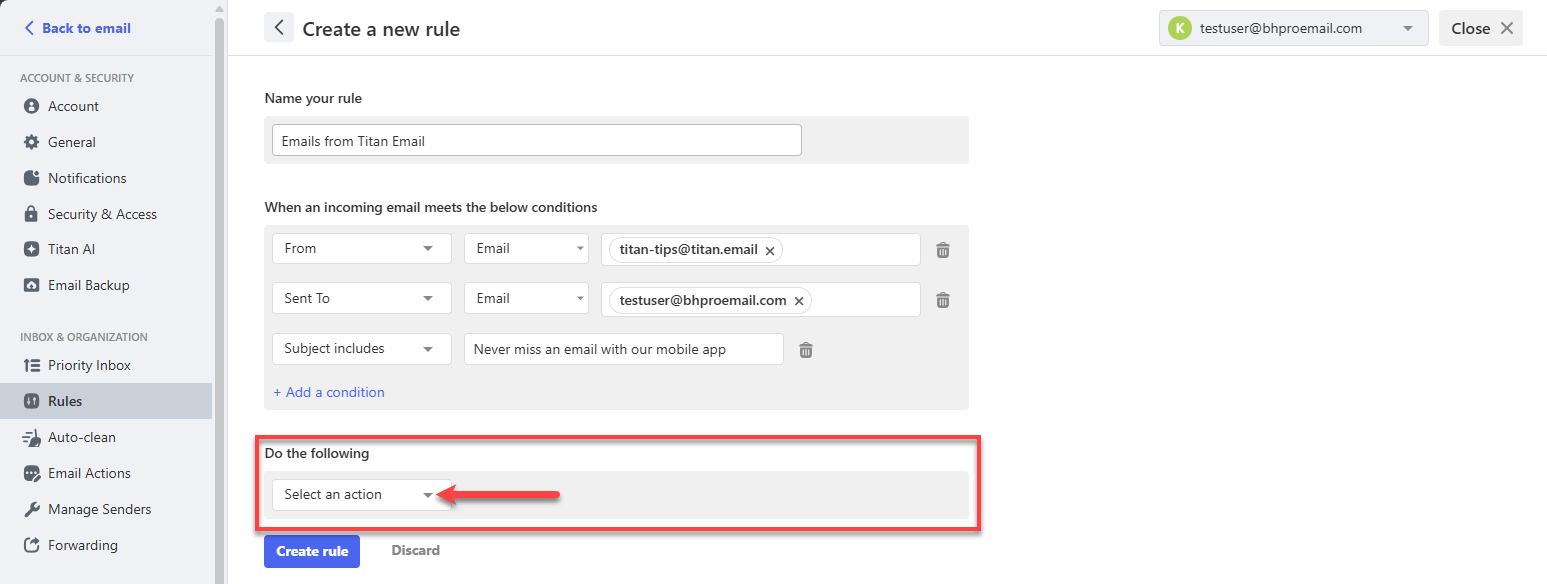
- Move to - Move the email to a selected folder.
- Forward to - Automatically forward the email to another email address.
- Mark as read - Mark the email as read when it arrives.
- Star it - Add a star to make the email easier to identify.
- Apply labels - Apply a label to help organize and categorize emails.
- Click Create Rule to save the rule.
The rule will automatically process future emails that meet the specified conditions.
Tip: Combine multiple conditions and actions to create more powerful inbox automation. For example, you can create a rule that forwards emails from a specific sender, marks them as read, and applies a label automatically.
Create a Rule From Scratch (Settings)
Use this method when creating a rule from scratch.
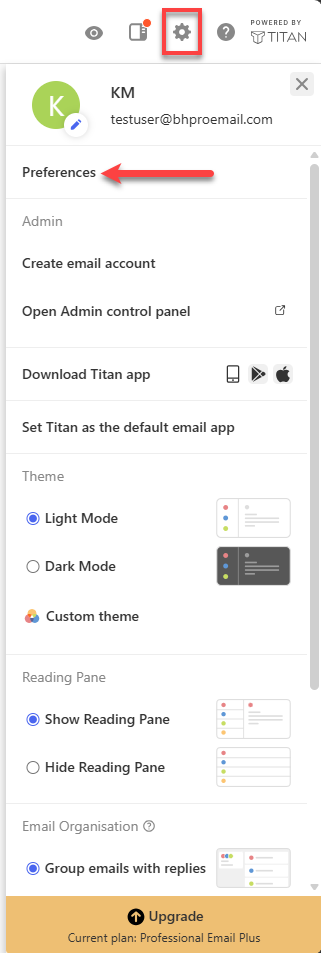
- In your webmail, click the Settings (gear) icon.
- Select Preferences.
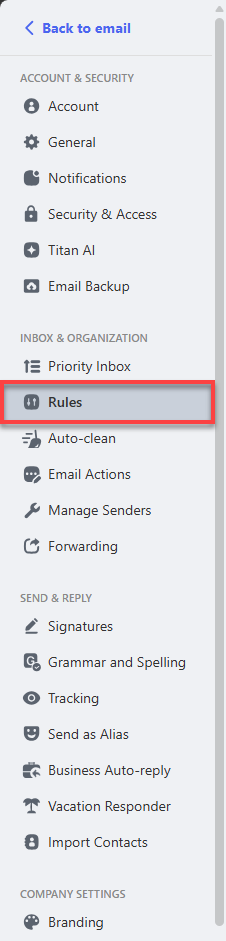
- Click Rules.
- On the Rules page, click Create a New Rule.

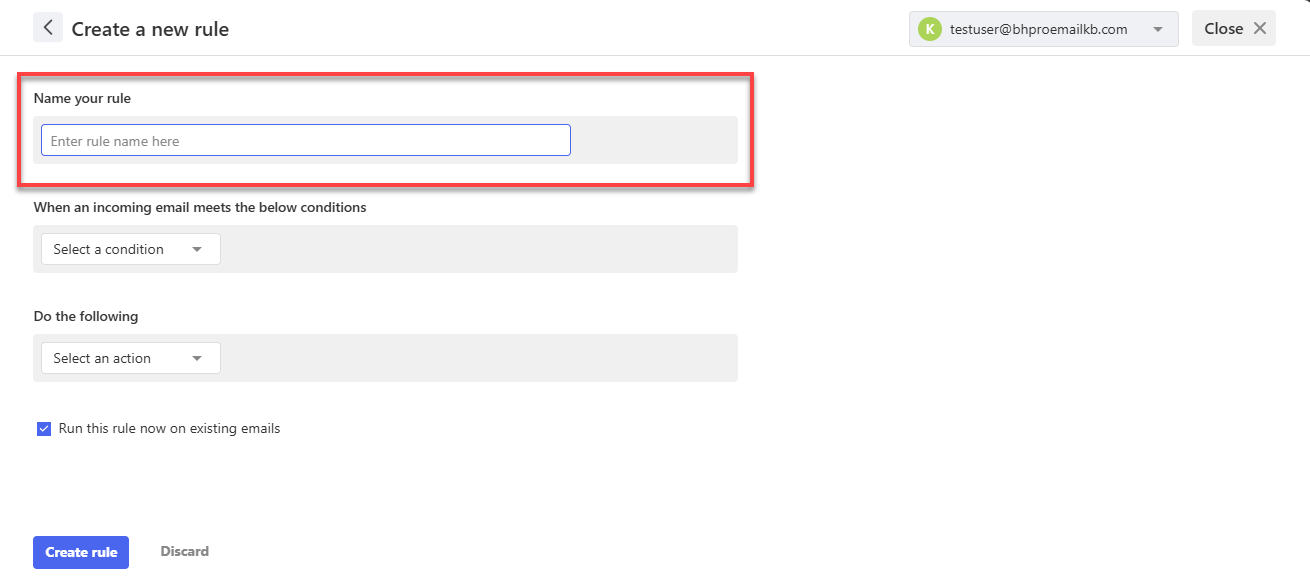
- Enter a descriptive name for the rule in the Name your rule field.
- Select a condition under When an incoming email meets the below conditions, such as:
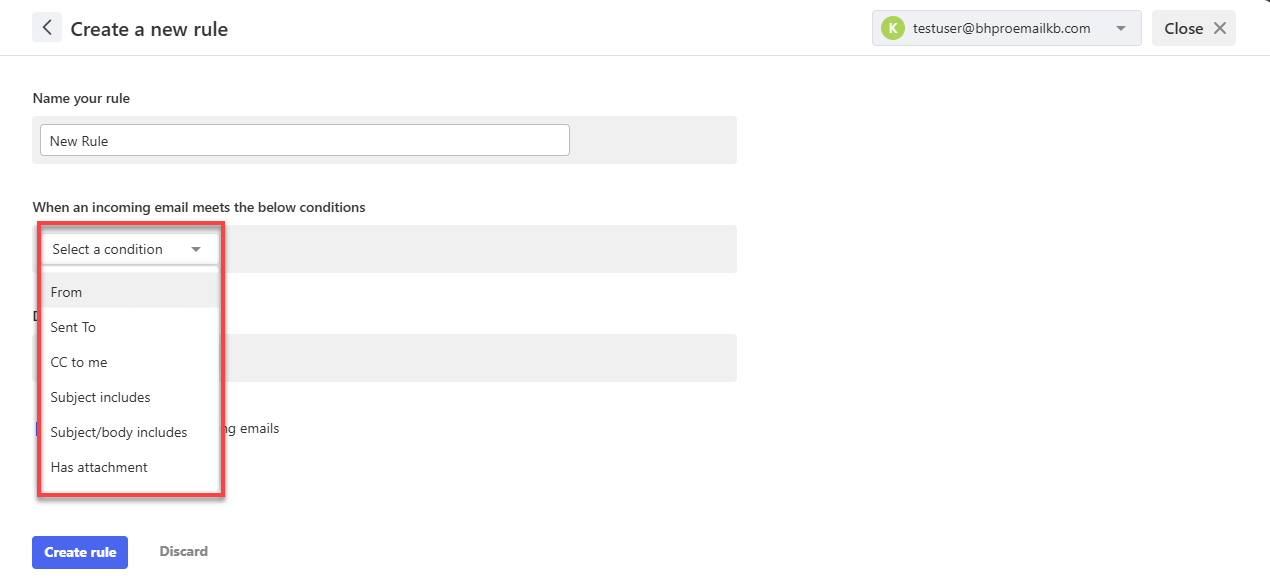
- From - Match emails from a specific sender.
- Sent To - Match emails sent to a specific recipient.
- CC to me - Match emails where your address is included in the CC field.
- Subject includes - Match emails containing specific text in the subject line.
- Subject/body includes - Match emails containing specific text in the subject line or message body.
- Has attachment - Match emails that include attachments.
- Enter the value to match.
- Optional: Add additional conditions to make the rule more specific.
- Under Do the following, select one or more actions:
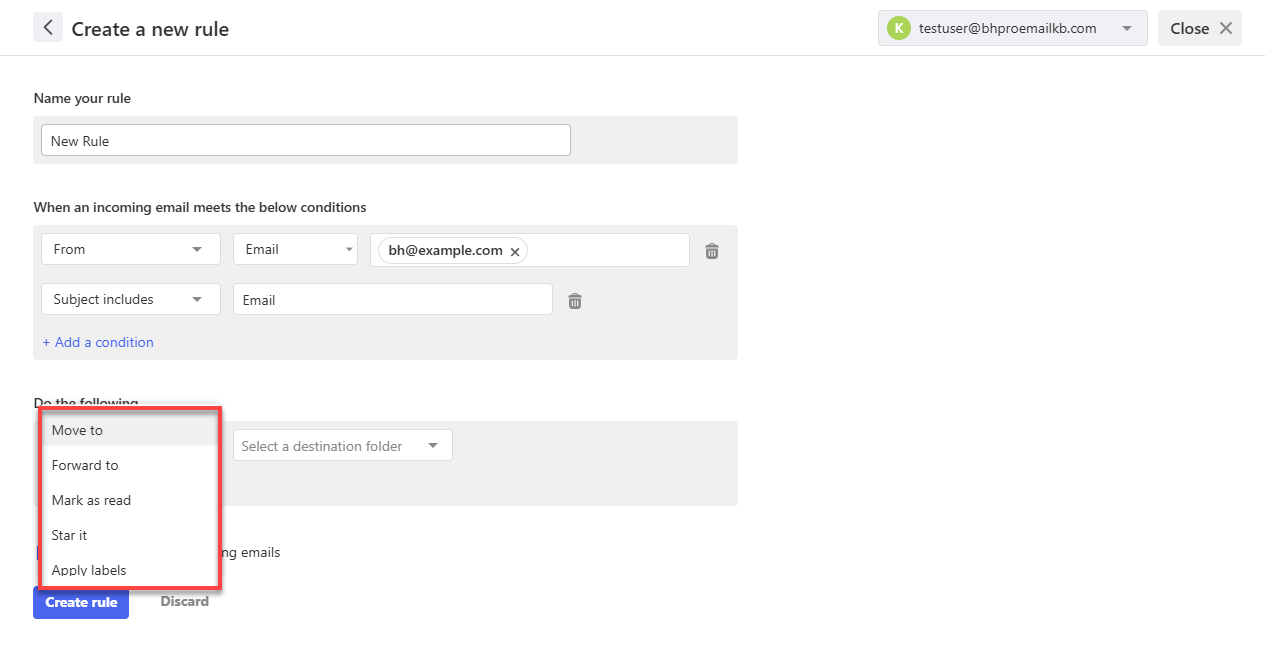
- Move to - Move the email to a selected folder.
- Forward to - Automatically forward the email to another email address.
- Mark as read - Mark the email as read when it arrives.
- Star it - Add a star to make the email easier to identify.
- Apply labels - Apply a label to help organize and categorize emails.
- Optional: Select Run this rule now on existing emails to apply the rule to messages already in your mailbox.
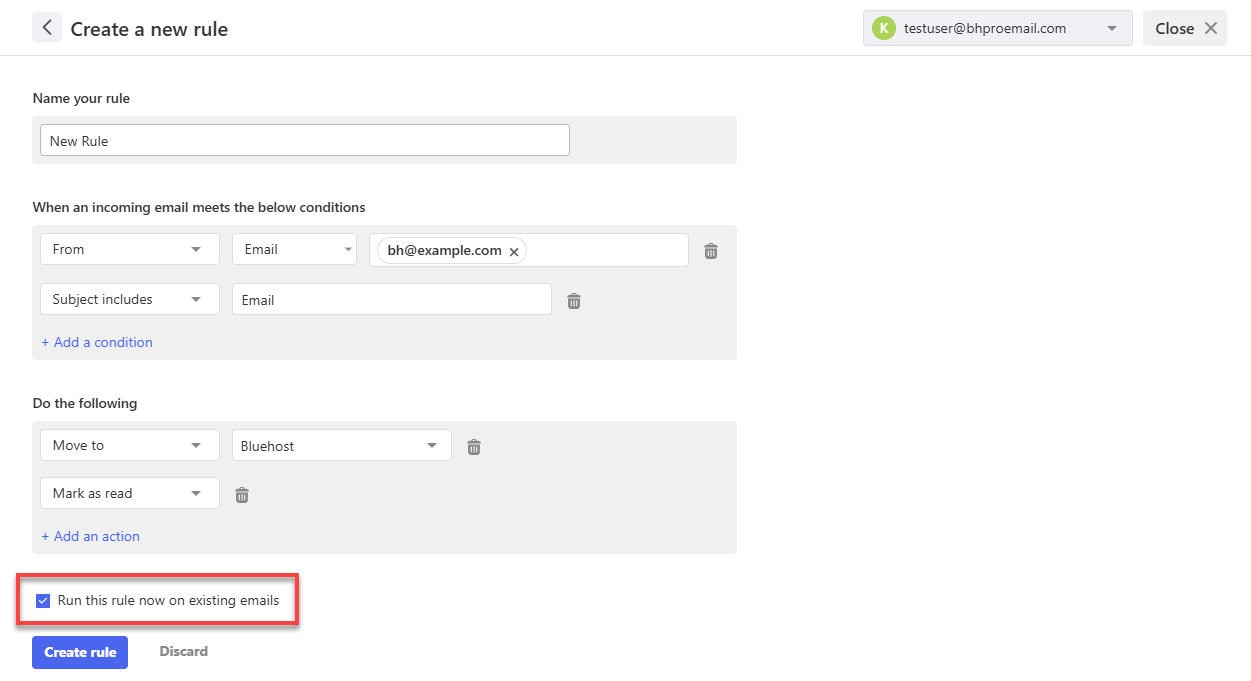
- Click Create Rule.
Create a Domain-Based Rule
A domain-based rule applies to all emails received from a specific domain. For example, a rule created for example.com applies to emails from any sender using that domain, such as [email protected] or [email protected].
- Follow the steps in Create a Rule from an Existing Email or Create a Rule from Scratch (Settings).
- In the From condition, change the condition type from Email to Domain.
- Enter the domain name (for example,
example.com).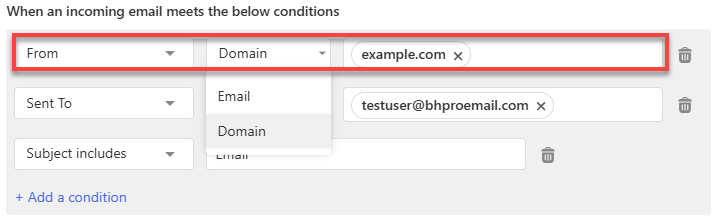
- Follow the remaining steps in the selected procedure to configure the rule.
- Click Create rule.
Note: Domain-based rules apply to all emails received from the specified domain, helping you organize messages from an entire organization without creating separate rules for individual email addresses.
Edit or Delete a Rule
You can update or remove rules at any time.
- Click Settings.
- Select Preferences.
- Click Rules.
- Locate the rule you want to manage.
- To edit the rule:
- Click the Edit icon.
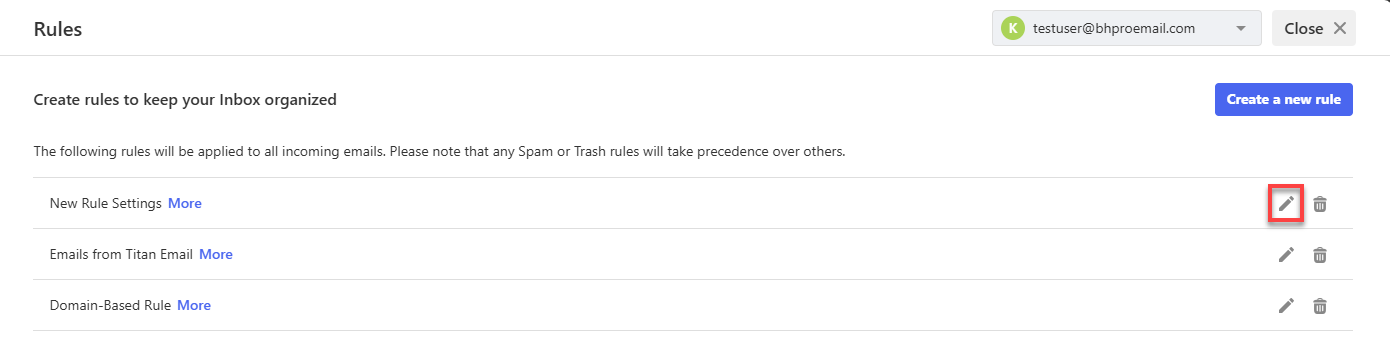
- Make your changes and click Update Rule.
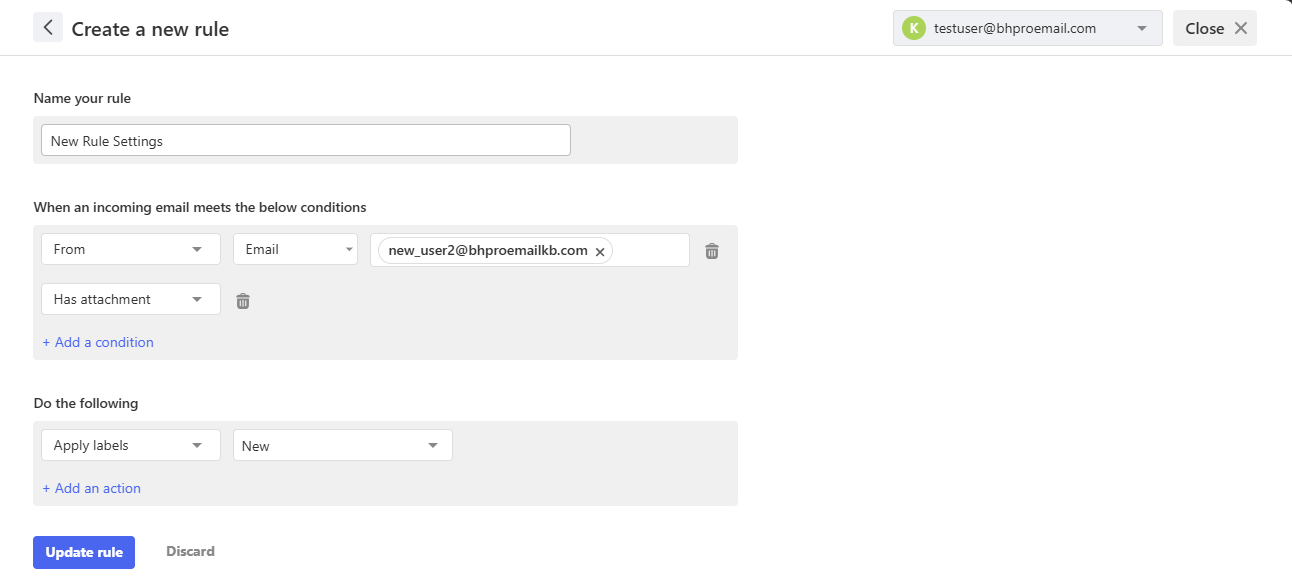
- Click the Edit icon.
- To delete the rule:
- Click the Trash icon.
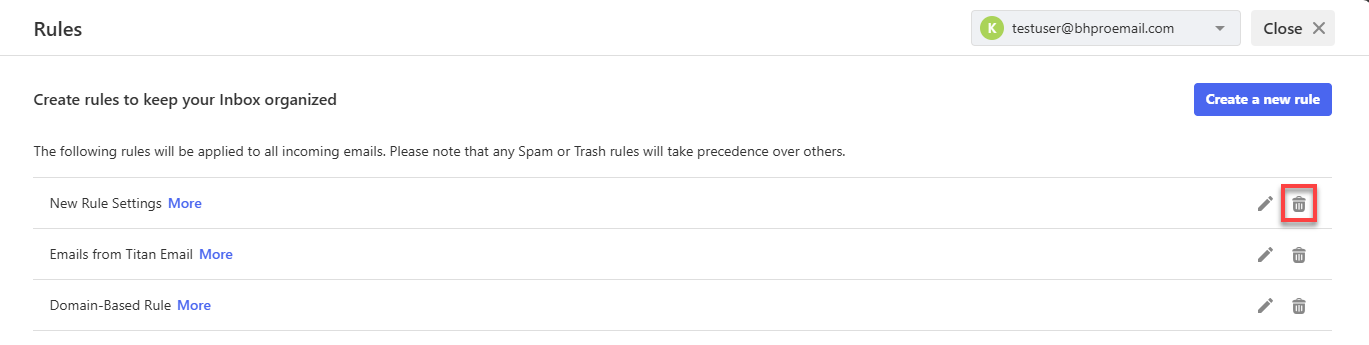
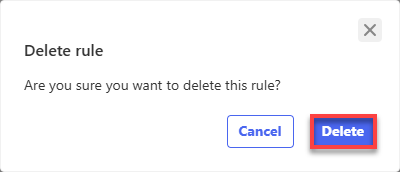
- In the Delete rule pop-up, click Delete.
- Click the Trash icon.
- To edit the rule:
Test Your Rule
After creating a new rule:
- Send a test email that meets the rule conditions.
- Check the destination folder or mailbox behavior.
- Confirm the email was processed as expected.
- If necessary, edit the rule and test again.
Troubleshooting
Rule Is Not Moving Emails
Cause: The email does not exactly match the rule conditions, or the email arrived before the rule was created
Solution:
- Verify the sender address, subject line, and other conditions.
- Confirm there are no typing errors in the rule.
- If the email arrived before the rule was created, create or recreate the rule from the Rules page and select Run this rule now on existing emails.
Emails Are Going to the Wrong Folder
Cause: Another rule may be processing the same email, or the selected action points to the wrong folder.
Solution:
- Review all existing rules.
- Verify the selected destination folder.
- Edit or remove conflicting rules.
Too Many Emails Match the Rule
Cause: The conditions are too broad, such as filtering only by a common subject keyword.
Solution:
- Add additional conditions.
- Combine sender and subject filters for better accuracy.
- Use domain-based filtering when appropriate.
Frequently Asked Questions
Q: Can I create a rule for all emails from a company?
A: Yes. Create a domain-based rule using the company's domain name to apply the same action to all emails received from that organization.
Q: Can I apply a rule to emails already in my mailbox?
A: Yes. When creating a rule from the Rules page, select Run this rule now on existing emails to apply the rule to messages already in your mailbox.
Q: What actions can a rule perform?
A: Rules can perform one or more actions, including Move to, Forward to, Mark as read, Star it, and Apply labels.
Q: Can I edit a rule after creating it?
A: Yes. Open Settings > Preferences > Rules, select the rule, and click the Edit icon to update it.
Q: Can I delete a rule?
A: Yes. Open the Rules page and click the Trash icon next to the rule you want to remove.
Related Articles
Summary
Inbox rules and filters help automate email management in Professional Email by organizing incoming messages based on conditions you define. Create rules from an existing email or from the Rules settings page, apply one or more actions, and use domain-based rules to manage emails from an entire organization. Regularly review and update your rules to keep your inbox organized and ensure important emails are handled efficiently.
If you need further assistance, Bluehost Chat Support is available 24 hours a day, 7days a week while Bluehost Phone Support is available 7 days a week from 7 am-12 midnight EST.
- Chat Support - While on our website, you should see a CHAT bubble in the bottom right-hand corner of the page. Click anywhere on the bubble to begin a chat session.
- Phone Support -
- US: 888-401-4678
- International: +1 801-765-9400
You may also refer to our Knowledge Base articles to help answer common questions and guide you through various setup, configuration, and troubleshooting steps.