 ChatGPT,
  Claude,
  Gemini,
  Grok — all four for
 Purchase a Virtual Dedicated Server with CyberPanel Installation
CyberPanel is an open-source web hosting control panel built on OpenLiteSpeed. It provides an easy-to-use web interface for managing websites, databases, DNS, email accounts, and SSL certificates. It also includes features like one-click WordPress installation, support for multiple PHP versions, automatic Let's Encrypt SSL setup, and built-in email hosting, making server management simple without requiring command-line expertise.
This article explains how to purchase a Bluehost Virtual Dedicated Server (VDS) hosting plan with CyberPanel installed.
Why Choose CyberPanel?
Compared to hosting control panels like cPanel, CyberPanel offers a powerful free version that lets users host multiple websites on their own VDS or cloud servers without paying licensing fees. It streamlines server administration by automating key tasks, including one-click WordPress staging, Git-based deployments, and automatic Let's Encrypt SSL certificate installation and renewal.
Uses of CyberPanel
Here are some of the key features of CyberPanel.
- High-Performance Web Hosting – Powered by advanced web server technology, CyberPanel helps websites and online stores load quickly and perform efficiently.
- Unlimited Site Management – Host and control as many websites as your server resources allow, with no additional licensing costs.
- Easy One-Click Management – Install applications like WordPress, manage website files, and perform common tasks without advanced technical knowledge.
- Automatic Security Features – Keep your websites protected with built-in security tools, including free SSL certificates that are installed and renewed automatically.
Server Requirements
Here is what your system needs to run this software smoothly.
This applies to both VPS and VDS.
- Do not purchase a server that only meets the minimum requirements. The minimum specifications represent the software's bare survival threshold and do not account for operating system overhead or production workloads. Running with only 2 vCPUs, 4 GB RAM, and 20 GB of disk space can result in severe performance slowdowns, system freezes, or unexpected crashes during traffic spikes.
- For a stable deployment, we recommend using at least 4 vCPUs, 8 GB RAM, and 20 GB SSD. Consider allocating additional disk space if you plan to store recordings, logs, or other application data.
| Resource | Minimum | Recommended |
|---|---|---|
| vCPUs | 2vCPUs | 4 vCPUs |
| RAM | 4 GB | 8 GB |
| Disk | 20 GB | 20 GB SSD |
How to Purchase a Virtual Dedicated Server with CyberPanel Installation
- In your browser, go to https://www.bluehost.com.
- Click Hosting in the top menu, then select Virtual Dedicated Server.

You can also go to this link directly: https://www.bluehost.com/vds-hosting.
- On the Virtual Dedicated Server Hosting page, click Explore Plans. You can also scroll down to the hosting plans section.

- Choose a plan from either tab — Standard or High Performance — by clicking Choose Plan.
 Pricing is subject to change. Please visit https://www.bluehost.com/vds-hosting for the current introductory/sign-up offer for the Bluehost Virtual Dedicated Server hosting. For the most up-to-date renewal pricing, visit your Bluehost Portal's Renewal Center.
 - On the next page, configure your VDS hosting to meet your requirements. The configuration options are divided into the following sections:
- Location: Select your data center in this section.

- Hardware: This section shows your pre-selected plan. You can also switch to another Virtual Dedicated Server plan in this section.

- Software:
If the selected plan does not meet the app's minimum requirements, the app will be grayed out.
- Click the OS With Panel tab, then select CyberPanel.
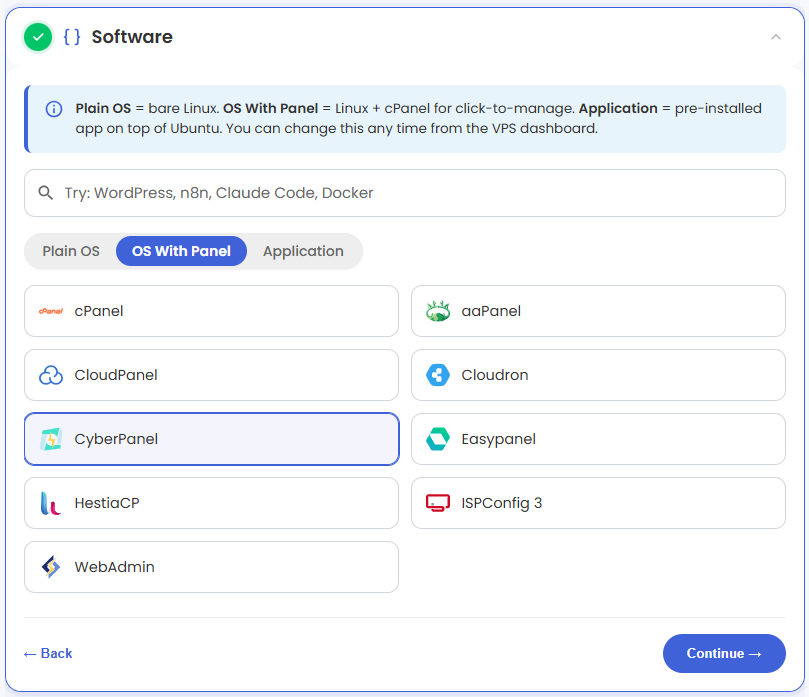 You can install only one application per purchase; the system will automatically select the best operating system for it.
 - In the pop-up, click Confirm.
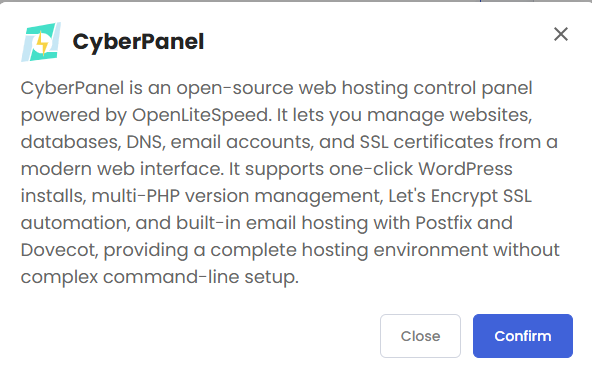
- Click the OS With Panel tab, then select CyberPanel.
- Location: Select your data center in this section.
- Support & Security: You can add Premium Support - Recurring, which provides priority access to expert assistance and faster response times.

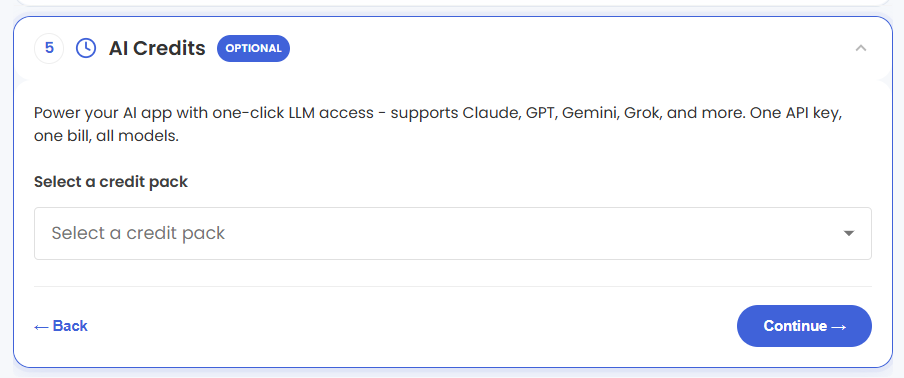
Pricing for optional add-ons is subject to change. Please visit https://www.bluehost.com/vds-hosting for current add-on pricing. - AI Credits: Select a credit pack to access multiple AI models with one API key and consolidated billing.
Pricing for optional add-ons is subject to change. Please visit https://www.bluehost.com/vds-hosting for current add-on pricing. - Advanced Options:
- Extra IPs: You can add IP addresses for an additional fee. Pricing changes based on how many IPs you add.
- Hostname (Optional): Assign a custom hostname to identify your server.
- SSH Key (Optional): Add an SSH public key to enable secure, passwordless access after provisioning.
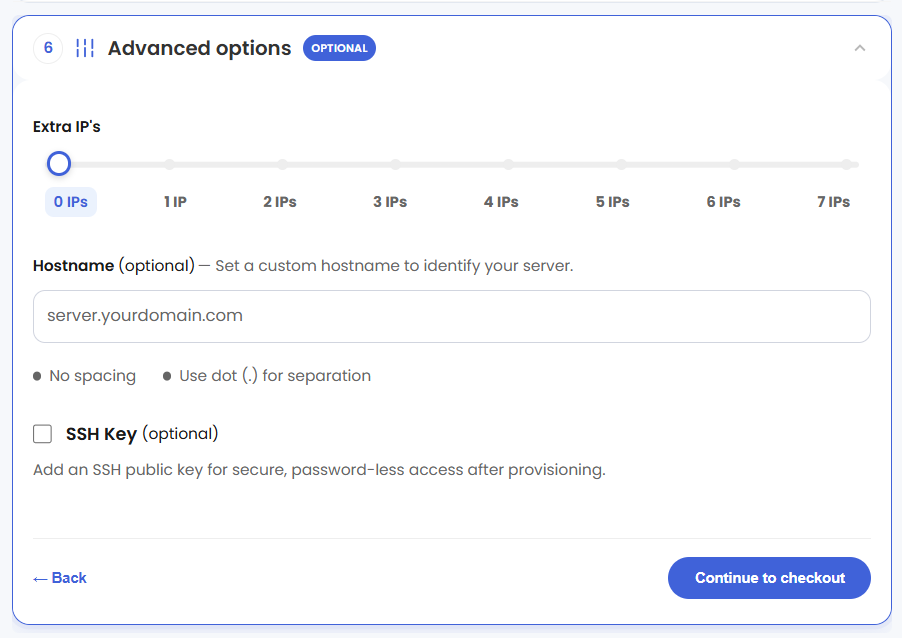
Pricing for optional add-ons is subject to change. Please visit https://www.bluehost.com/vds-hosting for current add-on pricing.
- Select your billing term and review your selected items on the right pane, along with the summarized total cost.
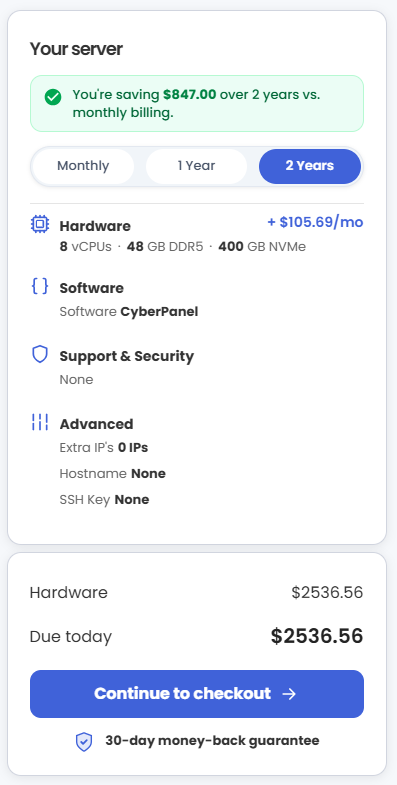
*Please review the current pricing plans available on Bluehost.com.
- Click Continue to checkout.
- Do the following on the Checkout page:
If you're new to Bluehost:- Create your Bluehost account by using your email address or by connecting with your Google, Apple, or GitHub account — whichever you prefer!

- Select your preferred payment method: credit card, Google Pay, or PayPal. Enter your billing information.

If you have an account with us, you will see your Bluehost login details when you are logged into your Bluehost Portal. If you are not logged in, please click the Log In link.

- Create your Bluehost account by using your email address or by connecting with your Google, Apple, or GitHub account — whichever you prefer!
- In the Shopping Cart, choose your billing term if you did not choose one on the previous page.
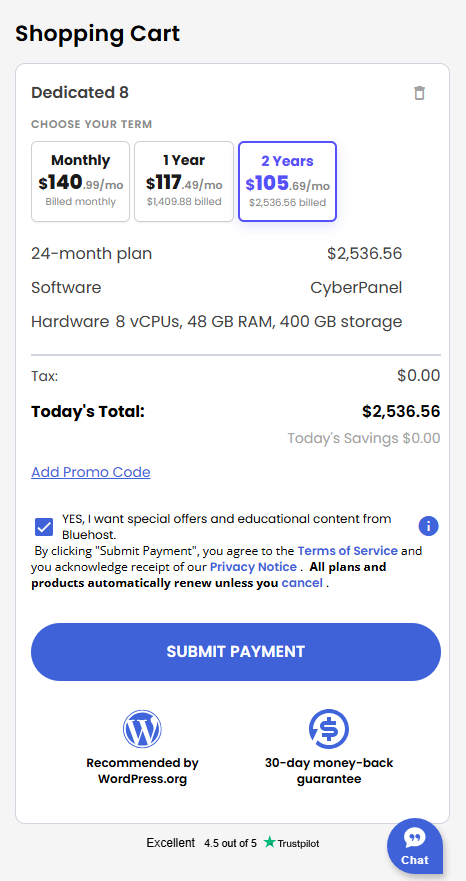
- Add a Promo code if you have one and then click Submit Payment to complete your purchase.
After completing the purchase, your VDS hosting will begin provisioning. You can access and manage your new VDS hosting in the Hosting tab of your Bluehost Portal.
How to Access CyberPanel and Set Up Your First Website
CyberPanel is an easy-to-use web hosting control panel. It lets you manage your websites, databases, emails, and security from a single dashboard—no complex coding required.
Step 1: Reset Root Password and Connect via SSH
After installation completes:
- Log in to your Bluehost Portal.
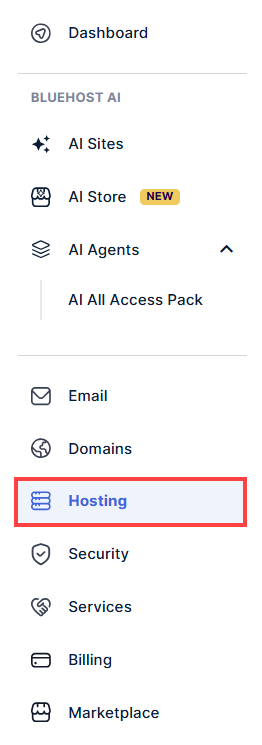
- In the left-hand menu, click Hosting, then select My Plans.
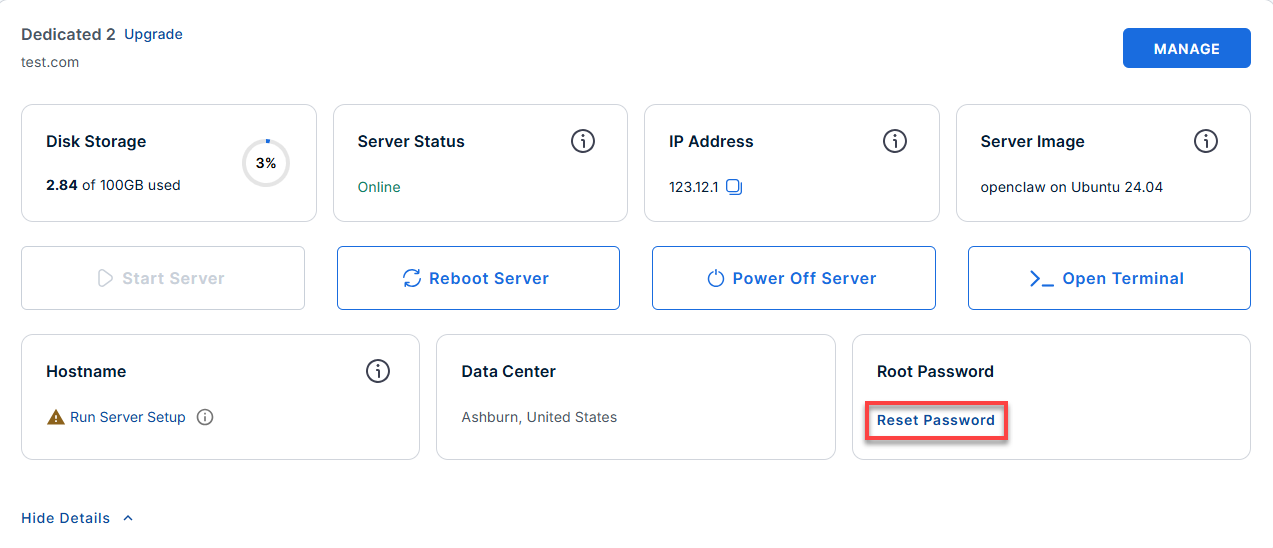
- Locate the server you want to manage, then click View Details in the bottom-left corner to expand the section and access additional server information.
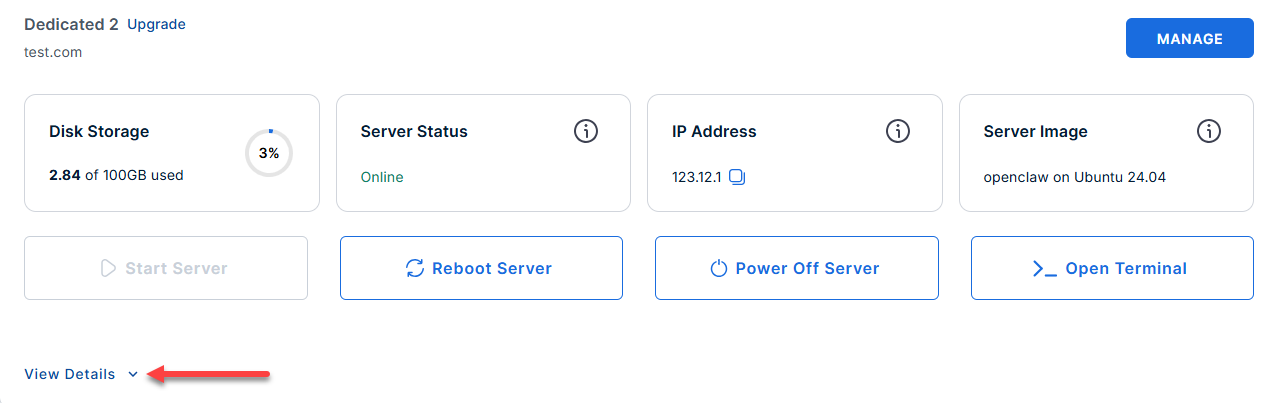
- Click the Reset Password.
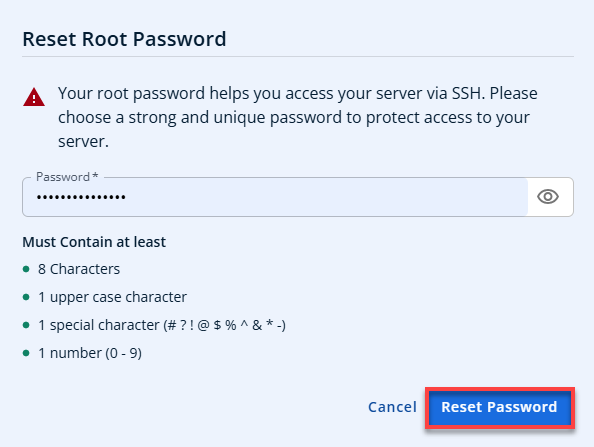
- In the pop-up window, type your new root password, then click Reset Password again to confirm and save the changes.
- Connect to your server via SSH.
Use an SSH client to connect to your VDS usig its IP address and credentials. Follow the prompts and enter your root password when prompted:ssh root@your_server_ipReplaceyour_server_ipwith your actual server IP address.Example Output:
Welcome to Ubuntu 24.04.4 LTS (GNU/Linux 6.8.0-124-generic x86_64) ******************************************************************************** CyberPanel + OpenLiteSpeed Stack Firewall: Ports 22, 80, 443, 8090, 7080 open Access URLs: CyberPanel Dashboard : https://12.1.1.123:8090 OLS Admin : https://12.1.1.123:7080 Hosted Websites : https://12.1.1.123 Login: CyberPanel Username : admin Password : see /root/.app_passwords (CYBERPANEL_PASS) OLS Admin Username : admin Password : see /root/.app_passwords (OLS_ADMIN_PASS) Key Paths: Credentials : /root/.app_passwords CyberPanel : /usr/local/CyberCP Logs : /var/log/{cyberpanel,lsws}/ MySQL pass : /etc/cyberpanel/mysqlPassword Quick Commands: systemctl {status|restart} lscpd systemctl {status|restart} lsws systemctl {status|restart} mariadb tail -100 /var/log/lsws/error.log For full details: /root/README.md ******************************************************************************** - If you ever need to quickly review the system's deployment notes directly inside your server terminal, you can print out the original README file by running:
cat /root/README.md
Step 2: Retrieve Initial Credentials
Before you can log in to the web interface, retrieve the unique passwords generated during the server's initial boot.
Use admin as your username and enter the password you just retrieved.
- CyberPanel Dashboard: https://your-ip-address:8090
- OLS Admin Panel: https://your-ip-address:7080
View your generated passwords:
Example Output:
root@server-123456:~# sudo cat /root/.app_passwords
sudo: unable to resolve host server-123456.anothertestfornvme2.com: Name or service not known
CYBERPANEL_PASS=abc12345GJxJ3tuIJ8OA9hmx
OLS_ADMIN_PASS=abc12345lpin0zOfKbaloRKd
Step 3: Log In to the CyberPanel Dashboard
- Open your web browser and navigate to:
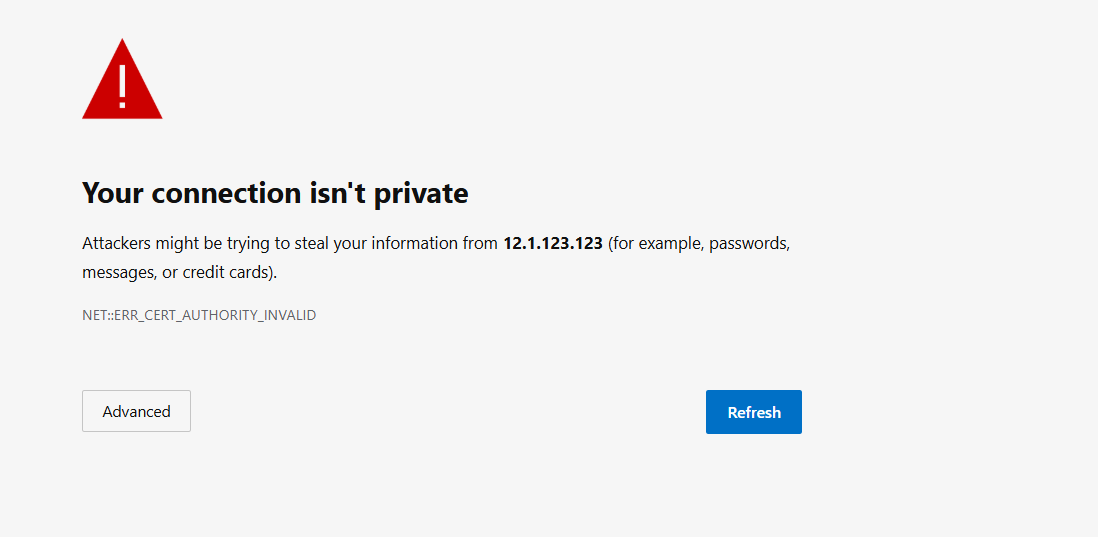
https://<your-server-ip>:8090 - Bypass the SSL warning: You will see a security warning ("Your connection is not private") because a trusted SSL certificate hasn't been issued for the IP address yet. Click Advanced and choose Proceed to continue.
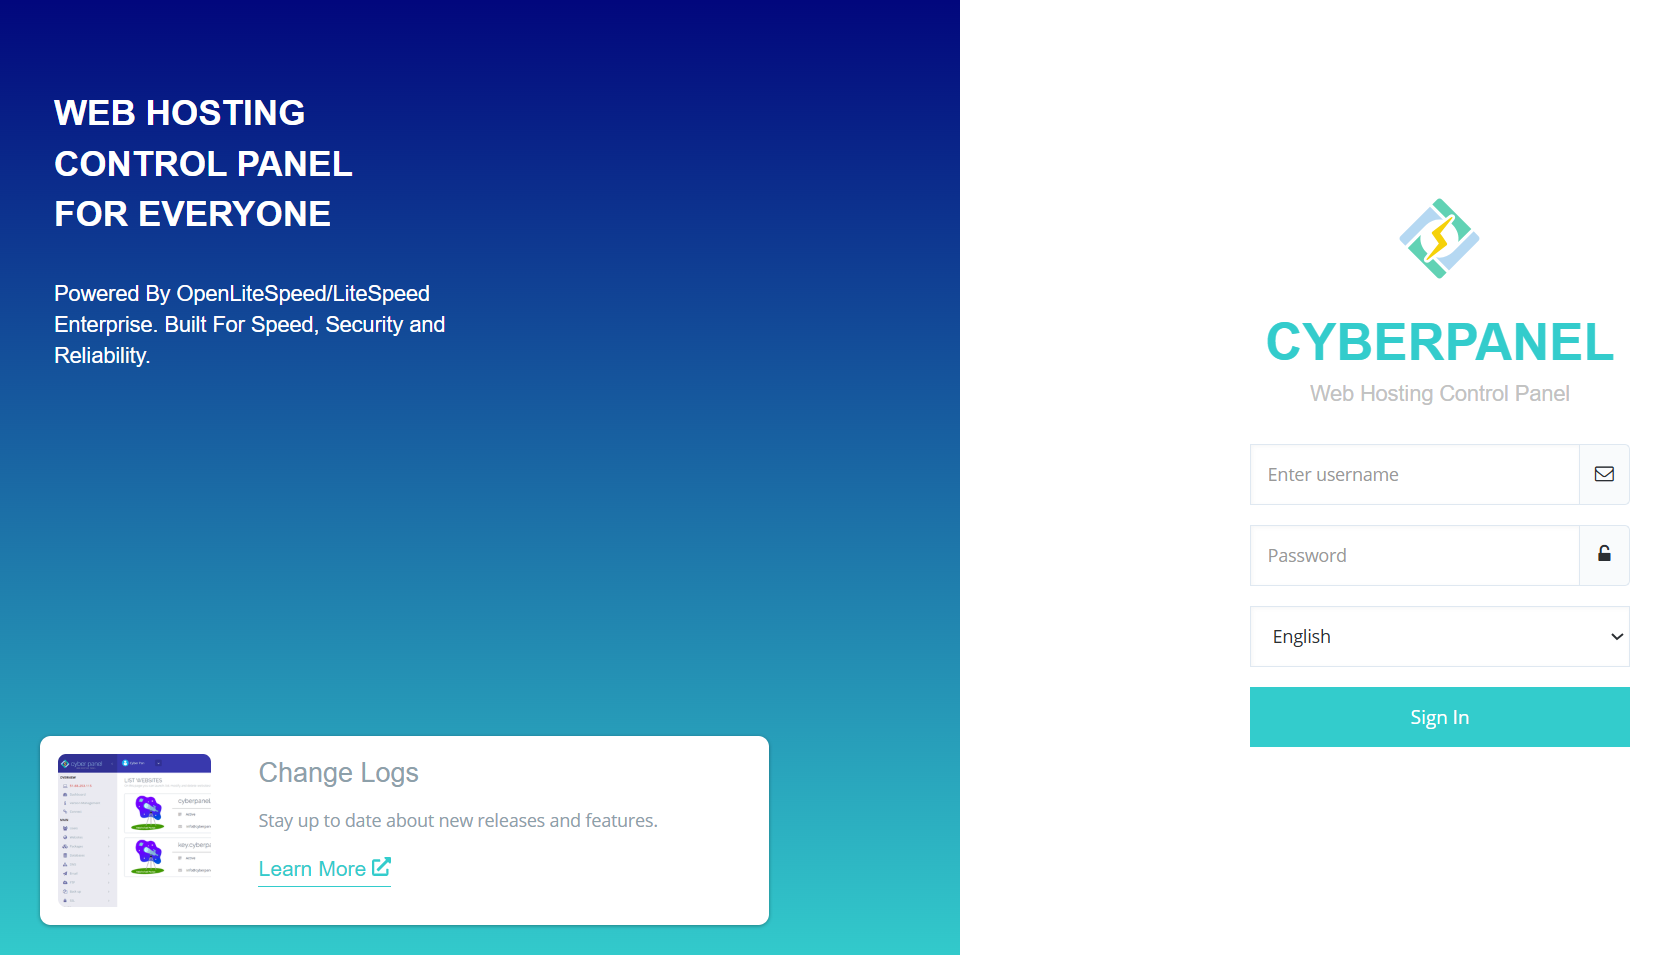
- Log in using the following details:
- Username:
admin - Password: (The password you copied from Step 2)
- Username:
Step 4: Point Your Domain to the Server
Before creating a website or issuing a secure SSL certificate, your domain name must point to your server's location.
- Log in to your domain registrar.
- Go to your domain's DNS Management / DNS Zone Editor.
- Add or edit an A Record:
- Host/Name:
@(or leave it blank / enter your domain name) - Value/Points to:
<your-server-ip> - TTL:
Automaticor3600
- Host/Name:
Step 5: Create Your First Website
Now that your domain points to the server, you can configure the website container inside CyberPanel.
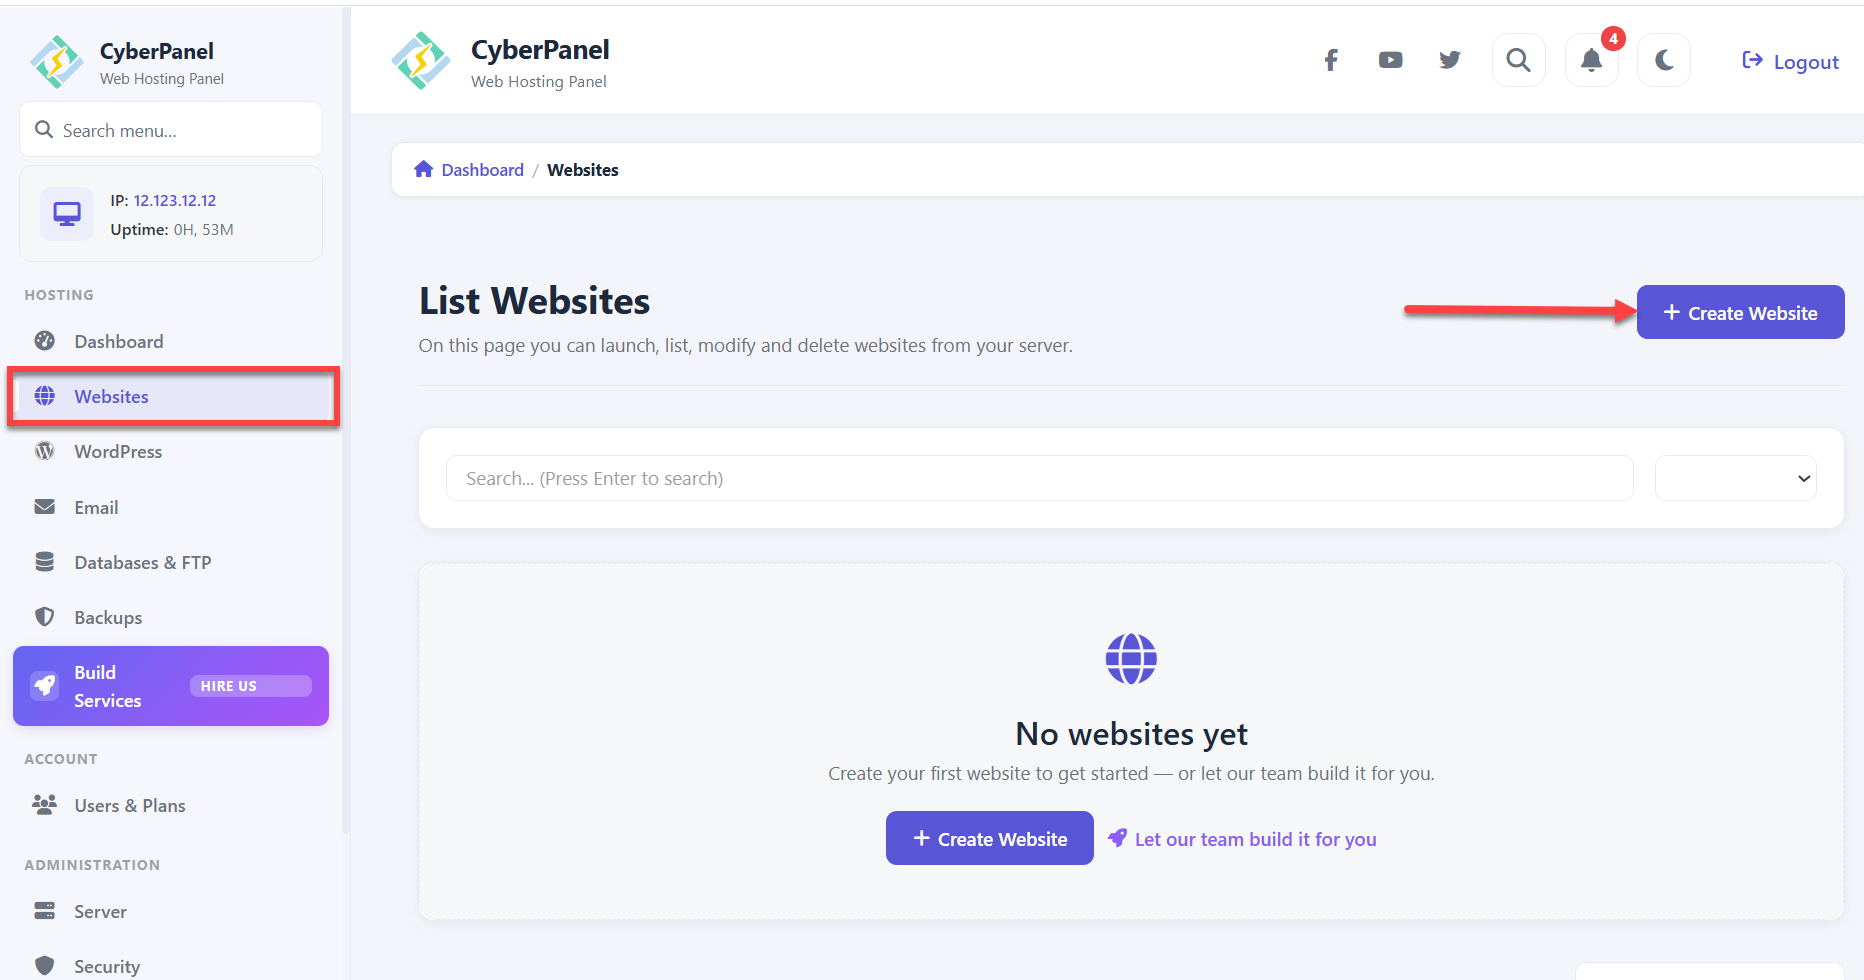
- On the CyberPanel dashboard, click Websites in the left navigation menu, and then click Create Website.
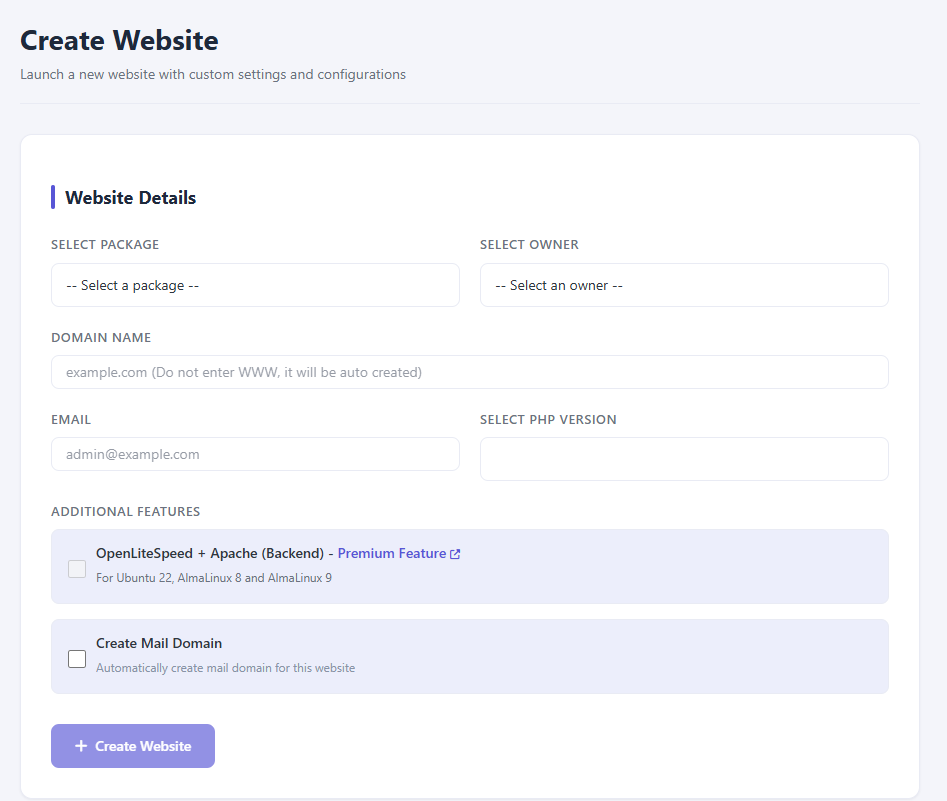
- Fill out the required details:
- Package: Select
Default. - Owner: Select
admin. - Domain Name: Enter your domain.
- Email: Enter your email (used for important SSL renewal notifications).
- PHP Version: Select the version required by your application.
- Package: Select
- Click Create Website.
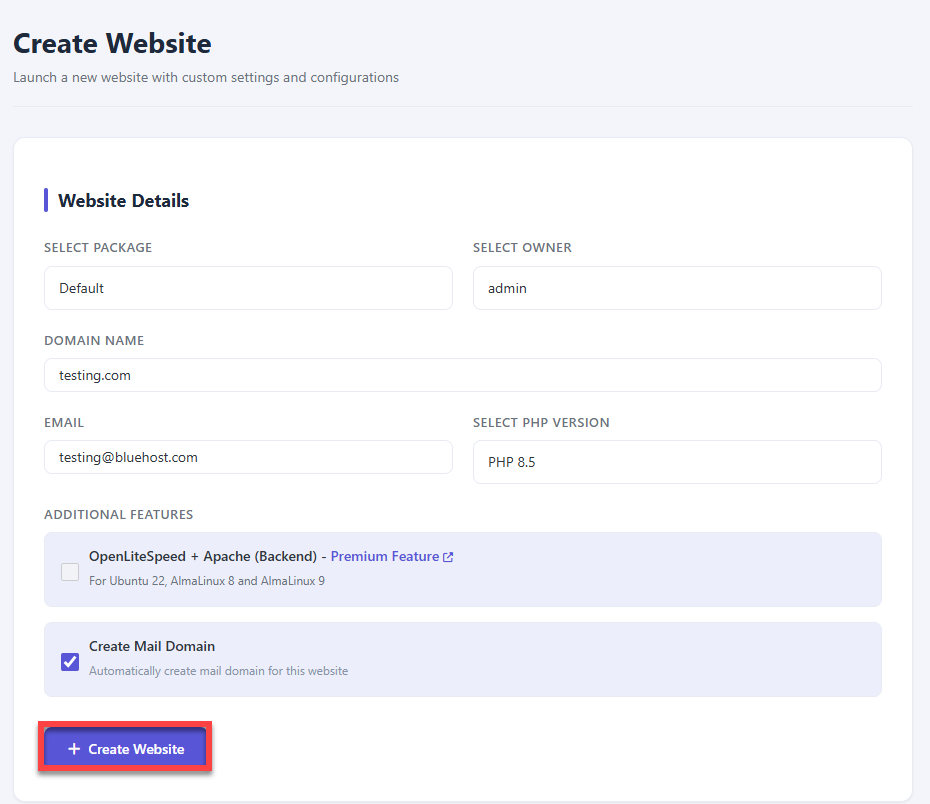
CyberPanel will automatically configure the virtual host, folder structures, and PHP routing.
Step 6: Secure Your Website with HTTPS (SSL)
CyberPanel gives you free, automatic SSL certificates through Let's Encrypt.
- Log in to your domain registrar and point your domain's A record to your
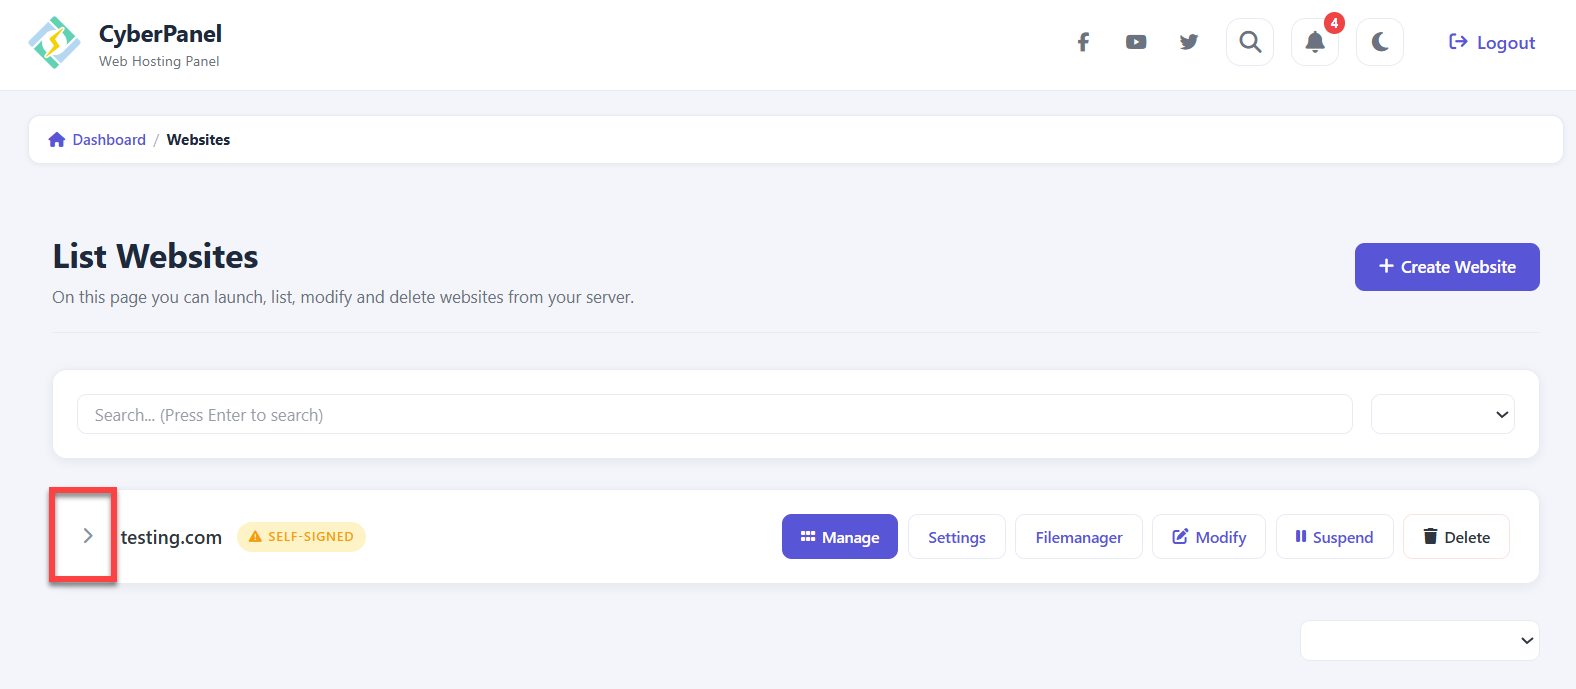
<your-server-ip>. - Return to CyberPanel, go to Websites, and then click on List Websites.
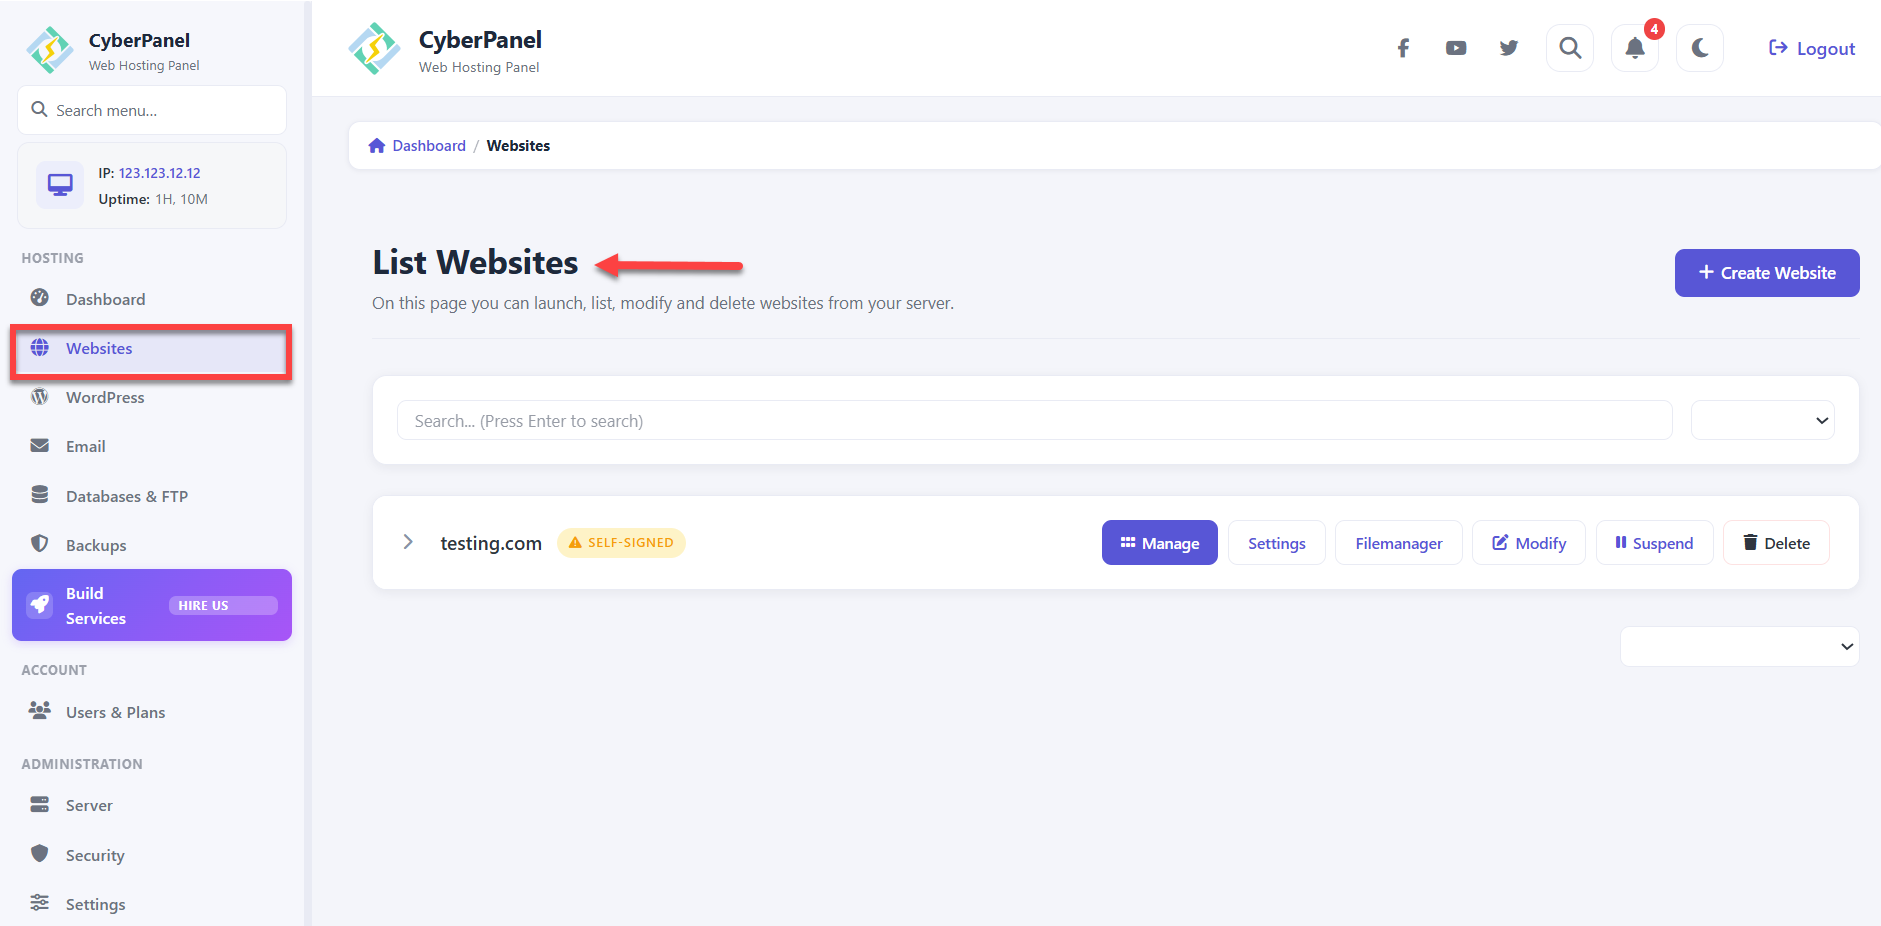
- Click the dropdown icon of the website you want to manage.
- Click Issue SSL.
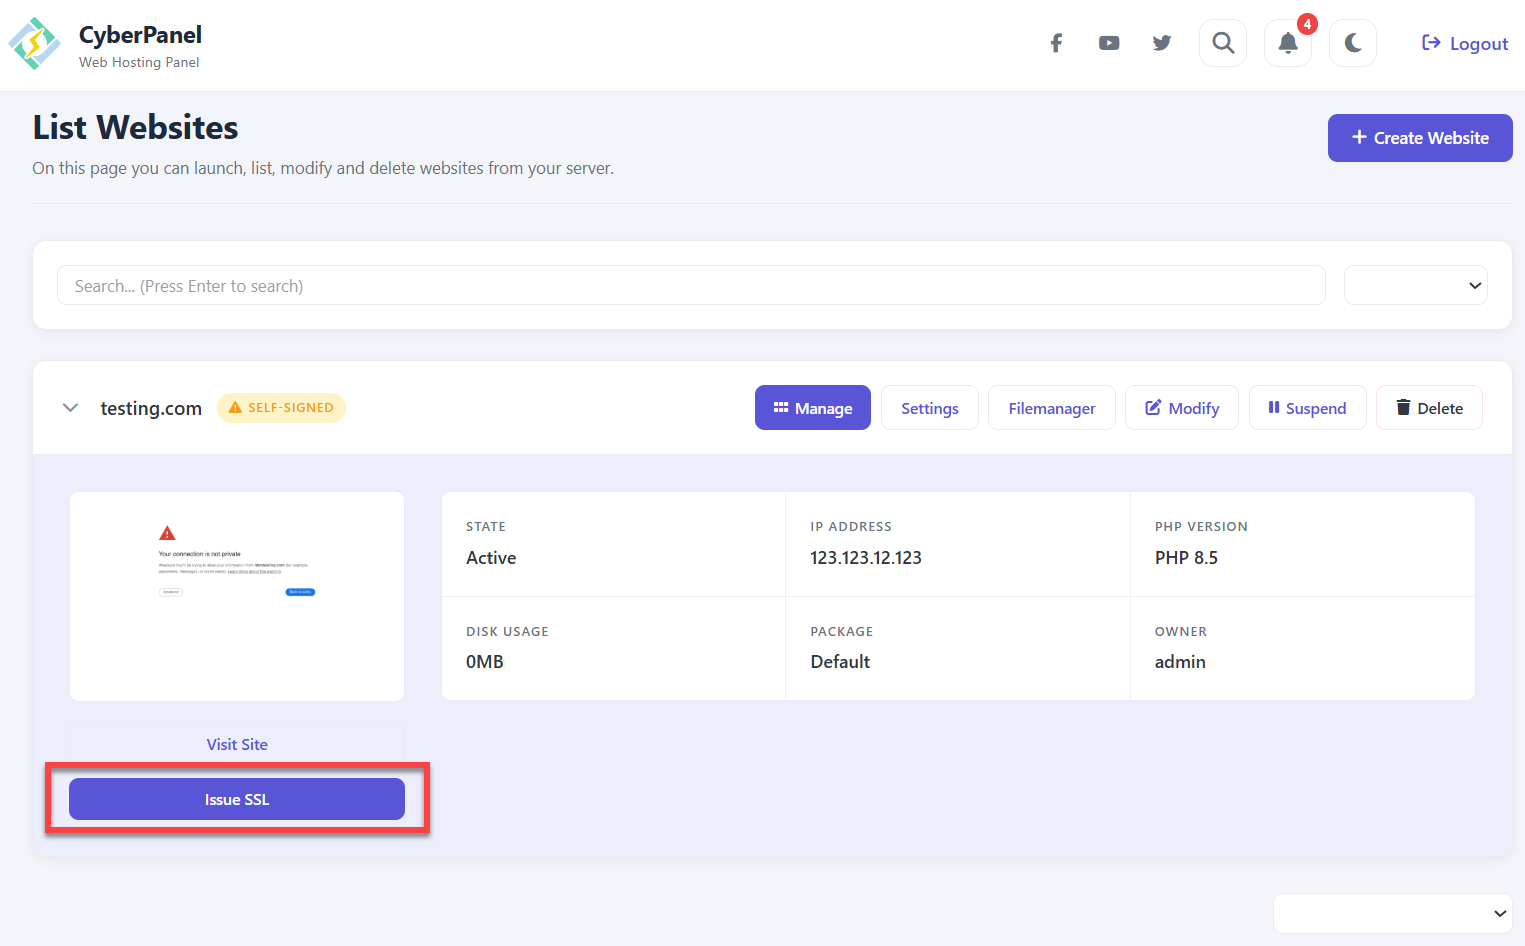
CyberPanel will secure your site automatically.
Step 7: Create a Database (Optional)
If your website uses a database (like WordPress), you can set it up in seconds.
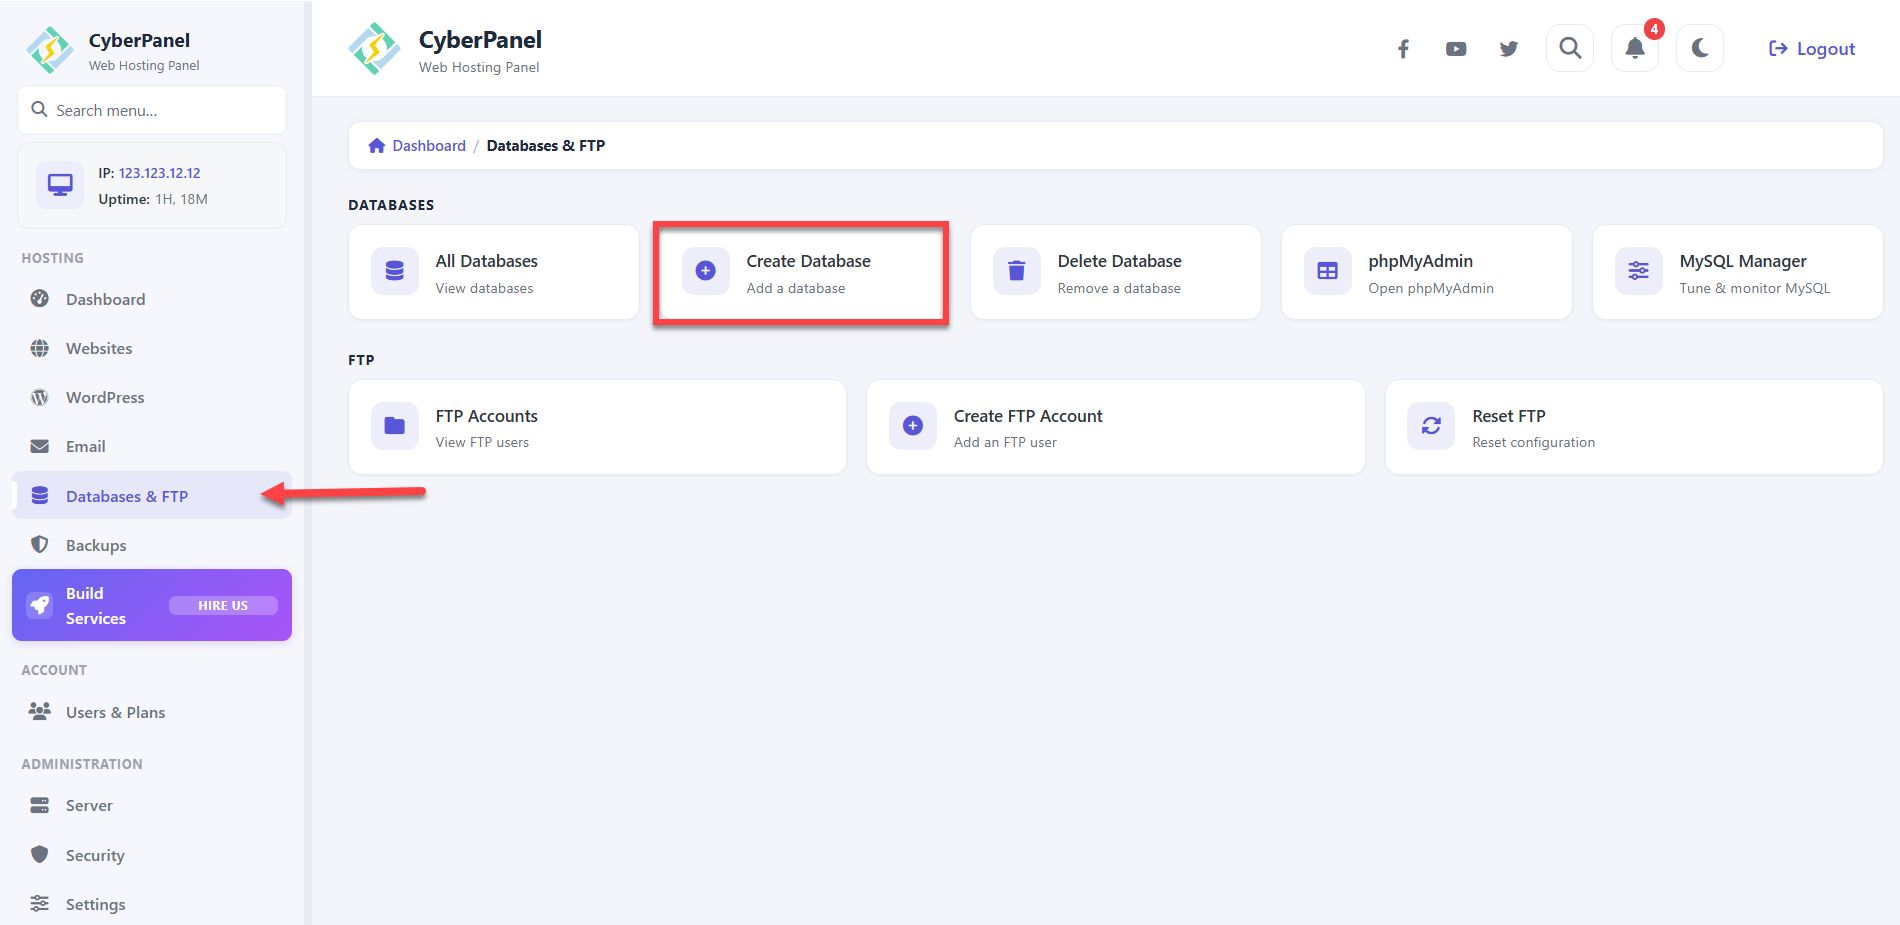
- Go to Databases & FTP and then click on Create Database.
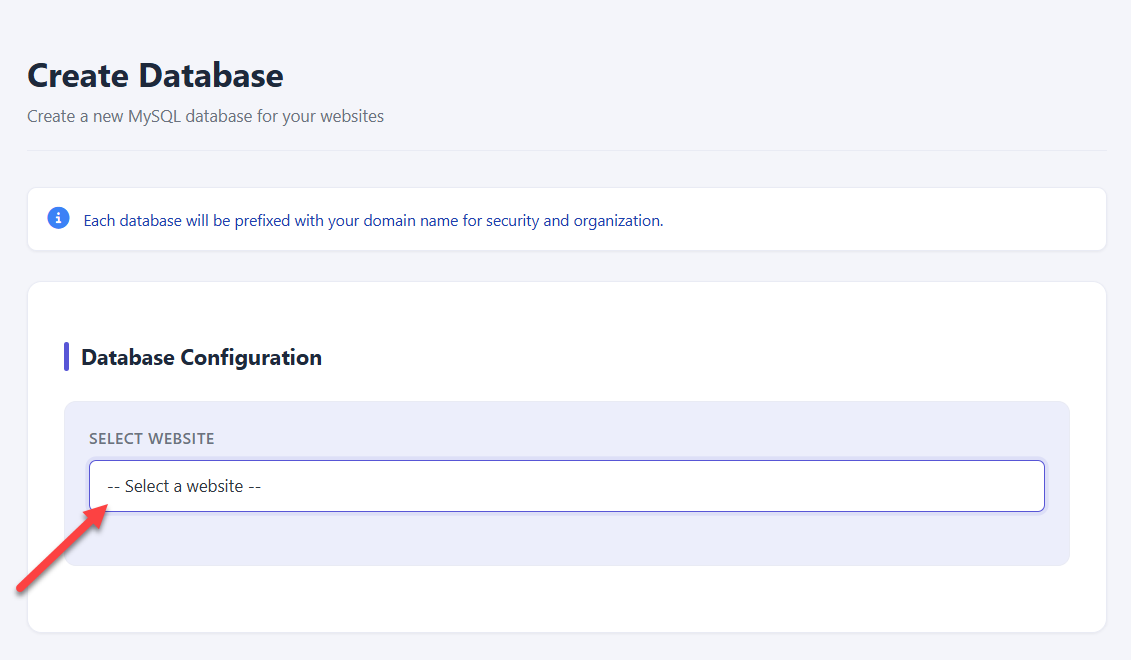
- Select your website from the dropdown.
- Enter a Database Name, Database User, and Password.
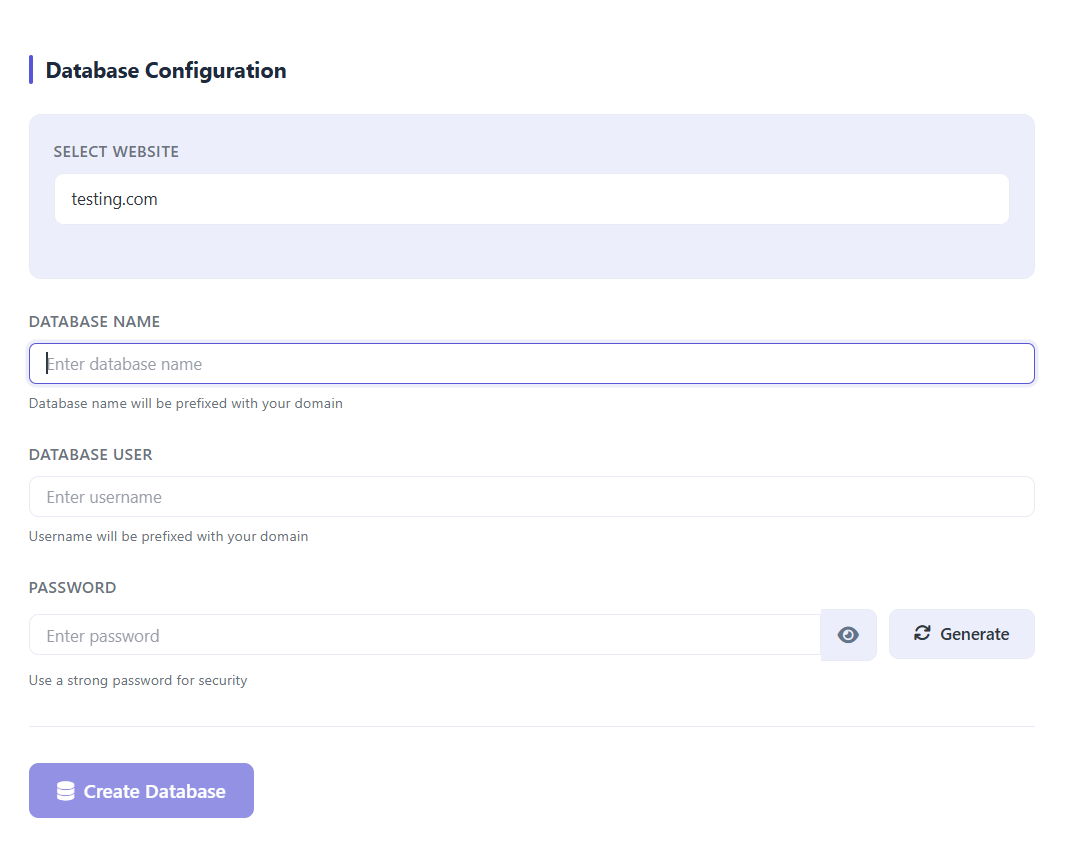
- Click Create Database.
- To manage your databases visually, go to Databases and then click on phpMyAdmin in your panel.
Useful Cheat Sheet for Maintenance
Once everything is running, you can monitor and manage your services directly from the command line using these commands:
Web Server and Panel Controls
- Restart OpenLiteSpeed (No Downtime):
/usr/local/lsws/bin/lswsctrl restart
- Restart CyberPanel Interface:
systemctl restart lscpd
Checking Logs (Troubleshooting)
- Live CyberPanel Dashboard logs:
journalctl -u lscpd -f
- Live Web Server error logs:
tail -f /usr/local/lsws/logs/error.log
Supporting Information and Sample Output
You can run cat /root/README.md to see more information and useful commands:
Example Output:
root@server-123456:~# cat /root/README.md
# CyberPanel

## Description

CyberPanel is an open-source web hosting control panel powered by OpenLiteSpeed. It lets you manage websites, databases, DNS, email accounts, and SSL certificates from a modern web interface. It supports one-click WordPress installs, multi-PHP version management, Let's Encrypt SSL automation, and built-in email hosting with Postfix and Dovecot, providing a complete hosting environment without complex command-line setup.

Traffic flow:

```text
Browser (HTTPS/HTTP)
        |
        v
  OpenLiteSpeed (ports 80, 443)    managed by CyberPanel
        |
   +------------------------------+
   |  Hosted websites / apps      |
   |  (PHP, static, reverse proxy)|
   +------------------------------+

Browser -> CyberPanel management UI:
  https://server-ip:8090  (direct access)
```

CyberPanel manages SSL certificates for all hosted websites via Let's Encrypt
automatically once a domain is pointed at the server.

---

## Services

| Service       | Port(s) | Purpose                             |
| ------------- | ------- | ----------------------------------- |
| CyberPanel UI | 8090    | Management dashboard                |
| OpenLiteSpeed | 80, 443 | Website hosting and automatic TLS   |
| OLS Admin     | 7080    | OpenLiteSpeed admin panel           |
| OpenSSH       | 22      | Remote access (rate-limited by UFW) |

Ports are protected using UFW. Database and cache services are intentionally
bound to localhost only and are not accessible from outside the server.

---

## How to use

### Initial access

Open https://server-ip:8090 in your browser.

Note: Your browser may show a certificate warning on first access. This is
expected -- click Advanced and Proceed to continue. CyberPanel will provision
a trusted Let's Encrypt certificate once a domain is configured.

On first visit:

1. Retrieve the generated admin credentials:

```bash
sudo cat /root/.app_passwords
```

2. Use these credentials to log in:

| Service             | URL                      | Username | Password          |
| ------------------- | ------------------------ | -------- | ----------------- |
| CyberPanel          | https://server-ip:8090 | admin    | `CYBERPANEL_PASS` |
| OpenLiteSpeed Admin | https://server-ip:7080 | admin    | `OLS_PASS`        |

Both services automatically share the same randomized admin password generated during first boot.

3. You will land on the CyberPanel dashboard.
4. Click Websites -> Create Website to add your first site.

---

### Creating your first website

1. Go to Websites -> Create Website
2. Fill in:
   - Domain name -- your domain (e.g. example.com)
   - Email -- used for SSL certificate notifications
   - PHP version -- select the version your app needs
   - Package -- select Default
3. Click Create Website

CyberPanel sets up the virtual host, web root, and PHP configuration automatically.

---

### Enabling HTTPS for hosted websites

CyberPanel manages OpenLiteSpeed and Let's Encrypt automatically. To enable
HTTPS for a website:

1. Point your domain's DNS A record at server-ip
2. In CyberPanel, go to Websites -> List Websites
3. Click Manage on your website
4. Click Issue SSL -- CyberPanel obtains a Let's Encrypt certificate automatically

No manual certbot or nginx configuration is required.

---

### Managing databases

1. Go to Databases -> Create Database
2. Fill in the database name, username, and password
3. Click Create Database

To manage databases visually, go to Databases -> phpMyAdmin.

---

## Manage

### CyberPanel Web Interface

| URL                      | Purpose                    |
| ------------------------ | -------------------------- |
| https://server-ip:8090 | CyberPanel admin dashboard |
| https://server-ip:7080 | OpenLiteSpeed admin panel  |
| https://server-ip      | Your hosted websites       |

Both dashboards automatically share the same randomized admin password generated during first boot.

### OpenLiteSpeed

```bash
# Check status
systemctl status lsws

# Restart OpenLiteSpeed
systemctl restart lsws

# Graceful reload (no downtime)
/usr/local/lsws/bin/lswsctrl restart
```

### CyberPanel service

```bash
# Check status
systemctl status lscpd

# Restart CyberPanel
systemctl restart lscpd
```

### MariaDB

```bash
# Check status
systemctl status mariadb

# Open MySQL shell
mysql -u root

# Show all databases
mysql -u root -e "SHOW DATABASES;"
```

### Logs

```bash
# CyberPanel logs
journalctl -u lscpd -f

# OpenLiteSpeed error log
tail -f /usr/local/lsws/logs/error.log

# First boot log
cat /var/log/onboot.log
```

---

## Security

| Hardening                | Detail                                           |
| ------------------------ | ------------------------------------------------ |
| UFW firewall             | Only ports 22, 80, 443, 7080 and 8090 are open   |
| SSH rate limiting        | Port 22 protected against brute-force attacks    |
| Local-only services      | Databases accessible only from the server itself |
| SSL support              | HTTPS via Let's Encrypt through CyberPanel       |
| No hardcoded credentials | Passwords are generated fresh at first boot      |

---

## Minimum resources

| Resource | Minimum |
| -------- | ------- |
| vCPUs    | 2       |
| RAM      | 4 GB    |
| Disk     | 20 GB   |

---

## Notes

- OpenLiteSpeed handles reverse proxying, SSL termination, and static content serving.
- CyberPanel automatically manages virtual hosts, PHP, and SSL certificates.
- Both CyberPanel and OpenLiteSpeed admin panels use synchronized passwords generated during first boot.
- Passwords are stored securely at `/root/.app_passwords`.
- MariaDB is intentionally bound locally for improved security.
- No nginx setup is required because OpenLiteSpeed handles web serving directly.

---

## Links

- CyberPanel Documentation: [https://cyberpanel.net/docs/](https://cyberpanel.net/docs/)
- OpenLiteSpeed Documentation: [https://docs.openlitespeed.org/](https://docs.openlitespeed.org/)
- Manage: [https://server-ip:8090](https://server-ip:8090)
Summary
Learn how to purchase a Bluehost Virtual Dedicated Server (VDS) with CyberPanel pre-installed and get started managing websites through an intuitive web hosting control panel. This article covers CyberPanel's key features, recommended server requirements, step-by-step VDS purchasing and configuration, access to the CyberPanel dashboard, domain setup, website creation, SSL installation, database management, and important maintenance commands for ongoing server administration.