 ChatGPT,
  Claude,
  Gemini,
  Grok — all four for
 Purchase a Virtual Dedicated Server with Magento 2 Installation
Magento 2 gives you a self-hosted, PHP e-commerce platform built for stores that need more than a simple shop-in-a-box. You own your code, themes, and extensions, so you're never locked into a closed SaaS product.
You get scale and flexibility right out of the box. You manage multiple stores from one admin panel, run strong catalog and order workflows, and merchandise your products with promotions and cross-sells. You also integrate search, checkout, and marketing tools easily, thanks to a large extension ecosystem and solid vendor documentation.
This article explains how to purchase a Bluehost Virtual Dedicated Server (VDS) hosting plan and set up and manage your Magento 2 Assistant.
Why Choose Magento 2?
You get the raw server power Magento 2 needs to run catalog, checkout, and order workflows smoothly, even during high-traffic sales. You enjoy dedicated CPU, RAM, and storage that you don't share with other tenants, so your store stays fast as you scale. You also get root access, letting you fine-tune PHP, your database, and caching layers exactly the way Magento recommends. And you keep full control over your data and extensions, since everything runs on infrastructure you own instead of a locked-down SaaS platform.
Uses of Magento 2
Magento 2 adapts to a wide range of online retail needs, giving you the flexibility to build the exact storefront your business requires.
- Multi-Store Management: Run multiple storefronts, brands, or regional sites from a single admin panel.
- B2B and B2C Sales: Manage complex pricing, quotes, and bulk ordering alongside standard retail checkout.
- Product Merchandising: Boost sales with promotions, cross-sells, upsells, and personalized product recommendations.
- Custom Integrations: Connect your store to payment gateways, shipping providers, ERPs, and marketing tools through Magento's extension ecosystem.
- Content-Rich Storefronts: Build custom themes and landing pages that match your brand, without relying on a locked-down template system.
Whichever use case fits your business, Magento 2 gives you the freedom to customize and scale your store as you grow.
How to Purchase a Virtual Dedicated Server with Magento 2 Installation
Magento 2 can be installed on a Bluehost Virtual Dedicated Server (VDS). You can choose to have Magento 2 installed during the initial VDS purchase or install it manually at a later time.
- In your browser, go to https://www.bluehost.com.
- Click Hosting in the top menu, then select Virtual Dedicated Server.

You can also go to this link directly: https://www.bluehost.com/vds-hosting.
- On the Virtual Dedicated Server Hosting page, click Explore Plans. You can also scroll down to the hosting plans section.

- Choose a plan from either tab — Standard or High Performance — by clicking Choose Plan.

Pricing is subject to change. Please visit https://www.bluehost.com/vds-hosting for the current introductory/sign-up offer for the Bluehost Virtual Dedicated Server hosting. For the most up-to-date renewal pricing, visit your Bluehost Portal's Renewal Center. - On the next page, configure your VDS hosting to meet your requirements. The configuration options are divided into the following sections:
- Location: Select your data center in this section.

- Hardware: This section shows your pre-selected plan. You can also switch to another Virtual Dedicated Server plan in this section

- Software:
If the selected plan does not meet the app's minimum requirements, the app will be grayed out.
- Under the Application tab, click on Magento 2.
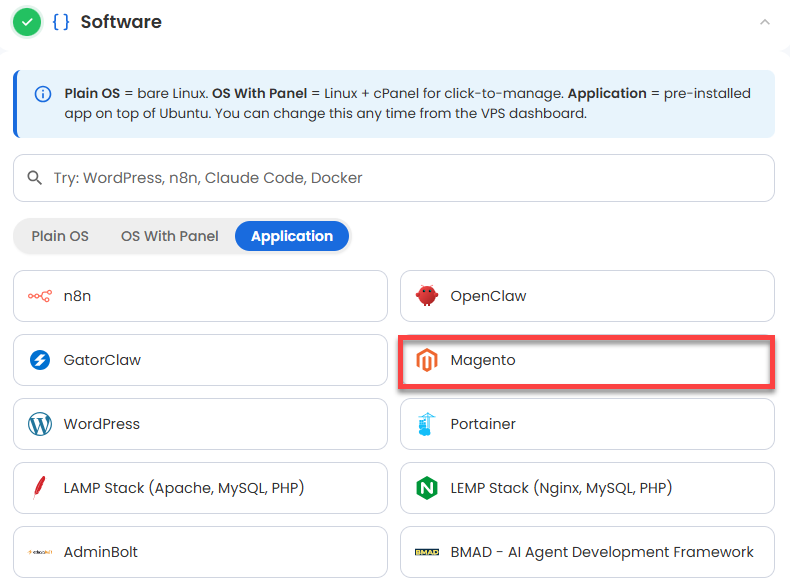
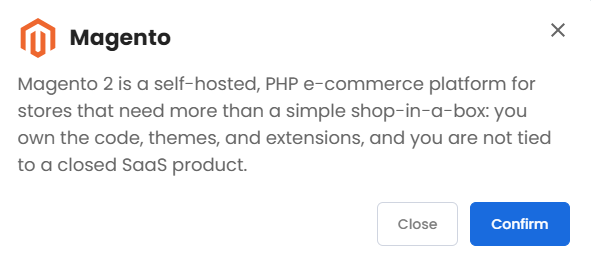
You can install only one application per purchase; the system will automatically select the best operating system for it. - In the pop-up, click Confirm.
- Under the Application tab, click on Magento 2.
- Support & Security: You can add Premium Support - Recurring, which provides priority access to expert assistance and faster response times.

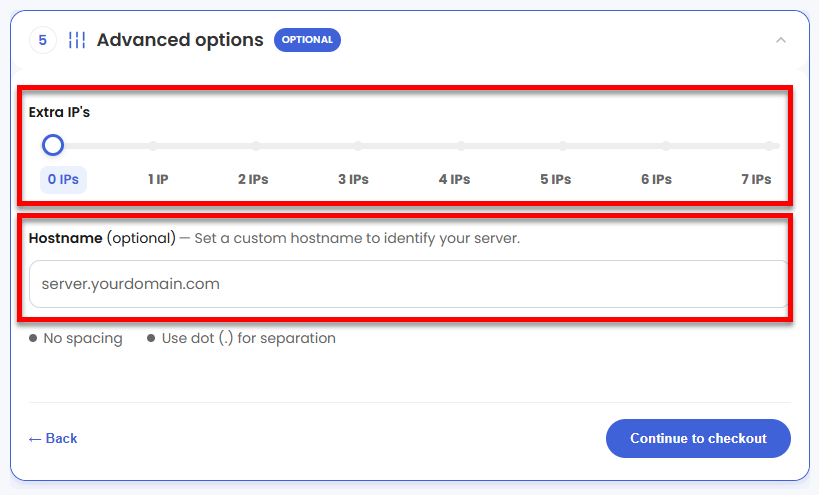
- Advanced Options:
- Extra IP's: You can add IP addresses for an additional fee. Pricing changes based on how many IPs you add.
- Hostname: Assign a custom hostname to identify your server. This is optional.
- Location: Select your data center in this section.
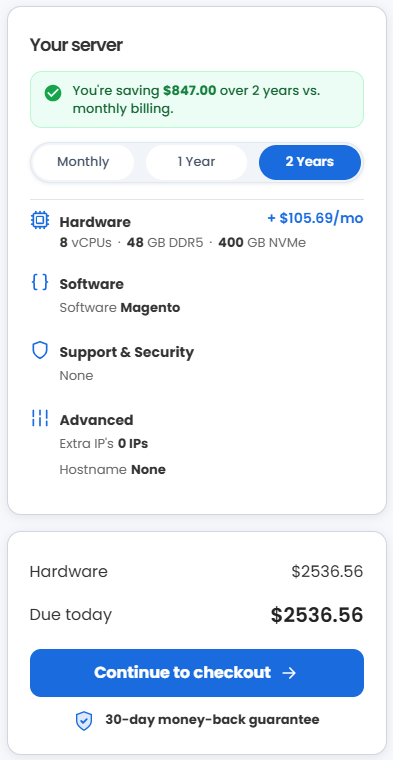
- Select your billing term and review your selected items on the right pane, along with the summarized total cost.
- Click Continue to checkout.
- Do the following on the Checkout page:
If you're new to Bluehost:- Create your Bluehost account by using your email address or by connecting with your Google, Apple, or GitHub account — whichever you prefer!

- Select your preferred payment method: credit card, Google Pay, or PayPal. Enter your billing information.

If you have an account with us, you will see your Bluehost login details when you are logged into your Bluehost Portal. If you are not logged in, please click the Log In link.

- Create your Bluehost account by using your email address or by connecting with your Google, Apple, or GitHub account — whichever you prefer!
- In the Shopping Cart, choose your billing term if you did not choose one on the previous page.
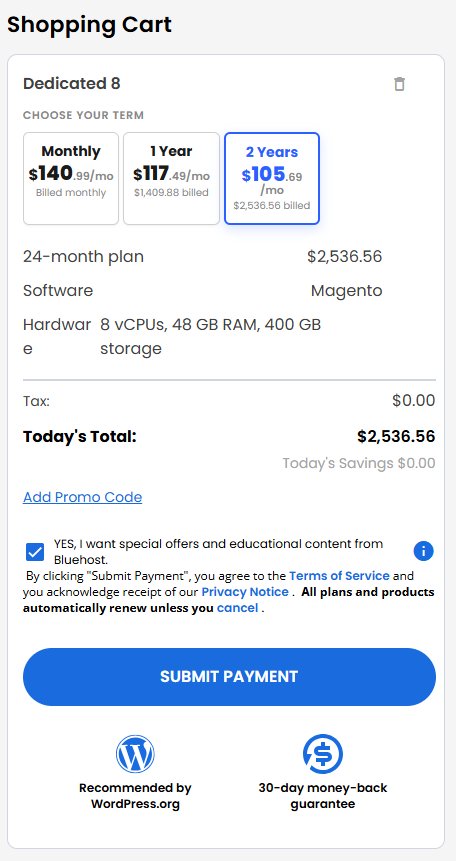
- Add a Promo code if you have one, and then click Submit Payment to complete your purchase.
After completing the purchase, your VDS hosting will begin provisioning. You can access and manage your new VDS hosting in the Hosting tab of your Bluehost Portal.
Setting Up Your Magento 2 Server
Welcome to your new Magento 2 server! Your server comes pre-installed with Magento 2, Nginx, PHP 8.3, MySQL, and OpenSearch. Follow this guide to log in, secure your account, and connect your custom domain.
Step 1: Log In and Retrieve Your Credentials
Your temporary login details and administrative URLs are securely stored directly on your server.
- Log in to your Bluehost Portal.
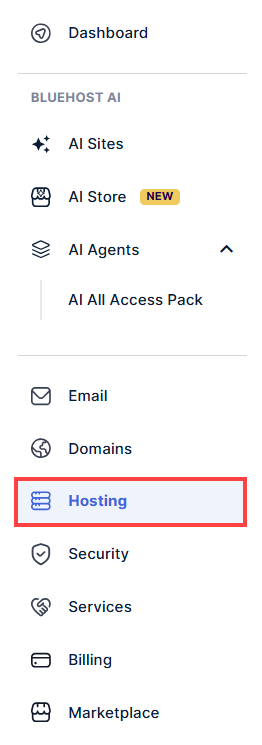
- In the left-hand menu, click Hosting, then select My Plans.
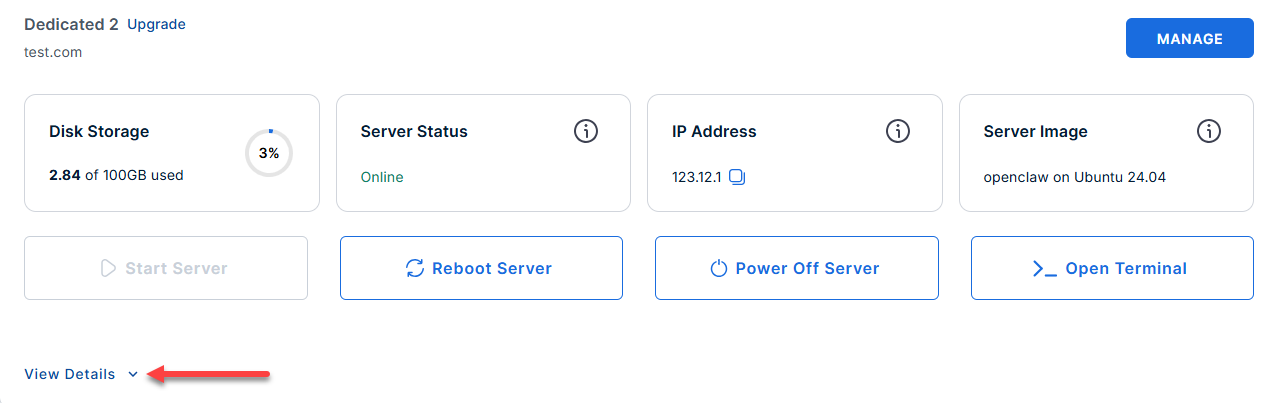
- Locate the server you want to manage, then click View Details in the bottom-left corner to expand the section and access additional server information.
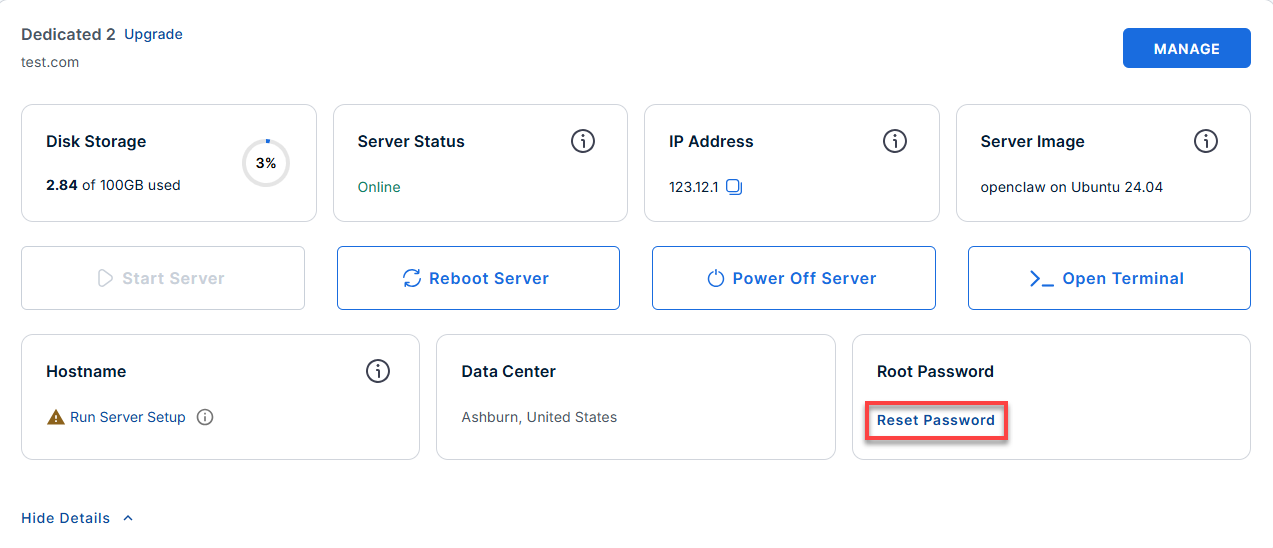
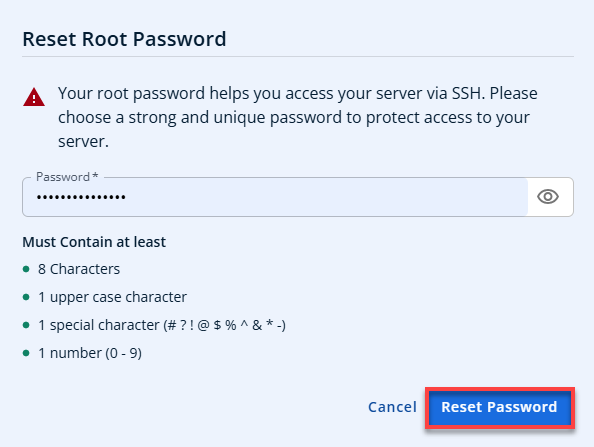
- Click the Reset Password.
- In the pop-up window, type your new root password, then click Reset Password again to confirm and save the changes.
- Connect to your server via SSH.
Open your computer's terminal (or an SSH client like PuTTY) and run the following command to log into your server as the administrator, using your server's public IP address: Follow the prompts and enter the new root password you created in the step above.Replaceyour_server_ipwith your actual server IP address.ssh root@your_server_ipExample Output:
Welcome to Ubuntu 24.04.4 LTS (GNU/Linux 6.8.0-111-generic x86_64)
********************************************************************************

Welcome to your Magento 2 installation!

    Store URL:   https://12.1.1.123/
    Admin URL:   https://12.1.1.123/admin_dqfm2f1
    Admin user:  testing
    Admin email: [email protected]

Your admin login and service credentials are saved in the following file: /root/.app_passwords

See /root/README.md for more information about using magento

This prompt is shown automatically only once. To run it again later, execute:
  /root/domain_connect
  [d] — Connect a domain name to magento (nginx + SSL will be updated for that host)
  [i] — Keep using the server's IP address (current behavior)
  [q] — Quit

Your choice [d/i/q]:
Choose one of the following options based on what you want to do:
Your choice [d/i/q]- Press i – Use Server IP (Recommended)
Choose this to finish setup instantly using your server's IP address (12.1.1.123). You can easily switch to a custom domain later. - Press d – Connect a Domain
Choose this only if you already own a domain (e.g.,myshop.com) and have pointed its DNS to12.1.1.123. This option will ask for your domain and install an SSL security certificate. - Press q – Quit
Choose this to exit the installer and access the command line. To restart this wizard later, run/root/domain_connect.
Type i, d, or q, then press Enter.
- Press i – Use Server IP (Recommended)
- If you ever need to quickly review the system's deployment notes directly inside your server terminal, you can print out the original README file by running:
cat /root/README.md
- View your credentials:
cat /root/.app_passwords
Example Output:
root@server-123456:~# cat /root/.app_passwords
root_mysql_pass="testonly785d3f281c50ec9ddfba60ee80"
admin_mysql_pass="testonly23abd5395b9b82cea14cbf73"
app_mysql_pass="testonlye73e35703437ccf4a013f95"
opensearch_pass="testonly!^*SF)3^Gd"
magento_admin_pass="testonlyb6e4f716bdec7419c06404a3"
[email protected]
magento_admin_user=testing
magento_admin_pass=testonly6e4f716bdec7419c06404a3
magento_admin_url=https://12.1.1.123/admin_dqfm2f1
magento_store_url=https://12.1.1.123/
Step 2: Access the Magento Dashboard
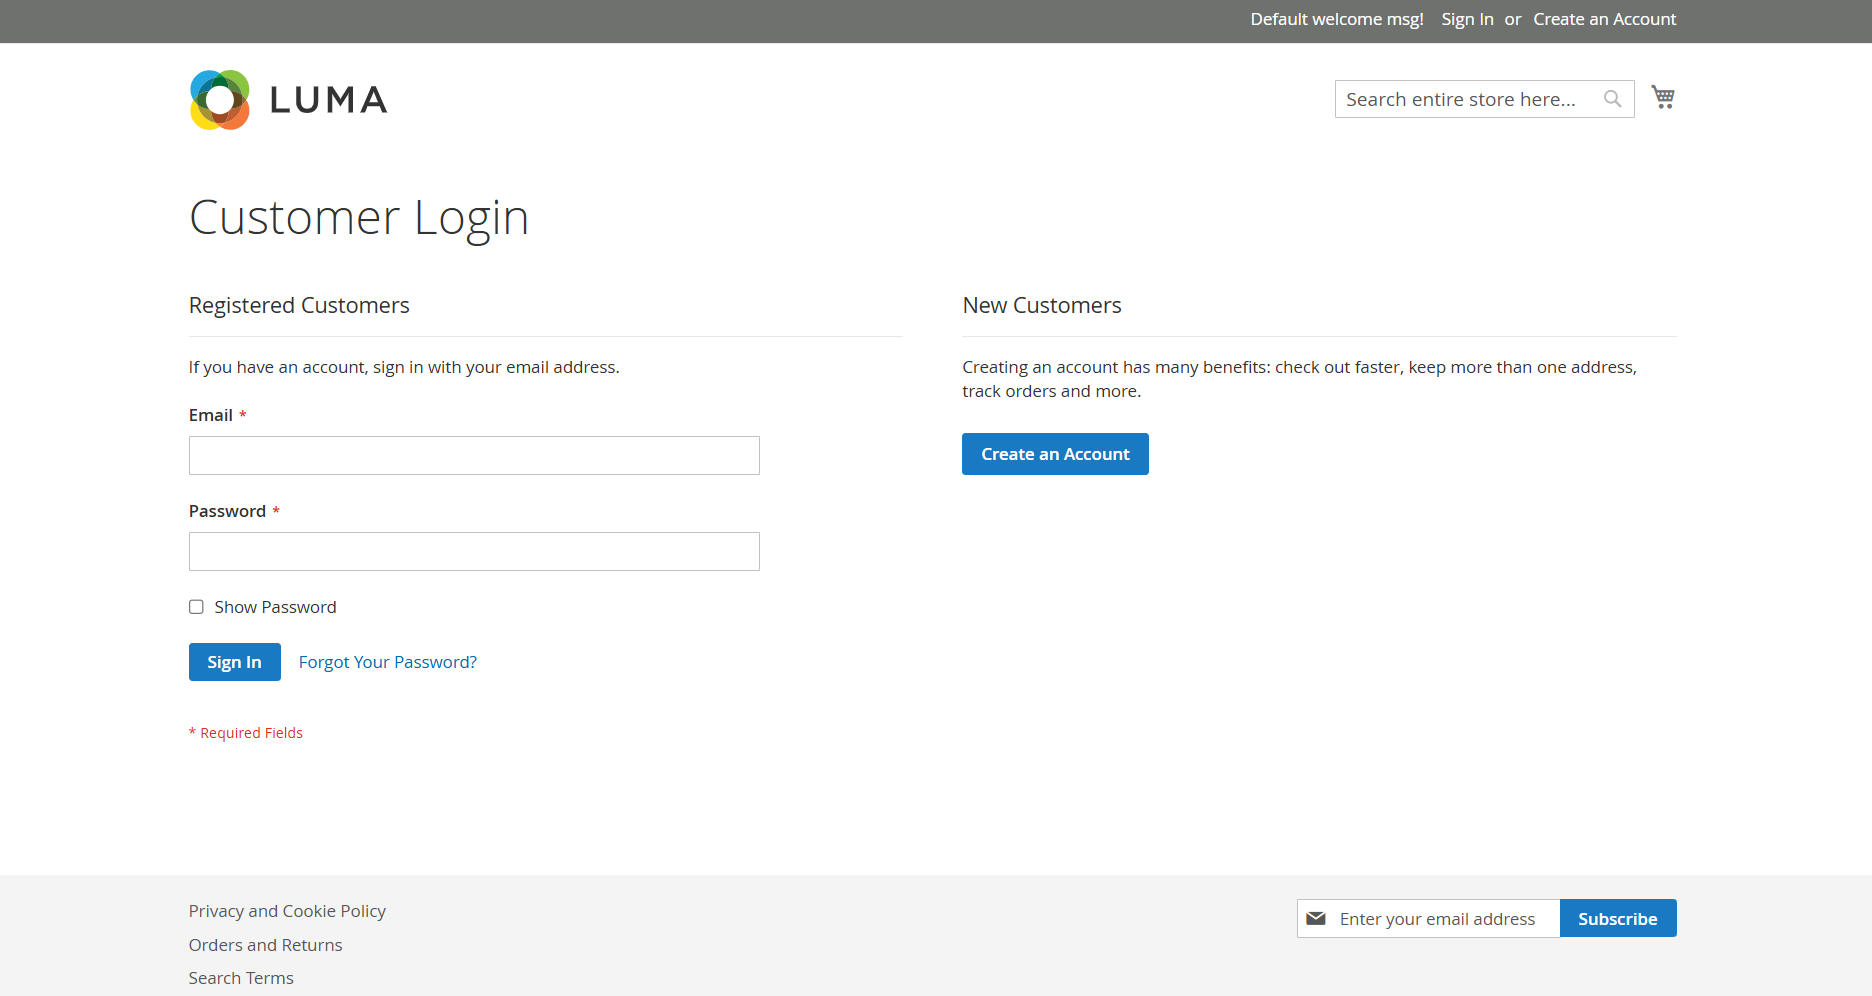
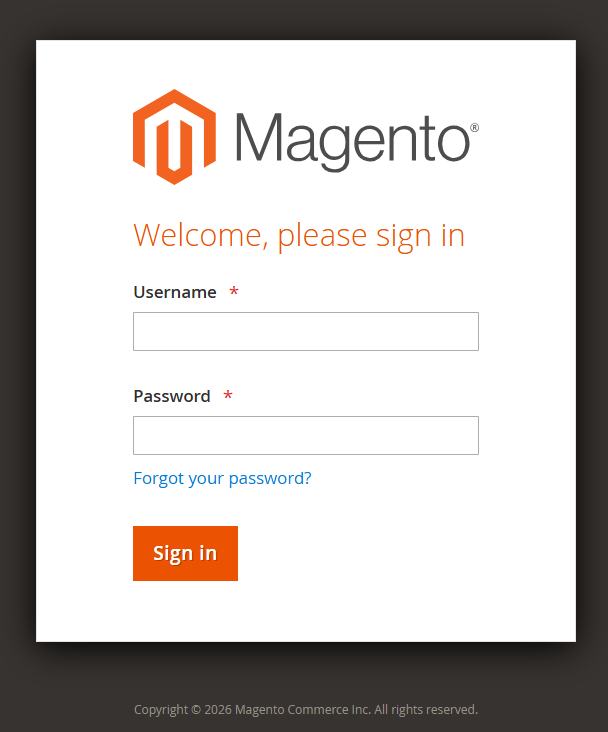
Open your web browser and navigate to the admin URL you found in the previous step. Log in using the default admin username and the password from your password file.
- Store URL: https://your-ip-address/
- Admin URL: https://your-ip-address/admin_dqfm2f1
Step 3: Secure Your Admin Account
For security purposes, you must create a personal administrator account and remove the default one.
- Run the user creation script in your terminal:
Follow the on-screen prompts to set up your unique username, password, and email.
/root/user_createExample Output:
root@server-123456:~# /root/user_create --- New Magento admin account --- First name [q=quit]: Test Last name [q=quit]: Account Email address [q=quit]: test [email protected] Admin username (letters, digits, underscore only) [q=quit]: jc Admin password: at least 12 characters with upper and lower case, a digit, and one of !@#$%^&* — or press Enter or type r to generate a random password. Password [Enter/r=random, q=quit]: Remove the existing admin user 'testing' after creating 'jc'? If you choose no, both accounts will remain. [y] — Remove the old admin after creating the new one [n] — Keep the old admin and add the new account [q] — Quit Your choice [y/n/q]: y - Go back to your Magento Admin Dashboard, log out of the default account, and log back in using the brand-new credentials you just created.
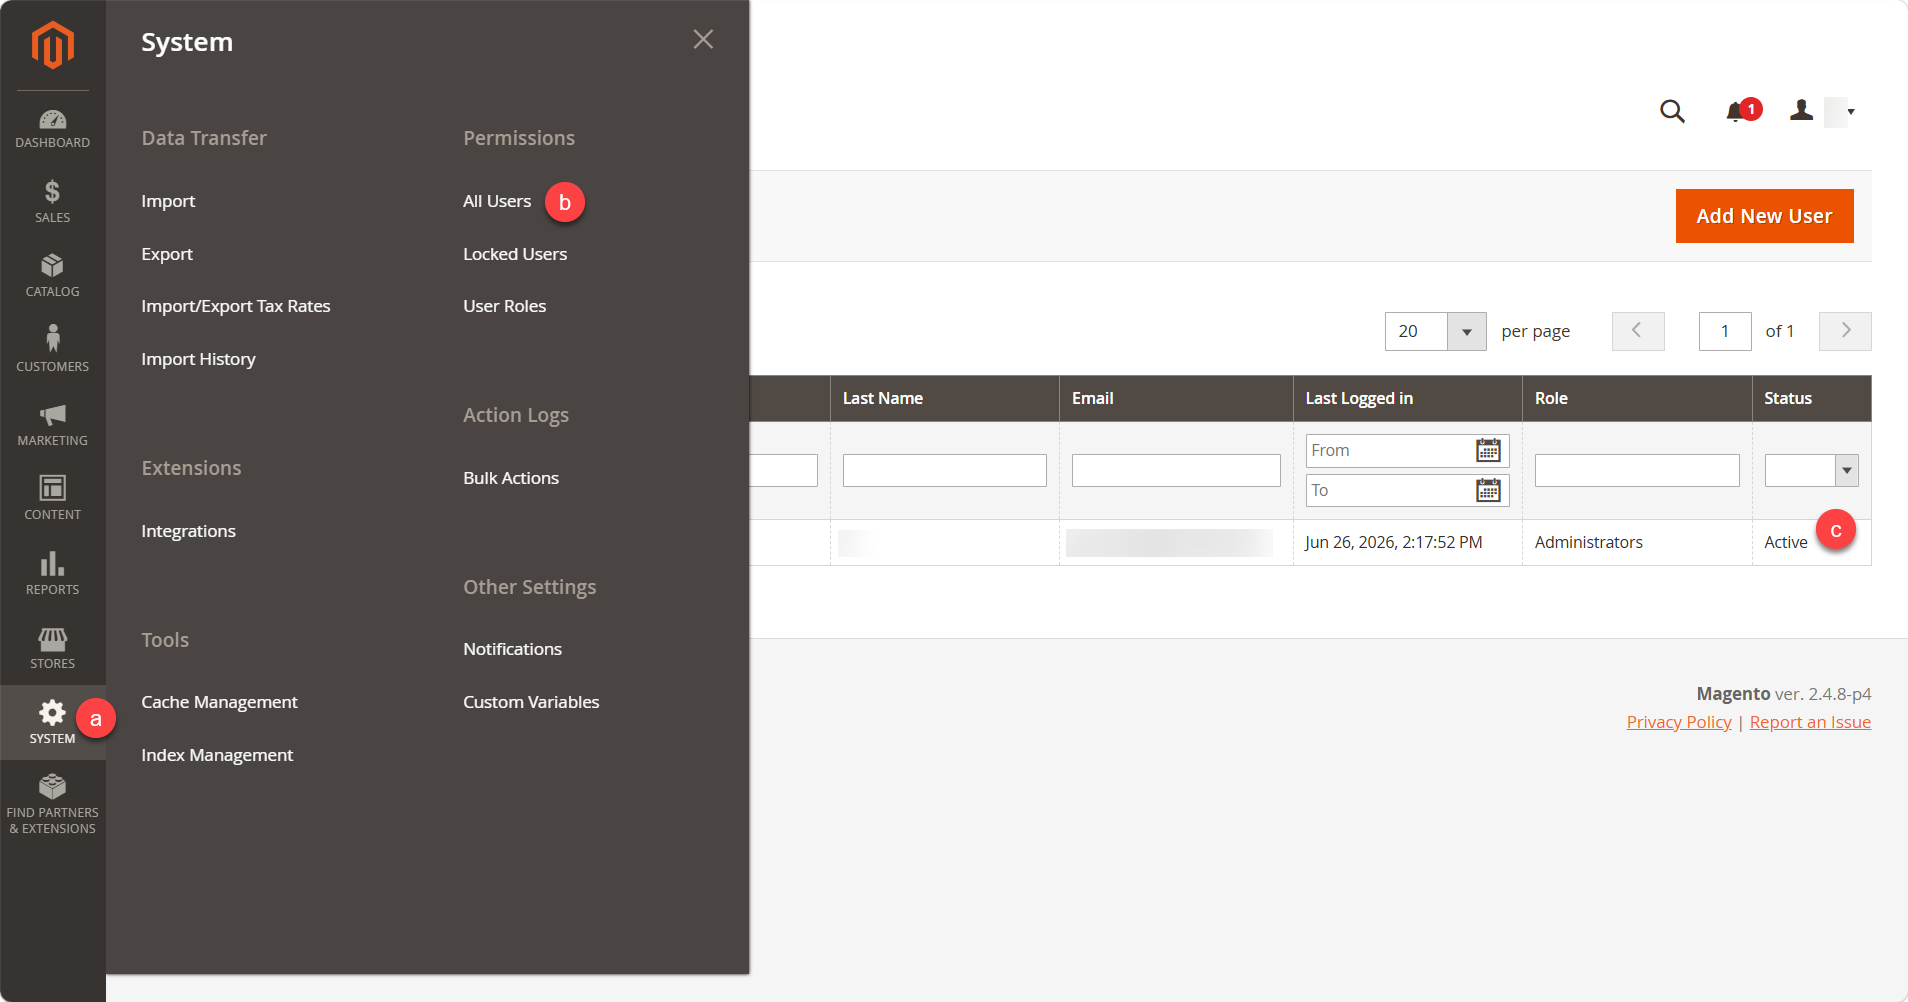
- Once you successfully log in with your new account, navigate to System ➔ Permissions ➔ All Users. Locate the default admin user and delete it to secure your store.
Step 4: Configure Your Domain Name and HTTPS
Right now, your site is running on the raw server IP address. To connect your actual domain name:
- Update your DNS: Go to your domain registrar and point your domain's A Record to your server's primary IP address.
- Wait for DNS to propagate.
- Once DNS is pointing to the server, run the built-in connection script as root:
/root/domain_connect
- Enter your domain name when prompted. The script will automatically update Magento, configure Nginx, and attempt to install a free, trusted Let's Encrypt SSL certificate.
Note: If the Let's Encrypt process fails or you need to manually force/renew the trusted certificate later, run this command (replace with your actual domain and email):certbot --nginx -d yourdomain.com -m [email protected] --non-interactive --agree-tos --force-renewal
Step 5: Update Store Email Addresses
The automated installer uses a placeholder email ([email protected]). You need to change this so you can receive system and order notifications.
- Log into your Magento Admin Dashboard.
- Update Store Emails: Navigate to Stores ➔ Configuration ➔ General ➔ Store Email Addresses and replace the placeholders with your operational emails.
- Update Admin Account Email: Navigate to System ➔ Permissions ➔ All Users, click on your user profile, and ensure your admin email address is correct.
Maintenance Commands
Your server has a built-in shortcut alias (magento) so you don't have to switch users constantly to manage the store. Whenever you make layout changes or configuration updates, run:
Flush Cache:
Reindex Data:
Supporting Information and Sample Output
You can run cat /root/README.md to see more information and useful commands:
root@server-123456:~# cat /root/README.md
# Magento

## Description

Magento 2 is a self-hosted, PHP e-commerce platform for stores that need more
than a simple shop-in-a-box: you own the code, themes, and extensions, and you
are not tied to a closed SaaS product.

It shines when you need **scale and flexibility**-one admin for multiple
stores, strong catalog and order workflows, merchandising (promotions,
cross-sells), and integrations for search, checkout, and marketing-backed by
a large extension ecosystem and solid vendor documentation.


## Services

Service          | Ports | Purpose
----------------|-------|---------
OpenSSH         | 22    | SSH
Nginx           | 80/443| Magento
OpenSearch      | 9000  | Magento Search

Ports are protected using ufw.


## How-to-use

On first boot, Magento is installed automatically using the server's
primary IP as the site URL. A Let's Encrypt certificate is requested
and installed for that address so HTTPS works out of the box. A
default Magento user is created so the installation can
finish. **Create your own administrator account** by running
`/root/user_create`. **You should remove the default admin** once your
account is in place.


### Custom domain and HTTPS

To point Magento at your own hostname, run **`/root/domain_connect`** as **root** (same as `python3 /root/domain_connect`). The script updates Nginx and Magento base URLs and (re)issues TLS for the chosen host.

**First SSH session:** The same wizard runs **automatically once** when you first log in as root-root's `.bashrc` starts it and records that it has run, so you are prompted immediately. **Later sessions:** Run `/root/domain_connect` yourself whenever you want to switch between a domain and the server IP or change the hostname.

**Let's Encrypt vs self-signed** (see `create_nginx_config` in `/opt/magento_util.py`):

- **Domain name (not an IP literal):** If **DNS for that name resolves to this server's primary IP**, the tool uses **Let's Encrypt** (`certbot` with the nginx plugin). If **DNS does not** resolve to this server yet, a **self-signed** certificate is generated so HTTPS can still be enabled until DNS is correct (you can run `/root/domain_connect` again after DNS propagates).
- **Primary IP as hostname:** When you keep using the IP and the hostname is that IPv4 address, **Let's Encrypt** is requested with Certbot's **IP certificate** flow (`certonly` / short-lived profile).
- If a Let's Encrypt request **fails** while DNS already points at this host (or in the IP flow), Certbot errors are surfaced and the script **does not** silently fall back to self-signed in those paths-fix DNS/rate limits/etc. and re-run.

This server is provisioned with **Magento 2** under `/home/magento/www` (web root: `/home/magento/www/pub`). The stack includes **Nginx**, **PHP 8.3** (FPM), **MySQL** (database `magento`), and **OpenSearch** for catalog search.


## First-boot installation

On first boot, cloud-init runs `/root/magento_install.py` as **root**. That script:

- Uses this machine's **primary IPv4 address on `ens3`** as the hostname for the initial **HTTPS base URL** and for **Nginx** `server_name`.
- Creates a **self-signed TLS certificate** and an **Nginx virtual host** (HTTP redirects to HTTPS).
- Runs **`bin/magento setup:install`** as the `magento` user, deploys static content, then records **admin credentials** and URLs.

You do not need to run `magento_install.py` yourself unless you are re-running or troubleshooting an install (it must be run as root).


## Where to find passwords and URLs

- **`/root/.app_passwords`** - MySQL app password, Magento admin password, admin URL, and related values.
- **`/etc/update-motd.d/99-magento`** - Shown when you log in via SSH: store URL, admin URL (path only; no password), admin user, and a pointer to the password file.


## Magento CLI

As root, the shell alias **`magento`** runs CLI commands as the `magento` user, for example:

```bash
magento cache:flush
Summary
Magento 2 gives you a self-hosted, PHP e-commerce platform where you own your code, themes, and extensions, letting you build multi-store, B2B, and B2C storefronts without relying on a closed SaaS product. Running it on a Bluehost Virtual Dedicated Server (VDS) gives your store dedicated CPU, RAM, and storage, so it stays fast and reliable as you scale. This article walks you through purchasing a Bluehost VDS plan with Magento 2 pre-installed, then logging in, securing your admin account, and connecting your domain with HTTPS. It also covers essential maintenance commands and configuration steps, like updating store emails and flushing cache, so your store runs smoothly from day one.