 ChatGPT,
  Claude,
  Gemini,
  Grok — all four for
Purchase a Virtual Dedicated Server with OpenLiteSpeed & WordPress Installation
OpenLiteSpeed pairs with WordPress to give you fast, reliable websites with less effort on your part. Its native caching plugin works behind the scenes to cut page load times so visitors get pages faster. It also helps your site handle more traffic without slowing down, even during busy periods. On top of that, you use fewer server resources than with standard setups, so your site runs leaner overall.
This article explains how to purchase a Bluehost Virtual Dedicated Server (VDS) hosting plan and set up and manage your OpenLiteSpeed & WordPress Assistant.
Why Choose OpenLiteSpeed and WordPress?
Running OpenLiteSpeed & WordPress on a VDS gives you fast, reliable websites without any extra setup on your end. The built-in caching plugin works behind the scenes to cut page load times so visitors get pages faster. It also helps your site handle more traffic without slowing down, even during busy periods. And since it uses fewer server resources than standard setups, your dedicated hardware goes further and runs leaner overall.
Uses of OpenLiteSpeed and WordPress
This setup can support a wide range of website needs, including:
- Business websites: Build professional pages for your brand or services.
- Blogs and content sites: Make publishing articles and updates simple.
- Online stores: Use WooCommerce to manage products and orders.
- High-traffic websites: Maintain steady performance even with an increase in traffic.
- Content management: Easily update pages, images, and posts anytime.
Overall, it helps you run a website that is fast, stable, and easy to manage.
How to Purchase a Virtual Dedicated Server with OpenLiteSpeed and WordPress Installation
OpenLiteSpeed & WordPress can be installed on a Bluehost Virtual Dedicated Server (VDS). You can choose to have OpenLiteSpeed & WordPress installed during the initial VDS purchase or install it manually at a later time.
- In your browser, go to https://www.bluehost.com.
- Click Hosting in the top menu, then select Virtual Dedicated Server.

You can also go to this link directly: https://www.bluehost.com/vds-hosting.
- On the Virtual Dedicated Server Hosting page, click Explore Plans. You can also scroll down to the hosting plans section.

- Choose a plan from either tab — Standard or High Performance — by clicking Choose Plan.

Pricing is subject to change. Please visit https://www.bluehost.com/vds-hosting for the current introductory/sign-up offer for the Bluehost Virtual Dedicated Server hosting. For the most up-to-date renewal pricing, visit your Bluehost Portal's Renewal Center. - On the next page, configure your VDS hosting to meet your requirements. The configuration options are divided into the following sections:
- Location: Select your data center in this section.

- Hardware: This section shows your pre-selected plan. You can also switch to another Virtual Dedicated Server plan in this section

- Software:
If the selected plan does not meet the app's minimum requirements, the app will be grayed out.
- Under the Application tab, click on OpenLiteSpeed & WordPress.
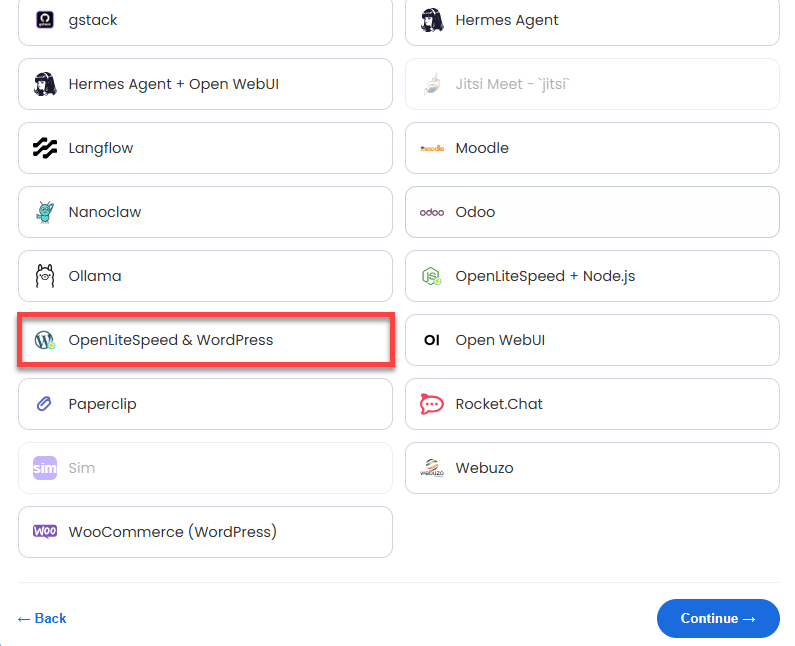 You can install only one application per purchase; the system will automatically select the best operating system for it.
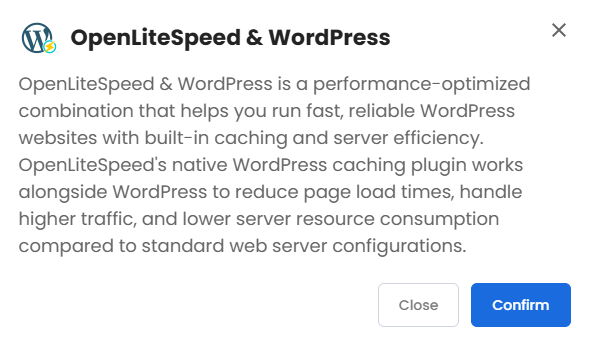
 - In the pop-up, click Confirm.
- Under the Application tab, click on OpenLiteSpeed & WordPress.
- Support & Security: You can add Premium Support - Recurring, which provides priority access to expert assistance and faster response times.

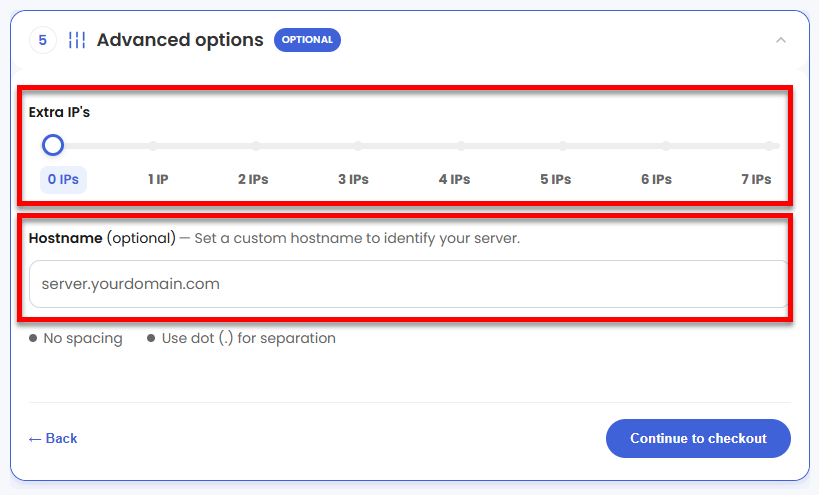
- Advanced Options:
- Extra IP's: You can add IP addresses for an additional fee. Pricing changes based on how many IPs you add.
- Hostname: Assign a custom hostname to identify your server. This is optional.
- Location: Select your data center in this section.
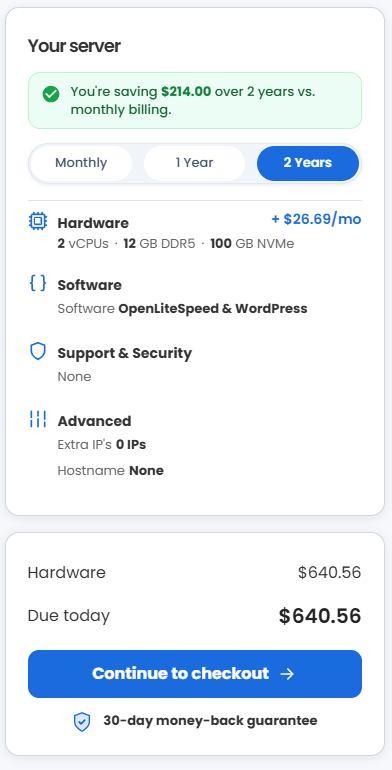
- Select your billing term and review your selected items on the right pane, along with the summarized total cost.
- Click Continue to checkout.
- Do the following on the Checkout page:
If you're new to Bluehost:- Create your Bluehost account by using your email address or by connecting with your Google, Apple, or GitHub account — whichever you prefer!

- Select your preferred payment method: credit card, Google Pay, or PayPal. Enter your billing information.

If you have an account with us, you will see your Bluehost login details when you are logged into your Bluehost Portal. If you are not logged in, please click the Log In link.

- Create your Bluehost account by using your email address or by connecting with your Google, Apple, or GitHub account — whichever you prefer!
- In the Shopping Cart, choose your billing term if you did not choose one on the previous page.
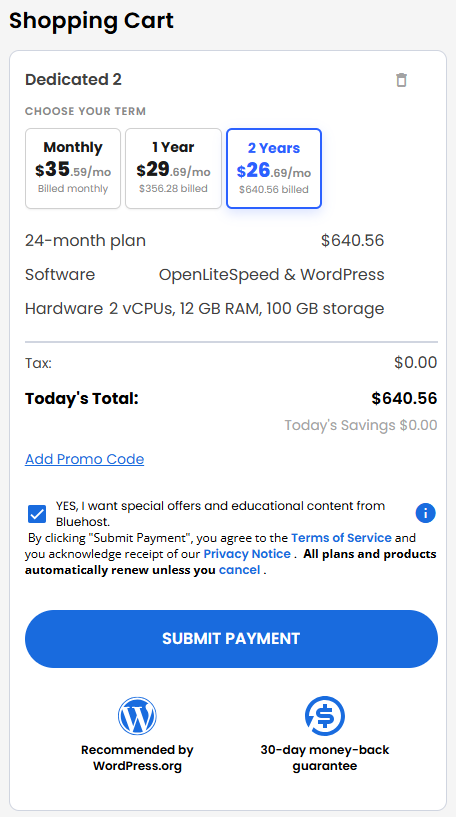
- Add a Promo code if you have one, and then click Submit Payment to complete your purchase.
After completing the purchase, your VDS hosting will begin provisioning. You can access and manage your new VDS hosting in the Hosting tab of your Bluehost Portal.
Getting Started with OpenLiteSpeed and WordPress
- OpenLiteSpeed Web Server: Think of this as the welcoming front desk of your website. It instantly greets your visitors, answering standard requests (like images and design files) in milliseconds while seamlessly guiding more complex requests to PHP.
- LSPHP (LiteSpeed PHP): This is the engine room that processes the core code of your WordPress site. Because it uses special LiteSpeed technology, it can process your posts, pages, and plugins significantly faster than traditional web servers.
- MariaDB Database: This is your digital vault. It securely stores all of your website's vital information—including your written posts, user accounts, and layout settings. For maximum security, this vault is completely hidden from the outside internet and will only communicate internally with your own server.
- UFW Firewall: This is your digital security guard. It monitors all incoming network traffic and blocks unauthorized access, ensuring only legitimate web visitors and your secure administrative connections are allowed through.
- Log in to your Bluehost Portal.
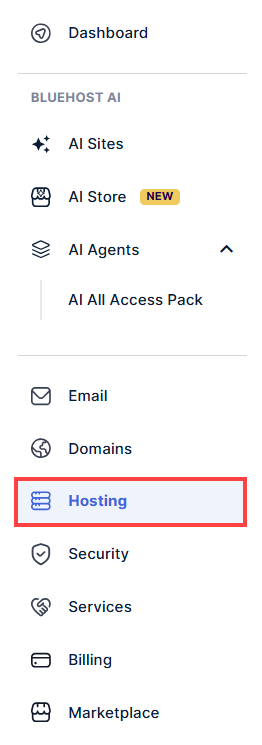
- In the left-hand menu, click Hosting, then select My Plans.
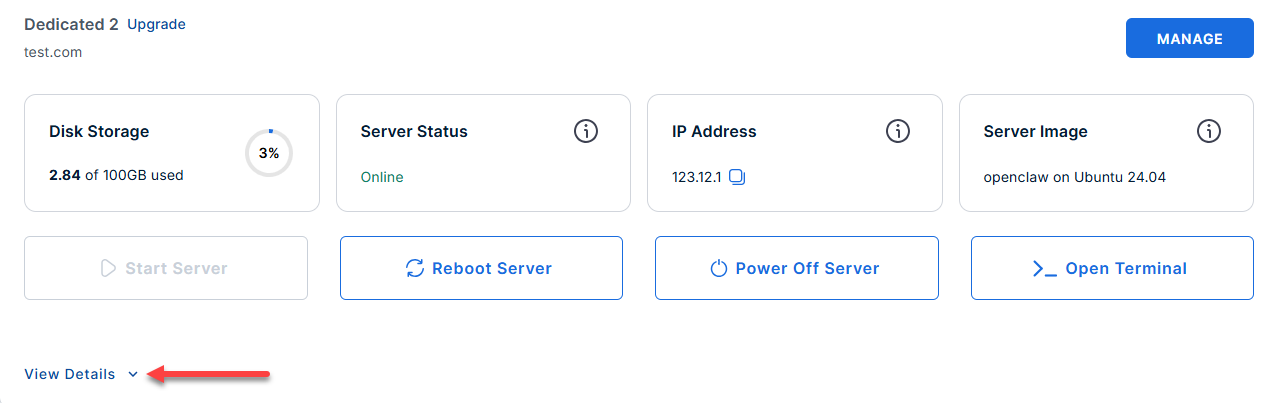
- Locate the server you want to manage, then click View Details in the bottom-left corner to expand the section and access additional server information.
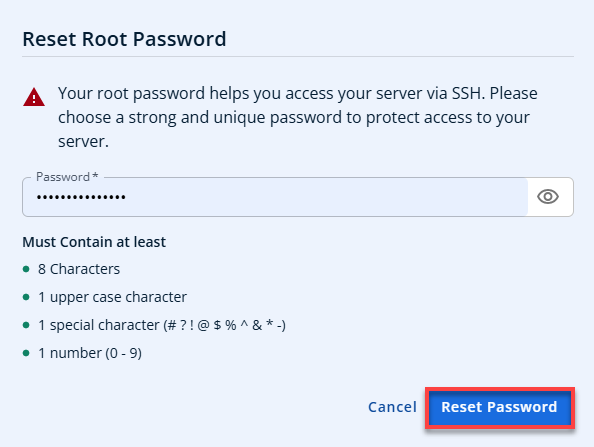
- Click the Reset Password.
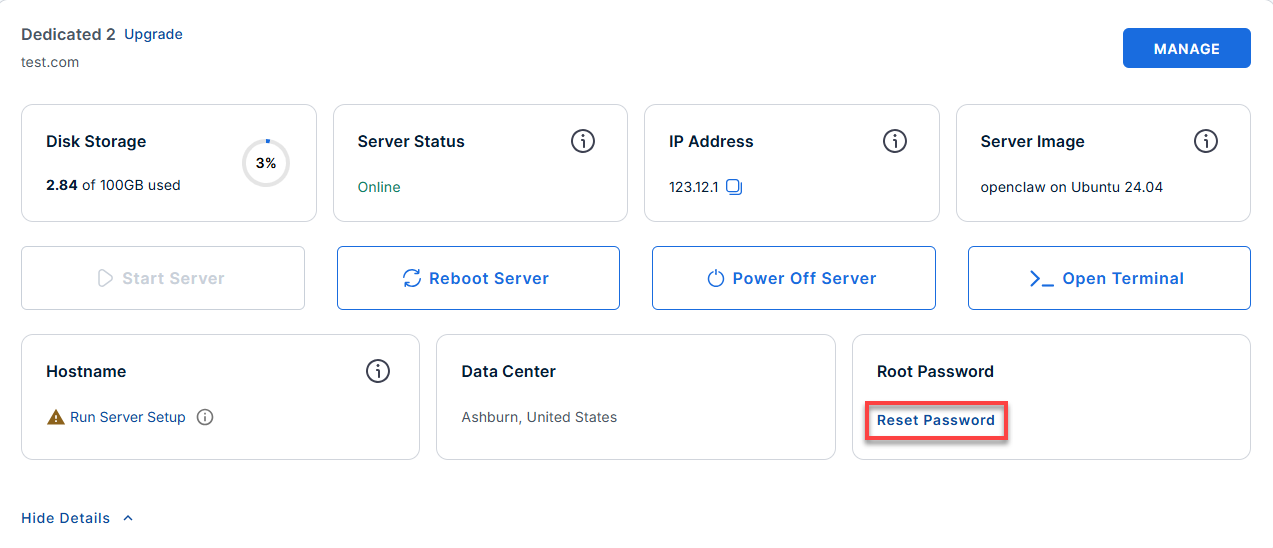
- In the pop-up window, type your new root password, then click Reset Password again to confirm and save the changes.
- Connect to your server via SSH.
Open your computer's terminal (or an SSH client like PuTTY) and run the following command to log into your server as the administrator, using your server's public IP address:Replaceyour_server_ipwith your actual server IP address.
Follow the prompts and enter the new root password you created in the step above.ssh root@your_server_ip - Retrieve your unique passwords.
For your security, our system automatically generates random, strong passwords during the first boot. Run this command to view them:cat /root/.app_passwordsExample Output:
root@server-123456:~# cat /root/.app_passwords OLS_ADMIN_PASS=mJkS7mux3hFQQzHgmMAtest WP_DB_PASS=Sm4MmaJN7udGV88P6AcTTEST MYSQL_ROOT_PASS=HUR6165dNavXZ44Mz1fEVjLC>WP_ADMIN_PASS=r9NkvbTESTmWsnVcMeQjrlK - Open your preferred web browser and navigate to the initialization page:
http:///wp-admin/install.php
Follow the on-screen prompts to configure your actual website:
- Enter your Site Title.
- Create a WordPress Admin Username.
- Create a WordPress Password (make sure to save this; it is completely separate from your server passwords).
- Enter your Email address and finish the setup.
Depending on how quickly your server configures itself, you might see a message stating "Already Installed" when you visit the setup URL. Don't worry—this just means our automated setup script has already taken care of the initial configuration for you!Here is how to log in:
- Click the Log In button on that page to go to your WordPress sign-in screen.
- Enter the administrator credentials you retrieved from your password file in Step 6
ssh root@your_server_ip.Example output:
Welcome to Ubuntu 24.04.4 LTS (GNU/Linux 6.8.0-124-generic x86_64)
********************************************************************************
  WordPress + OpenLiteSpeed Stack
  Firewall: Ports 22, 80, 443, 7080 open

  Access URLs:
    WordPress       : https://12.3.4.456
    WordPress Admin : https://12.3.4.456/wp-admin
    OLS Admin Panel : https://12.3.4.456:7080

  Credentials:
    OLS Admin User  : admin
    OLS Admin Pass  : mJkS7mux3hFQQzHgmMAtest
    DB Name         : wordpress
    DB User         : wpuser
    DB Pass         : Sm4MmaJN7udGV88P6AcTTEST

  SSL             : Let's Encrypt (Trusted)
  Auto Renew      : Every 12 hours via cron

  Key Paths:
    WordPress files : /var/www/html/wordpress
    Credentials     : /root/.app_passwords
    Boot log        : /var/log/onboot.log
    Logs            : /var/log/litespeed/

  Quick Commands:
    systemctl {status|restart} lsws
    systemctl {status|restart} mariadb
    tail -100 /var/log/litespeed/error.log

  For full details: /root/README.md
  To remove this MOTD: rm -f /etc/update-motd.d/99_ols_wp
********************************************************************************
- Once the installation is complete, you can manage and view your site using these URLs:
Replace
<your-server-ip>with your actual server IP address.- To view your live website: http://<your-server-ip>
- To log in and manage WordPress: http://<your-server-ip>/wp-admin
- If you need to change server-level configurations, tweak PHP settings, or manage your cache settings, you can access the server's control panel:
Replace
<your-server-ip>with your actual server IP address.- Navigate to: http://<your-server-ip>:7080
- Log in with the username: admin
- Use the password you found in Step 7 (the value for OLS_ADMIN_PASS).
Quick Troubleshooting Commands
If your website isn't loading, paste these commands into your SSH terminal to check if the background services are running properly:
- Check the Web Server:
systemctl status lsws
- Check the Database:
systemctl status mariadb
- View Error Logs:
tail -100 /var/log/litespeed/error.log
Supporting Information and Sample Output
You can run cat /root/README.md to see more information and useful commands:
Example Output:
root@server-123456:~# cat /root/README.md
# OpenLiteSpeed & WordPress

## Description

OpenLiteSpeed & WordPress is a performance-optimized combination that helps you run fast, reliable WordPress websites with built-in caching and server efficiency. OpenLiteSpeed's native WordPress caching plugin works alongside WordPress to reduce page load times, handle higher traffic, and lower server resource consumption compared to standard web server configurations.

## Image contents

This template installs and configures:

- OpenLiteSpeed web server
- LSPHP (LiteSpeed PHP)
- WordPress (latest) via WP-CLI
- MariaDB local database service
- UFW firewall rules for SSH, HTTP, HTTPS, and OLS Admin
- WordPress at `/var/www/html/wordpress`
- OpenLiteSpeed config at `/usr/local/lsws/`
- Logrotate configuration at `/etc/logrotate.d/openlitespeed-wordpress`
- App password store at `/root/.app_passwords`

## Services

| Service       | Ports | Purpose                        |
| ------------- | ----- | ------------------------------ |
| OpenLiteSpeed | 80    | Web server serving WordPress   |
| OLS WebAdmin  | 7080  | OpenLiteSpeed admin panel      |
| MariaDB       | 3306  | Database backend for WordPress |
| OpenSSH       | 22    | Remote access                  |

Ports are protected using UFW.


## OpenLiteSpeed configuration

The default OpenLiteSpeed configuration is at `/usr/local/lsws/conf/httpd_config.conf`.

Key settings include:

- Virtual host config: `/usr/local/lsws/conf/vhosts/wordpress/conf/vhconf.conf`
- Document root: `/var/www/html/wordpress`
- PHP handler: LSPHP via LiteSpeed SAPI
- Admin panel port: `7080`
- Admin username: `admin`
- Admin password: `OLS_ADMIN_PASS` -- replaced at first boot by the per-instance cloud-init script

The systemd service unit is `lsws` and starts OpenLiteSpeed as the `lsadm` user.

## WordPress configuration

WordPress is installed at `/var/www/html/wordpress`.

Key settings in `/var/www/html/wordpress/wp-config.php`:

- `DB_NAME = wordpress`
- `DB_USER = wpuser`
- `DB_PASSWORD` -- replaced at first boot by the per-instance cloud-init script
- `DB_HOST = localhost`

## First-time access (How to use)

SSH into your server using your cloud provider credentials and the server public IP:

ssh root@<your-server-ip>

Get the generated passwords:

cat /root/.app_passwords

After the VM boots, complete the WordPress setup at:

http://<your-server-ip>/wp-admin/install.php

Fill in:

- Site title
- Admin username
- Password (save this!)
- Email

Access the OpenLiteSpeed admin panel at:

http://<your-server-ip>:7080

Login credentials:

- Username: `admin`
- Password: value from `grep OLS_ADMIN_PASS /root/.app_passwords`

## Useful commands

Check OpenLiteSpeed service:

systemctl status lsws

Check MariaDB service:

systemctl status mariadb

View OpenLiteSpeed error log:

tail -100 /var/log/litespeed/error.log

View systemd logs:

journalctl -u lsws -n 100 --no-pager

Show generated passwords:

cat /root/.app_passwords

Verify listening ports:

ss -tulnp

## Validation tests

The template includes validation checks that verify:

- `lsws` and `mariadb` are enabled and active
- `/usr/local/lsws/conf/httpd_config.conf` exists
- `/var/www/html/wordpress/wp-config.php` exists
- first-boot script exists and is executable
- OpenLiteSpeed is listening on port 80
- `curl -I http://127.0.0.1/wp-admin/install.php` returns HTTP 200
- LSPHP processes are running (`ps aux | grep lsphp`)
- logrotate config passes dry run (`logrotate -d /etc/logrotate.d/openlitespeed-wordpress`)

## Notes

- `OLS_ADMIN_PASS` is the OpenLiteSpeed WebAdmin password. It is different from the WordPress administrator password you create in the setup wizard.
- MariaDB listens on localhost only and is not exposed externally.
- Logs are centralized under `/var/log/litespeed/`, `/var/log/wordpress/`, and `/var/log/mysql/`.

## Manage

- WordPress: http://{server_ip}
- OLS Admin Panel: http://{server_ip}:7080

## Links

- OpenLiteSpeed documentation: https://openlitespeed.org/docs/
- WordPress documentation: https://wordpress.org/documentation/
- WP-CLI documentation: https://wp-cli.org/
Summary
OpenLiteSpeed & WordPress on a Bluehost Virtual Dedicated Server (VDS) give you a fast, secure website with caching, a dedicated database, and firewall protection built right in. You can add this setup when you buy your VDS or install it later, picking your data center, hardware, and any extras like premium support. Once your server boots, you'll grab your auto-generated passwords from a file on the server, then finish setup by entering your site title, admin login, and email in the WordPress install wizard. From there, you run your site through wp-admin, tweak server settings through the OpenLiteSpeed admin panel, and fix issues fast with a few simple SSH commands.