 ChatGPT,
  Claude,
  Gemini,
  Grok — all four for
 Purchase a Virtual Dedicated Server with Portainer Installation
Portainer gives you a clean, web-based control panel for your Virtual Dedicated Server. Instead of typing commands, you click buttons. Deploy apps, monitor performance, and control your containers—Docker, Docker Swarm, or Kubernetes—right from your browser.
This article explains how to purchase a Bluehost Virtual Dedicated Server (VDS) hosting plan and set up and manage your Portainer Assistant.
Why Choose Portainer?
Portainer puts your entire VDS at your fingertips through one simple dashboard. You deploy apps, monitor performance, and manage containers with a few clicks—no command line needed. Save time, avoid costly mistakes, and stay in full control of your server, whether you're running one app or fifty.
Uses of Portainer
Portainer’s functionality is widely applicable in web development and software management:
- Hosting Self-Managed Applications: Easily run independent instances of popular open-source software, blogs, or business tools directly on your own hardware.
- Managing Docker Containers: Start, stop, restart, and pause running containers with a single click, completely bypassing the command-line interface.
- Deploying Applications: Launch custom websites and digital services quickly using built-in app templates or by pulling images straight from Docker Hub.
- Managing Docker Stacks (Docker Compose): Deploy, update, and organize complex, multi-container applications by writing or pasting standard Docker Compose files right into your browser.
- Managing Images, Volumes, and Networks: Clean up unused disk space, download new software versions, and safely isolate your apps' traffic using visual storage and networking tools.
- Access Control & User Management: Safely share infrastructure by creating custom user roles and permissions, giving team members access to specific apps without risking core server settings.
- Production & Small Business Environments: Provide small teams with a stable, secure, and low-overhead control panel to monitor live client apps and business infrastructure efficiently.
Whatever your setup, Portainer adapts to fit the way you already work.
How to Purchase a Virtual Dedicated Server with Portainer Installation
Portainer can be installed on a Bluehost Virtual Dedicated Server (VDS). You can choose to have Portainer installed during the initial VDS purchase or install it manually at a later time.
- In your browser, go to https://www.bluehost.com.
- Click Hosting in the top menu, then select Virtual Dedicated Server.

You can also go to this link directly: https://www.bluehost.com/vds-hosting.
- On the Virtual Dedicated Server Hosting page, click Explore Plans. You can also scroll down to the hosting plans section.

- Choose a plan from either tab — Standard or High Performance — by clicking Choose Plan.

Pricing is subject to change. Please visit https://www.bluehost.com/vds-hosting for the current introductory/sign-up offer for the Bluehost Virtual Dedicated Server hosting. For the most up-to-date renewal pricing, visit your Bluehost Portal's Renewal Center. - On the next page, configure your VDS hosting to meet your requirements. The configuration options are divided into the following sections:
- Location: Select your data center in this section.

- Hardware: This section shows your pre-selected plan. You can also switch to another Virtual Dedicated Server plan in this section

- Software:
If the selected plan does not meet the app's minimum requirements, the app will be grayed out.
- Under the Application tab, click on Portainer.
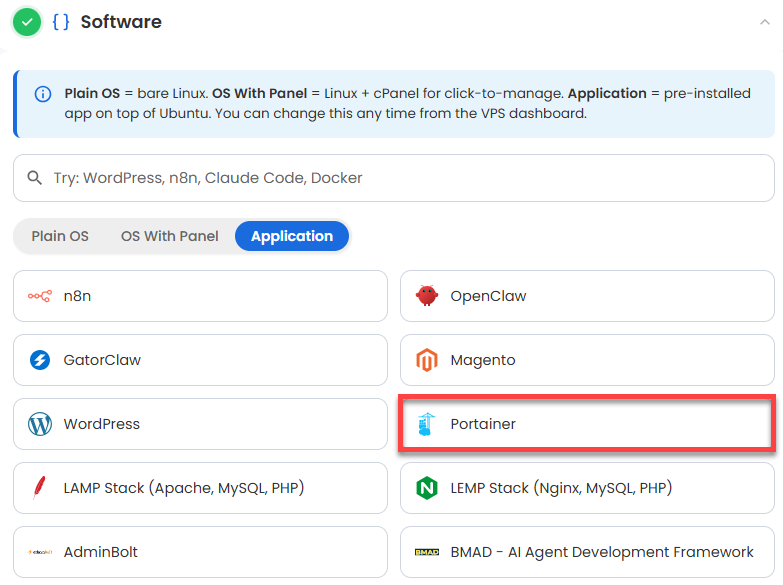
You can install only one application per purchase; the system will automatically select the best operating system for it. - In the pop-up, click Confirm.
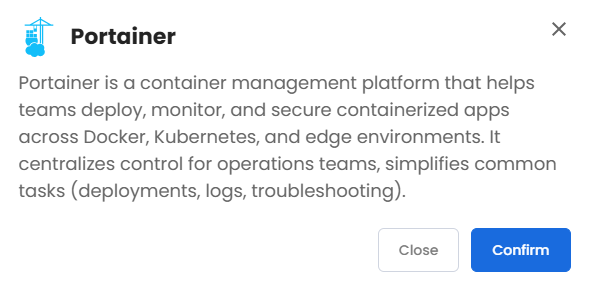
- Under the Application tab, click on Portainer.
- Support & Security: You can add Premium Support - Recurring, which provides priority access to expert assistance and faster response times.

- Advanced Options:
- Extra IP's: You can add IP addresses for an additional fee. Pricing changes based on how many IPs you add.
- Hostname: Assign a custom hostname to identify your server. This is optional.
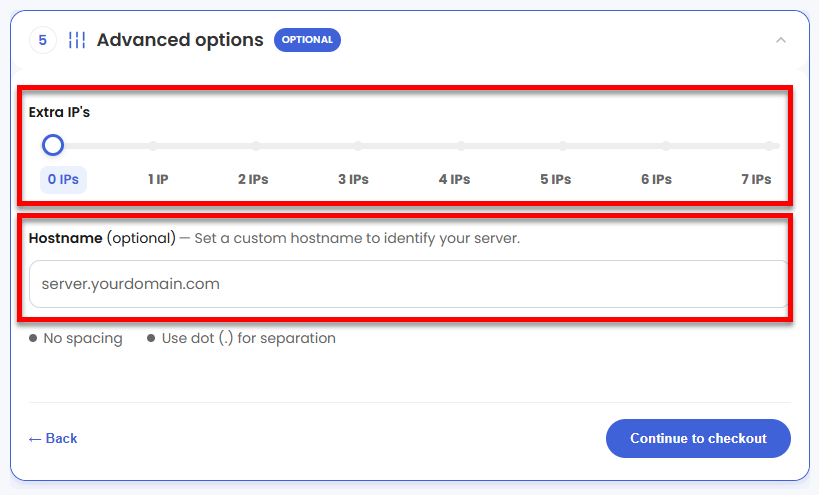
- Location: Select your data center in this section.
- Select your billing term and review your selected items on the right pane, along with the summarized total cost.
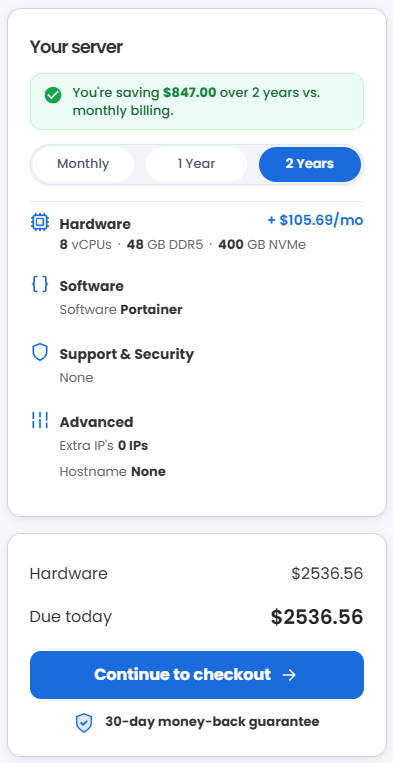
- Click Continue to checkout.
- Do the following on the Checkout page:
If you're new to Bluehost:- Create your Bluehost account by using your email address or by connecting with your Google, Apple, or GitHub account — whichever you prefer!

- Select your preferred payment method: credit card, Google Pay, or PayPal. Enter your billing information.

If you have an account with us, you will see your Bluehost login details when you are logged into your Bluehost Portal. If you are not logged in, please click the Log In link.

- Create your Bluehost account by using your email address or by connecting with your Google, Apple, or GitHub account — whichever you prefer!
- In the Shopping Cart, choose your billing term if you did not choose one on the previous page.
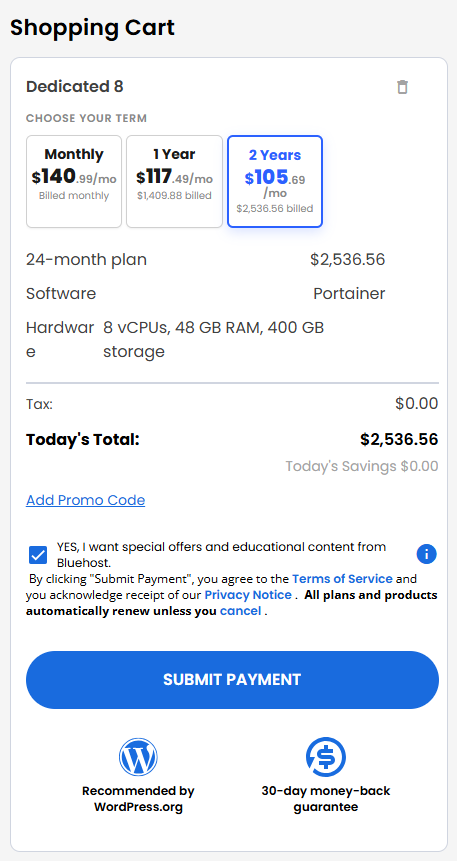
- Add a Promo code if you have one, and then click Submit Payment to complete your purchase.
After completing the purchase, your VDS hosting will begin provisioning. You can access and manage your new VDS hosting in the Hosting tab of your Bluehost Portal.
Summary
Portainer is a web-based panel that lets you manage containers without touching the command line. You'll see why Portainer makes sense for your Virtual Dedicated Server (VDS), plus real use cases like hosting your own apps and managing Docker stacks. Then you'll walk through the purchase step by step—picking your data center, hardware, and adding Portainer under Software, with optional extras like additional IPs or premium support. By the end, you'll complete checkout and have your new VDS ready to access in your Bluehost Portal.