 ChatGPT,
  Claude,
  Gemini,
  Grok — all four for
 Purchase a Virtual Dedicated Server with Rocket.Chat Installation
Rocket.Chat is an open-source communication platform that brings together real-time chat, voice and video meetings, and file sharing in one secure workspace. Designed for businesses and distributed teams, it offers greater control over communication processes while keeping conversations protected and well-organized. This deployment option provides full ownership of your server environment, enabling you to customize settings, enhance security, manage resource efficiently, and scale as your team grows.
This article explains how to purchase a Bluehost Virtual Dedicated Server (VDS) hosting plan with Rocket.Chat installed.
Why Choose Rocket.Chat?
Effective communication is essential for keeping teams productive and aligned. Rocket.Chat provides a centralized platform for real-time collaboration, enabling teams to communicate, share updates, and collaborate seamlessly.
One of Rocket.Chat’s key strengths is its flexibility. As a self-hosted solution, it gives you full control over your data, security configurations, user permissions, and integrations. When deployed on a Virtual Dedicated Server, you also gain the ability to customize your server environment, optimize performance, and scale resources to meet your organization's evolving needs.
Uses of Rocket.Chat
Here are some of the key uses of Rocket.Chat.
- Team Collaboration – Organize discussions through dedicated channels for departments, projects, and teams.
- Customer Support – Manage customer inquiries and live chat interactions from a single platform.
- Remote Team Communication – Keep distributed teams connected with real-time messaging, voice and video calls, and secure file sharing.
- Secure Private Messaging – Enhance privacy and maintain greater control over organizational communications and data.
- Community Management – Create and manage private or public communities with structured discussion spaces.
- Secure File Sharing – Share documents, images, and other resources safely to support collaboration and productivity.
Server Requirements
To keep your team communications lightning-fast, smooth, and reliable, your server infrastructure needs to meet certain hardware standards. Rocket.Chat handles complex database tasks and active, real-time user connections, so having the right amount of "breathing room" prevents system slowdowns.
Make sure your hosting provider meets or exceeds these baseline specs:
| Resource | Minimum Requirements | What It Handles |
|---|---|---|
| CPU | 2 vCPUs | Handles live chat traffic, message processing, and simultaneous user requests. |
| RAM | 6 GB | Powers the core Rocket.Chat application and keeps your MongoDB database running smoothly in memory. |
| Disk Space | 20 GB | Stores the system software, database logs, and shared files or media your team uploads. |
How to Purchase a Virtual Dedicated Server with Rocket.Chat Installation
- In your browser, go to https://www.bluehost.com.
- Click Hosting in the top menu, then select Virtual Dedicated Server.

You can also go to this link directly: https://www.bluehost.com/vds-hosting.
- On the Virtual Dedicated Server Hosting page, click Explore Plans. You can also scroll down to the hosting plans section.

- Choose a plan from either tab — Standard or High Performance — by clicking Choose Plan.
 Pricing is subject to change. Please visit https://www.bluehost.com/vds-hosting for the current introductory/sign-up offer for the Bluehost Virtual Dedicated Server hosting. For the most up-to-date renewal pricing, visit your Bluehost Portal's Renewal Center.
 - On the next page, configure your VDS hosting to meet your requirements. The configuration options are divided into the following sections:
- Location: Select your data center in this section.

- Hardware: This section shows your pre-selected plan. You can also switch to another Virtual Dedicated Server plan in this section.

- Software:
If the selected plan does not meet the app's minimum requirements, the app will be grayed out.
- Under the Application tab, click on Rocket.Chat.
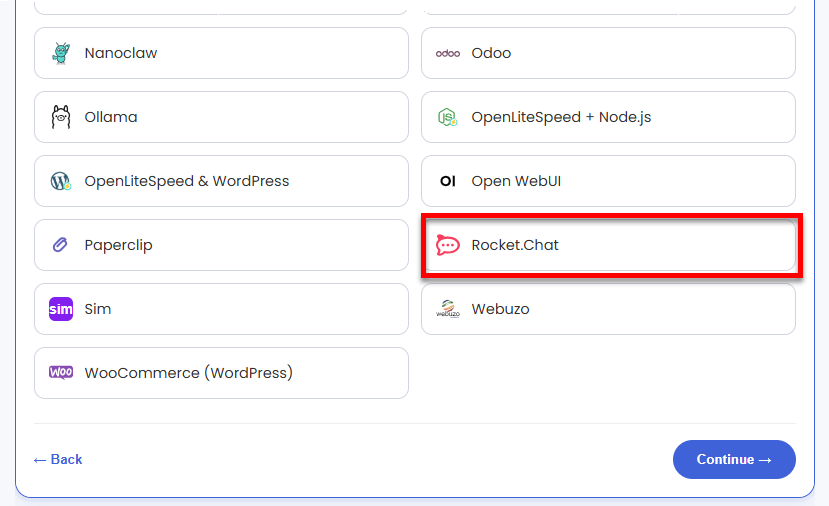 You can install only one application per purchase; the system will automatically select the best operating system for it.
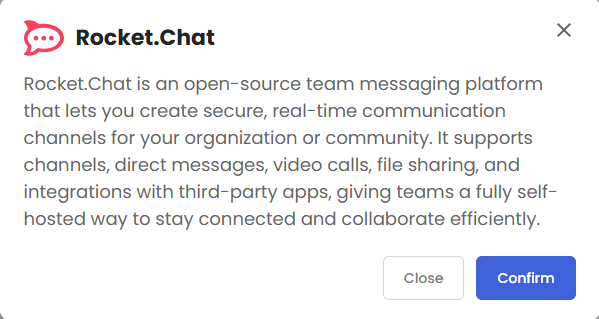
 - In the pop-up, click Confirm.
- Under the Application tab, click on Rocket.Chat.
- Support & Security: You can add Premium Support - Recurring, which provides priority access to expert assistance and faster response times.

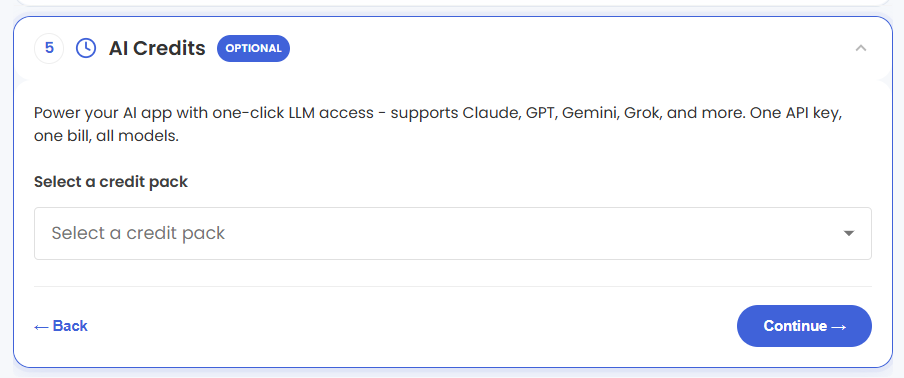
- AI Credits: Select a credit pack to access multiple AI models with one API key and consolidated billing.
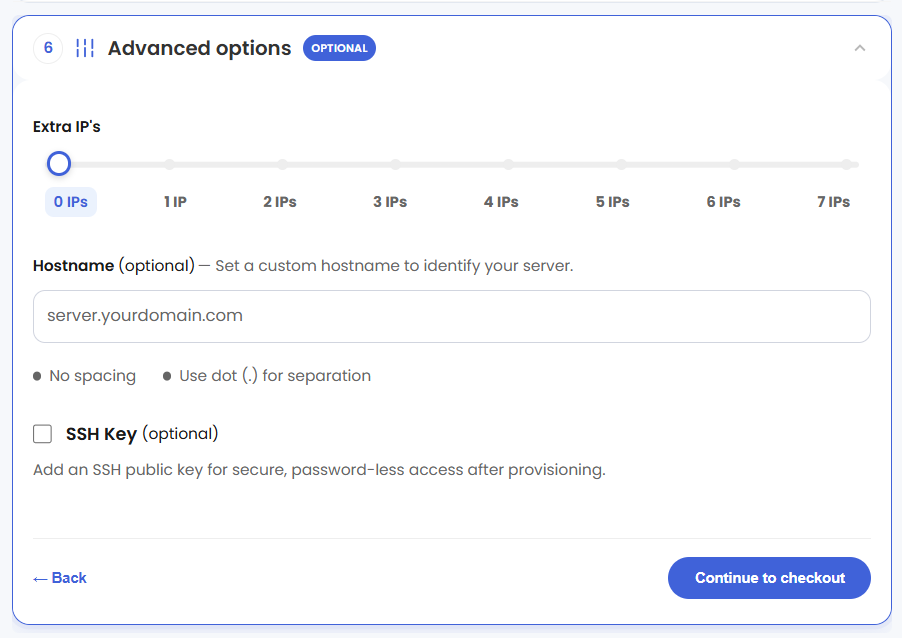
- Advanced Options:
- Extra IPs: You can add IP addresses for an additional fee. Pricing changes based on how many IPs you add.
- Hostname (Optional): Assign a custom hostname to identify your server.
- SSH Key (Optional): Add an SSH public key to enable secure, passwordless access after provisioning.
- Location: Select your data center in this section.
- Select your billing term and review your selected items on the right pane, along with the summarized total cost.
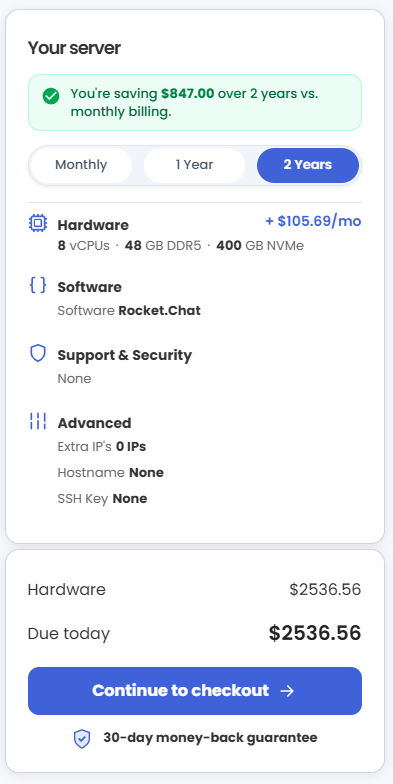
*Please review the current pricing plans available on Bluehost.com.
- Click Continue to checkout.
- Do the following on the Checkout page:
If you're new to Bluehost:- Create your Bluehost account by using your email address or by connecting with your Google, Apple, or GitHub account — whichever you prefer!

- Select your preferred payment method: credit card, Google Pay, or PayPal. Enter your billing information.

If you have an account with us, you will see your Bluehost login details when you are logged into your Bluehost Portal. If you are not logged in, please click the Log In link.

- Create your Bluehost account by using your email address or by connecting with your Google, Apple, or GitHub account — whichever you prefer!
- In the Shopping Cart, choose your billing term if you did not choose one on the previous page.
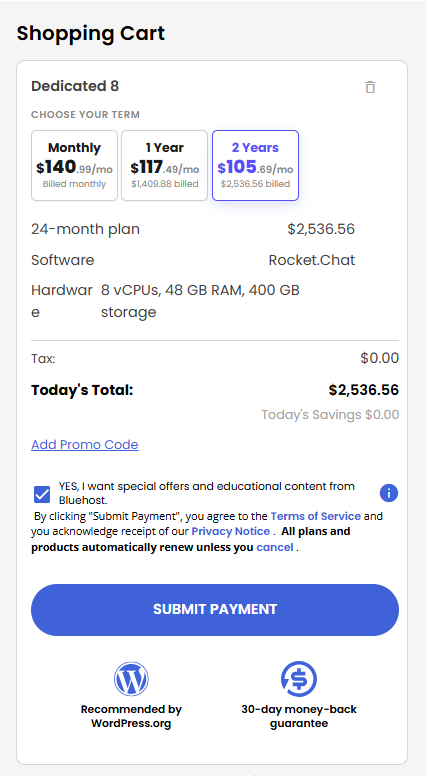
- Add a Promo code if you have one and then click Submit Payment to complete your purchase.
After completing the purchase, your VDS hosting will begin provisioning. You can access and manage your new VDS hosting in the Hosting tab of your Bluehost Portal.
How to Get Started with Your Rocket.Chat Server
- Rocket.Chat (Version 8.3.2): This is the application, workspace, and chat interface you access through your browser. It runs inside an isolated environment called a Docker container.
- MongoDB (Version 8.0): This is the database backend. It lives in its own secure container and stores all your messages, user profiles, channels, and system settings.
- Nginx: This acts as a security guard and traffic controller (a reverse proxy). Instead of exposing the chat app directly to the wild internet, Nginx sits at the front door (ports 80 and 443), handles the secure HTTPS encryption, and passes the traffic safely to Rocket.Chat internally.
- UFW (Firewall): It helps secure the server by preventing unauthorized access to the database and backend services. Only web traffic and your secure terminal access (SSH) are allowed in.
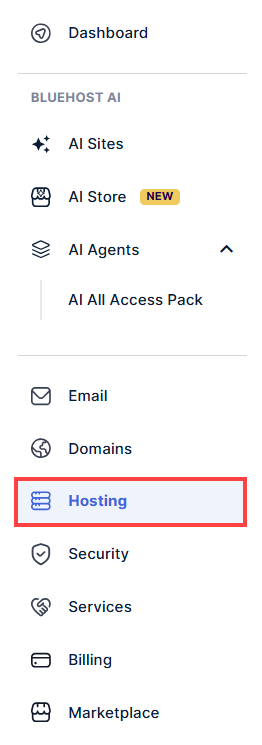
- Log in to your Bluehost Portal.
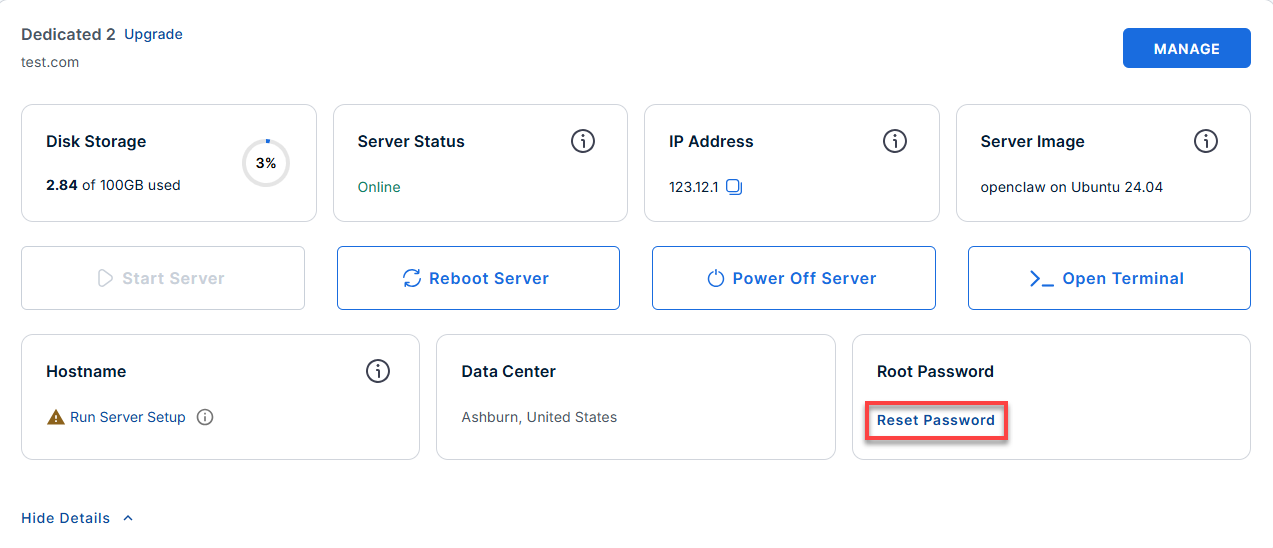
- In the left-hand menu, click Hosting, then select My Plans.
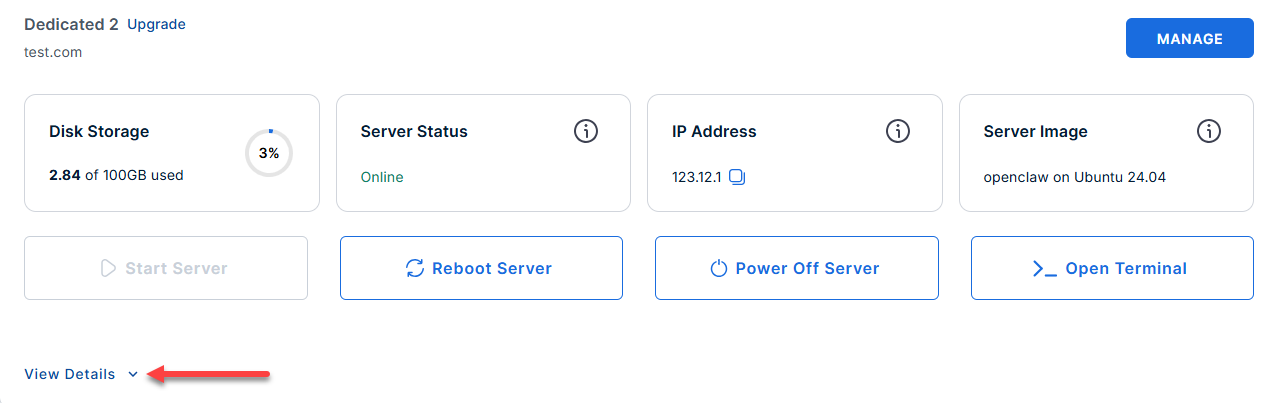
- Locate the server you want to manage, then click View Details in the bottom-left corner to expand the section and access additional server information.
- Click the Reset Password.
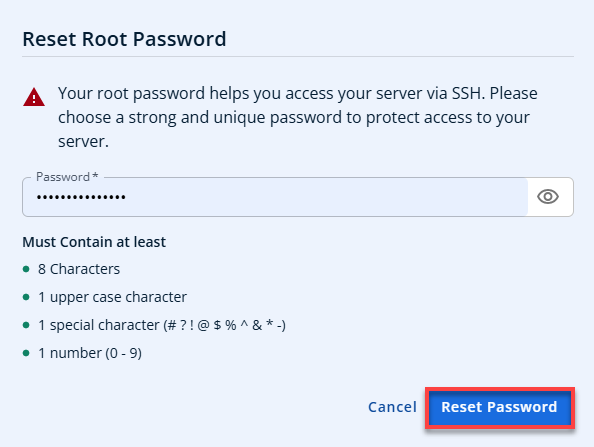
- In the pop-up window, type your new root password, then click Reset Password again to confirm and save the changes.
- Connect to your server via SSH.
Open your computer's terminal (or an SSH client like PuTTY) and run the following command to log into your server as the administrator, using your server's public IP address:ssh root@your_server_ipFollow the prompts and enter the new root password you created earlier and replaceyour_server_ipwith your server's actual IP address. - Now that you are connected to the server, run the following command to view your pre-configured site URL:
cat /root/.app_passwords<
Example result:
root@server-123456:~# cat /root/.app_passwords SITE_URL=https://12.3.4.567 - Copy the site URL displayed on your screen and paste it into your preferred web browser. This will automatically route you to the Rocket.Chat landing page to begin your configuration.
Activating Your New Workspace
- Create Your Admin Account
First, create your primary administrator profile. Enter your name, choose a username, and pick a strong password. This account will have full master control over your entire chat platform.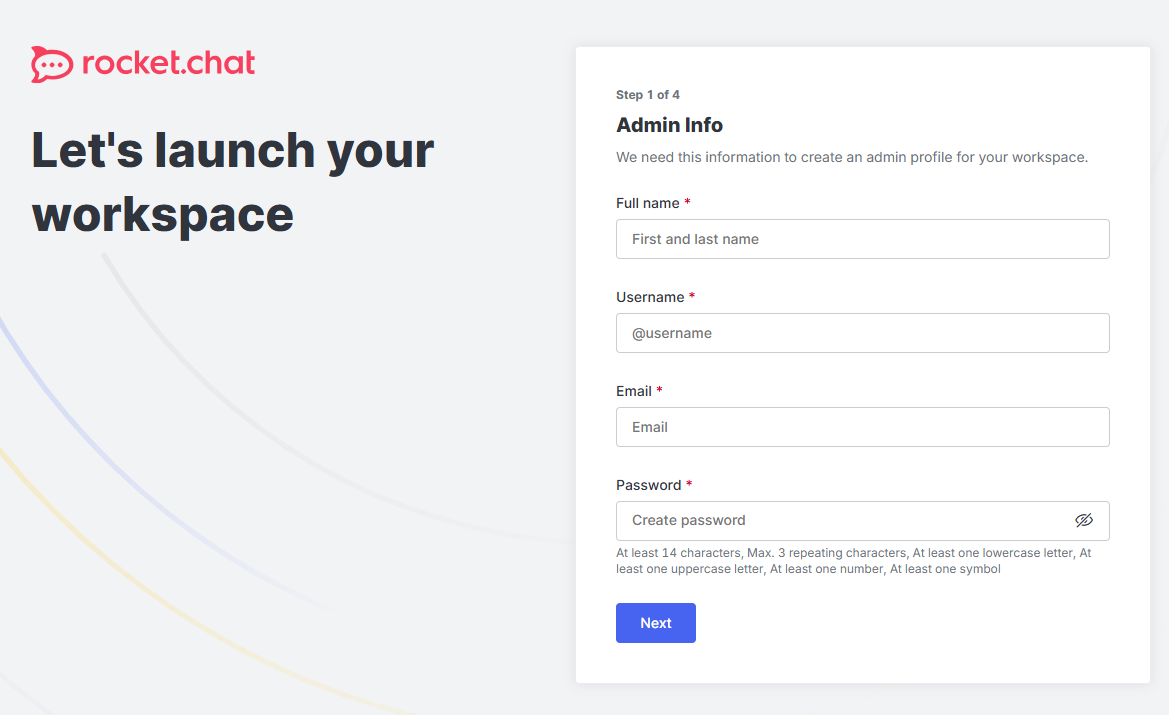
- Enter Your Organization Details
Tell the system a little bit about your team. You will be asked to select your organization type, your company name, and your expected team size so Rocket.Chat can properly optimize your environment.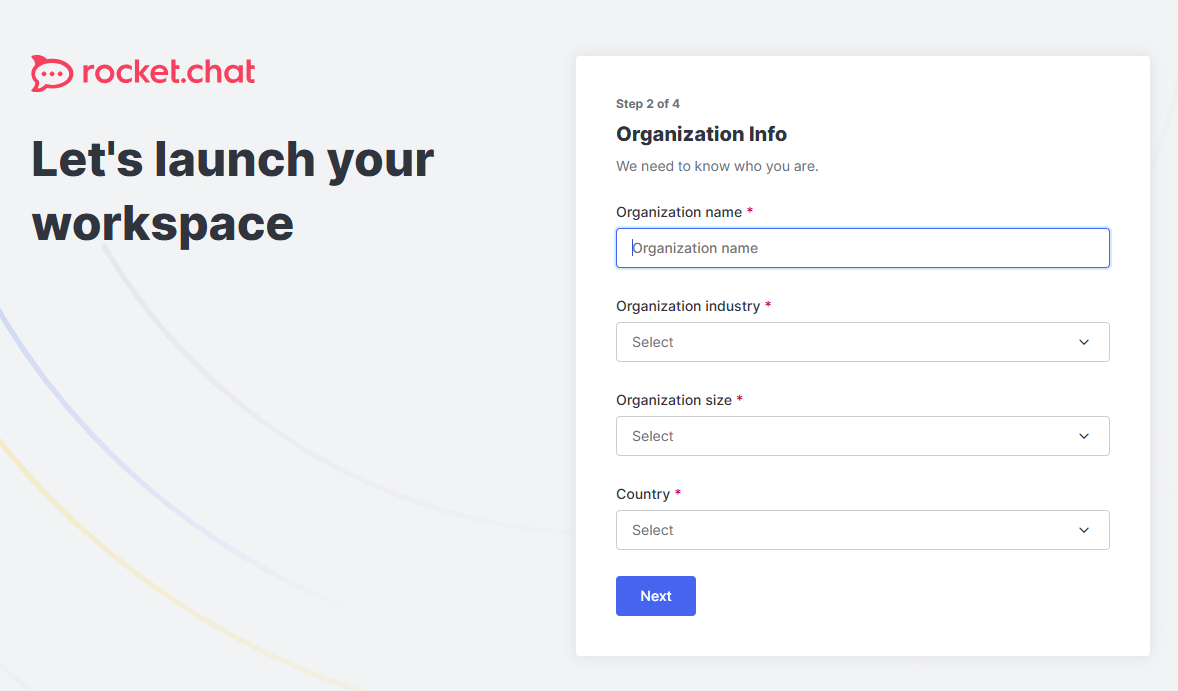
- Register Your Workspace
To unlock important features like push notifications for mobile devices and the app marketplace, you will be prompted to register your server. Simply input your preferred Admin Email Address to link this server to the Rocket.Chat network.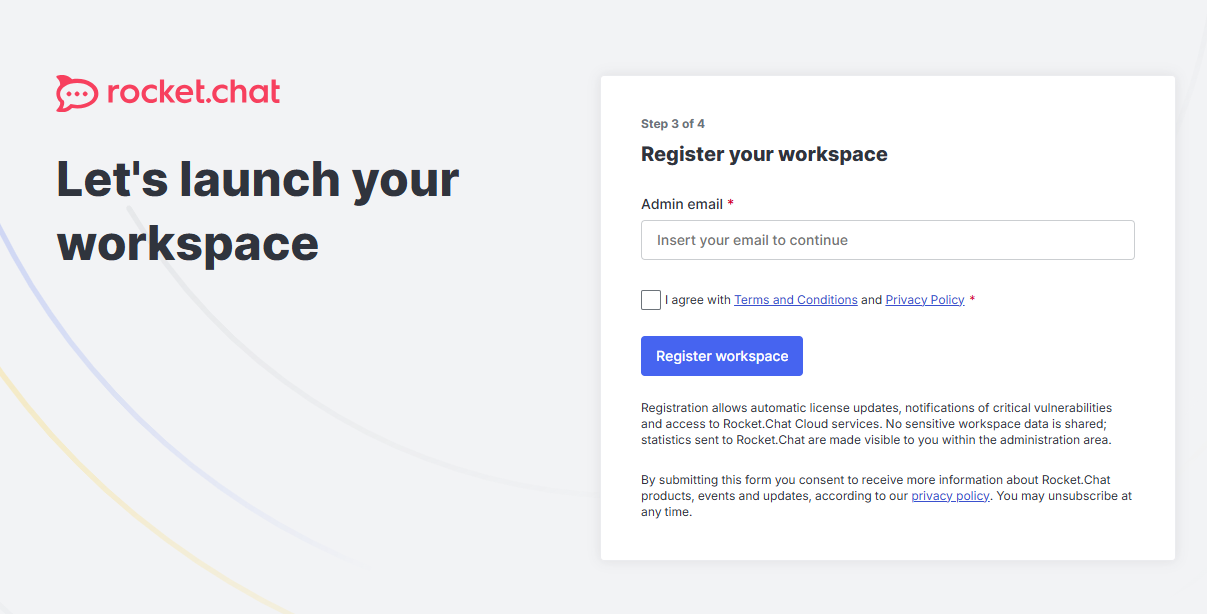
- Confirm and Verify Your Registration
Check your inbox! Rocket.Chat will automatically send a security confirmation email to the address you just provided.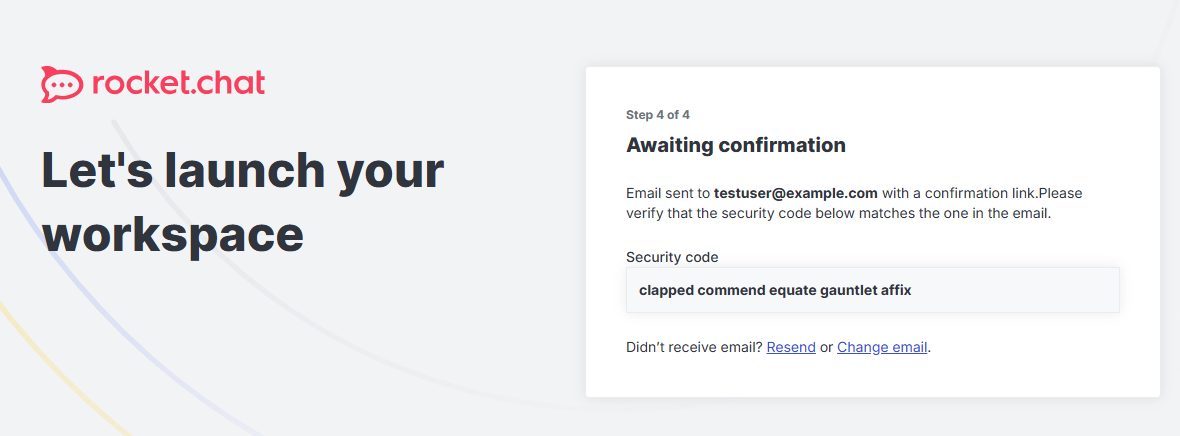
- Open the email and click the Verify Registration button.
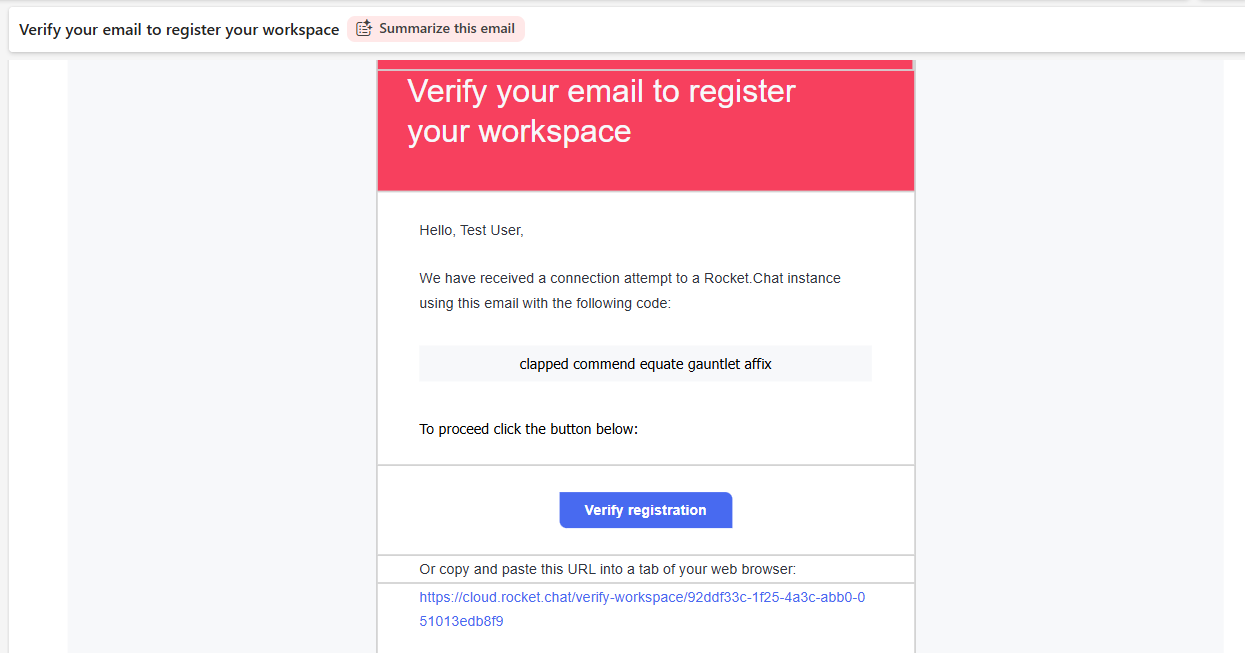
- A new browser tab will open, confirming your account is verified.
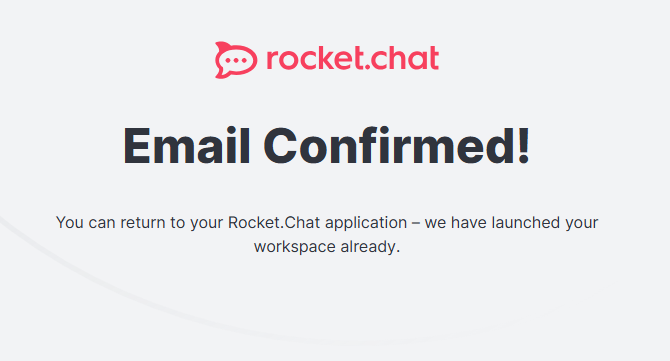
- You will also receive a second email confirming that you have been successfully placed on the Rocket.Chat Starter Plan.
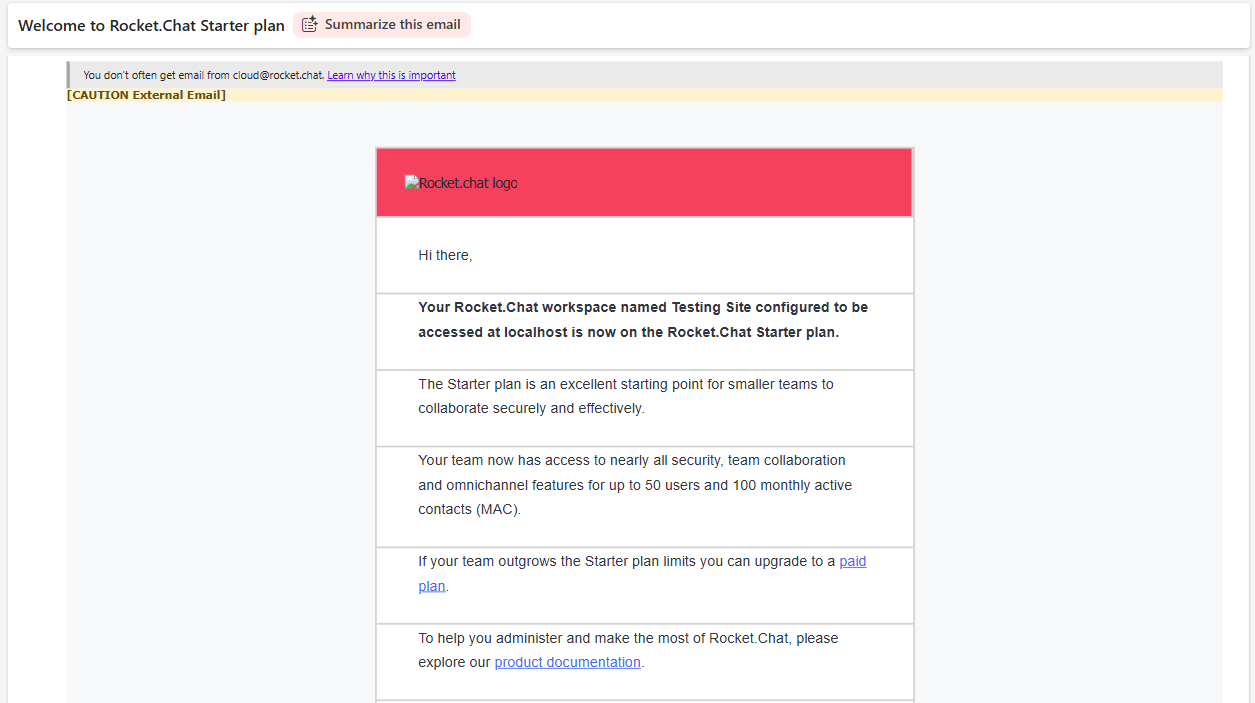
- Open the email and click the Verify Registration button.
- Access Your Dashboard
Switch back to your original setup wizard page. You will be securely logged right into your brand-new Rocket.Chat administration dashboard!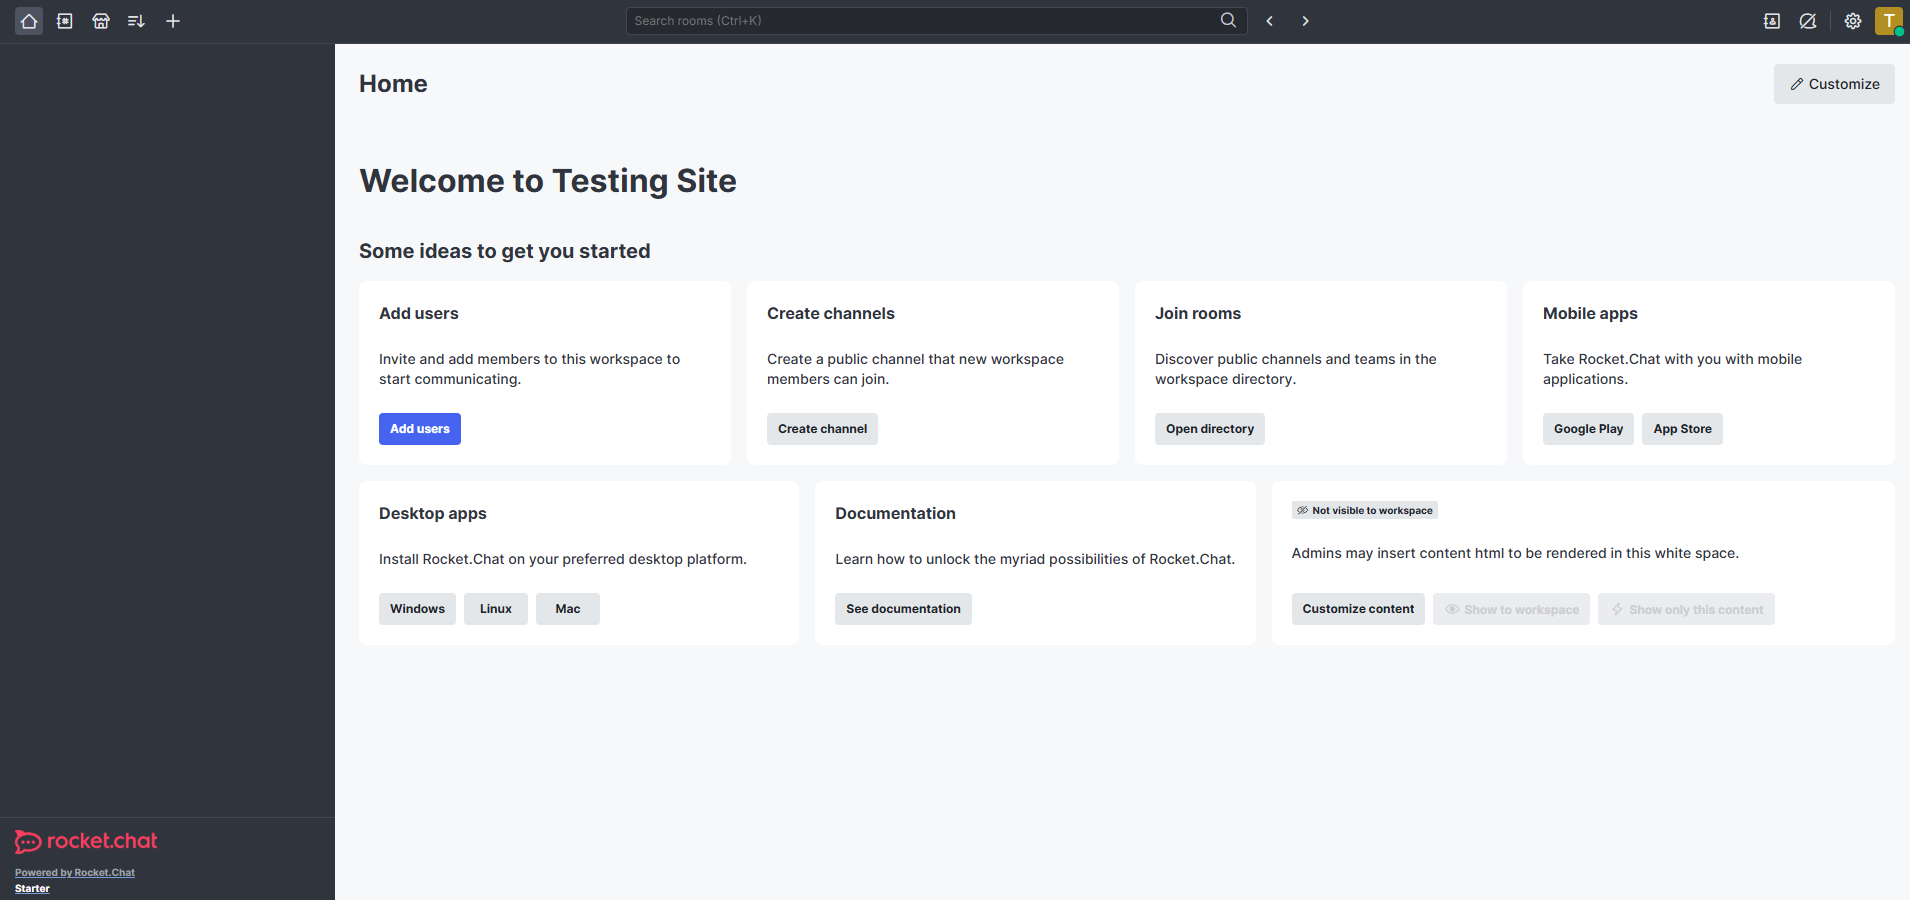
Supporting Information and Sample Output
You can run cat /root/README.md to see more information and useful commands:
Example Output:
root@server-123456:~# cat /root/README.md
# Rocket.Chat

## Description

Rocket.Chat is an open-source team messaging platform that lets you create secure, real-time communication channels for your organization or community.
It supports channels, direct messages, video calls, file sharing, and integrations with third-party apps, giving teams a fully self-hosted way to stay connected and collaborate efficiently.

---

## Image contents

This image installs and configures:
- Rocket.Chat 8.3.2 running via Docker
- MongoDB 8.0 running via Docker with replica set rs01
- Docker and Docker Compose for container management
- Nginx as a reverse proxy with HTTP and HTTPS support
- UFW firewall with ports 22, 80, and 443 open
- Log rotation at /etc/logrotate.d/rocketchat
- This README at /root/README.md

---

## Services

| Service     | Ports   | Purpose                                        |
|-------------|---------|------------------------------------------------|
| Rocket.Chat | 3000    | Rocket.Chat application (internal only)        |
| Nginx       | 80, 443 | TLS termination and reverse proxy to port 3000 |
| MongoDB     | 27017   | Database backend (container only)              |
| OpenSSH     | 22      | Remote access                                  |

Ports are protected using UFW. MongoDB port 27017 is not exposed externally.

---

## How-to-use

### 1. Access Rocket.Chat

Once the server has booted, open your browser and navigate to:

```
https://
```

Accept the self-signed certificate warning on first access, then complete
the setup wizard to create your admin account.

### 2. Get your credentials

The site URL is stored in /root/.app_passwords:

```bash
cat /root/.app_passwords
```

### 3. SSL / HTTPS certificate behavior

On first boot, a TLS certificate is automatically provisioned:

- A Let's Encrypt certificate is requested for the server's public IP.
- If Let's Encrypt is unavailable, a self-signed certificate valid for
  365 days is generated automatically as a fallback.

Nginx terminates TLS on port 443 and proxies traffic to Rocket.Chat on
port 3000. The X-Forwarded-Proto: https header signals HTTPS to Rocket.Chat.

To manually request a Let's Encrypt certificate after deployment:

```bash
/opt/certbot/bin/certbot certonly --webroot --webroot-path /var/www/html \
  -m [email protected] --agree-tos --non-interactive --ip-address

nginx -t && systemctl reload nginx
```

### 4. Useful commands

```bash
docker ps                              # Check container status
docker logs rocketchat --tail 50       # Recent Rocket.Chat logs
docker logs mongo --tail 20            # Recent MongoDB logs
docker compose -f /opt/rocketchat/docker-compose.yml restart   # Restart all
systemctl status nginx                 # Nginx status
systemctl status ssh                   # SSH status
```

### 5. MongoDB

```bash
docker exec mongo mongosh                             # Open MongoDB shell
docker exec mongo mongosh --eval "rs.status()"        # Check replica set health
```

---

## Minimum Resources

| Resource | Minimum |
|----------|---------|
| CPU      | 2 vCPUs |
| RAM      | 6 GB    |
| Disk     | 20 GB   |

---

## Security hardening

| Hardening    | Detail                                             |
|--------------|----------------------------------------------------|
| UFW firewall | Only ports 22, 80, 443 open. Default deny incoming |
| SSH          | Port 22 rate limited - brute force protection      |
| MongoDB      | Not exposed externally - container only            |
| Credentials  | Stored in /root/.app_passwords (mode 0600)         |

---

## Configuration files reference

| File                                           | Purpose                         |
|------------------------------------------------|---------------------------------|
| /opt/rocketchat/docker-compose.yml             | Docker Compose configuration    |
| /etc/systemd/system/rocketchat.service         | Rocket.Chat systemd service     |
| /etc/nginx/sites-available/rocketchat          | Nginx site config               |
| /var/lib/cloud/scripts/per-instance/001_onboot | First-boot configuration script |
| /root/.app_passwords                           | Site URL (generated at boot)    |
| /etc/logrotate.d/rocketchat                    | Log rotation config             |

---

## Links

- Manage: [https://{server_ip}](https://{server_ip})
- Documentation: [https://docs.rocket.chat](https://docs.rocket.chat)
- Ubuntu deployment guide: [https://docs.rocket.chat/docs/deploy-with-ubuntu](https://docs.rocket.chat/docs/deploy-with-ubuntu)
- Rocket.Chat releases: [https://github.com/RocketChat/Rocket.Chat/releases](https://github.com/RocketChat/Rocket.Chat/releases)
Summary
Learn how to purchase a Bluehost Virtual Dedicated Server (VDS) with Rocket.Chat pre-installed, providing a secure and customizable self-hosted communication platform for teams and businesses. This article covers Rocket.Chat’s key features, server requirements, and step-by-step instructions for selecting a VDS plan, completing the purchase, and accessing the server. The guide also walks users through initial Rocket.Chat setup, workspace activation, and server management, including security, SSL, and essential administration commands.