 ChatGPT,
  Claude,
  Gemini,
  Grok — all four for
 Purchase a Self-Managed VPS with Jitsi Meet Installation
Jitsi Meet is a powerful, open-source video conferencing platform that enables secure, high-quality meetings for teams, businesses, and communities. With a Self-Managed VPS from Bluehost, you can deploy Jitsi quickly and easily, giving you full control over your conferencing environment and privacy.
Why Choose Jitsi Meet on a Self-Managed VPS?
- Full Control: Manage your own conferencing server, customize settings, and ensure privacy for your users.
- Scalable Solution: Easily upgrade resources as your team or business grows.
- Open Source: Benefit from a robust, community-driven platform with no licensing fees.
- Secure Meetings: Host encrypted video calls and protect sensitive information.
- Easy Integration: Connect Jitsi with other tools and platforms to enhance collaboration.
- Cost Effective: Avoid recurring SaaS fees by running your own conferencing solution.
What Can You Do With Jitsi Meet?
- Host Video Meetings: Run secure, high-quality video conferences for your team or clients.
- Webinars and Events: Organize virtual events, workshops, and webinars with ease.
- Screen Sharing: Share your screen for presentations, demos, or collaborative work.
- Chat and Collaboration: Use built-in chat and collaboration tools during meetings.
- Custom Integrations: Connect Jitsi to your business tools, websites, or apps.
- Manage Users: Control access, permissions, and meeting settings for your organization.
- Record Sessions: Enable recording for important meetings and training sessions.
System Requirements
Before deploying, ensure your server meets the following hardware requirements to ensure smooth video and audio performance:
- Do not purchase a server that only meets the minimum requirements. The minimum specifications represent the software's bare survival threshold and do not account for operating system overhead or production workloads. Running with only 4 CPU cores, 4 GB RAM, 20 GB of disk space, and a 100 Mbps network connection can result in performance slowdowns, system freezes, or unexpected crashes during periods of high usage.
- For a stable deployment, we recommend using at least 4 dedicated CPU cores, 8 GB RAM, a 20 GB SSD, and a 1 Gbps network connection. Consider allocating additional disk space if you plan to store recordings, logs, or other application data.
| Resources | Minimum Requirements | Recommended |
|---|---|---|
| CPU | 4 CPU cores | 4 dedicated CPU cores |
| Memory (RAM) | 4 GB | 8 GB |
| Disk | 20 GB | 20 GB SSD |
| Network | 100 Mbps | 1 Gbps |
How to Purchase a Self-Managed VPS with Jitsi Meet Installation

New to VPS or not sure where to start? No worries! At the top of the Self-Managed VPS purchase page, you’ll see the Pre-configured Setup section. This handy feature is perfect if you’re feeling a bit unsure—just pick the type of project you want, like WordPress Site, AI Agent/Claude Code, Dev/Staging, or eCommerce Store. We’ll take care of the rest by automatically filling in the best plan, operating system, and template for you.
- Super simple for beginners or anyone who just wants a quick setup
- Instantly get the recommended settings for your project
- Skip the guesswork and save time
- You can still customize things later if you want
- In your browser, go to https://www.bluehost.com/vps-hosting.
- Click the Choose Plan button under your preferred VPS hosting plan.
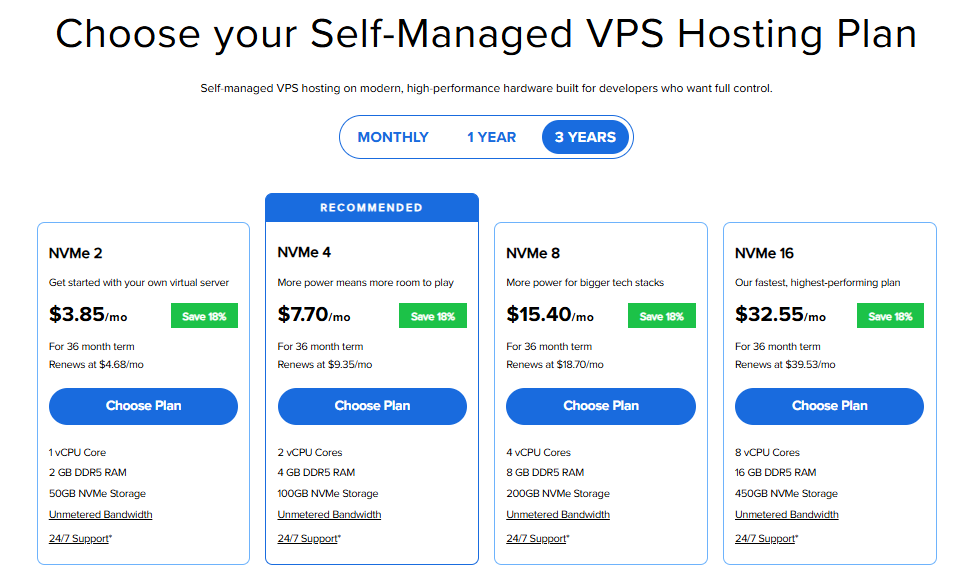
Important: Pricing is subject to change—please visit https://www.bluehost.com/vps-hosting for the current introductory/sign-up offer for Bluehost VPS Hosting. For the most up-to-date renewal pricing, visit your Bluehost Portal Renewal Center.
- Select your preferred Data Center location.

- On the Cart page, you can configure your server to fit your needs in the following section:
- Hardware:
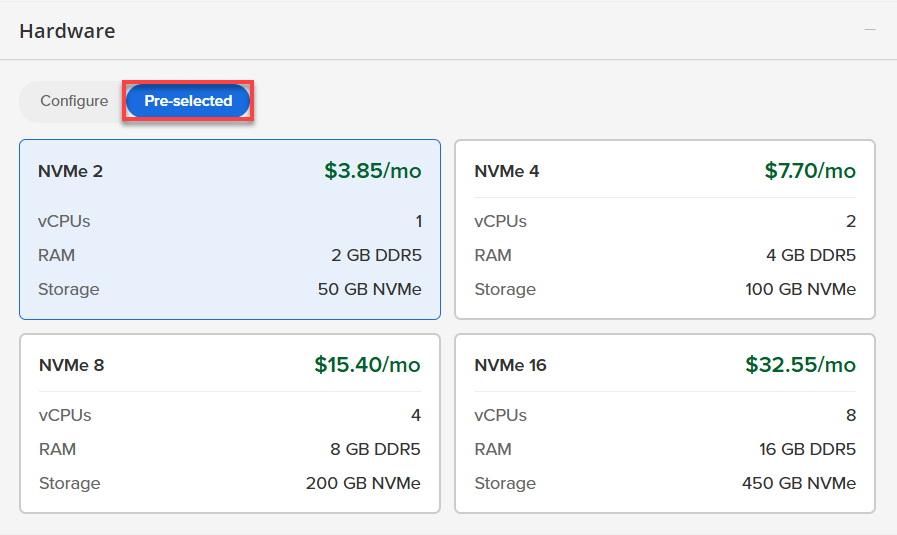
- Pre-selected:
You can select a different Self-Managed VPS plan in this section.
- Configure:
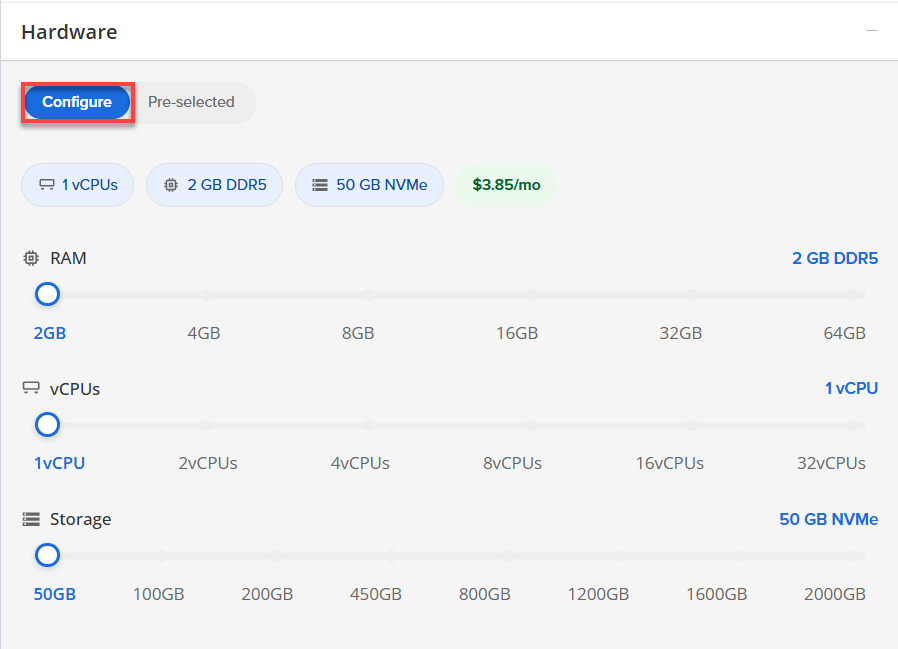
Click Configure to customize your package.
Note that your changes help customize your plan, and the overall cost will adjust accordingly to fit your needs.
- Pre-selected:
- Software:
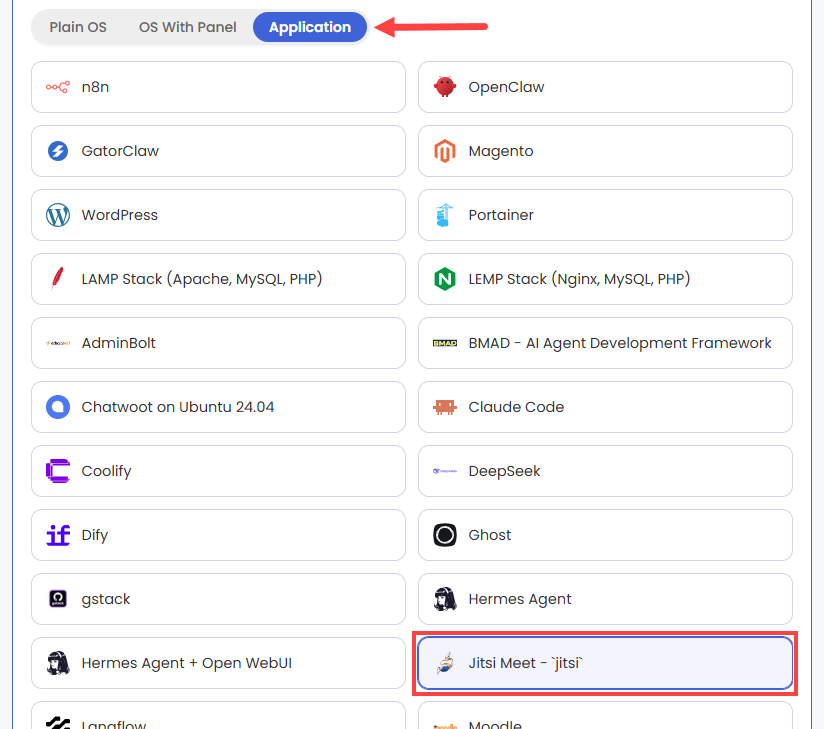
If the selected plan does not meet the app's minimum requirements, the app will be grayed out.
- Click the Application tab.
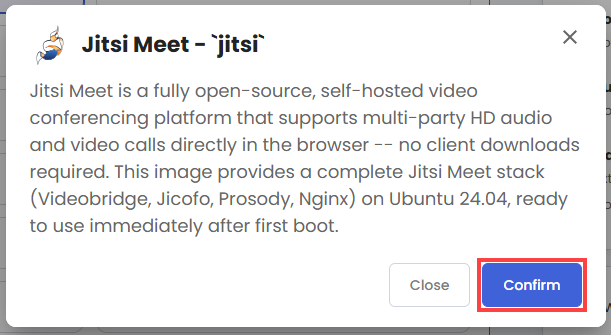
- Select Jitsi Meet - `jitsi` .
- In the pop-up, click Confirm.
- Hardware:
- Add-Ons: You can add Premium Support here, which gives you priority access to expert assistance and faster response times.

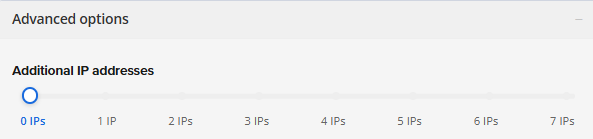
- In the Advanced options:
- Extra IP's: You can add extra IP addresses for an additional fee.
Pricing changes based on how many IPs you add. - Hostname: Assign a custom hostname to easily identify your server. This is optional.
- Extra IP's: You can add extra IP addresses for an additional fee.
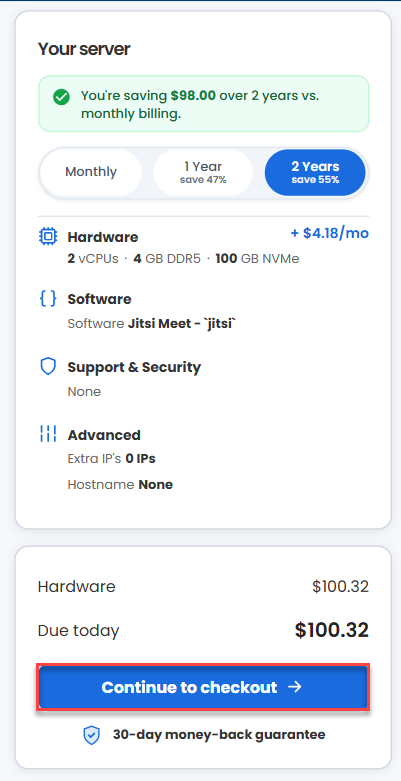
- Next, select your preferred billing term and review your Order Summary, then click Continue to Checkout.
- Do the following on the Checkout page:
If you're new with Bluehost:
- Create your Bluehost account by using your email address or by connecting with your Google, Apple, or GitHub account — whichever you prefer!

- Select your preferred payment method: credit card, Google Pay, or PayPal. Enter your billing information.

If you have an account with us, you will see your Bluehost login details when you are logged into your Bluehost Portal. If you are not logged in, please click the Log In link.

- Create your Bluehost account by using your email address or by connecting with your Google, Apple, or GitHub account — whichever you prefer!
- In the Shopping Cart section, you can still adjust your billing term if needed.
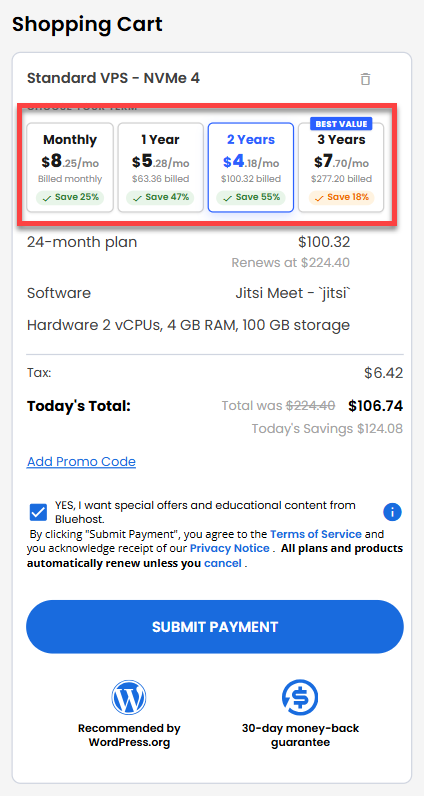
- Review the items in your cart, add a Promo Code if you have one, and then click Submit Payment to complete the purchase.
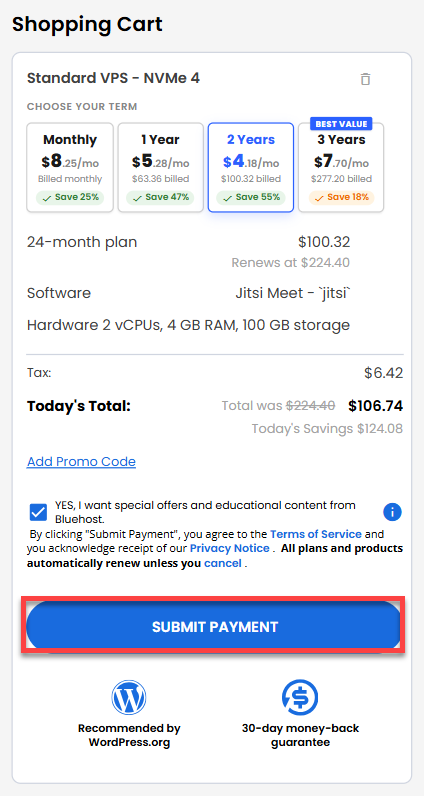
After completing the purchase, your VPS hosting will begin provisioning. You can access and manage your new VPS hosting in the Hosting tab of your Bluehost Portal.
How to Deploy and Manage Your Own Jitsi Meet Server on Ubuntu 24.04
Jitsi Meet is a powerful, open-source video conferencing solution that allows you to host private, secure meetings directly in your browser. This guide walks you through the process of deploying and managing a pre-configured Jitsi Meet stack on Ubuntu 24.04.
Phase 1: Reset Your Root Password
- Log in to your Bluehost Portal.
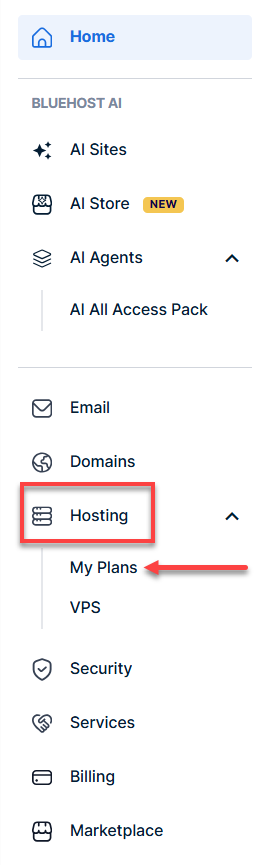
- In the left-hand menu, click Hosting, then select My Plans.
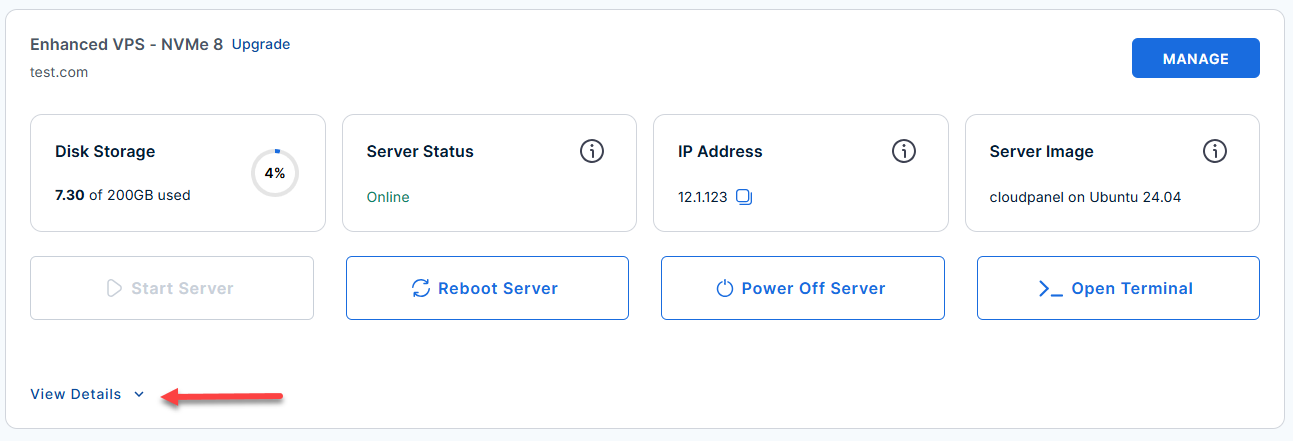
- Locate the server you want to manage, then click View Details in the bottom-left corner to expand the section and access additional server information.
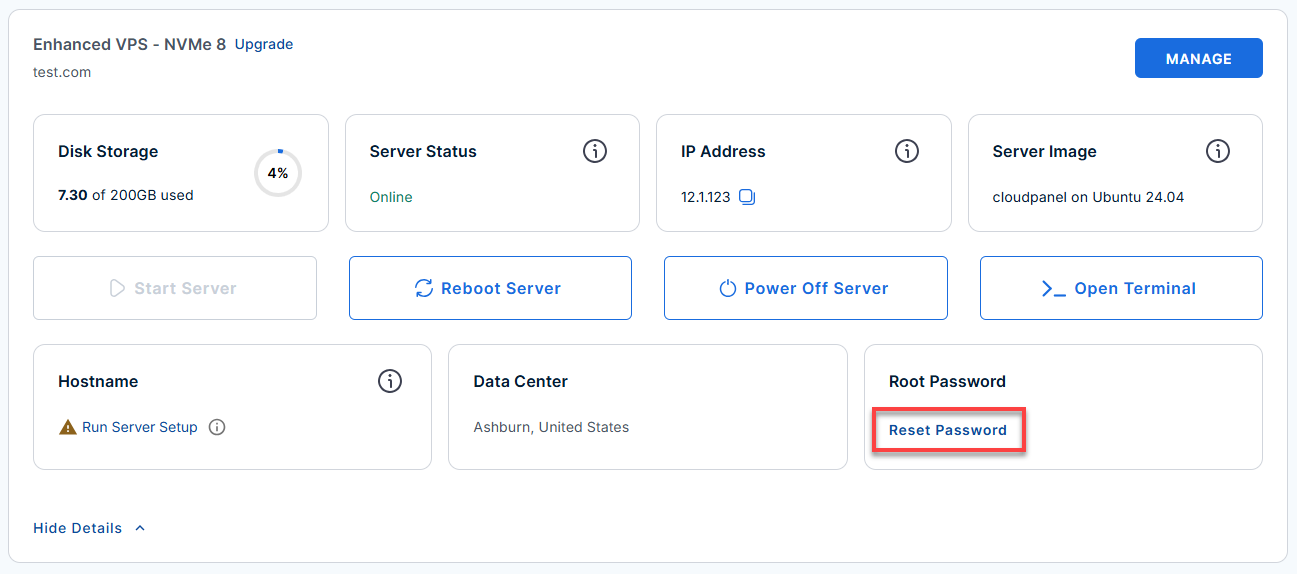
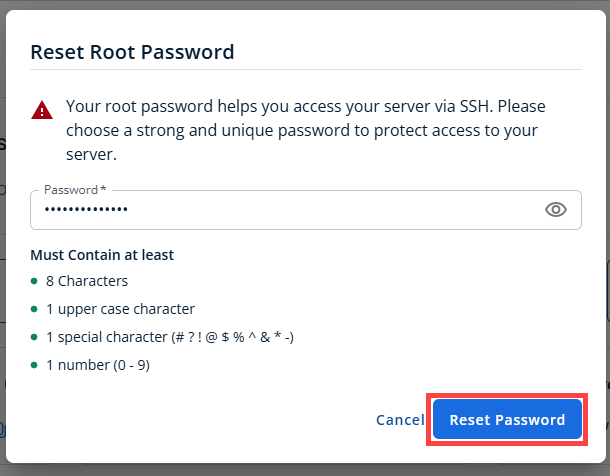
- Click the Reset Password.
- In the pop-up window, type your new root password, then click Reset Password again to confirm and save the changes.
Phase 2: Initial Server Access
After launching your instance, the system automatically performs an initial boot sequence that takes approximately 30 seconds. This process detects your server's public IP, configures the Jitsi components, and generates a self-signed TLS certificate.
- SSH into your server: Open your terminal and connect as the root user:
Replace
your_server_ipwith your actual server IP address.ssh root@your_server_ip - Verify Setup: If you need to check the progress or verify that initialization completed, you can view the logs:
cat /var/log/cloud-init-output.log
Phase 3: Access the Web Interface
Once the server is ready, you can start hosting video calls immediately.
- Navigate to the interface: Go to https://<server-ip> in your web browser.
ReplaceExample: https://12.3.456.789/
your_server_ipwith your actual server IP address. - Bypass the security warning: Because the server uses a self-signed certificate by default, your browser will show a security warning. This is expected. Click Advanced, then Proceed.
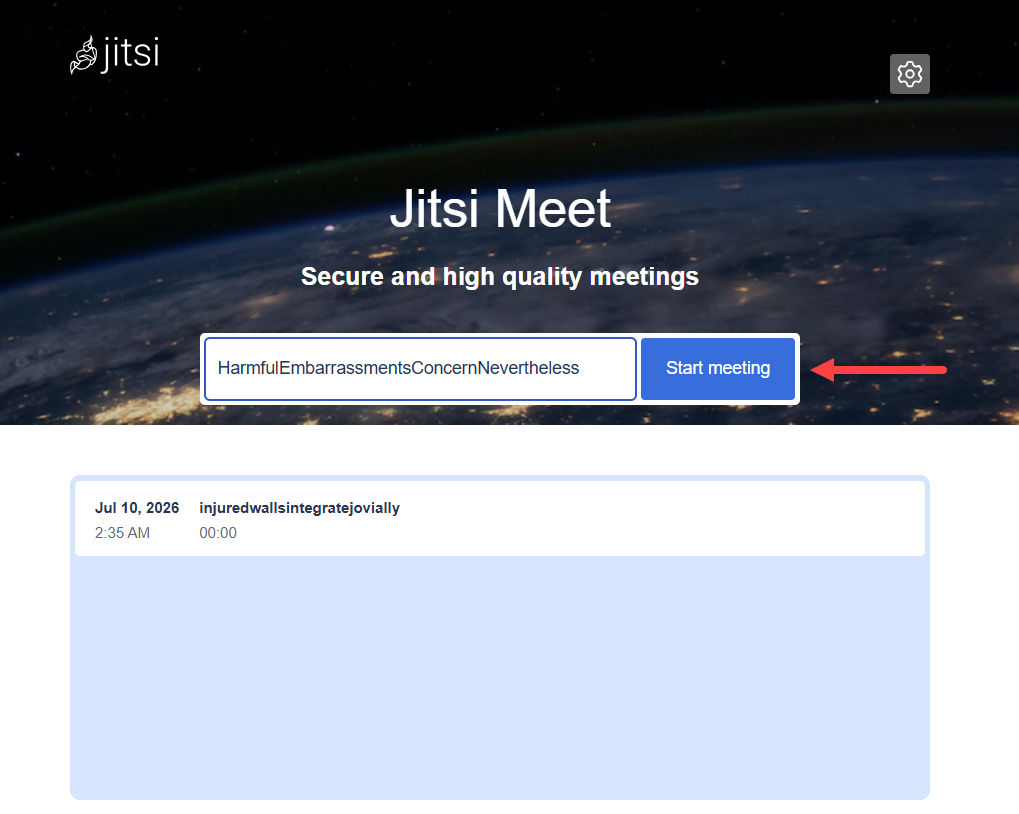
- Start a meeting: Click the Start meeting button. No account is required to get started.
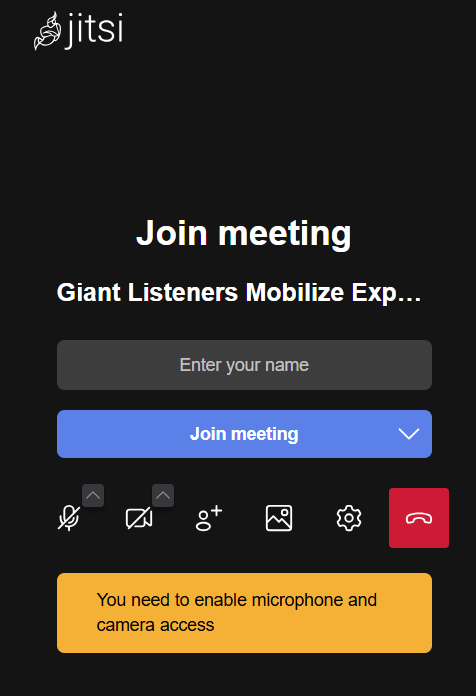
- Allow Access: Click the camera icon in your browser's address bar and select "Allow" for camera and microphone access. Then, refresh the page.
- Enter Name: Type your name in the "Enter your name" box.
- Join: Click the blue "Join meeting" button.
Phase 4: Configure and Secure Your Server
To move from a testing environment to a production-ready server, you need to apply a trusted SSL certificate and manage system settings.
- Set up a Domain: Ensure you have pointed a domain name (eg, meet.yourdomain.com) to your server's public IP address via your DNS provider.
- Install a Trusted SSL: Once your DNS has propagated, run the following script in your SSH terminal to automatically obtain and install a Let's Encrypt certificate:
sudo /opt/jitsi/setup-ssl.sh
This will replace the self-signed certificate and remove browser security warnings.
Phase 5: Service Management
Your Jitsi stack consists of several core services. If you need to perform maintenance, always restart them in the following order to ensure proper dependency synchronization:
-
systemctl restart prosody
-
sleep 5
-
systemctl restart jicofo
-
systemctl restart jitsi-videobridge2
-
systemctl restart nginx
Phase 6: Monitoring and Troubleshooting
If you experience connectivity issues, use these commands to inspect the health of your server.
- Check Service Status:
systemctl status jitsi-videobridge2 systemctl status jicofo systemctl status prosody systemctl status nginx
- View Real-time Logs:
- Video bridge:
tail -f /var/log/jitsi/jvb.log
- Jicofo:
tail -f /var/log/jitsi/jicofo.log
- Nginx:
journalctl -u nginx -f
- Video bridge:
- Firewall: Your server uses UFW to protect sensitive ports. View the status with:
ufw status verbose
Configuration Reference
If you need to make advanced adjustments, refer to these primary configuration files:
- Nginx web configuration:
/etc/nginx/sites-available/jitsi
- Jitsi Meet client interface settings:
/etc/jitsi/meet/-config.js
- Jicofo backend configuration:
/etc/jitsi/jicofo/jicofo.conf
- Videobridge media configuration:
/etc/jitsi/videobridge/jvb.conf
- Prosody XMPP server settings:
/etc/prosody/conf.d/jitsi.cfg.lua
Additional Information and Example Documentation Output
You can run cat /root/README.md to see more information and useful commands:
Example Output:
 # Jitsi Meet - `jitsi`

## Description

Jitsi Meet is a fully open-source, self-hosted video conferencing platform that supports multi-party HD audio and video calls directly in the browser -- no client downloads required. This image provides a complete Jitsi Meet stack (Videobridge, Jicofo, Prosody, Nginx) on Ubuntu 24.04, ready to use immediately after first boot.

On first boot the image automatically detects the server's public IP, reconfigures all Jitsi components to use it, and generates a self-signed TLS certificate. For production use, point a domain name at the server and a Let's Encrypt certificate will be obtained automatically.

---

## Services

| Service             | Port  | Protocol | Purpose                                    |
|---------------------|-------|----------|--------------------------------------------|
| Jitsi Meet UI       | 443   | TCP      | HTTPS -- Jitsi Meet web interface          |
| HTTP redirect       | 80    | TCP      | Redirects HTTP to HTTPS / ACME challenge   |
| Jitsi Videobridge   | 10000 | UDP      | WebRTC media traffic                       |
| RTP fallback        | 4443  | TCP      | RTP over TCP fallback (Videobridge)        |
| STUN                | 3478  | UDP      | STUN queries (coturn)                      |
| TURNS               | 5349  | TCP      | TURNS / coturn TLS fallback                |
| OpenSSH             | 22    | TCP      | Remote access                              |

Ports are protected using UFW.

---

## How-to-use

### 1. Open Jitsi Meet

After the instance boots, open your browser and go to:

| URL | Purpose |
|-----|---------|
| `https://` | Jitsi Meet web interface |

Accept the self-signed certificate warning and click **Start a meeting** -- no account required by default.

### 2. SSH into the server

```bash
ssh root@
```

### 3. If Jitsi Meet is not accessible after boot

Run the first-boot script manually:

```bash
sudo bash /var/lib/cloud/scripts/per-instance/001_onboot
```

---

## Manage

### Jitsi services

```bash
systemctl status jitsi-videobridge2
systemctl status jicofo
systemctl status prosody
systemctl status nginx
```

```bash
systemctl restart jitsi-videobridge2
systemctl restart jicofo
systemctl restart prosody
systemctl restart nginx
```

### Service startup order

When restarting all services manually, always follow this order:

```bash
systemctl restart prosody
sleep 5
systemctl restart jicofo
systemctl restart jitsi-videobridge2
systemctl restart nginx
```

Prosody (XMPP server) must be fully up before Jicofo connects to it.

### UFW Firewall

```bash
ufw status verbose
```

### Logs

```bash
tail -f /var/log/jitsi/jvb.log
tail -f /var/log/jitsi/jicofo.log
journalctl -u prosody -f
journalctl -u nginx -f
journalctl -u jitsi-firstboot.service
cat /var/log/cloud-init-output.log
```

---

## Security hardening

| Hardening        | Detail                                                              |
|------------------|---------------------------------------------------------------------|
| UFW firewall     | Ports 22, 80, 443, 4443, 5349, 10000 open. Default deny incoming   |
| SSH rate limiting| Port 22 set to LIMIT -- brute force protection                      |
| HTTPS only       | All HTTP traffic redirected to HTTPS, WebRTC requires secure context|
| TLS certificate  | Self-signed by default, Let's Encrypt for production domains        |

---

## Configuration files reference

| File | Purpose | Permissions |
|------|---------|-------------|
| `/etc/nginx/sites-available/jitsi` | Nginx virtual host config | `0644` |
| `/etc/jitsi/meet/-config.js` | Jitsi Meet client config | `0644` |
| `/etc/jitsi/jicofo/jicofo.conf` | Jicofo config | `0644` |
| `/etc/jitsi/videobridge/jvb.conf` | Videobridge config | `0644` |
| `/etc/prosody/conf.d/jitsi.cfg.lua` | Prosody XMPP config | `0644` |
| `/opt/jitsi/setup-ssl.sh` | SSL setup and nginx rewrite script | `0755` |
| `/var/lib/cloud/scripts/per-instance/001_onboot` | First-boot script | `0755` |
| `/etc/update-motd.d/99-jitsi` | MOTD shown on SSH login | `0755` |
| `/etc/logrotate.d/jitsi` | Log rotation config | `0644` |

---

## Notes

- Jitsi Meet requires HTTPS -- WebRTC will not allow camera or microphone access over plain HTTP.
- The self-signed certificate will show a browser warning -- this is expected. For production, use a real domain so Let's Encrypt can issue a trusted certificate.
- First-boot configuration runs automatically via `jitsi-firstboot.service` and completes in approximately 30 seconds.
- The sentinel file `/var/lib/jitsi-firstboot.done` prevents the first-boot script from running more than once. Delete it to force a re-run.
- Remove the MOTD once no longer needed: `rm -f /etc/update-motd.d/99-jitsi`

---

## Minimum Resources

| Resource | Minimum  | Recommended       |
|----------|----------|-------------------|
| CPU      | 4 cores  | 4 dedicated cores |
| RAM      | 4 GB     | 8 GB              |
| Disk     | 20 GB    | 20 GB SSD         |
| Network  | 100 Mbps | 1 Gbps            |

---

## Links

- Jitsi Meet: [https://jitsi.org/jitsi-meet/](https://jitsi.org/jitsi-meet/)
- Jitsi Self-Hosting Guide: [https://jitsi.github.io/handbook/docs/devops-guide/devops-guide-quickstart](https://jitsi.github.io/handbook/docs/devops-guide/devops-guide-quickstart)
- Jitsi GitHub: [https://github.com/jitsi/jitsi-meet](https://github.com/jitsi/jitsi-meet)
- Ubuntu 24.04 LTS Release Notes: [https://wiki.ubuntu.com/NobleNumbat/ReleaseNotes](https://wiki.ubuntu.com/NobleNumbat/ReleaseNotes
Summary
Jitsi on a Self-Managed VPS gives you a secure, flexible, and cost-effective video conferencing solution. You have full control over your meetings, can scale as needed, and integrate with your business tools. With Bluehost, getting started is simple—just select Jitsi during VPS setup and enjoy reliable, private video conferencing for your organization.