 ChatGPT,
  Claude,
  Gemini,
  Grok — all four for
 Purchase a Self-Managed VPS Hosting with Ollama Installation
Ollama is an AI-powered platform designed to provide advanced language model capabilities for businesses and developers. It offers robust natural language processing (NLP) tools that can be integrated into applications for tasks such as text generation, summarization, translation, and conversational AI. Ollama combines ease of use with powerful customization, making cutting-edge AI technology accessible without the need for deep technical expertise.
Why Use Ollama?
In this age, when AI and machine learning are revolutionizing various sectors, the use of such platforms as Ollama can contribute to improving the capability of understanding, producing, and analyzing text-based data. It is possible to automate customer engagement processes, create text, analyze data, and make decisions by using Ollama.
Uses of Ollama
There are many applications of Ollama in different fields:
- Customer Support: Automate your customer support replies using conversational AI.
- Content Creation: Generate articles, marketing copy, and creative writing effortlessly.
- Data Analysis: Summarize big pieces of text, highlight important points, and translate text into other languages.
- Development: Integrate AI-driven language capabilities into apps, chatbots, and virtual assistants.
- Education: Assist in tutoring, language learning, and interactive training through intelligent dialogues.
This versatility makes Ollama a valuable asset for companies looking to harness the power of AI-driven communication.
System Requirements
Before deploying, ensure your server meets the requirements below. For a stable production deployment, we recommend using higher specifications than the Approximate Size requirements.
Important:
- Do not purchase a server that only meets Approximate Size requirements. The Approximate Size specifications represent the software's bare survival threshold and do not account for operating system overhead or production workloads. Running with minimal resources can result in severe performance slowdowns, system freezes, or unexpected crashes during traffic spikes.
- For a stable deployment, we recommend allocating additional resources beyond basic installation levels, especially if you plan to store recordings, logs, or other application data.
Recommended Plans:
Ollama AI Model Storage Requirements
Ensure your server has sufficient disk space available to download and store the specific AI models you plan to run locally in Ollama:
| AI Model | Approximate Size | Description |
|---|---|---|
| TinyLlama | 637 MB | The starter model that comes pre-downloaded on first boot. |
| Llama 3.2 | 2 GB | A slightly larger, more capable model example. |
| 7B Parameter Models | 4 – 8 GB | The general disk space range required for standard 7-billion-parameter models. |
How to Purchase a Self-Managed VPS Hosting with Ollama Installation
To get started with Ollama on Bluehost, you first need to purchase a Self-Managed VPS plan. Follow the steps below:

New to VPS or not sure where to start? No worries! At the top of the Self-Managed VPS purchase page, you’ll see the Pre-configured Setup section. This handy feature is perfect if you’re feeling a bit unsure—just pick the type of project you want, like WordPress Site, AI Agent/Claude Code, Dev/Staging, or eCommerce Store. We’ll take care of the rest by automatically filling in the best plan, operating system, and template for you.
- Super simple for beginners or anyone who just wants a quick setup
- Instantly get the recommended settings for your project
- Skip the guesswork and save time
- You can still customize things later if you want
- In your browser, go to https://www.bluehost.com/vps-hosting.
- Click the Choose Plan button under your preferred VPS hosting plan.
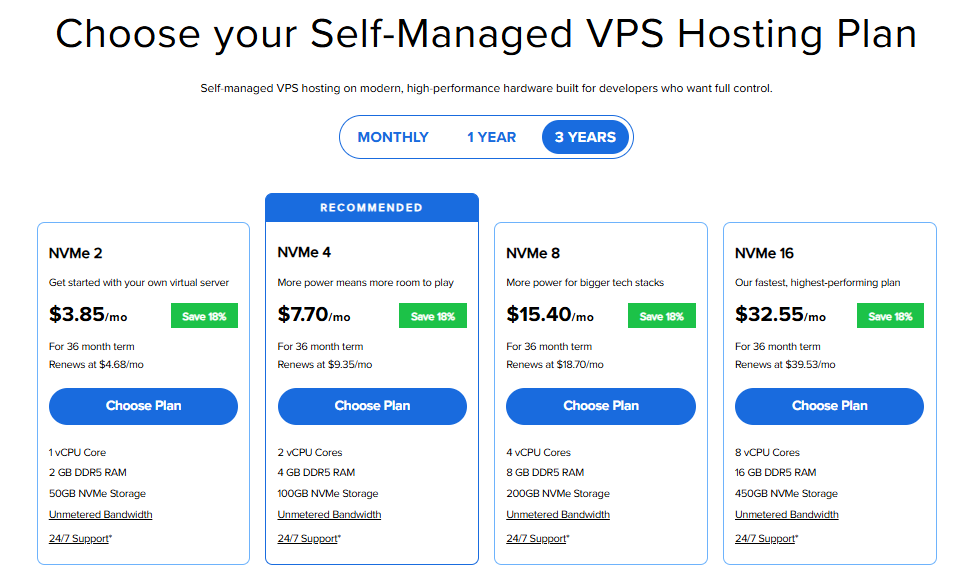
Important: Pricing is subject to change—please visit https://www.bluehost.com/vps-hosting for the current introductory/sign-up offer for Bluehost VPS Hosting. For the most up-to-date renewal pricing, visit your Bluehost Portal Renewal Center.
- Select your preferred Data Center location.

- On the Cart page, you can configure your server to fit your needs in the following section:
- Hardware:
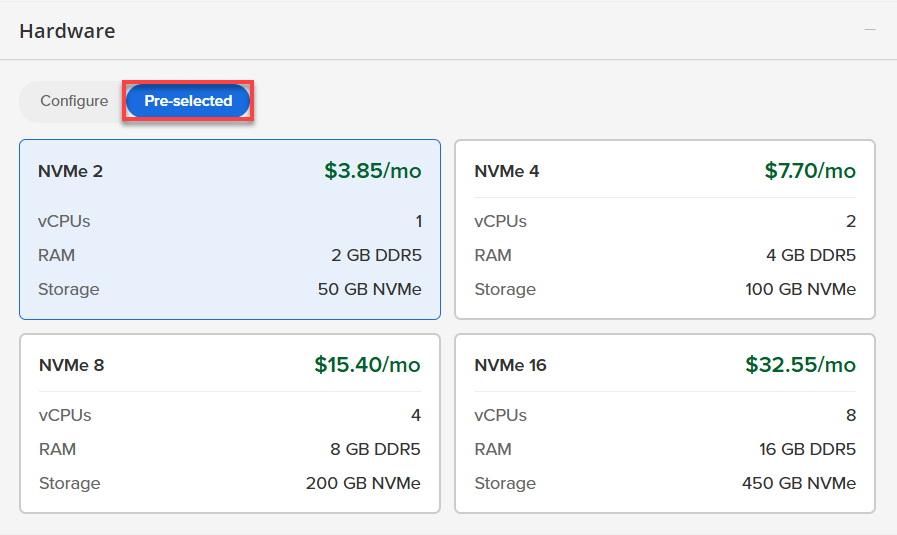
- Pre-selected:
You can select a different Self-Managed VPS plan in this section.
- Configure:
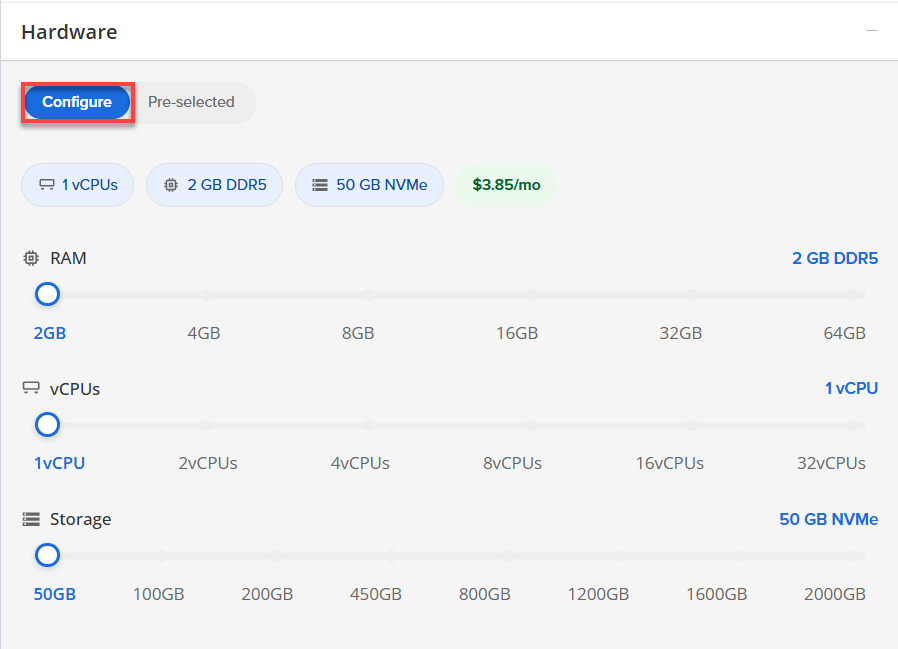
Click Configure to customize your package.
Note that your changes help customize your plan, and the overall cost will adjust accordingly to fit your needs.
- Pre-selected:
- Software:
If the selected plan does not meet the app's minimum requirements, the app will be grayed out.
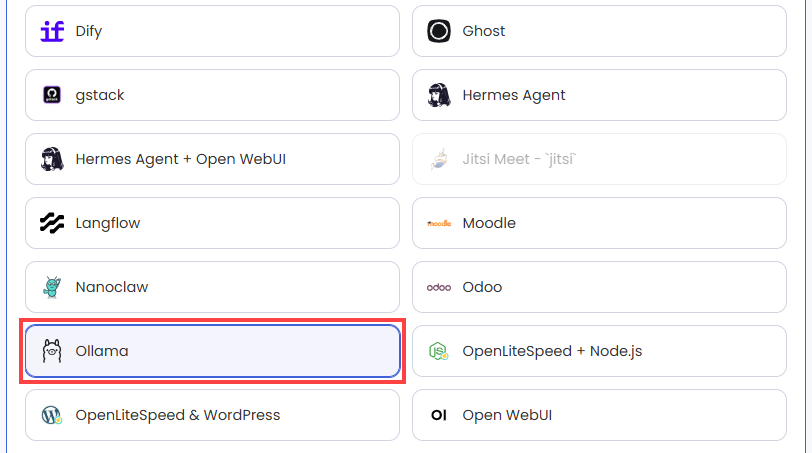
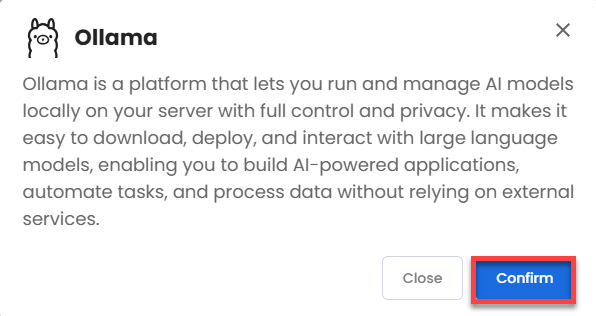
- Click on the Application tab.
- Choose Ollama.
- Click Confirm to continue.
- Hardware:
- Add-Ons:
- Support & Security:
- Premium Support - Recurring:
This service provides you with priority access to our expert team for faster responses and personalized assistance whenever you need it.

- Premium Support - Recurring:
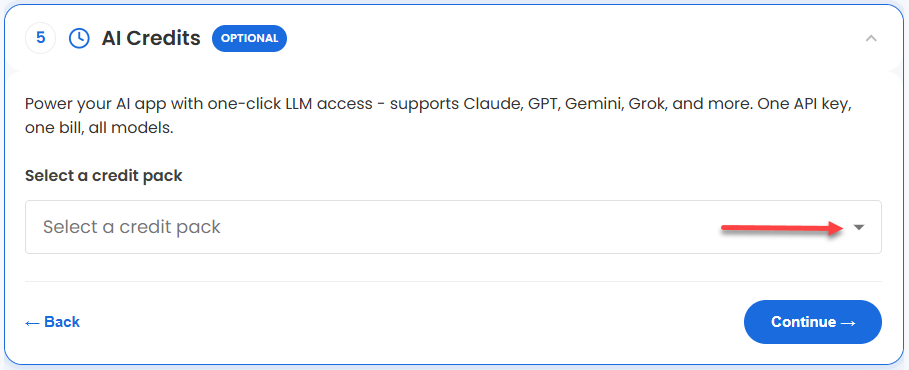
- AI Credits:
Purchase an AI credit package to effortlessly connect your application to leading LLMs through a single API key and bill. This step is optional.
- In the Advanced options:
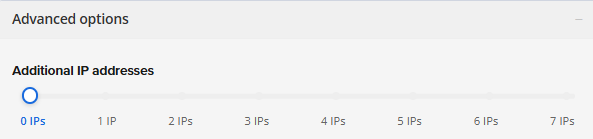
- Extra IP's: You can add extra IP addresses for an additional fee.
Pricing changes based on how many IPs you add. - Hostname: Assign a custom hostname to easily identify your server. This is optional.
- SSH Key: Add an SSH public key for secure, password-less access after provisioning.
- Extra IP's: You can add extra IP addresses for an additional fee.
- Support & Security:
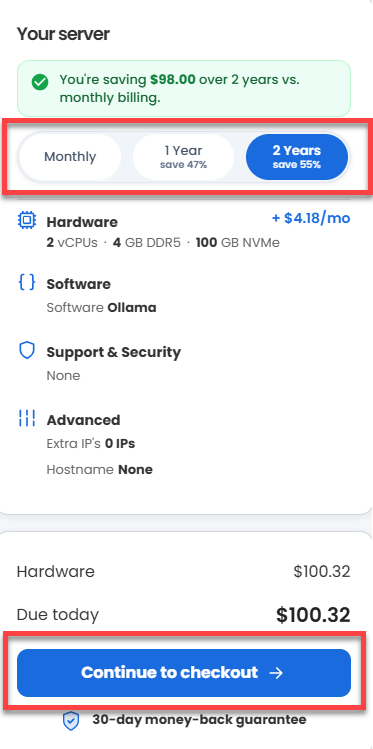
- Select your preferred billing term and view your Order Summary. Click the Continue to Checkout button to proceed.
- Do the following on the Checkout page:
If you're new with Bluehost:
- Create your Bluehost account by using your email address or by connecting with your Google, Apple, or GitHub account — whichever you prefer!

- Select your preferred payment method: credit card, Google Pay, or PayPal. Enter your billing information.

If you have an account with us, you will see your Bluehost login details when you are logged into your Bluehost Portal. If you are not logged in, please click the Log In link.

- Create your Bluehost account by using your email address or by connecting with your Google, Apple, or GitHub account — whichever you prefer!
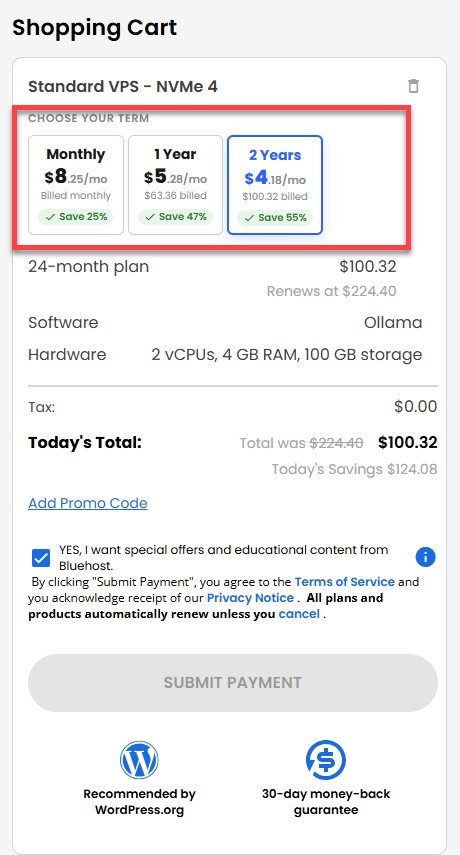
- In the Shopping Cart section, you can still adjust your billing term if needed.
- Review the items in your cart, add a Promo Code if you have one, and then click Submit Payment to complete the purchase.
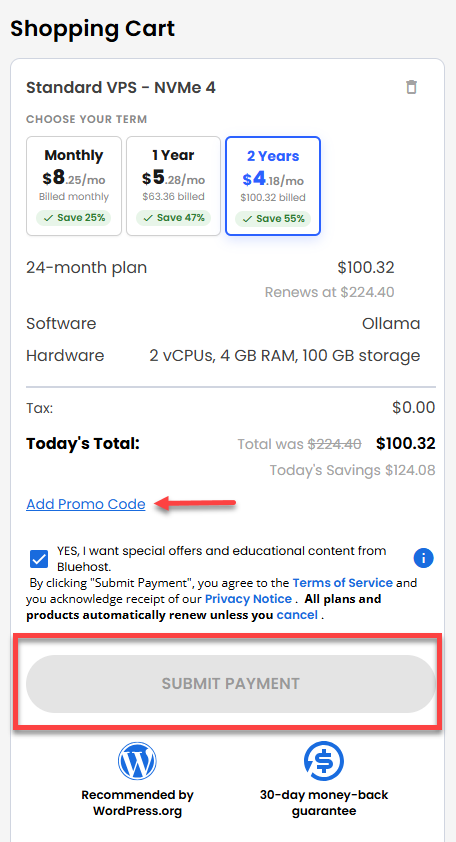
After completing the purchase, your VPS hosting will begin provisioning. You can access and manage your new VPS hosting in the Hosting tab of your Bluehost Portal.
How to Use Ollama
After the installation completes, follow the steps below to set up your application.
- Log in to your Bluehost Portal.
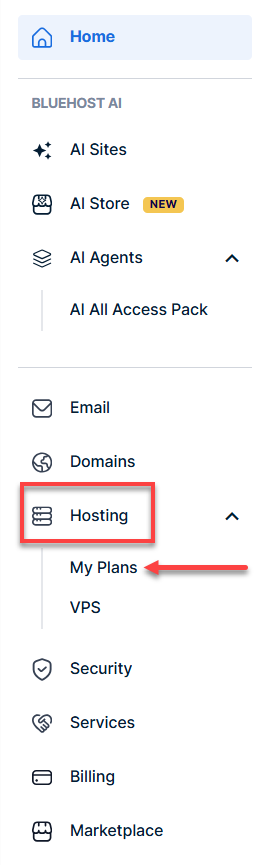
- In the left-hand menu, click Hosting, then select My Plans.
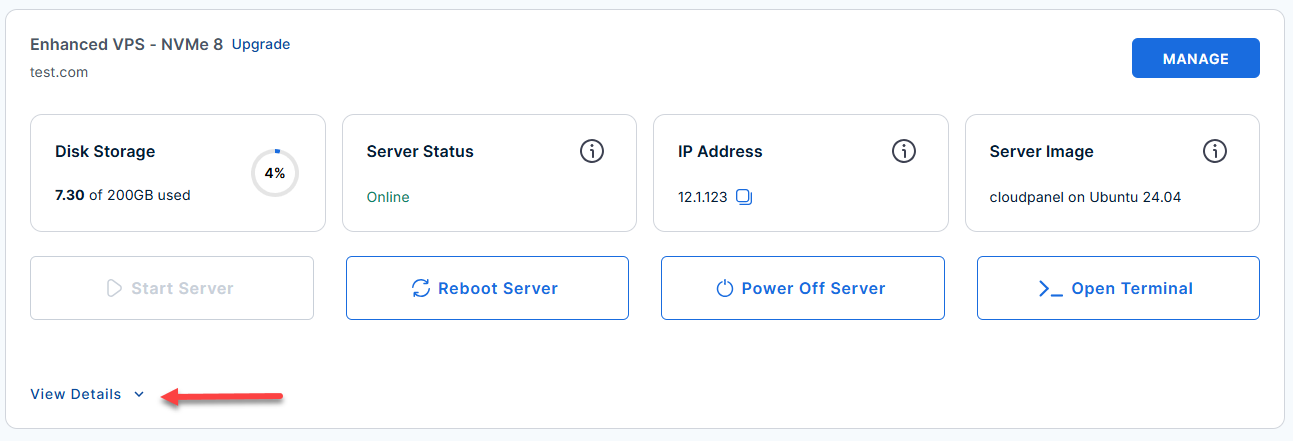
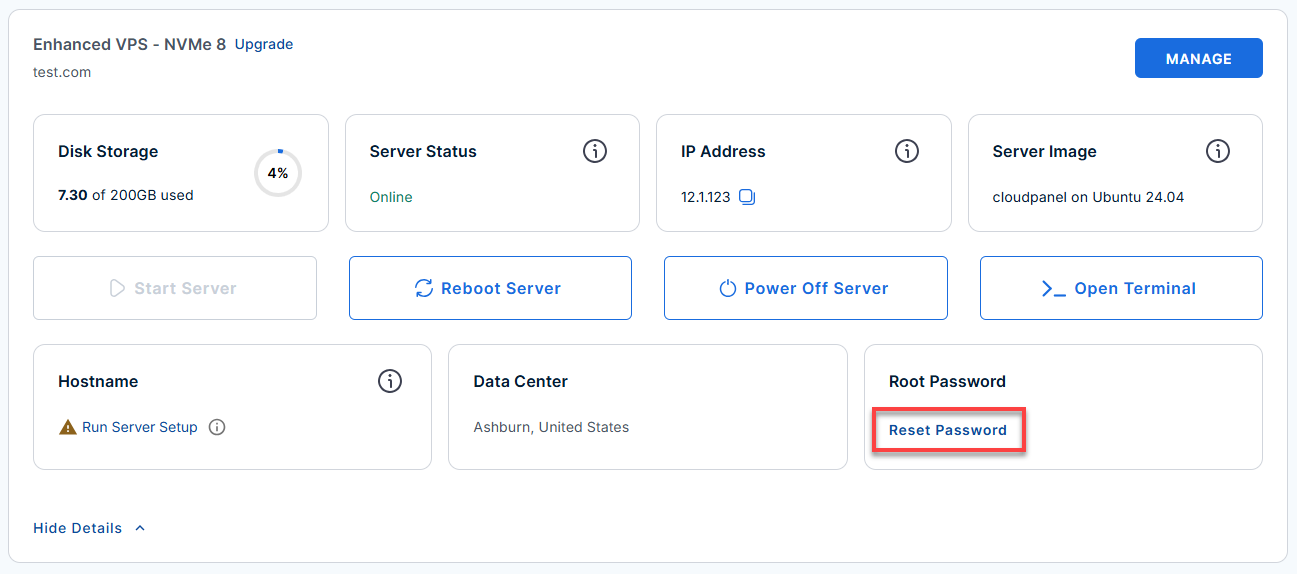
- Locate the server you want to manage, then click View Details in the bottom-left corner to expand the section and access additional server information.
- Click the Reset Password.
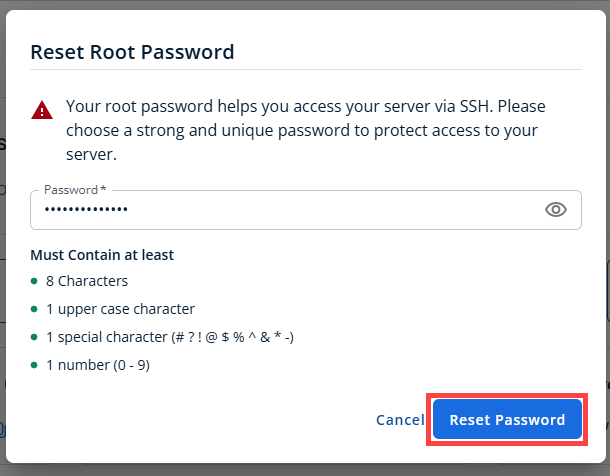
- In the pop-up window, type your new root password, then click Reset Password again to confirm and save the changes.
- Connect to your VPS via SSH.
Open your computer's terminal (or an SSH client like PuTTY) and run the following command to log into your server as the administrator, using your server's public IP address:Replaceyour_server_ipwith your actual server IP address.
Follow the prompts and enter the new root password you created in the step above.ssh root@your_server_ipExample Output:
Welcome to Ubuntu 24.04.4 LTS (GNU/Linux 6.8.0-111-generic x86_64) ******************************************************************************** Ollama is running on this server. The UFW firewall is enabled. All ports are BLOCKED except 22 (SSH) and 11434 (Ollama API). API endpoint: http://localhost:11434 Common commands: ollama list # list downloaded models ollama pull llama3.2 # download a model (~2GB) ollama pull tinyllama # download a small starter model (~637MB) ollama run tinyllama # start an interactive chat session REST API examples: curl http://localhost:11434/api/version curl http://localhost:11434/api/tags curl -X POST http://localhost:11434/api/generate \ -d '{"model":"tinyllama","prompt":"Hello","stream":false}' On the server: Models are stored in /var/lib/ollama/.ollama/models Service config: /etc/systemd/system/ollama.service.d/override.conf For more details please see /root/README.md To delete this message of the day: rm -rf /etc/update-motd.d/99-ollama - Check installed and available models via the CLI.
Example Output:ollama list
NAME ID SIZE MODIFIED tinyllama sha256:e5562a3b… 637 MB 3 minutes ago - Pull a model (tinyllama is preinstalled on first boot):
Example Output:ollama pull llama3.2
pulling manifest pulling 2.0 GB model ... success - Start an interactive session with a model:
Example Output:ollama run tinyllama
>>> Hello, how can I help you today? (type /exit to quit) - Remove a model to free up disk space:
Example Output:ollama rm tinyllama
Deleted model 'tinyllama' - Interact with the Ollama REST API
- Check Ollama version:
Example Output:curl http://localhost:11434/api/version
{"version": "0.1.25"} - List available models (tags):
Example Output:curl http://localhost:11434/api/tags
{"models":[{"name":"tinyllama","modified_at":"2024-06-18T10:17:22.093Z"}]} - Generate a non-streaming completion:
Example Output:curl -X POST http://localhost:11434/api/generate \ -H 'Content-Type: application/json' \ -d '{"model":"tinyllama","prompt":"Why is the sky blue?","stream":false}'
{"response":"The sky looks blue because of the way sunlight interacts with Earth's atmosphere...","model":"tinyllama",...} - Start a chat session via API:
Example Output:curl -X POST http://localhost:11434/api/chat \ -H 'Content-Type: application/json' \ -d '{"model":"tinyllama","messages":[{"role":"user","content":"Hello"}]}'
{"message":{"role":"assistant","content":"Hello! How can I help you?"}, ...}
- Check Ollama version:
- Model storage location
Models are stored in/var/lib/ollama/.ollama/modelsBefore pulling large models, make sure you have sufficient disk space (7B models may need 4-8 GB free space).
- Service config and logs
- Service configuration is at
/etc/systemd/system/ollama.service.d/override.conf
- For logs or troubleshooting, see:
cat /root/README.md
- Service configuration is at
Links
Additional Information and Example Documentation Output
You can run cat /root/README.md to see more information and useful commands:
Example Output:
root@12-1-1-123:~# cat /root/README.md
# Ollama

## Description

Ollama is a platform that lets you run and manage AI models locally on
your server with full control and privacy. It makes it easy to
download, deploy, and interact with large language models, enabling
you to build AI-powered applications, automate tasks, and process data
without relying on external services.


## Services

Service    | Ports   | Purpose
-----------|---------|---------
ollama API | 11434   |
OpenSSH    | 22      | SSH

Ports are protected using ufw. Port 11434 is open to allow external API access.


## How-to-use

On first boot the image will automatically pull **tinyllama** (~637 MB) as a starter
model so the API is ready to use without any manual steps.

### Interacting via CLI

SSH into the server and use the `ollama` command:

```bash
ollama list                    # list downloaded models
ollama pull llama3.2           # pull a model (~2 GB)
ollama pull tinyllama          # pull a small model (~637 MB)
ollama run tinyllama           # start an interactive session
ollama rm tinyllama            # remove a model
```

### Interacting via REST API

The API is accessible from outside the server on port 11434:

```bash
# Check version
curl http://localhost:11434/api/version

# List available models
curl http://localhost:11434/api/tags

# Generate a completion (non-streaming)
curl -X POST http://localhost:11434/api/generate \
     -H 'Content-Type: application/json' \
     -d '{"model":"tinyllama","prompt":"Why is the sky blue?","stream":false}'

# Chat endpoint
curl -X POST http://localhost:11434/api/chat \
     -H 'Content-Type: application/json' \
     -d '{"model":"tinyllama","messages":[{"role":"user","content":"Hello"}]}'
```

### Model storage

Models are stored in `/var/lib/ollama/.ollama/models`. Ensure your volume has
sufficient space before pulling large models (7B parameter models are typically 4-8 GB).


## Links

Documentation: [https://docs.ollama.com/](https://docs.ollama.com/)
Summary
Ollama is a powerful AI-driven language platform that businesses and developers can leverage for various applications such as customer support, content creation, data analysis, development, and education. By purchasing a Self-Managed VPS Hosting plan from Bluehost, you can gain the flexibility and control necessary to configure your environment and deploy Ollama effectively. This combination enables you to harness the potential of advanced AI technology to drive innovation and improved communication.