
Key highlights
- A payment gateway connects your WooCommerce store to your customer’s bank — verifying, authorizing and routing every transaction in seconds.
- Classic gateways (like Authorize.net) suit high-volume stores. Modern gateways (like Stripe and WooPayments) suit beginners and smaller stores.
- Evaluate gateways on five factors: transaction fees, supported payment methods, PCI-DSS compliance, subscription support and third-party integrations.
- About 13% of shoppers abandon checkout when their preferred payment method is unavailable. Offering multiple gateways directly reduces this drop-off.
- Bluehost WooCommerce Hosting includes a free SSL certificate, which is a hard requirement for every major payment processor.
Retail eCommerce sales continue to experience impressive growth year over year, creating exciting opportunities for entrepreneurs looking to establish their online presence. With this upward trend showing no signs of slowing down, now is an ideal time to launch your online business.
But let’s face it. Even if you’ve developed the best products or services, your WooCommerce store will only offer a window-shopping experience until you’ve set up a payment gateway.
With cyber threats becoming increasingly sophisticated, setting up a secure payment gateway is paramount to your success as a business owner. The growing frequency of online security incidents makes it essential to prioritize robust protection for your customers’ sensitive information.
And, with hundreds of online payment processors guaranteeing maximum security, it may be challenging to choose the right payment gateway for your WooCommerce store.
This guide covers everything about WooCommerce payment gateways and how they work. You’ll learn to accept payments after launching your online store.
How does a WooCommerce payment gateway work?
A payment gateway is a third-party processor that sits between your store and your customer’s bank. It verifies the transaction, checks funds and routes the payout. The full process takes a few seconds.
Here is exactly what happens at checkout:
- Your customer selects a payment method and submits their card or wallet details.
- Your gateway encrypts that data and sends it to the customer’s issuing bank.
- The bank confirms or declines the transaction.
- Your gateway returns an approval or decline to your store in real time.
- The gateway releases the funds to your account on a set payout schedule.
Three prerequisites must be in place before any gateway will process transactions: WooCommerce installed on a WordPress site, a valid SSL certificate and your verified business and bank account details. Without all three, your gateway application will fail or your checkout page will error out on launch day.
Pro tip: Authorization speed matters more than most store owners realize. A flash-sale store that runs weekend promotions needs a gateway that confirms card payments in under 3 seconds — because customers click away before a slow confirmation screen loads.
What is the difference between classic and modern WooCommerce payment gateways?

Not every payment gateway is built for the same type of store. The choice between a classic and a modern gateway comes down to your transaction volume and how fast you need to go live.
| Factor | Classic gateways | Modern gateways |
| Examples | Authorize.net, Worldpay | Stripe, WooPayments, PayPal |
| Vendor account required | Yes. Strict business verification. | No. Simplified sign-up. |
| Transaction fees | Lower. Cost-effective at scale. | Higher. Adds up at high volume. |
| Best for | High-volume, established stores | New or small-scale stores |
| Setup complexity | More involved | Beginner-friendly |
Classic gateways like Authorize.net and Worldpay require you to create a verified merchant account. This involves business registration checks and takes more time to set up. The trade-off is lower per-transaction fees, which matters when you process thousands of orders per month.
Modern gateways like Stripe, WooPayments and PayPal remove the merchant account requirement entirely. You can go live faster and setup friction is much lower. WooPayments is built on Stripe and supports Apple Pay and Google Pay natively — covering most digital wallet users without additional configuration.
The right category depends on where your store is right now. New stores should start with a modern gateway and reassess when transaction volume justifies the lower fees a classic gateway offers.
How do you choose the right payment gateway for your WooCommerce store?
Picking a gateway on name recognition alone is how store owners end up locked into a fee structure that quietly erodes their margins. These five factors give you a decision framework based on your actual store setup.
| Factor | What it does | Why it matters |
| Transaction fees | Percentage + flat fee per sale | Directly impacts your profit margin |
| Payment methods | Cards, wallets, BNPL, PayPal | More options = fewer abandoned carts |
| PCI-DSS compliance | Encrypts and protects card data | Required by major card networks |
| Subscription support | Handles recurring billing | Essential for SaaS or membership sites |
| Third-party integrations | Connects to CRM, analytics tools | Streamlines your entire store stack |
1. Transaction fees
Every payment gateway deducts a processing fee from your revenue, combining a percentage of the sale with a flat per-transaction rate. Because these fractions compound on high-volume stores, the difference between providers has a direct impact on your margins. Here is how the two dominant options compare:
| Provider | Domestic rate | International surcharge | Currency conversion |
|---|---|---|---|
| WooPayments | 2.9% + $0.30 | +1.5% | +2% |
| Stripe | 2.9% + $0.30 | +0.8% | Varies |
Run these numbers against your average order value before committing to a provider. Once you have modeled your transaction costs, the next question is whether your gateway supports the methods your customers actually prefer.
2. Payment methods
About 13% of online shoppers abandon checkout when their preferred payment method is unavailable. Your gateway must support cards and digital wallets at minimum. Depending on your customer base, adding PayPal or a BNPL option like Klarna reduces checkout friction further.
No single gateway covers every method — plan to run two complementary gateways if your audience is broad.
3. Security and compliance
Your gateway must hold PCI-DSS certification — this is a non-negotiable requirement from major card networks. Stripe and Square both hold PCI-DSS Level 1 certification, the highest tier available. Your hosting environment plays a role here too: an SSL certificate encrypts the data your customers submit at checkout before it ever reaches the gateway.
Also read: How to Configure SSL Certificate and Submit Validation
4. Subscription and recurring payments
Most modern gateways support recurring billing, but features and pricing vary. If you sell monthly training programs or membership plans, test the full subscription flow in sandbox mode before going live. A payment failure mid-cycle cancels the subscription and triggers manual recovery work that scales badly.
5. Third-party integrations
Your gateway should connect to your CRM, email marketing platform and analytics stack without custom code. Check integration documentation before committing. A gateway mismatch with your tooling creates operational drag that compounds as your store grows.
Pro tip: Before you finalize a gateway, calculate your average order value against the domestic and international fee rates of your top two options. International fee differences compound faster than most store owners expect — particularly if you sell to customers outside your home market.
Need a WooCommerce store that handles payments from day one?
How to set up WooCommerce payments?
Payment setup follows a clear sequence. Each step builds on the previous one — skip one and the gateway will not go live correctly.
1. Install and activate WooCommerce
- Log in to your WordPress admin dashboard and navigate to Plugins > Add New.

- Type ‘WooCommerce’ in the search bar and tap the Install Now button.

- After installation, click Activate and work through the setup wizard. The wizard surfaces the most common payment gateways for immediate installation.
2. Add products to your store
- Navigate to WooCommerce > Home > Add products to sell > Add products.
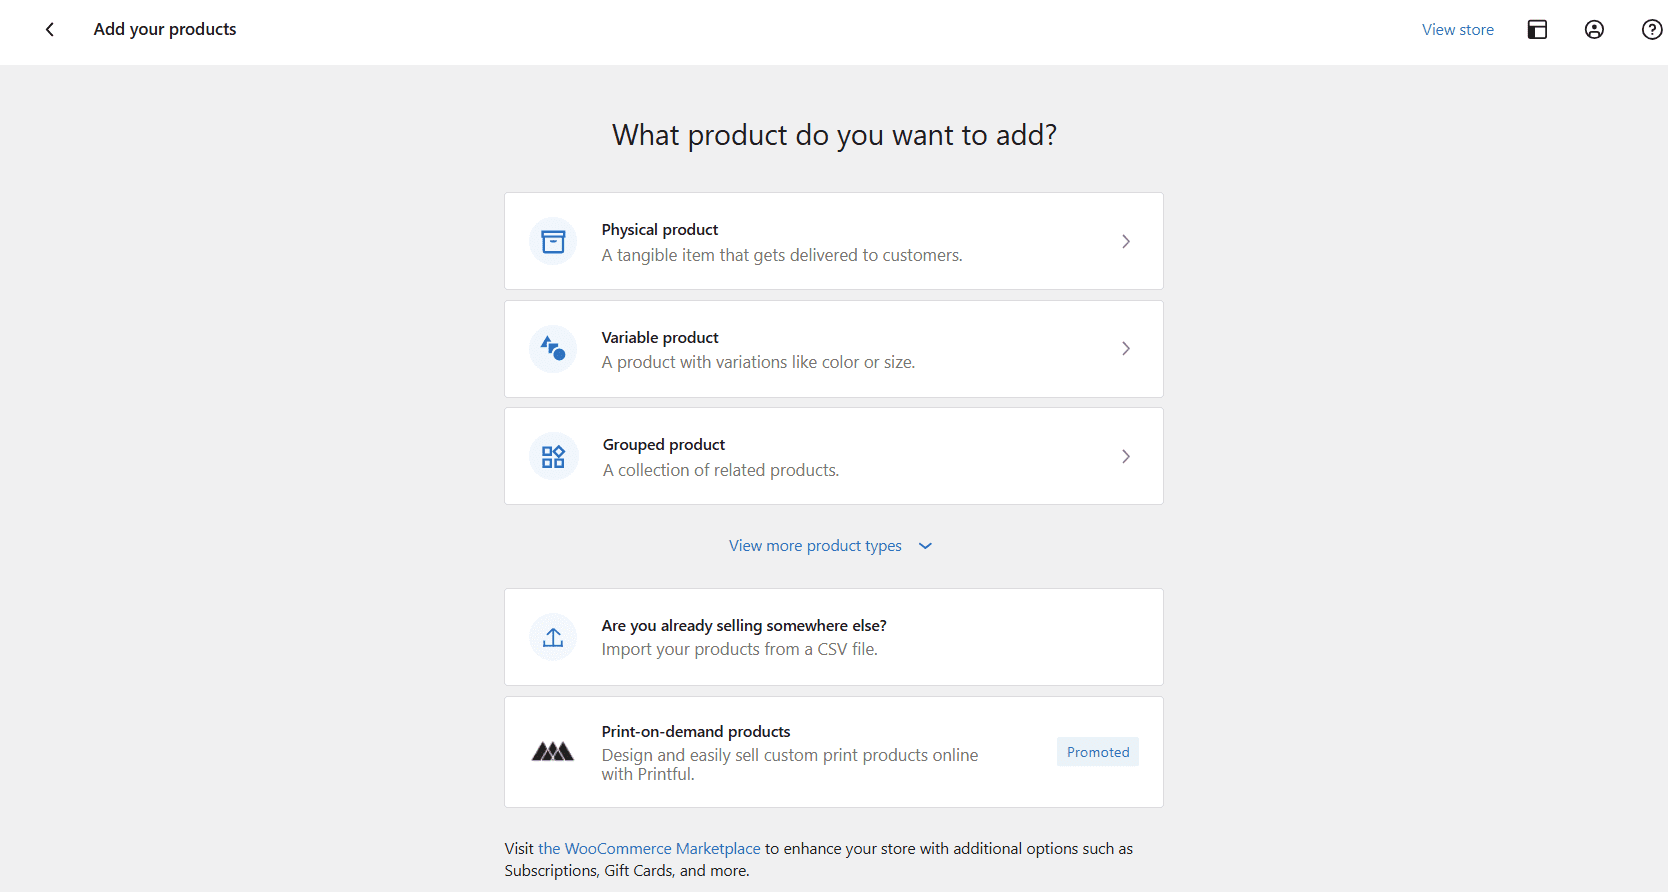
- Once you’ve clicked the Add products button, you’ll be redirected to a new page where you’ll need to provide product data.
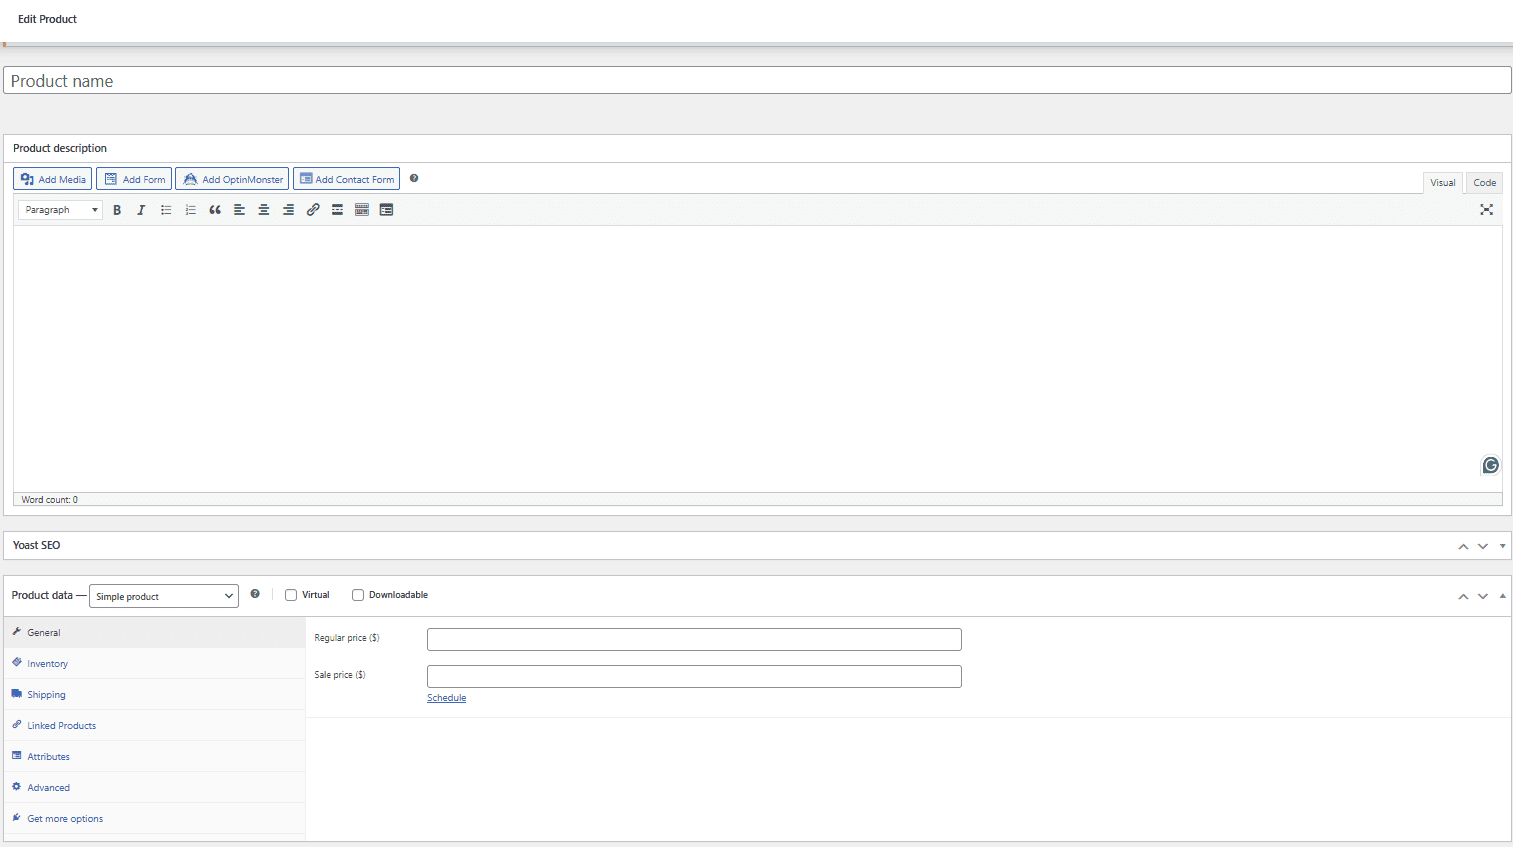
- On this page, you can add a product name, upload high-quality images, write a compelling description, set your prices and add other relevant information about the product. At this point, you’ll need to specify whether you’re adding a simple product or a subscription-based item.
WooCommerce allows you to update your product data, so you can always go back and edit it.
3. Set up payment gateways
Navigate to WooCommerce > Settings > Payments. WooCommerce recommends WooPayments as the default option. WooPayments comes pre-integrated with Apple Pay and Google Pay and is built in partnership with Stripe.
To activate WooPayments:
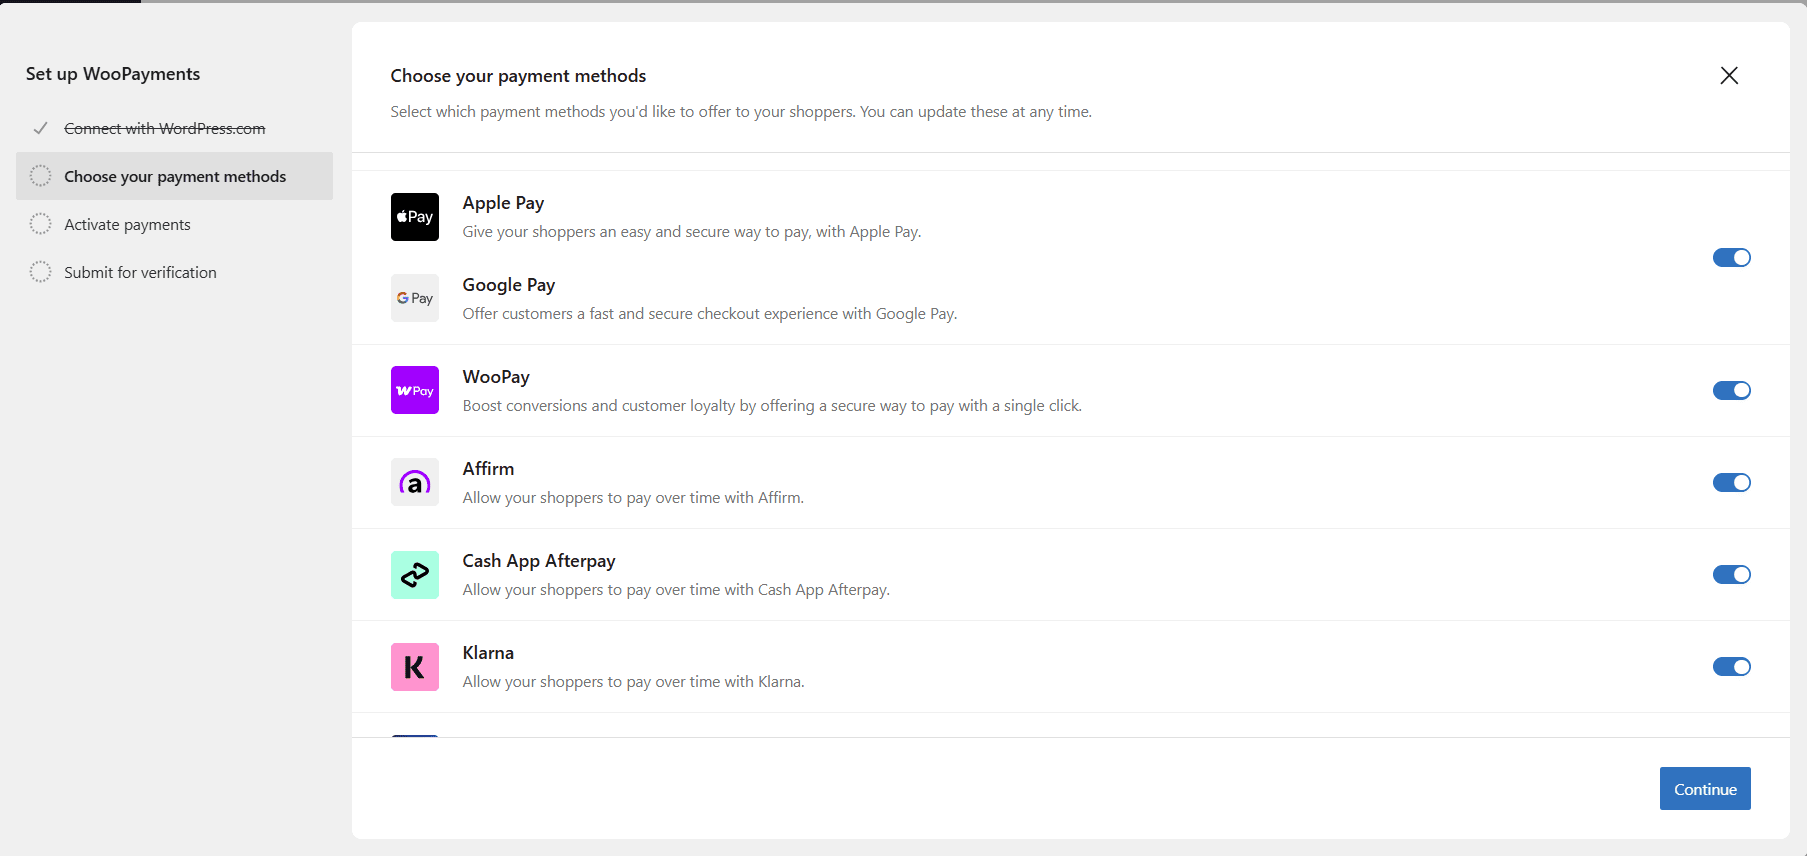
- Click Install WooCommerce Payments if not already installed.
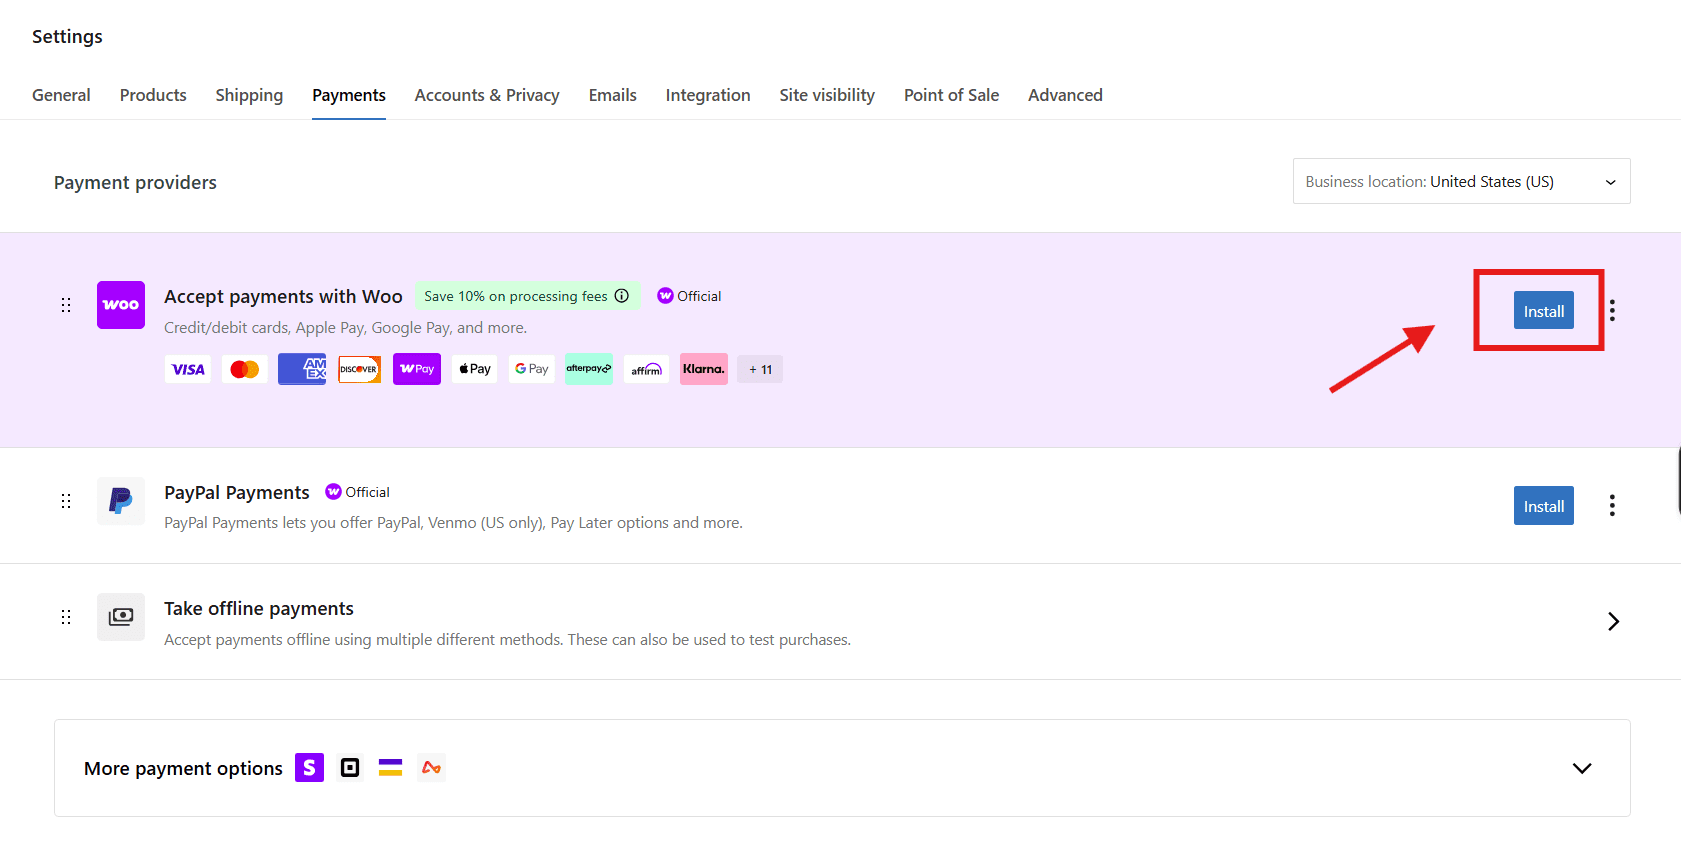
- Click Activate once installation completes. You can enable PayPal Payments, Amazon Pay, Klarna and more with one click. Each gateway has its own requirements and pricing structure, which you’ll need to consider before making a choice.
- Once you’ve installed a payment gateway, you’ll need to share some details about your business.
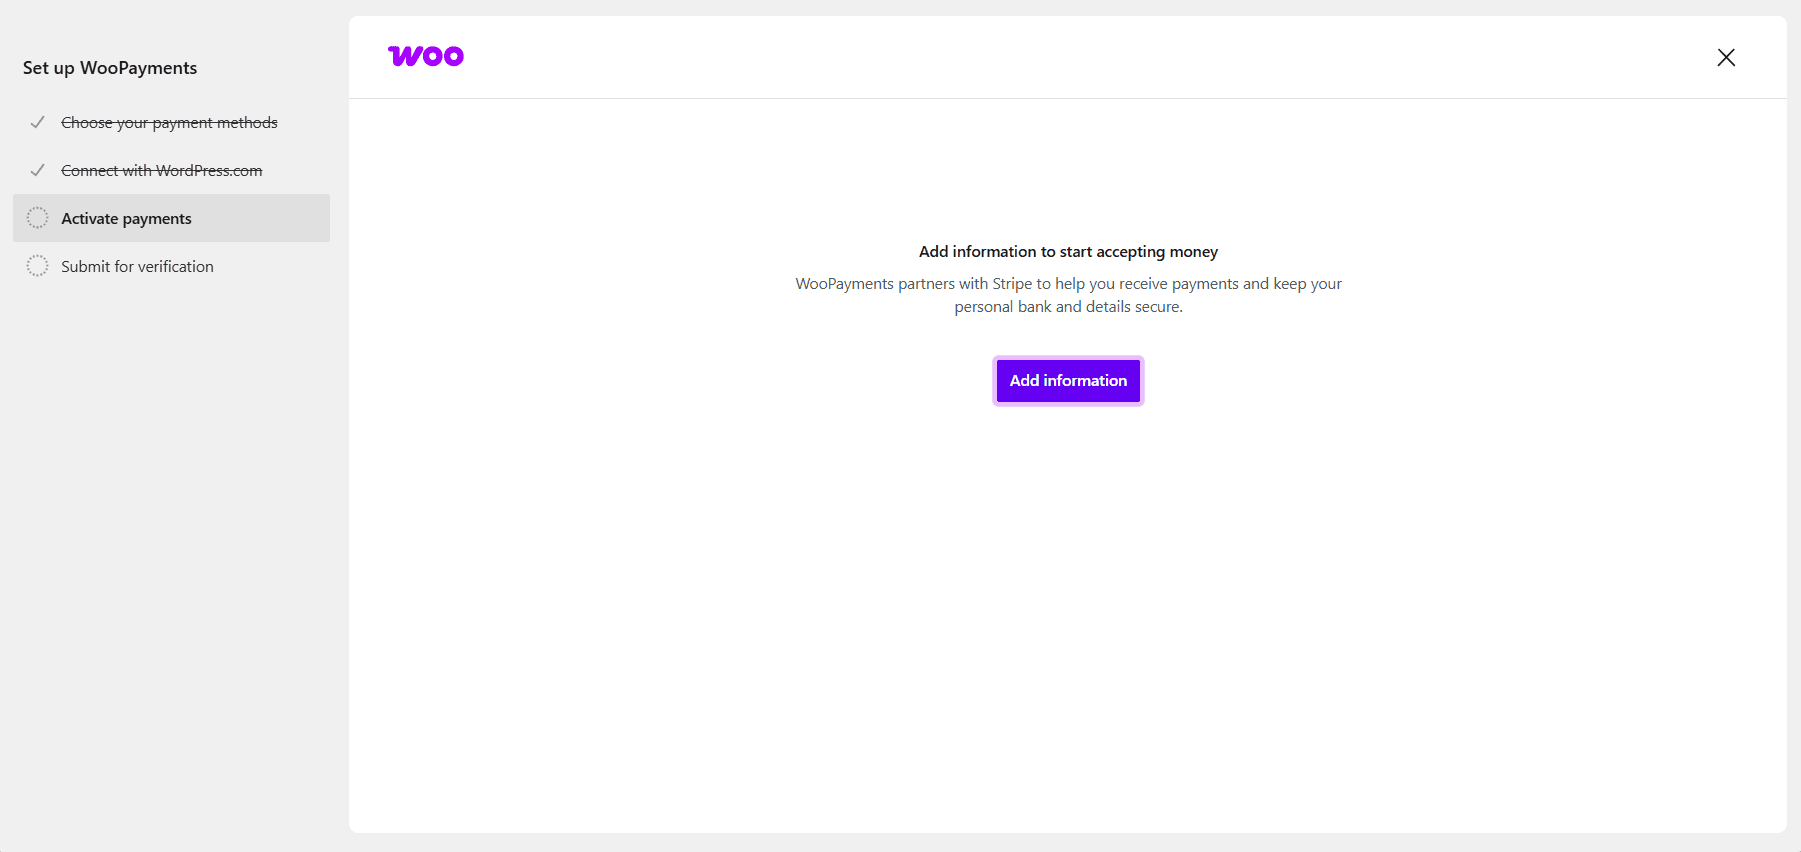
- You’ll need to provide your personal data, including your bank account number, which allows you to receive local payments. Once you’ve submitted the form, the payment gateway will review your information before approving your account.
- Once approved, visit your store’s checkout page. Confirm all payment options appear correctly, including card fields and any digital wallet buttons. Run a test transaction in sandbox mode before accepting live customer payments.
Need hosting that keeps up with your store? Bluehost WooCommerce Hosting runs on NVMe storage, delivers a 99.9% uptime guarantee and includes YITH plugins for built-in cross-sell and upsell campaigns. Get started with WooCommerce Hosting today!
Best practices for accepting WooCommerce payments
Getting the gateway live is the starting point. These practices protect your store, reduce checkout abandonment and keep your payment infrastructure performing at scale.
1. Confirm PCI-DSS compliance
Choose a gateway that holds PCI-DSS certification. This standard protects your customers’ card data and builds trust in your store. Stripe and Square are PCI-DSS Level 1 certified.
2. Simplify the checkout process
A complicated checkout kills conversions. Aim for a single-page checkout with the minimum number of form fields. Every extra step is a point where customers exit.
3. State your refund policy clearly
Link your refund policy directly from the checkout page. If you sell both physical and digital goods, maintain two separate policies. Most digital goods are non-refundable. Your customers need to know that before they pay.
4. Use multiple payment gateways
Running WooPayments alongside a PayPal option covers the widest range of payment preferences without significant configuration overhead. More payment methods means fewer customers leave at checkout.
5. Track performance metrics
WooCommerce’s built-in reports show order completion rates and refund volumes over time. Most gateways also integrate with analytics platforms so you can measure checkout performance alongside your broader store metrics.
Final thoughts
Figuring out how to accept WooCommerce payments can seem difficult if you’re new to eCommerce. However, it’s a quick and straightforward process, once you get the hang of it.
To increase your chances of making a sale, choose a payment gateway that is compatible with your eCommerce platform and convenient for your customers. Consider installing multiple gateways for an added advantage customers get a range of payment options to choose from.
While you can protect customer data by choosing a PCI-compliant gateway, you’ll get maximum security when you choose a web host that prioritizes your security. WooCommerce hosting with Bluehost includes everything you need to build a professional website. With a free SSL certificate and a free domain for the first year, you can cut down on expenses while launching a secure online store.
FAQs
If the payment method is not appearing, check three things: WooCommerce Payments is enabled in your payment settings, your account verification is complete and your site has a valid SSL certificate installed.
What are the eligibility requirements for WooCommerce Payments?
WooCommerce Payments is available in select countries including the United States, Canada, Australia and several European nations. You need a valid business registration, bank account and tax identification number to complete setup and verification.
How long does account verification take?
Account verification typically takes one to seven business days after you submit your business information and required documents. You can start accepting payments in test mode while verification is pending, but live transactions require full approval.
Can I run test transactions before going live?
Yes. WooCommerce Payments includes a built-in test mode that lets you process sample transactions without real money. Use it to verify your checkout flow and payment forms work correctly before accepting live customer payments.
When will I receive payouts from customer payments?
Payouts are typically processed within two to seven business days after a successful transaction, depending on your location and bank. You can view payout schedules and transaction details directly in your WooCommerce dashboard under Payments.
Do I need to use multiple payment gateways?
You are not required to, but running at least two gateways reduces checkout abandonment. WooPayments handles cards and digital wallets. Adding PayPal covers the large segment of shoppers who prefer to pay through their PayPal account. The configuration is simple and the conversion benefit is measurable.

Write A Comment