Key highlights
- Learn how to make an online shop from scratch in just 10 actionable steps, covering everything from niche selection to launching and scaling your profitable online store.
- Discover the top eCommerce platforms of 2026, including Bluehost WooCommerce plan, ideal for new and growing online businesses.
- Understand essential business needs like choosing the right business structure, securing licenses, and setting up payment and shipping options to attract customers and stay compliant.
- Get expert insights on improving customer experience, building loyalty, optimizing your store for search engine results, and leveraging marketing tools such as social media marketing and built-in marketing tools to boost eCommerce sales.
Have you ever dreamt of turning your passion into a fully functional business? Maybe it’s your secret recipe for brownies, unique artwork or trendy DIY crafts. Now, imagine this: instead of just dreaming, your creations are being shipped across the globe, earning you praise – and profit – from customers you’ve never met. Sounds like a Netflix – worthy success story, doesn’t it? This is exactly what you can achieve by learning how to make an online store.
Guess what? That story could be yours.
To start an online store isn’t just for tech wizards or business moguls anymore. It’s for creators like you who are ready to turn “what if” into “look at this!” Whether it’s growing a side hustle or launching the next eCommerce hit, the possibilities are endless.
This article is your backstage pass to create an online store that doesn’t just sell – it shines. From picking the right platform and designing a storefront and acing your marketing game, we’ll walk you through it all. Think of it as your personal blueprint to success – simple, actionable and 100% doable.
Ready to take the leap and make your mark? Let’s turn your vision into reality – step by step, starting now!
Quick guide – Steps to build an online store
The following are the 9 steps for building an online store successfully:
- Identify and define your niche.
- Choose the right online platform.
- Secure your business essentials.
- Get a domain name and hosting plan.
- Design your online store.
- Select your products and set up inventory.
- Launch your store.
- Build customer experience and retention.
- Monitor and scale your business.
Step 1: Identify and define your niche
A clear plan is essential for creating online stores that attract customers and drive online sales. Here’s what you can do:
1. Niche selection
A focused niche helps you meet specific market demand. It also lets you tailor your product descriptions, marketing campaigns and store inventory to a defined group of potential customers.
Your niche plays a huge role in how well your eCommerce website performs on search engines. It affects how you drive traffic, set up product pages and even the type of digital products or physical products you sell.
2. Target audience
Know your target audience before you start selling online. Consider factors like age, gender, location, income, buying behavior and interests. This helps you send the right message and choose better marketing efforts like social media posts, paid ads or automated emails.
For example, if you sell online products like eco-friendly exfoliators, plant-based serums and nourishing face creams, your eCommerce store can attract customers who care about cruelty-free beauty. These customers often prefer online purchases from brands that match their values.
Understanding your audience also helps when you create policy pages, choose main categories and write engaging content. Whether you sell your own products or use print-on-demand, knowing your market is key.
3. Financial planning
Every new online store setup needs a budget. Startup costs may include a custom domain, web hosting, store builder tools, payment processing and marketing campaigns. You may also have upfront costs for inventory management, content creation or hiring a web designer.
Estimate your expected online sales and profit margins. This gives you realistic financial goals. You can also plan when to offer shipping, what payment options to accept and how to reduce costs with features like a free domain or built-in SEO tools.
A strong financial plan ensures your online business stays on track. It also helps you scale and convert more visitors into loyal customers as your store grows.
Step 2: Choose the right online platform
Your online store depends on the eCommerce platform you choose. It forms the core of your website and affects everything from store design to customer experience. The right platform helps you start an online store with fewer upfront inventory costs, strong security, and all the tools needed to accept payments and support online selling growth.
Whether you sell digital products, physical products, or both, your platform should fit your business model and brand values. It should scale with your online business and streamline operations to reach customers effectively.
1. Popular eCommerce Platforms in 2026
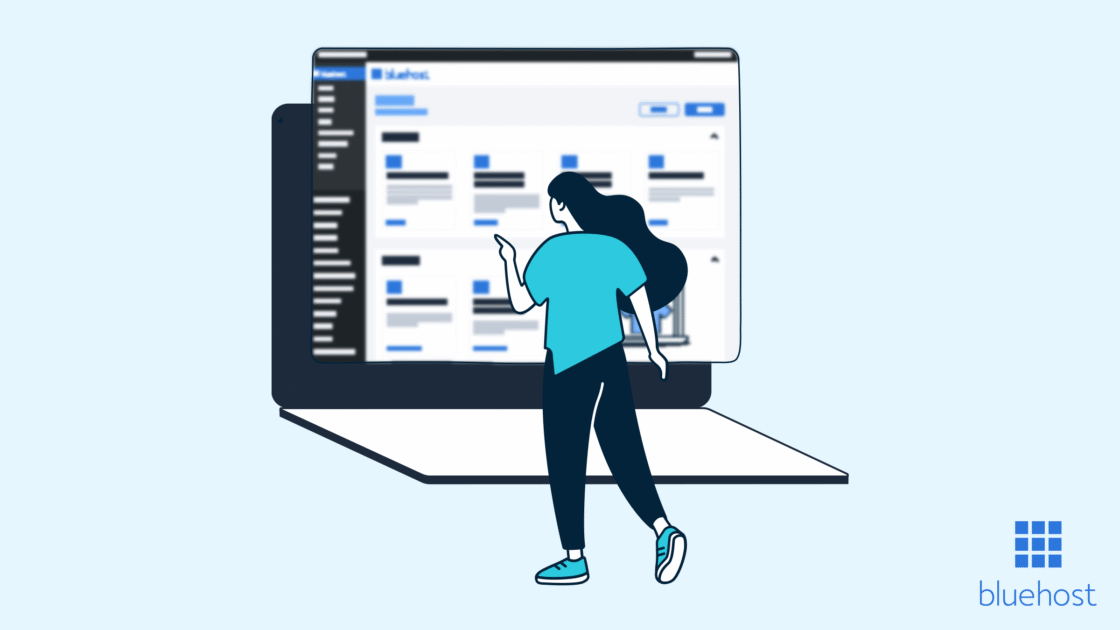
Bluehost
Bluehost’s WooCommerce hosting plan is tailored for a successful online store. We offer optimized web hosting, free domain, built-in SEO tools and strong payment processing features. With store inventory tools and product pages that are easy to manage, we simplifies the process of running a store – even for users with no coding skills.
Our platform also supports mobile devices, automates customer data collection and is perfect whether you want to hit publish on a new online store or grow an existing business. It’s ideal for small stores and large ones alike.
Know more: Black Friday Domain Deals – Save Big on Domains & Hosting
Shopify:
Shopify is a well-known, user-friendly platform. It’s best for entrepreneurs who want to start selling fast. It comes with pre-made themes, easy product listings and reliable payment options. It also supports marketing efforts like social media integration and paid ads.
BigCommerce:
BigCommerce is built for larger brands that need advanced features. If your goal is to scale fast and handle lots of online purchases, this platform offers everything from flexible product descriptions to built-in analytics and inventory management.
Wix:
Wix is a drag-and-drop website builder with eCommerce features. It’s ideal for small businesses that want to start selling without hiring a web designer. You can sell your own products, add product photos and use built-in tools to attract customers.
2. How to choose the right platform?
When choosing your platform, consider several factors – case of use, associated costs, scalability, integrations, mobile compatibility and support for search engines. Your choice should match your store’s size, your technical skills and how you plan to grow.
If you want a customizable and affordable store builder, you can pick Bluehost. Shopify works well if you need a quick setup with no tech hassle. BigCommerce fits if you’re scaling fast and Wix is perfect if you’re just starting your online business.
Always choose a platform that lets you grow, attract loyal customers and expand your product offerings with ease.
3. How does Bluehost help in making an online store?
If you’re looking to set up an online store in 2026, Bluehost WooCommerce hosting is one of the best plans to consider. It’s a WooCommerce-powered solution that simplifies how you create, manage and grow your online business.
With built-in SEO tools, free domain, optimized web hosting and advanced eCommerce features, it’s designed for small stores and large businesses alike.
You don’t need coding skills or a web designer to get started. This store builder offers everything in one place – making it easy to start selling online, manage store inventory and offer a seamless shopping experience across devices.
Use smart tools to simplify online easier
- Staging environment: Test your changes safely before going live. Update product pages, tweak layouts and adjust store inventory – without affecting your live eCommerce store.
- InstaWP migration tool: Already have a website? This tool helps you move it to Bluehost quickly and without downtime. No tech headaches or data loss.
- Yoast SEO integration: Want your store to rank better on search engines? Bluehost includes Yoast SEO, which helps optimize your product descriptions, content and pages – bringing in more potential customers organically.
Enhance product management to boost efficiency and sales
- Product comparison: Allow shoppers to compare products side by side. This adds credibility and helps customers make informed online purchases.
- Search & filters: Improve user experience with real-time search tools and product filters. Customers can easily browse your store, even on mobile devices.
- Advanced reviews: Display genuine reviews and testimonials. Build trust and turn buyers into and new customers.
Boost engagement and repeat sales to build loyalty and growth
- CreativeMail email marketing: Send automated emails to promote products, offer shipping updates and reconnect with existing customers. Perfect for running targeted marketing campaigns.
- Custom email templates: Create on-brand, engaging content using ready-to-go templates. Great for social media posts, paid ads and automated emails.
- Easy Login: Make signing in quick and simple. This helps boost retention and keeps users coming back.
Bluehost WooCommerce hosting gives you a full-featured, secure and scalable solution to launch and grow your online store with confidence. Whether you’re offering physical products, digital downloads or print on demand, this platform supports your journey – from your first sale to long-term success.
Step 3: Secure your business essentials
Once you’ve chosen your eCommerce platform, it’s time to set up the essential foundations of your online business. Before you can start selling online, your store needs to be legally compliant and financially protected. This step plays a major role in building a successful online store.
1. Register your business name and structure
Start by registering your business name and choosing the right legal structure – such as a sole proprietorship, partnership or LLC. A registered business name adds credibility and helps attract customers.
Don’t forget to apply for a valid business license, which may vary depending on your location and the products you plan to sell. Every country and even state, has different legal requirements for launching an eCommerce website.
2. Understand legal requirements and product liability
If your store offers products such as food, cosmetics, alcoholic beverages, or digital goods, you may be required to obtain additional permits or licenses to operate in compliance with regulatory standards. It’s important to stay updated on product liability laws to protect your business. Being compliant not only builds trust but also helps you avoid fines, legal disputes and damage to your brand.
3. Separate business and personal finances
To ensure clarity and security, create a dedicated business bank account. Keep your personal assets and business expenses separate. This makes tax filing easier, streamlines income tracking and protects your finances.
Use accounting tools to manage customer data, record transactions when customers pay and monitor store inventory. This will help with budgeting, reporting and scaling your eCommerce store in the future.
By securing these essentials early, you lay a strong foundation for your online store to grow, drive traffic and deliver seamless online sales.
Get a domain name and hosting plan
Once you’ve handled the legalities and business essentials, it’s time to design and create an online store.
Choosing a domain name
A domain name is like the address of the website you own on the internet, making it easy for people to find and visit your site.
If your business name is ‘eCommerce’, then you can have ‘ecommerce’ as your domain name and ‘.com’ as a TLD extension for a global reach.
However, thinking of a name isn’t enough! To truly claim that name and make it your brand identity on the World Wide Web, you need to buy and register your domain name.
Let’s see how to do that with Bluehost.
Go to the Bluehost Domain search page and type in your desired eCommerce store name in the search bar and click on ‘Search.’
The domain extension is set to .com. Because this is one of the most popular domain extensions, it may or may not be available. For example, here’s what popped up for our search above:

Now, what? You can either use a new and interesting domain name that better suits your business or look at the recommended alternatives that show up for your search.
Design your online store
Once your domain is set, the next task is to design your online store. With WordPress AI Builder, you can build a fully functional eCommerce store without any coding experience. The tool offers an intuitive drag-and-drop website builder and pre-built templates that are easy to customize.
Here are the detailed steps for how to start an online store using WordPress AI Builder:
1. Selecting a theme
WordPress AI Builder provides a library of professional and some of the best business WordPress themes that are fully responsive to the website, meaning they automatically adjust to different screen sizes for mobile, tablet and desktop users.
Select the theme that aligns with your brand’s style and reflects your target audience’s preferences. For example, if you’re selling high-end products, you might opt for a sleek, minimalistic design.
2. Customizing your theme with WordPress AI Builder Blocks
WordPress AI Builder Blocks is a built-in design tool within the AI builder that allows you to personalize your site easily. The tool provides pre-built content blocks that can be easily added to your pages with just a few clicks. These blocks include:
- Header and navigation blocks: Choose from different header styles (for example, fixed header, logo-based header) and easily set up your navigation menu with different WooCommerce categories.
- Product display blocks: You can add product grids, carousels and banners to showcase your products effectively.
- Call-to-action (CTA) blocks: Place buttons for actions like ‘Shop Now,’ ‘Learn More’ or ‘Subscribe’ to drive engagement.
- About us and testimonials blocks: Easily add sections to share your business story or display customer reviews.
Using the drag-and-drop builder, you can adjust the layout of these blocks, modify text, change images and tweak fonts, colors and spacing to fit your store’s branding.
3. Customizing page and layout
- Homepage: Customize the homepage to highlight your top-selling products or promotions. You can also feature product categories for easy navigation.
- Product pages: For each product, make sure to create detailed product pages that include high-quality images, descriptions, features, prices and stock availability.
- Contact and FAQ pages: Use WordPress AI Builder Blocks to add a contact page and an FAQ page to answer common customer questions. It’s also a great idea to include a blog or ‘About Us’ page to share more information about your business.
Key features to include:
Your eCommerce website needs several core features to function smoothly:
- Payment gateways: Integrate WooCommerce payment gateway options like PayPal or Stripe to process transactions securely.
- Mobile optimization: Ensure your website is responsive and provides a seamless shopping experience on all devices, especially smartphones.
- Product pages: Write product descriptions, high-quality images and pricing.
- Checkout process: Simplify the checkout process to reduce cart abandonment.
Select your products and set up inventory
Once your store is set up, it’s time to decide what you’ll sell and how you’ll manage it. Your product selection and inventory system will directly impact sales and customer satisfaction.
1. Selecting product
Choose the products that align with your niche and meet the needs of your target market. You can sell physical products, digital downloads or even offer services. If you choose physical products, consider your suppliers and shipping logistics.
YITH Shippo plugins allow you to support multiple carrier services and streamline the tracking process.
2. Managing inventory
Managing your inventory is essential to ensure that you can fulfill orders on time. If you’re just starting, consider Dropshipping or print-on-demand as low-risk ways to sell products without holding stock. If you decide to hold inventory, plugins integrated into WooCommerce can help you manage stock levels effectively.
Multichannel Inventory Management by Ecomdash allows you to manage overselling and retain customer loyalty. It provides live listing for easy management.
3. Pricing
Set a pricing strategy based on your competitors, cost of goods sold and profit margins. Offering discounts or running flash sales using YITH WooCommerce Points and Rewards can help attract customers and boost sales.
Launch your store – testing and going live
Before your store goes live, it’s critical to test every aspect to ensure a smooth launch.
1. Pre-launch testing
Test your store on multiple devices and browsers to ensure it functions correctly. Ensure that your payment gateways are set up and working and run test purchases to make sure the checkout process flows seamlessly.
2. Soft launch
Consider doing a soft launch to get feedback from a select group of customers. This will allow you to make adjustments before the official launch.
3. Going live
Once everything is set up and tested, launch your store and announce it through your social media channels, email newsletters and other marketing efforts. Make sure you track key metrics such as traffic and conversion rates using tools like Google Analytics.
Build customer experience and retention
To build long-term success, focus on creating a great customer experience and retaining loyal customers.
1. Optimizing for user experience
Ensure your own website is user-friendly and easy to navigate, with fast load times and a streamlined checkout process. Offering multiple payment options can help enhance the user experience. You can even update your website based on seasons and holidays.
Read more: WooCommerce Holiday Checklist: Prepare Your Store for Holidays
2. Building trust
Incorporate customer reviews, testimonials and trust badges to build credibility. A secure and transparent return policy also helps establish trust with customers. Use YITH WooCommerce Advanced Reviews to create a social proof of positive reputation.
3. Customer retention
Offer loyalty programs, personalized recommendations and exclusive discounts to keep customers coming back. Use tools such as YITH membership and YITH subscription to create a loyal customer base.
Monitor and scale your business
As your business grows, it’s important to continuously monitor and adjust your strategy.
1. Analyzing performance
Use Google Analytics and other business tools to track traffic, conversion rates and sales data. This allows you to make data-driven decisions and improve performance.
2. Scaling your store
As your business expands, consider scaling your store with more products, enhanced customer support and advanced marketing strategies. Automating processes such as email campaigns, inventory management and customer feedback will free up time for you to focus on growth and innovation.
What are the advantages of running an online store in 2026?
In 2026 as well, consumers are continuously looking to increase their online shopping while finding value in what they buy. For those still debating between opening a physical store or an online business, here’s why eCommerce stores have the edge in 2026:
1. Targeted marketing
Online businesses benefit from digital marketing solutions and tools that allow you to target your specific customers based on their browsing habits, location and preferences. With Google Analytics and social media platforms, you can fine-tune your marketing efforts to generate repeat customers and build brand loyalty.
2. Lower overhead costs
Operating an online store reduces the overhead to a large extent. With fewer operational costs, you can allocate more resources toward driving traffic and improving customer experience.
In contrast, an online store requires only a domain name, web hosting and marketing, allowing you to run it from virtually anywhere.
3. Global customer reach 24/7
An online store gives you the unique ability to tap into a global customer reach 24 hours a day, seven days a week. Unlike a physical store, where your target market is limited, an eCommerce website allows customers to browse and make purchases at any time, from anywhere in the world.
4. Flexibility in business location and hours
With an online store, you’re not tied to a specific location or restricted by traditional working hours. Whether you’re managing your eCommerce business from home or while traveling, you can keep your store operational at all times. This flexibility extends to your customers too, who can shop online at their convenience, resulting in a better overall customer experience.
Final thoughts
The world of online shopping is constantly evolving, offering endless opportunities for entrepreneurs to stand out. Every day, new businesses bring fresh ideas and unique products to the digital marketplace. Now is the time to rise to the occasion and create your own online store.
While the process can seem daunting, the right tools and mindset will guide you to success. Consider using Bluehost to get started. Whether you’re launching a new eCommerce site or upgrading your current platform, our solution provides seamless integration with WooCommerce and other essential features to ensure your store is set up for success.
Explore Bluehost WooCommerce hosting today and unlock the power of a reliable, secure and scalable eCommerce platform. Your online store is just a few clicks away!
FAQs
It depends on your business model. If you’re using dropshipping or print-on-demand, your suppliers handle inventory management. For stock-based businesses, you’ll need to track and manage inventory either manually or through an integrated system.
You can set up payment gateways like PayPal or Stripe through your eCommerce platform. Bluehost WordPress Commerce Solution, for example, integrates these payment processors easily, enabling you to accept secure payments from customers worldwide.
Focus on SEO (search engine optimization), content marketing, social media engagement and paid ads (like Google and Facebook). Collaborating with influencers and running email campaigns also helps to attract and retain customers.
Use SSL certificates, implement secure payment gateways, keep software up to date and consider tools like firewalls or security plugins. Regularly backing up your site and using strong passwords also helps protect your store from threats.

Write A Comment