Key highlights
- Understand what custom error pages are and why replacing default error pages improves user experience and site trust.
- Learn how common HTTP error codes work and when each one is shown to visitors on your website.
- Explore step-by-step methods to create custom error pages in cPanel using built-in tools and File Manager.
- Uncover how to use the .htaccess config file to handle errors and redirects more effectively.
- Know when to use custom error pages versus redirects to guide users and prevent confusion or site exits.
When an error occurs on a website, visitors usually see a default error page generated by the web server. This page appears when users try to access a non-existent page, a restricted resource or when the origin server returns an error code based on an HTTP status code.
While a default error page shows basic information, it often fails to guide users or protect sensitive information. This is where custom error pages become important. A well-configured error page helps explain what went wrong, improves the user experience and keeps visitors engaged with your site.
In this article, you will learn how to create custom error pages in cPanel, understand different status codes and configure pages that are helpful, secure and suitable for a live website.
TL;DR
- Custom error pages replace the default error page shown when an error occurs, helping websites guide users instead of losing visitors.
- HTTP status codes like 404, 403 and 500 tell the browser and web server why a page cannot be displayed.
- cPanel custom error pages let you create and customize error pages directly by selecting the domain and clicking Error Pages in the advanced section.
- Custom error pages using .htaccess provide more control through a config file when server-level customization is required.
- Redirects and custom error pages should be used together to handle non-existent pages, moved content and broken links correctly.
- Well-configured error pages protect sensitive information, improve user experience and keep visitors engaged on your site.
Why use custom error pages in cPanel
By default, when an error occurs, the web server displays a default error page based on the status code returned by the origin server. These default error pages are not designed for your website or users. They often look plain, provide limited information and may reveal sensitive information about the server or resource being accessed.
Using custom error pages in cPanel gives you more control over how errors are displayed on your live site. You can create a configured error page that explains the problem in simple terms and helps visitors take the next step. For example, when a user requests a non-existent page, a custom error page can guide them back to the home page or suggest other pages. This improves user experience, reduces confusion and keeps visitors engaged rather than leaving your site.
Also read: cPanel overview: Your Simple Guide to Mastering Website Management
Understanding common HTTP error codes
An HTTP error code, also called a status code, is a response sent by the web server when something goes wrong during the processing of user requests. This response helps the browser and users understand why a page cannot be displayed. When an error occurs, the server returns a specific error code and shows an error page based on that code.
These status codes make it easier to identify whether the issue is caused by a missing file, restricted access, authentication problems, or a server-side error. By understanding common HTTP error codes, website owners can create custom error pages that display clear messages and guide visitors to the correct page. This also helps protect sensitive information instead of showing a default error page.
Also read: HTTP Status Codes: Complete List & Troubleshooting Guide
Common HTTP error codes
Common HTTP error codes explain why a page cannot be displayed and help identify the server response, so issues can be handled correctly.
- 400 – Bad request: The server cannot process the request due to incorrect syntax or invalid data.
- 401 – Unauthorized: Authentication is required to access the requested resource.
- 403 – Forbidden: The user does not have permission to access the page.
- 404 – Not found: The requested URL points to a non-existent page or missing file.
- 500 – Internal server error: The origin server encountered an issue while processing the request.
This complete list helps you decide which error pages should be customized for your website.
Watch our video on How to Fix 404 Page Not Found Error to see step-by-step solutions and quick fixes that help you resolve broken links and missing pages effectively.
How to create custom error pages in Bluehost cPanel
Customizing your error pages (like the famous 404 Not Found) allows you to keep visitors on your site even when they hit a dead end. Follow these specific steps to access and edit them through your Bluehost dashboard.
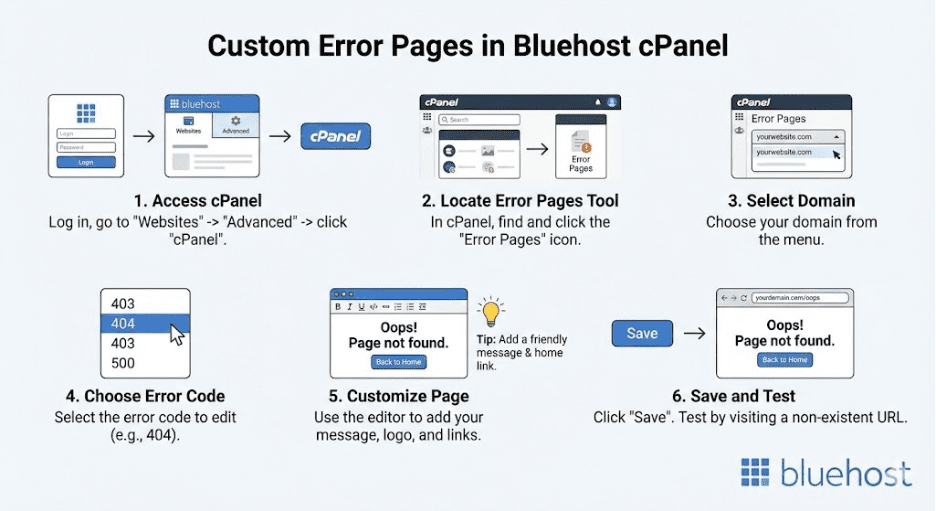
Step 1: Access cPanel via Bluehost dashboard
Since Bluehost integrates cPanel into its main Account Manager, you must navigate there first.
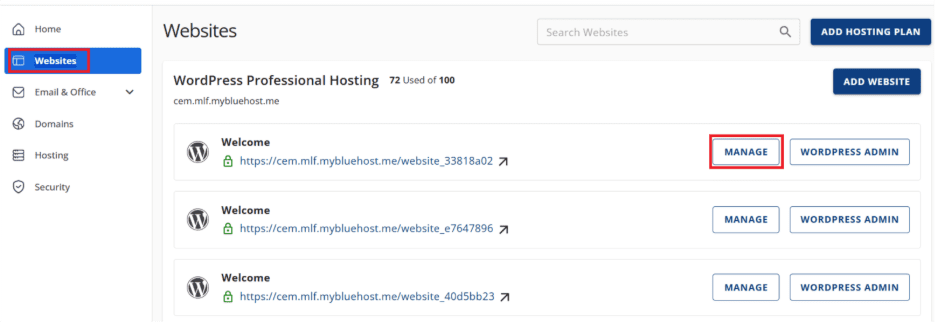
- Log in: Go to the Bluehost login page and sign into your account.
- Select Website: Click on the Websites tab in the left-hand side menu.
- Manage: Locate the specific site you want to work on and click the Settings or Manage button.
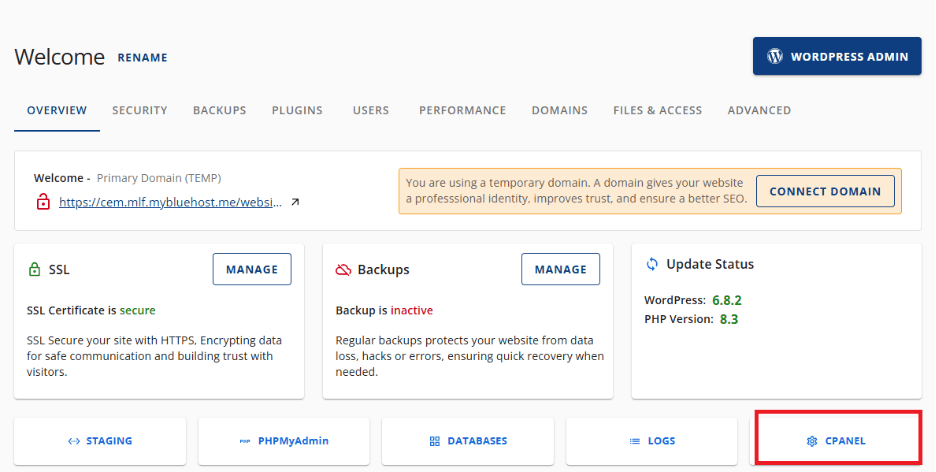
- Launch cPanel: Look for the cPanel button (often located at the bottom of the page or under an “Advanced” tab, depending on your dashboard version) to open the traditional control panel.
Step 2: Locate the error pages tool
Once the cPanel interface loads:
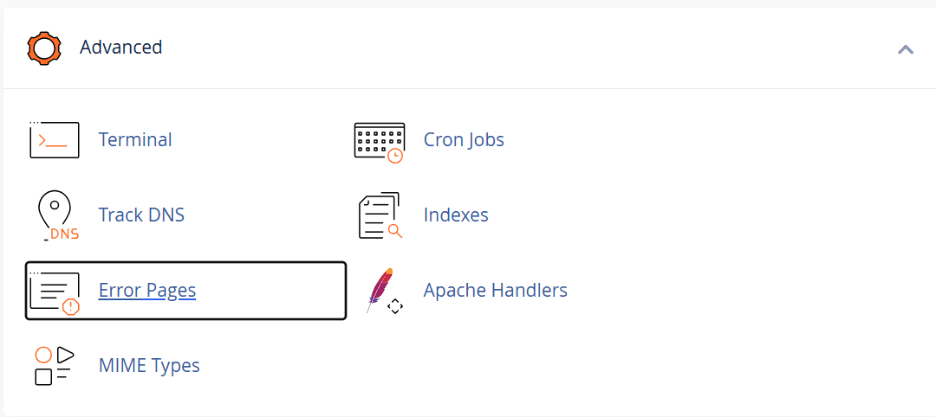
- Scroll down to the Advanced section.
- Click on the Error Pages icon.
Step 3: Select your domain
If you have multiple domains or subdomains hosted on this account:
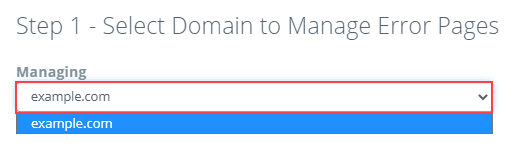
- Click the “Managing:” drop-down menu.
- Select the specific domain for which you want to create the custom page.
Step 4: Choose the error code to customize
Select the specific error code you wish to edit from the list. The most common ones are:
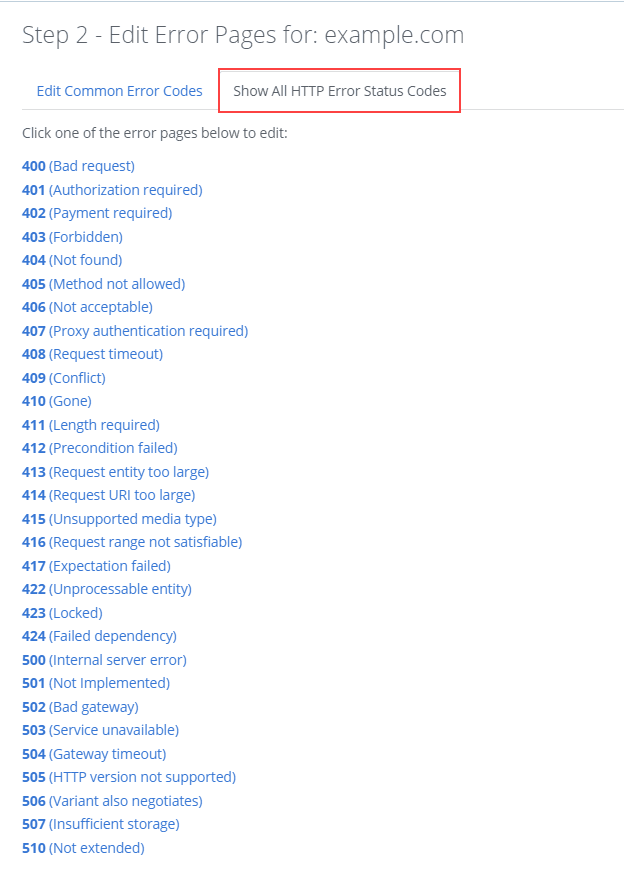
- 404 (Not Found): The most important one shown when a visitor types a wrong URL or clicks a broken link.
- 403 (Forbidden): Shown when a visitor tries to access a restricted folder.
- 500 (Internal Server Error): Shown when there is a server-side script failure.
Also read: What Is a 404 Error Code? How to Fix Page Not Found Issues on Your Website
Step 5: Customize your error page
You will be taken to an editor window. You can enter plain text or use HTML to brand this page (e.g., add your logo, a search bar or a link back to the homepage).
You can also insert dynamic tags to display technical details to the user. Click the buttons at the top of the editor to insert these variables:
| Tag variable | Function |
| Referring URL | Shows the URL of the page the visitor came from. |
| Visitor’s IP Address | Displays the user’s IP address. |
| Requested URL | Displays the specific URL the user was trying to reach. |
| Server Name | Shows your server name. |
| Visitor’s Browser | Detects and displays the user’s browser type (e.g., Chrome). |
Tip: For a standard 404 page, you typically don’t need technical tags. A friendly message like “Oops! We can’t find that page” with a button to your Home Page is best for user experience.
Also read: 500 Internal Server Error: What It Is & How to Fix It
Step 6: Save and publish
- Once you are done editing the HTML, click Save at the bottom of the editor.
- The file will automatically be saved with the .shtml extension (e.g., 404.shtml) in your site’s public root directory.
- Test it: Open a new browser tab, type your domain name and add a nonsense slug at the end (e.g., yourdomain.com/thisdoesnotexist) to see your new custom page in action.
Also read: How to Fix the 403 Forbidden Error in WordPress
Implementing custom error pages and redirects together
Custom error pages and redirects solve different problems, but they work best when you use them together. A custom error page is shown when an error occurs and the web server returns an HTTP status code like 404 or 403. A redirect changes the response, so visitors are sent to a different URL instead of seeing an error page.
1. When to use a 404 custom error page vs a redirect
- Use a 404 custom error page when the content truly does not exist and there is no direct replacement. This is common when a user requests a non-existent page or types the wrong URL.
- Use a redirect when a page has moved to a new location, the file name has changed, or you have replaced old content with a new page.
2. Smart redirect examples
- Redirect an old blog URL to the updated article page.
- Redirect a deleted product page to the closest category page or home page.
- Redirect HTTP to HTTPS (if your site uses SSL).
3. How to prevent redirect loops
Redirect loops happen when a URL is redirected back to itself or through multiple pages in a loop. To avoid this:
- Keep redirects simple and avoid chains.
- Test changes on a live site carefully, using the URL in a browser.
- Review your settings and rules if you edit your .htaccess file or use a redirect tool in cPanel.
Also read: How to Locate, Create or Edit the WordPress .htaccess File
Final thoughts
Custom error pages play an important role in how users experience your website when something goes wrong. Instead of a default error page, a configured error page explains the issue clearly and guides visitors to the correct page. Whether an error occurs from a non-existent page, access restriction, or server issue, custom error pages keep users engaged.
Using cPanel, the File Manager, or the .htaccess file allows you to customize how errors are displayed on your live site. When combined with smart redirects, custom error pages improve navigation, protect sensitive information and create a smoother experience for visitors. Taking the time to configure them properly helps your site appear more reliable and professional.
FAQs
To create custom error pages, you first design an error page using HTML or a shtml file with a clear message and helpful links. Then, you configure the web server to display this page when a specific error code is triggered. This can be done using cPanel custom error pages or by editing a config file, such as the .htaccess file. This approach avoids showing a default error page or yellow screen that may confuse users or expose such information.
To learn how to create custom error pages in cPanel, log in, click Error Pages in the advanced section, and select your domain. Choose the 404 error code and customize the page using HTML. Follow the on-screen steps, save the changes and test the page on your live site. This method works well for visitors and remote users across browsers, including Internet Explorer.
You can redirect a 404 error to a custom error page by implementing custom error pages and redirects using the .htaccess file. Add the appropriate rule to link the error code to your custom page.
Note: Always back up files before editing. Right-click and edit carefully to avoid redirect issues.
In MVC, you create a custom error page by configuring error handling in the application settings and linking the error response to a specific view. The error page can display a helpful message, hide sensitive details like a connection string and guide users to other pages. This ensures errors are handled cleanly and the article remains helpful for real-world website scenarios.

Write A Comment