
Key highlights
- How to edit website content? Start by checking your platform: WordPress, custom code or builder.
- Always back up your web page to avoid losing important data during updates.
- Use visual edit mode or drag-and-drop tools to make changes without needing to edit code.
- For advanced tweaks, explore the source code using Google Chrome developer tools or the JavaScript Console.
- For a fast, beginner-friendly editing experience, try the Bluehost Website Builder, no coding required.
Ever looked at your site and thought, “This could use a quick update?” Maybe your homepage needs a fresh look, a blog post is outdated or you just want to swap a new photo. Whatever the case, knowing how to edit website content is a must—especially if you want to keep things current and professional.
The best part? You don’t need to be a tech pro to do it. These days, editing a website is surprisingly simple. Most platforms are built to be user-friendly, so making updates feels more like editing a doc than working with code.
In this guide, we’ll give a walkthrough on how to edit website step by step. No tech jargon, no guesswork—just simple instructions to help you keep your site fresh and up to date.
What should you know before editing a website?
Before jumping into how to edit website process, it’s helpful to cover a few essentials. This way, you’ll avoid unwanted surprises and feel more in control of the process.
1. Know your website platform
Every web page runs on some kind of platform or builder. The editing process will vary depending on what you’re using, such as:
- WordPress website: Offers flexible editing with themes, plugins and a block-based editor
- Wix or Squarespace: Drag-and-drop builders that are easy to use with visual edit mode
- Custom-built sites: May require help from a web developer if they use HTML/CSS or source code
Not sure which one you’re using? Try checking your login screen or asking the person who built your WordPress site.
2. Backup your website
Before you make any changes, it’s smart to create a backup—just in case. A backup lets you restore your WordPress site if something goes wrong. If you’re using WordPress, many hosting providers (like Bluehost) include easy backup tools.
You can also use plugins like:
- UpdraftPlus (WordPress website)
- Jetpack Backup (also great for WordPress sites)
- Or your platform’s built-in backup option
Related read: Jetpack Backup and Restore
3. Make sure you have the right access
You’ll need the correct permissions to make edits. If you’re not the original site owner or admin:
- Request admin or editor access from the person who manages the web page
- Double-check your login credentials
- Test your access by trying to edit a test page or blog post
For advanced edits, you might need to use a code editor to access the source code. Some developers also use tools like the JavaScript Console or Google Chrome’s developer tools to inspect site elements and troubleshoot issues.
Once these basics are sorted, you’re ready to safely enter edit mode and start customizing your site. Understanding how to edit website elements correctly from the start can help avoid common mistakes and save time.
How to edit a WordPress website?
If you’re using WordPress, learning how to edit a website is simple and beginner-friendly. WordPress allows you to update content, adjust your design and add functionality, no coding required.
Here’s a step-by-step look at how to edit your WordPress website with ease:
- Log into your WordPress dashboard
- Edit pages and posts
- Customize the design
- Use WordPress plugins to enhance your site
- Update and preview changes
With all this in mind, let’s dig deeper into the details:
1. Log into your WordPress dashboard
First, go to WordPress admin and log in with your username and password. Once inside the dashboard, you’ll see the main menu on the left where all the editing tools live.

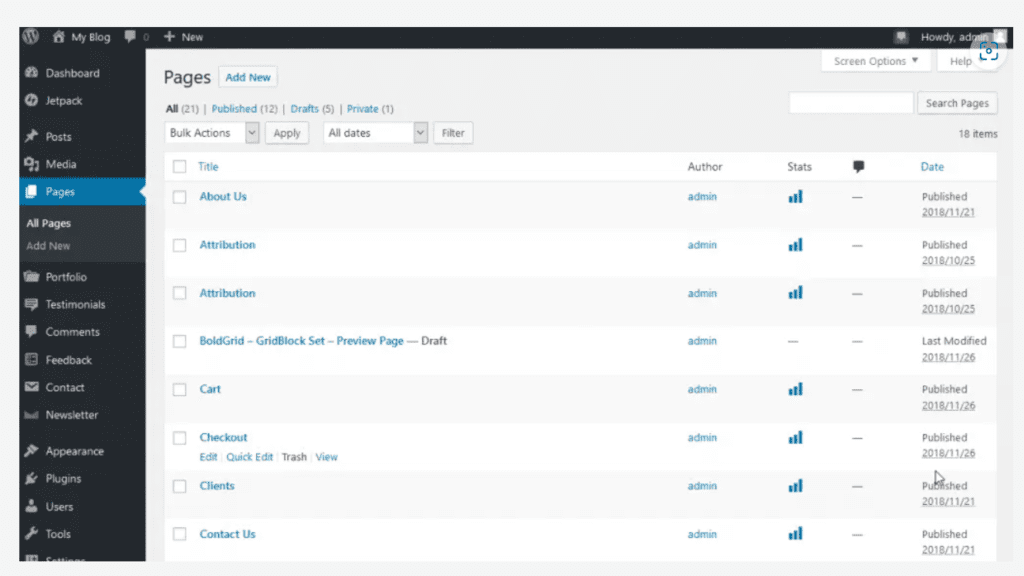
2. Edit pages and posts
To change text, images or layouts:
- Click ‘Pages’ or ‘Posts’ in the left-hand menu.
- Choose the one you want to edit.
- Use the block editor (Gutenberg) to make changes—click on any block to edit text, images, buttons and more.
- Don’t forget to click ‘Update’ to save your changes.
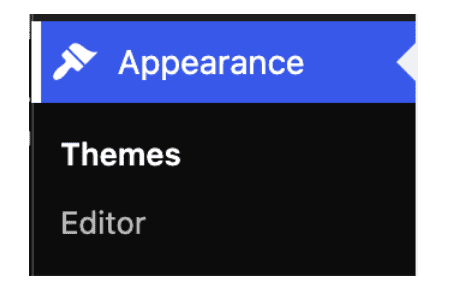
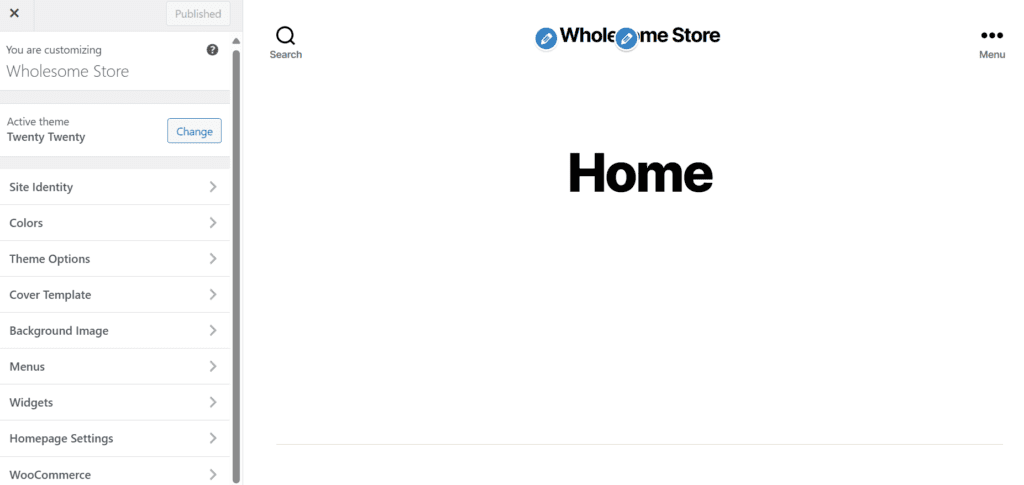
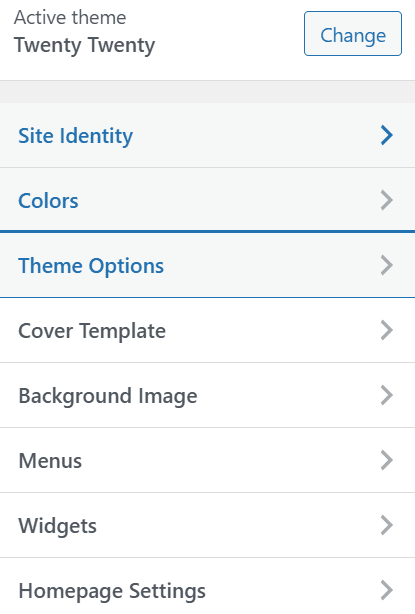
3. Customize the design
Want to change your site’s look and feel?
- Go to ‘Appearance’ > ‘Customize’.
- This will open the WordPress Customizer, where you can tweak your logo, colors, fonts, homepage layout and more.
- Some themes also allow advanced layout changes under ‘Appearance’> ‘Theme’.
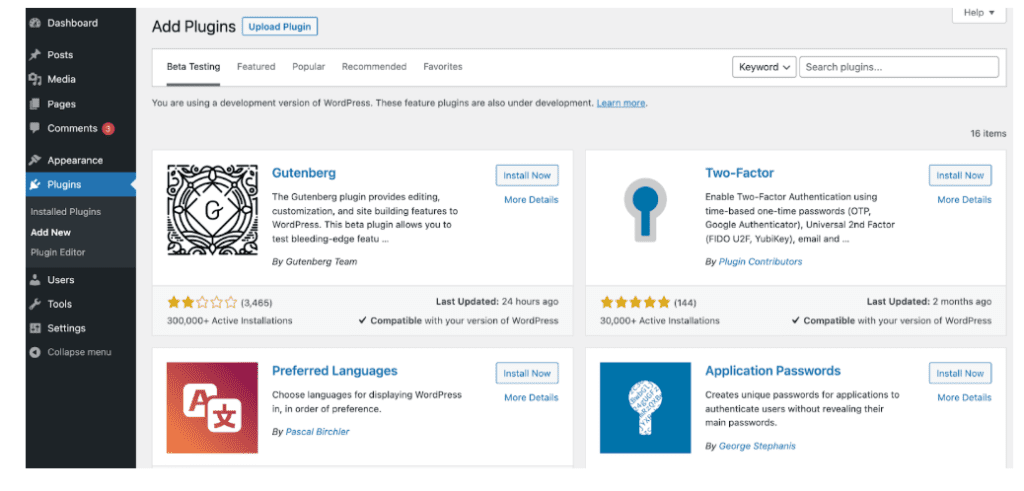
4. Use WordPress plugins to enhance your site
Plugins let you add powerful features without coding. You can:
- Add contact forms (e.g., WPForms).
- Improve SEO (e.g., Yoast SEO- included in Bluehost hosting plans).
- Speed up your site (e.g., WP Super Cache).
- Just go to ‘Plugins’> ‘Add New’, search for what you need and install with one click.
5. Update and preview changes
Before going live:
- Use the ‘Preview’ button to see how your edits look.
- Once you’re happy, hit ‘Update’ or ‘Publish’.
- Revisit your site in a new tab to double-check that everything looks good on desktop and mobile.
Related read: How to Create, Delete and Edit a Page in WordPress
How do you edit a website built with the Bluehost website builder?
The Bluehost website builder makes it easy to edit a website, even if you’re a complete beginner. With intuitive drag-and-drop tools and a visual editor, you have full control to customize your site—no coding skills needed. Here’s a quick walkthrough:
1. Accessing the builder from your Bluehost dashboard
To begin, log into your Bluehost account and open your website dashboard. From there:
- Click on “Edit your site” to launch the edit mode.
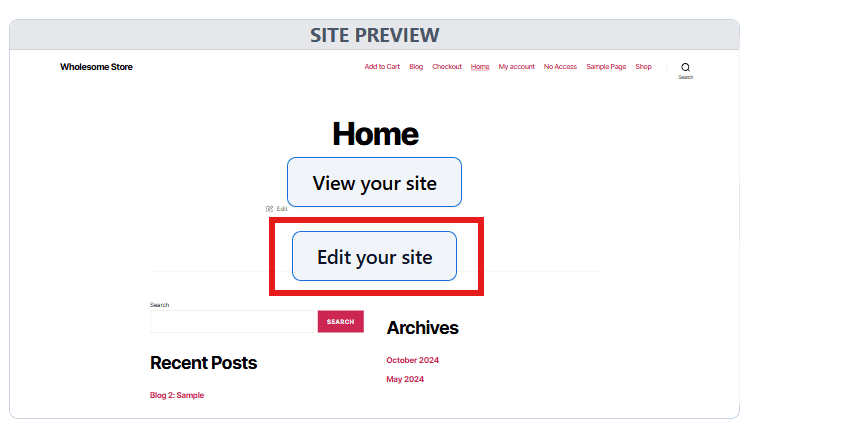
- Your home page or the last edited page will load automatically.
- Choose the page you want to edit from the top menu or add a new page.
Once inside, you’ll be in edit mode, where changes are easy to make and instantly visible.
2. Drag-and-drop editing explained
Bluehost’s builder uses a drag-and-drop system. To start editing:
- Simply double click any text box or image you want to edit.
- You can edit text, add images, buttons or move elements around.
- The sidebar lets you customize your layout, colors, fonts and more.
No need to touch the source code, but if you prefer more control or need to edit code, Bluehost allows advanced users to access custom HTML/CSS sections.
Tip: If you’re inspecting elements using modern browsers like Google Chrome, right-click to open the JavaScript Console or use the context menu to view the source code and debug styling issues.
3. Previewing and publishing changes
As you build or update your site, use the preview option to see how it looks before going live. This is essential for checking responsive design across different devices.
Once you’re happy:
- Click “Publish” to make your changes live.
- Always preview before publishing to ensure a seamless customer experience for your site visitors.
Well-edited websites not only look good but also perform better with search engines, helping you rank higher and attract more traffic.
If you’re not using Bluehost yet, it’s time to make the switch. Our website builder is designed for ease, allowing you to edit your site effortlessly with drag-and-drop functionality. Plus, with our reliable hosting plans, your site will stay fast and secure.
Start editing and building with us today!
How do you edit a custom-coded website (HTML, CSS, JavaScript)?
Editing a custom-coded website built with HTML, CSS and JavaScript involves directly modifying the source code to update design, content or functionality. This gives you full control over how your site looks and behaves, making it ideal for personalized web development. Here’s how you can do it:
- Use a code editor
- Locate the correct HTML/CSS files
- Make changes and test locally
- Upload changes via FTP or hosting control panel
Here’s a detailed breakdown on the steps:
1. Use a code editor (VS Code, Sublime Text)
Install a code editor like Visual Studio Code, Sublime Text or Atom. These editors offer syntax highlighting, extensions and version control integration to make editing easier and more efficient.
2. Locate the correct HTML/CSS files
Find the folder where your website’s files are stored. You’ll typically see:
- .html files (structure/content)
- .css files (styling)
- .js files (functionality/behavior)
If your site is already online, download these files using FTP software (like FileZilla) or your hosting provider’s file manager.
3. Make changes and test locally
Before uploading anything, edit and test your changes locally in a web browser:
- Double-click the HTML file to open it in your browser.
- Make edits in your code editor.
- Refresh the browser to see the updates.
You can also use browser developer tools (Inspect Element) to debug styles.
4. Upload changes via FTP or hosting control panel
Once everything looks good:
- Use FTP client (like FileZilla or Cyberduck) to upload your edited files to the web server.
- Or use your hosting provider’s control panel (like cPanel or Bluehost’s File Manager) to manually upload and overwrite the old files.
Remember: Make sure to back up your original files before replacing them, just in case something breaks.
What are the best practices for editing your website?
Once you know how to edit a WordPress website, it’s just as important to do it well. A few smart habits can make sure your site looks polished, performs smoothly and provides a great experience for visitors. Here are some best practices to follow every time you make changes:
- Keep branding consistent
- Focus on mobile responsiveness
- Optimize images and media
- Maintain website speed and performance
- Always preview changes across different devices
- Choose the right website builder for editing
Now that we’ve covered the basics, let’s explore the details.
1. Keep branding consistent
Make sure your colors, fonts, logo and tone of voice match every page on your web page. A consistent look helps build trust and makes your brand feel professional. If you update one area (like a new font or button style), try to apply it sitewide. This ensures that your website maintains a unified appearance, boosting user experience and credibility.
2. Focus on mobile responsiveness
More people browse on their phones than ever, so your edits need to look good on all screen sizes. Use preview tools (like WordPress’s mobile view or your browser’s responsive mode) to check how things display on tablets and smartphones. This will help ensure your website is user-friendly and provides a seamless experience for website visitors across all devices.
Related read: How to Make a Mobile-Friendly Website: 14 Best Tips
3. Optimize images and media
Large, uncompressed files can slow your site down. When uploading images:
- Resize them to the appropriate dimensions.
- Use compressed formats like JPEG or WebP.
- Consider plugins like Smush or ShortPixel to optimize media automatically.
These steps can significantly improve website load times and reduce unnecessary code bloat, making your web experience faster and more efficient for website visitors.
4. Maintain website speed and performance
Don’t let your edits bog down your site. Remove any outdated plugins or unused elements and test your website speed with tools like Google Page Speed Insights. A faster web page means better SEO and happier visitors. Focus on performance to improve rankings in search engines and enhance user engagement.
Related read: Optimize Your Site: Website Speed Test GTmetrix Tips
5. Always preview changes across different devices
Before you hit “Publish,” take a moment to preview your changes on desktop, tablet and mobile. A layout that looks great on a laptop might break on a phone screen—and it’s always easier to catch it before it goes live. By using the developer tools in your browser or editor, you can quickly check how your site will appear across different screen sizes.
6. Choose the right website builder for editing
Picking the right platform makes editing much easier. If you’re wondering which website builder is easiest to use?, Bluehost offers an intuitive drag-and-drop experience. With Bluehost website building features, you can update text, replace images, reorganize layouts and instantly preview updates, making the whole process of how to edit a website effortless.
How can you troubleshoot common website issues?
Even when you know how to edit a WordPress website, things don’t always go perfectly—and that’s totally normal. If something looks off after making changes, don’t panic. Here are a few common issues and how to fix them:
- Broken layouts after editing
- Missing elements
- Slow loading pages
- Rollbacks and restore from backup
- Editing website content and not saving
- Changes after a theme update
- Plugin conflicts when you edit websites
With that foundation, it’s time to dive into the specifics.
1. Broken layouts after editing
You’ve made some changes to your web page and suddenly your page looks all out of whack. This usually happens when:
- A new block or selected object doesn’t align properly.
- You accidentally deleted a section of HTML code or a CSS element.
- A plugin or theme update caused a layout conflict.
Fix it: Try undoing recent changes or switching to a previous version of the page (WordPress lets you view “revisions”). If you’re using a page builder like Elementor, check the responsive settings. You can also use developer tools in your browser to inspect the layout for potential issues.
2. Missing elements
Sometimes, images, buttons or entire sections seem to vanish after editing. Don’t worry—they’re often just hidden or unpublished by mistake.
Fix it: Double-check visibility settings for each block or section. Also, make sure any plugins tied to that content are still active. You can check the CSS for any rules that might be hiding elements.
3. Slow loading pages
If your site suddenly takes forever to load after an update, it could be due to:
- Large images or videos that aren’t optimized.
- Heavy plugins or too many scripts running at once.
- Unnecessary JavaScript slowing down the page.
Fix it: Optimize your images by compressing them to reduce file sizes. Remove any plugins you don’t need and run a speed test to see what’s slowing things down. Caching plugins like WP Super Cache or LiteSpeed can also help improve page load times. If you’re using WordPress, you can use the built-in performance settings or tools like Google Developer Tools to pinpoint issues.
4. Rollbacks and restore from backup
Worst-case scenario? Something major breaks and you just want to undo everything. That’s where backups come in handy.
Fix it: If you’ve created a backup (and you definitely should), restore it through your hosting dashboard or backup plugin. Many WordPress hosts like Bluehost offer one-click restore options, so you can quickly revert your web page to a previous version.
5. Editing website content and not saving
You’ve updated text, images or links, but sometimes editing website content doesn’t show up on the live page. This usually happens due to caching or missed publishing steps.
Fix it: Clear your browser cache and confirm you clicked “Update” or “Publish” after editing website content. In WordPress, always double-check the page status to make sure your website editing changes are live.
6. Changes after a theme update
When switching or updating a theme, your design may shift unexpectedly. Menus, layouts and colors often move around, making it tricky if you don’t know how to change a website properly.
Fix it: Open the Customizer or page builder to reassign menus, widgets and styling. Always preview updates so you’re confident about how to change a website before saving. Knowing how to edit a website step by step helps prevent design issues after theme changes.
7. Plugin conflicts when you edit websites
Sometimes plugins clash, causing broken layouts or hidden sections while you try to edit websites. This is one of the most common challenges in website editing.
Fix it: Deactivate plugins one by one until the issue is clear. Update or replace any problematic ones. Keeping your plugin list lean makes it easier to edit websites smoothly without conflicts.
Learning how to use WordPress to edit a website can help you avoid many of these issues from the start and feel more confident making changes. By regularly using developer tools and keeping backups, you’ll be ready for anything that comes your way.
Final thoughts
Editing a website doesn’t have to be complicated. With the right tools and access, you can easily learn how to edit website pages, improve your design and enhance the experience for your visitors while boosting performance in search engines.
You don’t need to be a developer or dive into the source code. With drag-and-drop editors and built-in customization options, editing website content is simple and intuitive. Whether you’re updating text, images or layouts, website editing can be done quickly without ever touching code or opening developer tools.
So, wondering how to edit your website in just minutes? Get started with Bluehost Website Builder, no coding required, mobile-ready and beginner friendly.
Build and edit your site with ease using Bluehost!
FAQs
To edit a WordPress website, log in to your WordPress dashboard, go to ‘Pages’ or ‘Posts’ and click ‘Edit’ under the content you want to update. You can also customize design elements using the Customizer or a page builder like Elementor.
WordPress makes it easy to edit your site. Use the block editor (Gutenberg) to update text, images and layouts. You can also install themes and plugins to customize design and functionality—all without needing to code.
Not at all! Most modern website builders are designed for non-coders. You can make changes to text, images, layouts and even design elements without touching a single line of code.
Layouts can shift depending on screen size. Always preview your edits on mobile and tablet views before publishing. Responsive design ensures your site looks great on all devices.
Try checking the login URL or asking your developer or web host. You can also use tools like BuiltWith to see what platform and technologies your site is using.
Here, knowing how to edit your website is key. A platform with a user friendly interface makes website editing smooth and efficient, giving you quick edit tools to update product descriptions, prices or images. Additionally, regularly updating your services page or adding a new webpage for promotions keeps information accurate and engaging. By consistently focusing on how to edit your website, you ensure your site stays fresh, trustworthy and aligned with both customer needs.
You can edit a web page in WordPress by logging into your dashboard and selecting the page you want to update. Use the block editor to change text, images or fonts. This process makes your site more intuitive and ensures a consistent look across all pages. If you wonder how to edit my website quickly, WordPress makes it simple.
Edit mode lets you view and change your site in real time. From the page editor, you can reflect updates instantly without needing coding knowledge. It’s perfect if you’re asking how to change a website and want fast answers. Use edit mode to adjust settings, check accessibility and even preview changes before publishing to make sure everything works as expected.
Yes. Regular website editing helps improve SEO by keeping your content up to date and relevant. Adding new text and optimizing structure can increase conversion and generate more leads. Search engines reward sites with consistent updates and strong security measures. Editing also improves effectiveness, which can matter when you’re tailoring pages to specific market trends.
Developer tools give you a clear way to spot issues on your webpage, whether it’s broken images, styling problems or outdated content. They let you preview changes instantly, so you know how edits will look before your visitors do. If you’re wondering how to edit my website more effectively, pairing these tools with Bluehost website building features makes it easy to create updates and connect everything across your site without needing advanced skills.
If you’re asking which website builder is easiest to use, Bluehost is a great choice. Bluehost website building features make both building and editing simple. You can drag and drop elements, update text, swap images and adjust layouts in minutes. You can also preview changes before publishing, so edits always look right to your visitors.

Write A Comment