Key highlights
- Learn how to correctly configure PHP timezone settings to prevent scheduling conflicts and timestamp errors on your WordPress site.
- Discover the step-by-step process for modifying WordPress timezone configuration through your hosting control panel.
- Understand common timezone-related issues that affect post scheduling, event management and server timestamps.
- Explore multiple methods to change PHP timezone settings including php.ini modifications and WordPress admin adjustments.
- Know which timezone configuration approach works best for your specific WordPress hosting environment.
Have you ever noticed that your website displays the wrong time, even though you’re sure you set everything up correctly? This frustrating issue is more common than you might think, and it usually stems from a disconnect between your server’s PHP timezone settings and your WordPress configuration. When these two systems aren’t aligned, you’ll see incorrect timestamps on blog posts, comments, scheduled content and anywhere else time appears on your site.
The good news is that fixing timezone issues doesn’t require advanced technical skills. This guide will walk you through two essential approaches to get your site displaying the correct time. First, we’ll show you how to change the reported timezone in PHP by modifying your server settings through your hosting control panel. This method affects how your server processes time-related functions at the core level.
After covering the PHP approach, we’ll dive into WordPress-specific timezone settings that you can adjust directly from your dashboard. These WordPress timezone controls influence how timestamps appear in your admin area, on your live site and for scheduled posts. By the end of this post, you’ll understand both methods and know exactly which approach works best for your specific situation.
Configure timezone in PHP
Start by logging in to your Bluehost Account Manager then follow these steps:
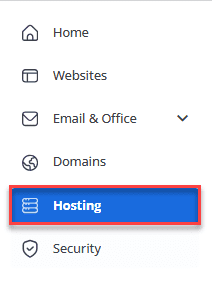
1.Click Hosting from the side navigation menu to the left.
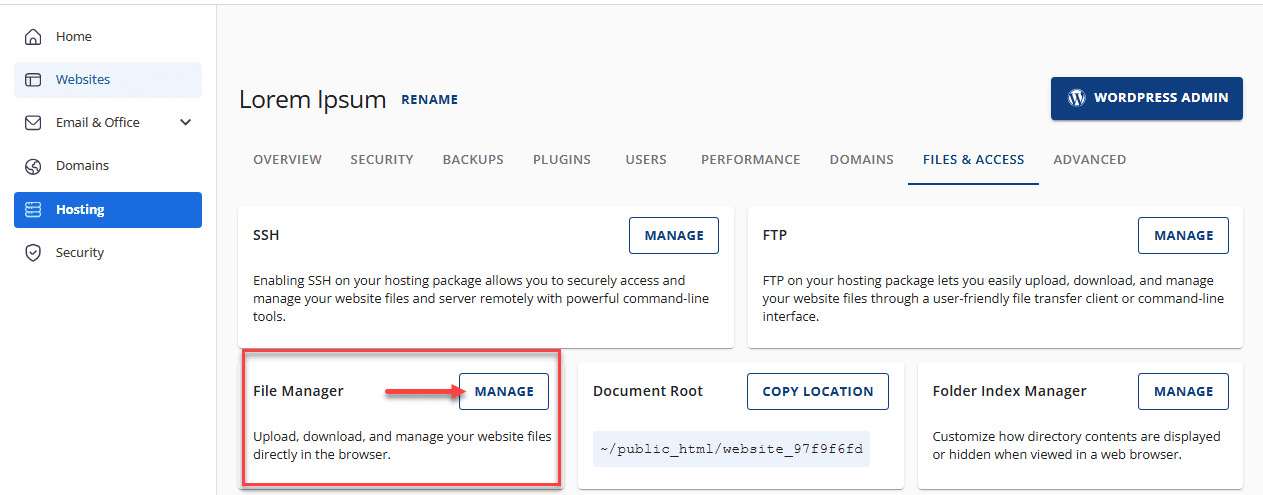
2. Go to the FILES & ACCESS tab and click MANAGE on the File Manager tile.
3. Open the public_html folder.
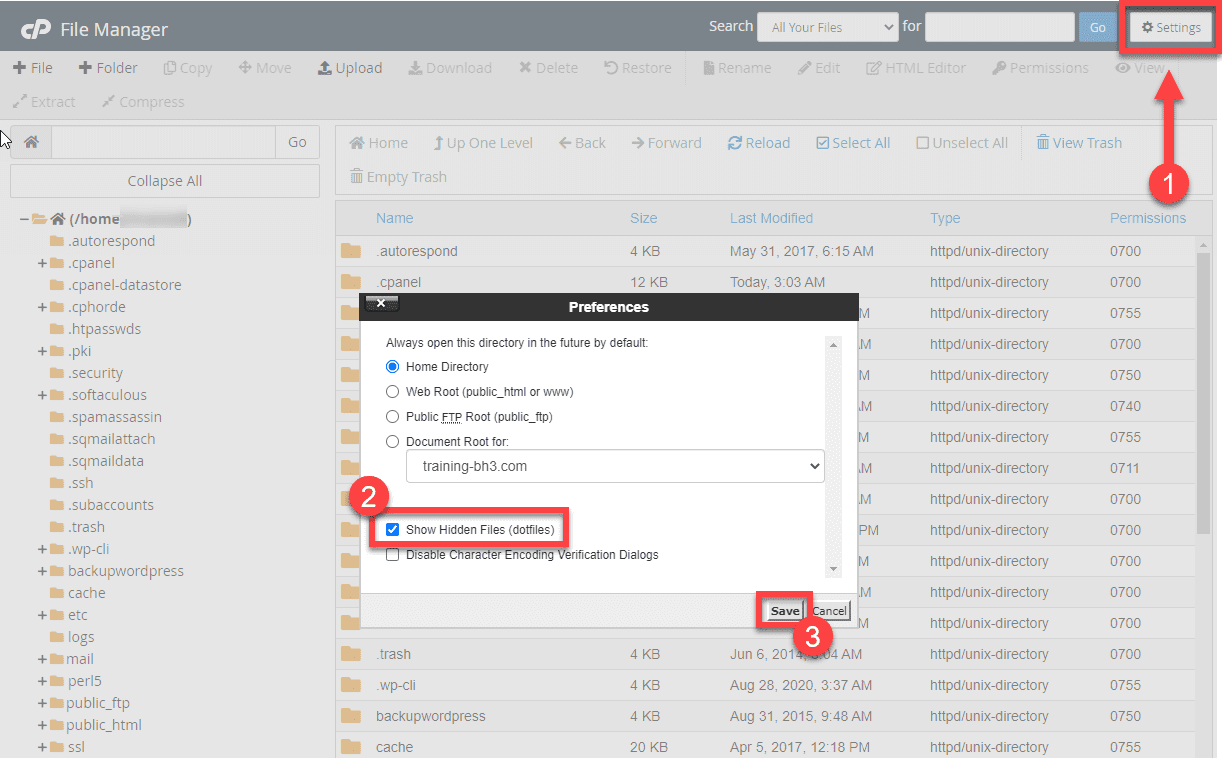
4. Click the Settings button at the top right corner. Make sure that there is a check mark on Show Hidden Files (dotfiles), then hit Save.
6. Navigate to the folder that contains the .htaccess file and click the Edit icon in the Toolbar.
7. Alternatively, you can right-click on the selected file and click on Edit from the drop-down menu.
8. Click on the Edit button again.
9. Press Ctrl+F (Shortcut to find the section easily) and enter the
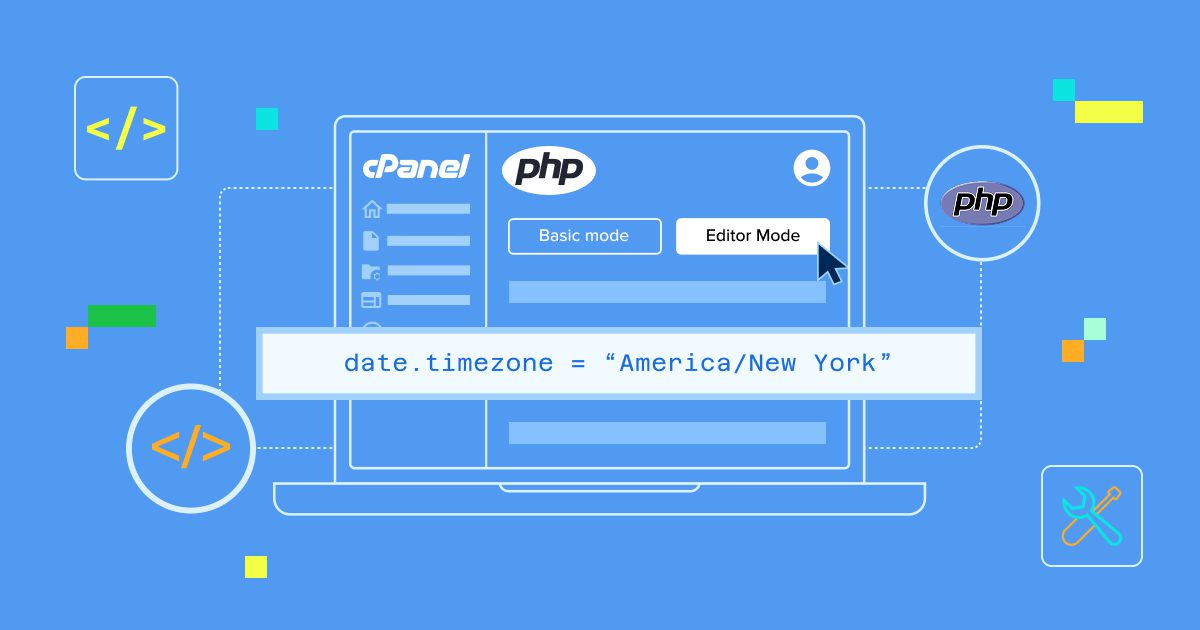
10. For example, you can add the line php_value date.timezone “America/Denver.” Check the list of supported timezones by PHP at http://php.net/timezones.

11. Click the Save Changes button in the top-right corner of your screen.
How to change your WordPress timezone?
To change WordPress timezone you can do the following:
- WordPress has its own timezone setting that can override how times are displayed in your dashboard and on your site, separate from server-level PHP timezone settings.
- You should change your WordPress timezone when you need accurate post publish times, proper scheduling for future posts, correct comment timestamps and consistent analytics data.
- This is particularly important if your hosting server is located in a different timezone than your target audience or business location.
- WordPress timezone settings primarily control how dates and times appear to visitors and in your admin dashboard, while server-level PHP timezone changes are typically only necessary for custom applications or when WordPress timezone settings aren’t sufficient.
- If you’re experiencing issues with scheduled posts publishing at wrong times, or if timestamps on comments and posts don’t match your local time, adjusting the WordPress timezone is usually the right solution.
- Before you start, ensure you have admin access to your WordPress dashboard, know your local city or UTC offset and confirm which site you’re editing if you manage multiple WordPress installations.
- You’ll also want to check if any scheduled posts might be affected by the timezone change, as this could impact their publication timing.
Set your site’s timezone
1.Log in to your WordPress dashboard and navigate to Settings, then click on General Settings.
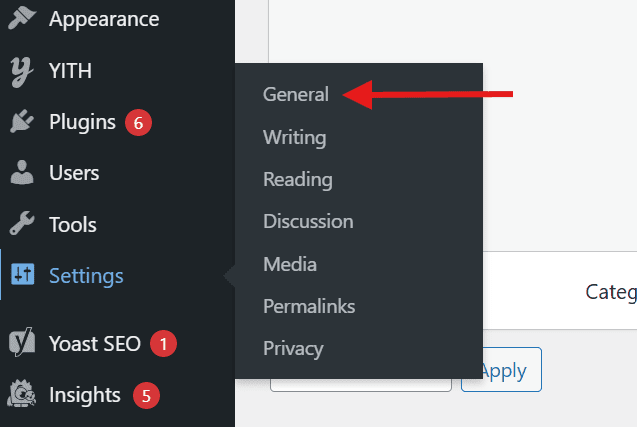
2. Scroll down to the Timezone section and look for the dropdown menu labeled “Timezone.”
3. Choose a city-based timezone when available (such as “New York” or “Los Angeles”) rather than UTC offsets, as these automatically handle daylight saving time changes.

4. If your preferred city isn’t listed, select the appropriate UTC offset that matches your local timezone.
5. Click “Save Changes” at the bottom of the page to apply your timezone settings.
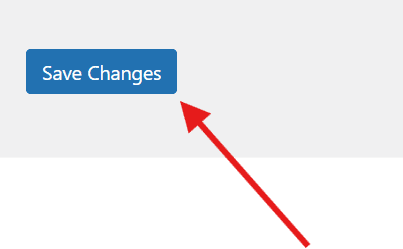
6. WordPress will display a confirmation message once the settings are saved successfully.
After updating your timezone, verify the change by checking the current time displayed in your WordPress dashboard’s “At a Glance” widget. Review any scheduled posts to ensure their timing aligns with your expectations and visit your website’s front end to confirm that post timestamps and comments show the correct time. If you manage an eCommerce site, also check that any time-sensitive promotions or events display accurate timing for your visitors.
Set your date and time format
Your date and time format settings control how visitors see timestamps throughout your WordPress site – from blog post dates and archive pages to comment timestamps and widget displays. These formatting options don’t change your site’s underlying timezone but simply adjust how dates and times appear to your audience.
To customize your date and time format, navigate to Settings > General in your WordPress dashboard and scroll to the “Date Format” and “Time Format” sections. You can choose from common presets or create a custom format using formatting codes. For US audiences, consider formats like “March 15, 2024” or “3/15/2024”, while international audiences often prefer “15 March 2024” or “15/03/2024”. Maintain consistency across your entire site by using the same format style throughout.
Common format options include:
- Full date with month name (March 15, 2024)
- Numerical date (03/15/2024 or 15/03/2024)
- 12-hour time (3:30 pm) or 24-hour time (15:30)
After saving your changes, verify the formatting by checking a recent blog post, any scheduled posts in your dashboard and theme areas that display dates like your sidebar or footer to ensure everything appears correctly.
Final thoughts
Adjusting the timezone for your PHP application ensures your website displays accurate timestamps for your visitors. By modifying the php_value date.timezone directive in your .htaccess file through your File Manager in the Account Manager, you can successfully configure the correct timezone settings for your PHP environment. This simple configuration change helps maintain consistency across your WordPress site and improves the user experience for your global audience.
If you’re looking for reliable WordPress hosting with easy-to-use control panels and robust file management tools, consider Bluehost WordPress hosting. With optimized performance, 24/7 support and seamless integration with WordPress, Bluehost makes managing your PHP configurations and timezone settings effortless.
Get started with Bluehost WordPress hosting today and power your website with the hosting solution trusted by millions.
FAQs
Your .htaccess file is typically located in the root directory of your website. Log in to your Account Manager, access the File Manager and navigate to the public_html folder. If you don’t see the file, make sure hidden files are visible in your File Manager settings.
You should use the standard PHP timezone identifiers such as “America/New_York”, “Europe/London” or “Asia/Tokyo”. A complete list of supported timezones can be found in the official PHP documentation.
Yes, WordPress has its own timezone setting in the WordPress admin dashboard. Navigate to Settings > General and select your timezone from the dropdown menu. This setting controls how WordPress displays dates and times throughout your site.
Changing the PHP timezone setting affects how PHP interprets and displays times, but it doesn’t automatically update existing timestamps in your database. Your database may have its own timezone configuration that needs to be set separately.
If your .htaccess modifications don’t take effect, check that your hosting provider allows PHP timezone changes through .htaccess files. Some hosting environments may require you to use php.ini or contact support for assistance. You can also try clearing your website cache and browser cache to see the changes.


Write A Comment