
Key highlights
- Learn to use a valid government-issued ID, good lighting and a stable connection.
- Understand that many flows require you to scan the ID front and back.
- Know you may need to upload a verification selfie or confirm your identity with a video selfie.
- Discover that most rejections come from image quality, expired IDs or detail mismatches.
- Explore strong name tag security habits (secure device, private network, updated OS).
Online platforms are under constant pressure to prevent fraud, fake accounts and impersonation, without creating a frustrating user experience. That is why nametag identity verification has become a common method for confirming a real person is behind an account, especially for marketplaces, creator platforms and communities that require stronger trust.
In this guide, you will learn what Nametag is. You’ll understand how the Nametag ID process typically works. Learn what you need before you start the verification process.
What is nametag ID verification?
In simple terms, Nametag is an identity verification solution that helps platforms confirm a user’s identity by collecting and validating identity evidence, most commonly a government-issued ID and a selfie (photo or video). This is often presented to end users as a guided “verify your identity” flow inside an app or web page.
You may see references to Nametag, Nametag Inc, the Nametag app or Nametag software, depending on the platform you are using. In many cases, the verification screen is embedded into another product (for example, a creator platform or community) rather than a standalone app you download.
What “verify ID” usually means in a nametag flow
While implementations vary by platform, nametag identity verification commonly involves:
- Document capture: You take photos of your identity document (often requiring you to scan ID front and back).
- Livenessie check: You upload a verification selfie or record a short motion prompt to confirm your identity with a video selfie.
- Data matching: The system compares your selfie to the photo on the ID and checks the ID details for integrity.
- Decision outcome: The platform returns “verified,” “needs review, or “failed,” sometimes with limited reasons for privacy and security.
Together, these steps create a secure yet user-friendly process that helps platforms verify real identities without unnecessary friction. Understanding this flow also makes it easier to interpret related terms and labels you may encounter during identity verification.
Nametag vs. “name tag” vs. “name ID” terms in people search
Searches such as name tag security, name id, name ID verification or “confirm your name” often refer to the same real-world need: ensuring the person signing up is genuine and matches the identity data provided. If you arrived here after seeing a verification prompt, the practical steps are the same: capture the ID clearly, complete the selfie check and make sure your details match exactly.
Some users also encounter terms like Supertag ID or “super tag” in certain identity contexts. If your screen specifically says Supertag ID (or a similar label), follow the platform’s instructions. Most identity flows still require the same core steps: document + selfie + confirmation.
Once you understand how Nametag ID verification works and what the process typically involves, the next question is why platforms choose Nametag in the first place and what sets it apart from other identity verification solutions.
Why choose a nametag for ID verification?
Most people do not “choose” the vendor directly; the platform chooses it for them. However, users still benefit when an identity flow is designed to be fast, consistent and secure. The following are common reasons platforms adopt nametag software or similar verification tooling.
1. Fast and automated verification process
Automated checks can quickly confirm document readability and basic integrity. When the capture quality is strong, many verifications are completed in minutes rather than days. If your session is flagged for manual review, it can take longer, but good inputs (clear ID images and proper selfie capture) reduce delays.
2. Supports multiple government-issued IDs
Many verification flows accept a range of IDs, such as passports, driver’s licenses and national ID cards, depending on the platform and country. If you cannot find your document type in the dropdown, it may be unsupported for your region or that specific product’s compliance rules.
3. Designed to reduce fraud and identity misuse
A major goal of nametag identity verification is to limit account takeovers, fake profiles, chargebacks and impersonation. Requiring a real identity check helps protect communities where trust matters, such as creator monetization, payouts or age-restricted experiences.
Focuses on user privacy and data security
Identity checks involve sensitive data. Strong name tag security practices typically include encrypted transmission, strict access controls and limited retention policies, though the exact approach depends on the platform running the verification and its policies. As a user, you can improve outcomes and safety by verifying only within trusted apps, avoiding public Wi‑Fi and ensuring your device is updated.
How to verify your identity with Nametag
To securely complete the identity verification process using Nametag, please follow the steps outlined below:
1. Locate the verification email sent to your inbox. This message contains a secure, one-time link to launch the Nametag application.
2. Tap the link to begin. If you are accessing this email from a computer, a QR code will appear on your screen; scan this code with your smartphone camera to continue the process on your mobile device.
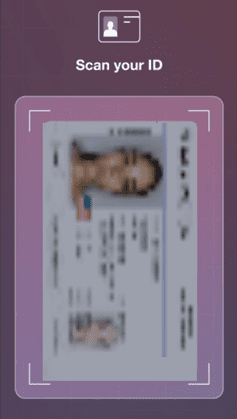
3. Nametag will guide you through scanning your government-issued ID. Ensure your ID is placed on a flat surface with good lighting so the image is clear and legible.
Scan your ID:
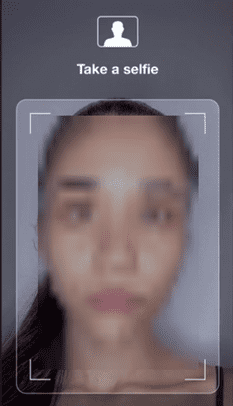
4. After scanning your ID, you will be prompted to take a selfie. This biometric step verifies that your face matches the photo on your ID.
Take a selfie:
5. Once you have completed the scans, tap Share to submit your information. We will automatically receive confirmation that your identity has been successfully verified.
For more information regarding data handling and security, please review the Nametag Privacy Policy.
Platform scenarios: Tango and prolific verification flows
Users often search for platform-specific instructions. While each platform has its own policies, the identity steps are usually similar when an embedded verification provider is used.
How to get verified on Tango (account trust and safety checks)
For searches like how to get verified on Tango, the same best practices apply: strong lighting, stable connection and careful ID capture. If a platform uses an embedded provider, you may see similar prompts to scan your document, then complete a selfie or video step.
Prolific ID verification (research participation and compliance)
Prolific ID verification typically emphasizes accuracy and matching details. If your typed profile information differs from your ID, correct your profile fields first (where allowed) before reattempting verification.
Nametag security: How to protect your data during verification
Identity verification requires sharing sensitive personal information, which makes security a critical part of the process. While Nametag uses advanced encryption and privacy-preserving technology to verify your identity without storing data on vulnerable servers, your own setup and behavior play an equally important role in keeping that data safe.
Best practices before you upload ID documents
- Verify the source: Only initiate verification through official support channels, trusted in-app prompts or verified email links from the service provider.
- Avoid public Wi-Fi: Conduct the verification process using a private home network or cellular data to prevent data interception.
- Update your device: Ensure your operating system and browser are fully updated, as Nametag often relies on on-device security features like the Secure Enclave.
- Disable screen recording: Close any screen-capture or remote-access tools to prevent accidental exposure of your ID credentials during the scan.
After verification: keep your account protected
- Enable Two-Factor Authentication (2FA): Immediately active 2FA on your recovered account, preferably using an authenticator app or hardware key.
- Use a strong, unique password: Generate a complex password and store it securely in a password manager to prevent future compromise.
- Stay alert for phishing: Be wary of unexpected emails asking you to “re-verify” or “confirm your identity” via suspicious links, as these are common tactics to bypass security.
Taking these steps right after verification helps lock down your account and reduces the risk of another security incident. A few minutes spent on prevention now can save you from account recovery headaches later.
Common issues and how to fix them
Most verification failures stem from image quality issues or data mismatches. Use the following troubleshooting steps to resolve these errors and speed up the review process.
1) Blurry or unreadable ID images
Symptoms: Errors such as “Unable to read document,” “Image too blurry,” or repeated capture failures.
- Wipe your camera lens and ensure you are in a well-lit area (avoid overhead glare or shadows).
- Place your ID on a plain, dark surface to create contrast and help the camera focus.
- Hold your phone steady and wait for the autofocus to lock onto the text before taking the photo.
- If prompted to retry, rescan both the front and back of your ID to ensure a consistent data set.
2) Mismatched personal details
Symptoms: Errors like “Details do not match,” “Name mismatch,” or “Date of birth mismatch.”
- Ensure the name on your account profile matches your ID exactly (including middle names).
- Do not use nicknames or abbreviated names unless they appear that way on your government ID.
- Check for typos in your profile, date of birth, or address and correct them before retrying the scan.
3) Unsupported or expired IDs
Symptoms: Alerts stating “Document not supported,” “Expired document” or failure to recognize the ID type.
- Verify that your ID is current; expired documents are generally rejected for security reasons.
- Ensure you are using a supported government-issued ID, such as a driver’s license, passport or state ID card.
- Check that the physical card is not cracked, taped or significantly damaged, as this can obscure security features.
4) Verification is taking longer than expected
Symptoms: Status remains stuck on “Pending” or “Under review” with no immediate confirmation.
- Allow the full processing time to elapse; some submissions trigger a manual security review (appeal) by Nametag experts.
- Avoid submitting multiple back-to-back requests, as this can flag your account for fraud and delay the process.
- Watch your email for additional instructions, such as requests for a new selfie or clarification on your details.
Quick Checklist: What to Do Before You Retry Nametag ID
Before attempting the Nametag ID verification process again, ensure you meet the following conditions for the best success rate:
- Update your mobile browser or the partner app to the latest version.
- Confirm your ID is valid, unexpired and physically with you.
- Find a location with bright, even lighting and minimize glare.
- Position the ID flat on a contrasting background and capture all four corners.
- Take your selfie in a single attempt, following all on-screen prompts (e.g., center your face, look straight ahead).
Final thoughts
Successful nametag identity verification is less about luck and more about preparation: a valid document, accurate matching details and high-quality images. If you follow best practices, especially when you must scan ID front and back and confirm your identity with a video selfie, you can reduce delays and avoid the most common rejection reasons.
If you’re building a WordPress website or launching an online store with Bluehost, remember that platform security and identity protection are essential for both you and your customers. While specific features may vary by hosting plan, the same fundamentals apply across every Bluehost WordPress workflow: clarity, accuracy and secure implementation.
Ready to protect your WordPress site? Start with Bluehost’s secure hosting solutions that include built-in SSL certificates and advanced security features to keep your website and customer data safe.
FAQs
Timing varies by platform and submission quality. Some checks are complete within minutes, while others may be queued for manual review and take longer. Clear images, correct details and completing the selfie step correctly typically reduce delays.
Accepted IDs depend on the platform configuration and your country. Commonly accepted documents include passports, driver’s licenses and national ID cards. If you do not see your ID type, it may be unsupported for your region or that specific verification flow.
The most common reasons are blurry or incomplete photos, glare, an expired or unsupported document or mismatched personal details (for example, the account name differs from the ID). Retrying with better lighting and exact matching information usually resolves the issue.
Identity verification providers and platforms generally use security controls designed to protect sensitive data, but your own practices matter as well. Use official in-app prompts, avoid public Wi‑Fi, keep your device updated and watch for phishing attempts to strengthen name tag security.
In most cases, yes, if the platform allows retries. Follow the error guidance, improve image quality and ensure you complete all required steps, including the selfie or video prompt. If repeated attempts fail, contact the platform’s support for next-step options.
NameSilo LLC is commonly associated with domain registration services, which are different from identity verification. If you are verifying an account, follow the verification instructions presented by your platform and rely on official help articles for that specific service.


Write A Comment