 ChatGPT,
  Claude,
  Gemini,
  Grok — all four for
How to Connect Bluehost AI Credits to Open WebUI
Power your Open WebUI chats directly using the AI Credits balance tied to your Bluehost account. AI Credits route through the Bluehost AI Gateway — a single, OpenAI-compatible endpoint — so you can call GPT, Claude, Gemini, Grok, and other supported models without creating a separate account with each provider.
This article assumes you already have Open WebUI running on a Bluehost Self-Managed VPS or Virtual Dedicated Server (VDS).
If you haven't installed Open WebUI yet, see:
- Purchase a Self-Managed VPS with Open WebUI Installation
- Purchase a Virtual Dedicated Server with Open WebUI Installation
- Reimage Your Server for Open WebUI Installation
Before You Start
Ensure you have the following prerequisites ready:
- Open WebUI Instance: Up and running, with your admin account already created (the first user to sign up becomes the global Admin).
- Access Level: Admin access to Open WebUI so you can reach Admin > Settings > Connections.
- Bluehost Account: An active account with an available AI credit balance (required for AI Credits only).
Note: You will need an AI Credits API key and a Gateway endpoint. If you haven't created a key yet, see How to Manage Your Bluehost API Keys. For an overview of how the system works, see Understanding AI Credits. If you don't have a credit balance yet, see How to Purchase Bluehost AI Credits.
AI Credits let you call supported models through Bluehost without creating a separate account with each model provider. Usage is deducted from your existing AI credit balance instead of being billed by the provider directly.
First Time Setup
Follow these steps to connect to your VPS or VDS, log in to Open WebUI for the first time, and configure your AI Credits key as a connection.
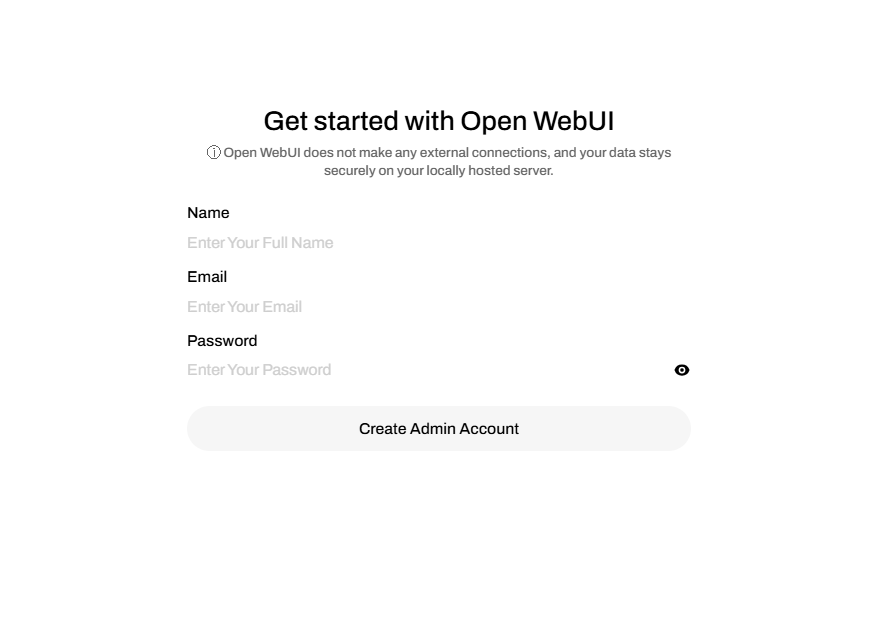
- Log in to your Open WebUI dashboard. Click Get started to create your account.

- The first user to register automatically becomes the global Admin.
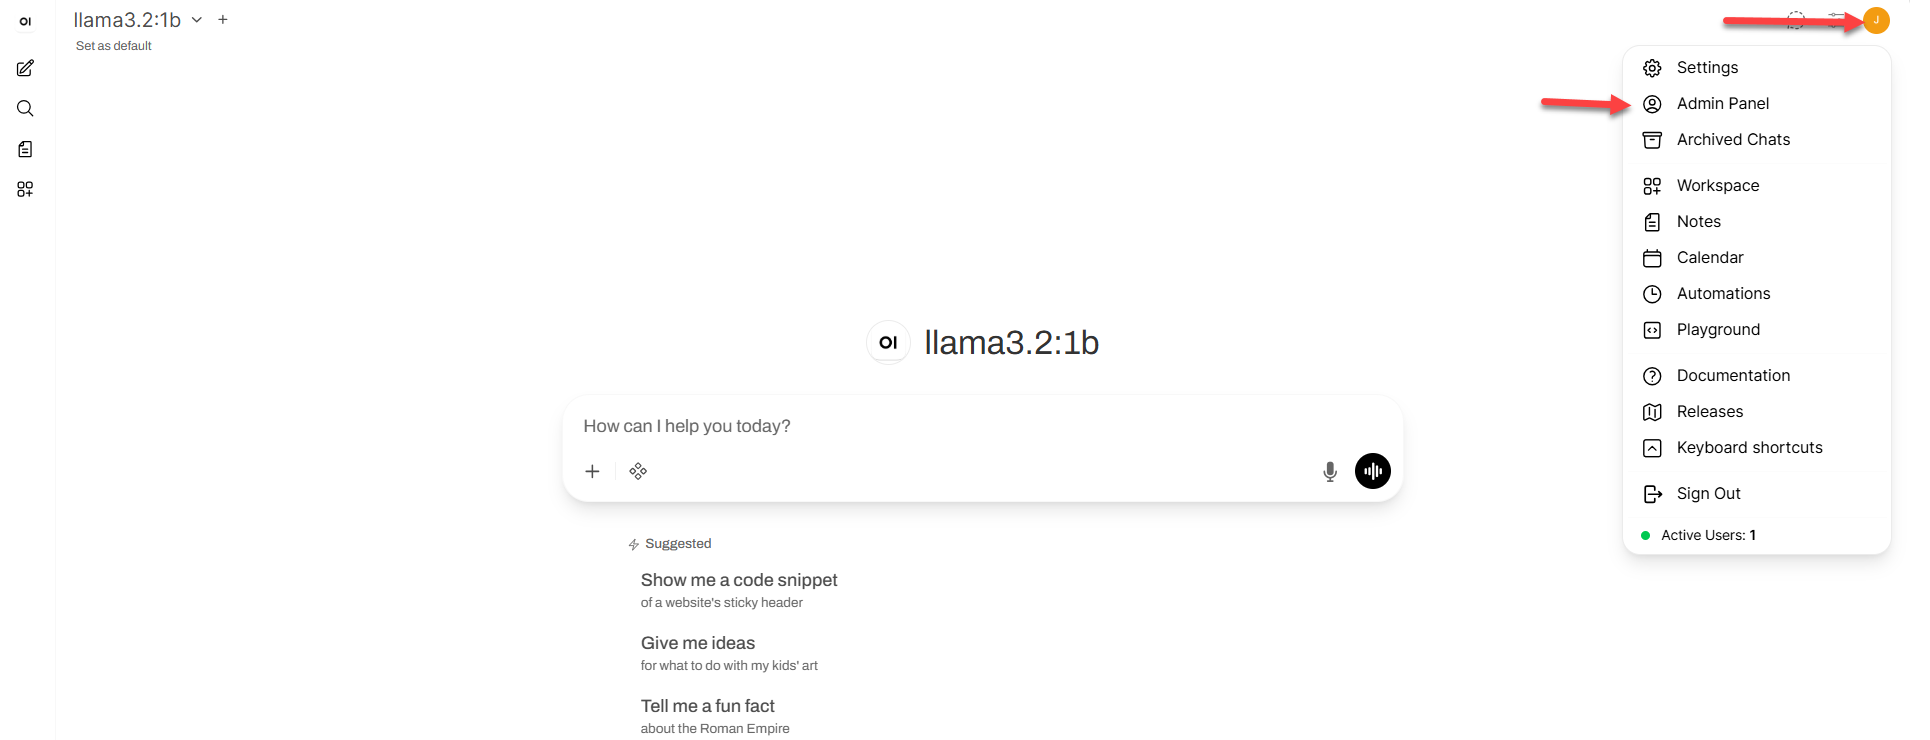
- Once logged in, click your profile icon in the bottom-left corner and select Admin Panel.
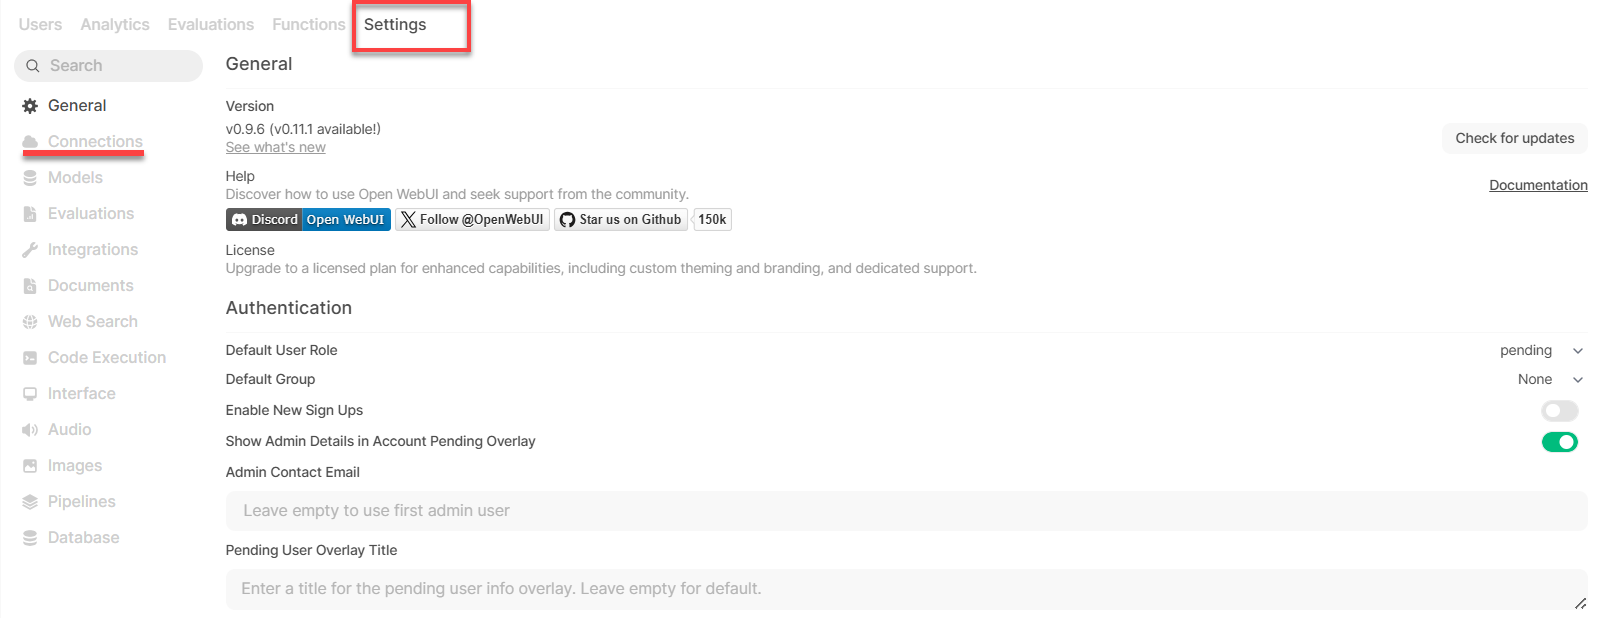
- Click Settings from the top menu, then select Connections on the left sidebar.
- Under OpenAI API, click the + icon to add a new connection.
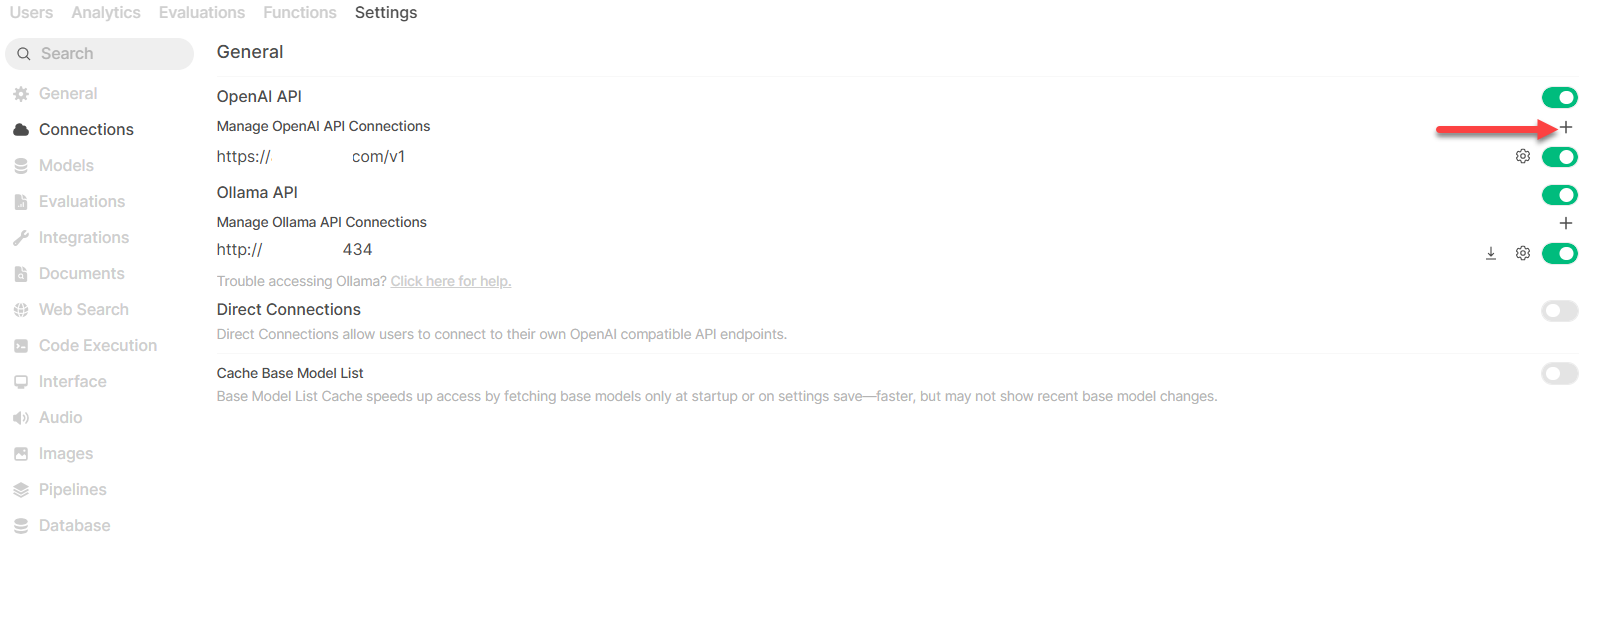
- In the URL field, paste your Gateway endpoint:
https://gateway.ai.bluehost.com/.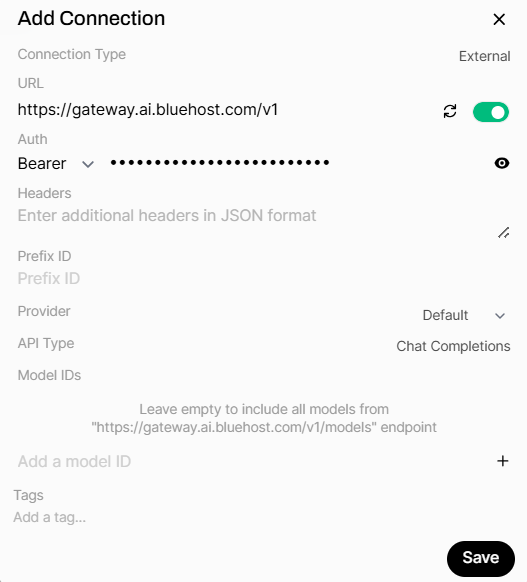
- Paste your AI Credits key into the Key field.
- Click the refresh/verify icon next to the connection to confirm it's reachable, then click Save. Your connection is now configured and active, with models available through your AI Credits balance ready to use.
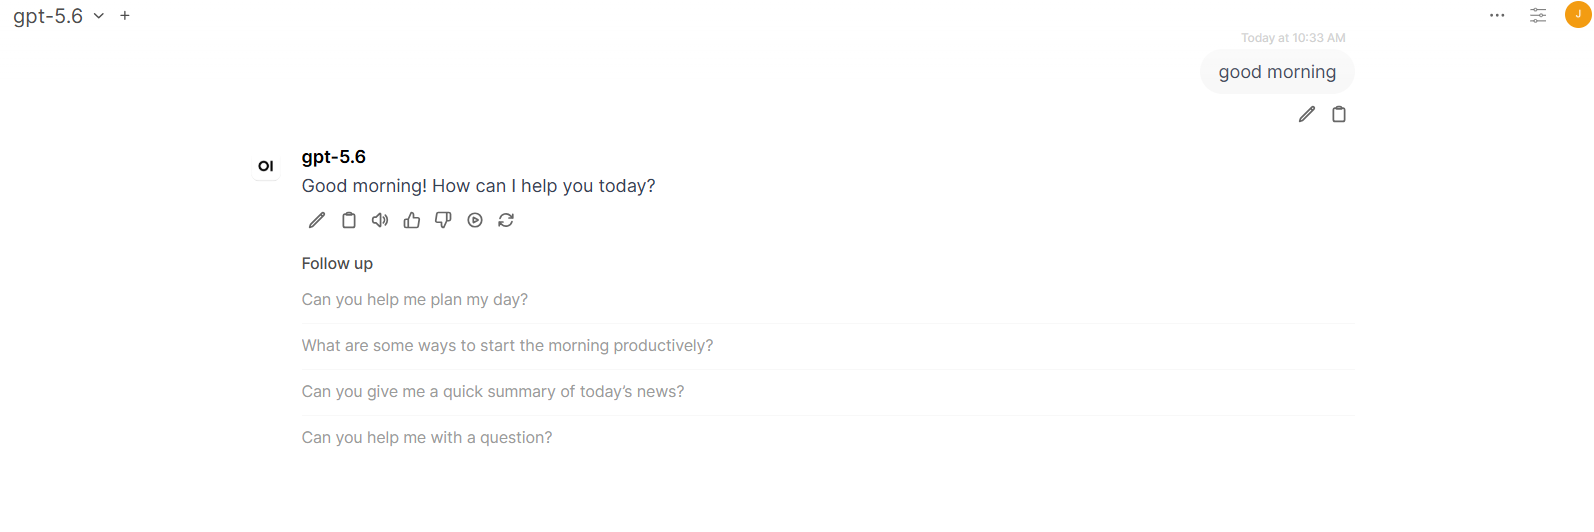
- Open a new chat, select a model from the dropdown at the top, and start chatting.
Passwords in Open WebUI (and Linux systems) are hashed using bcrypt for security.
How to Reset Your Password
Instead of viewing the old password, you can change your existing account password directly inside the database via SSH.
- Log in to your Bluehost Portal.
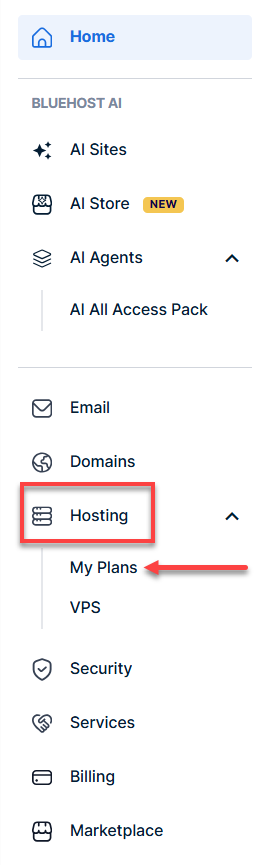
- In the left-hand menu, click the Hosting tab, then click My Plans.
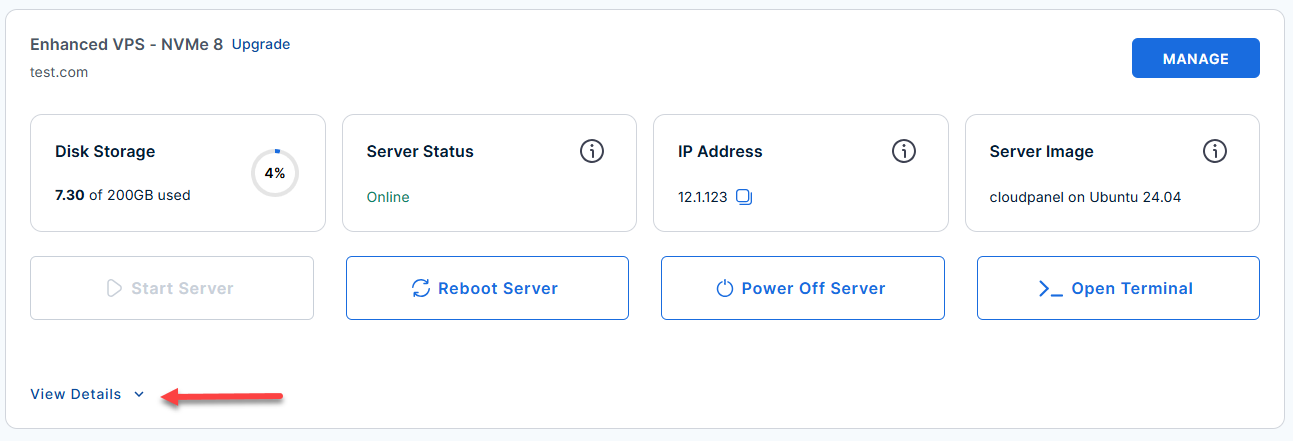
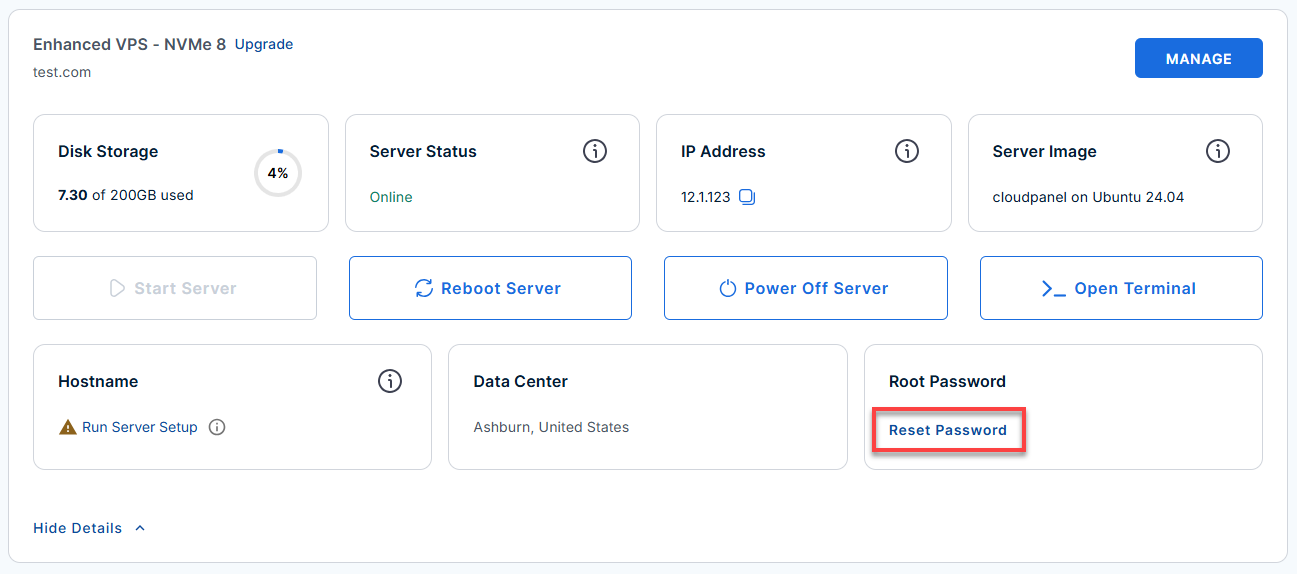
- Locate the server you want to manage, then click View Details in the bottom-left corner to expand the section and access additional server information.
- Click the Reset Password.
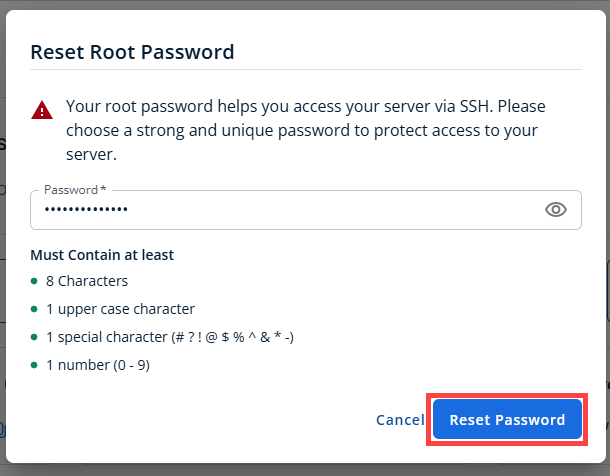
- In the pop-up window, type your new root password, then click Reset Password again to confirm and save the changes.
- Connect to your VPS via SSH.
Use your VPS IP and credentials with an SSH client, follow the prompts, and enter your root password when asked:Replace
your_server_ipwith your actual server IP address.ssh root@your_server_ip
If running in Docker:
Run this single command in your terminal (replace [email protected] and NEW_PASSWORD):
docker exec -it open-webui python3 -c "
import sqlite3, bcrypt
conn = sqlite3.connect('/app/backend/data/webui.db')
cursor = conn.cursor()
hashed = bcrypt.hashpw('NEW_PASSWORD'.encode('utf-8'), bcrypt.gensalt()).decode('utf-8')
cursor.execute('UPDATE auth SET password=? WHERE email=?', (hashed, '[email protected]'))
conn.commit()
print('Password updated successfully!')"
Alternative Quick Reset (Re-enable Web UI Sign-Up):
-
If you just want to set up a brand new Admin account, temporarily enable public registration via Docker. Since your existing container is likely already named
open-webui, remove it first:docker stop open-webui && docker rm open-webui
-
Start a new container with sign-up enabled:
docker run -d -p 3000:8080 -e ENABLE_SIGNUP=True -v open-webui:/app/backend/data --name open-webui --restart always ghcr.io/open-webui/open-webui:main
-
Open your browser, click Sign Up, and enter your new password.
-
Important: After creating your account, disable public sign-up again so your instance isn't left open to new registrations:
docker stop open-webui && docker rm open-webui && docker run -d -p 3000:8080 -e ENABLE_SIGNUP=False -v open-webui:/app/backend/data --name open-webui --restart always ghcr.io/open-webui/open-webui:main
Adding AI Credits to an Existing Open WebUI Install
If Open WebUI is already configured with a different provider and you want to add AI Credits (or switch to it) without repeating the full setup above:
- Log in to Open WebUI.
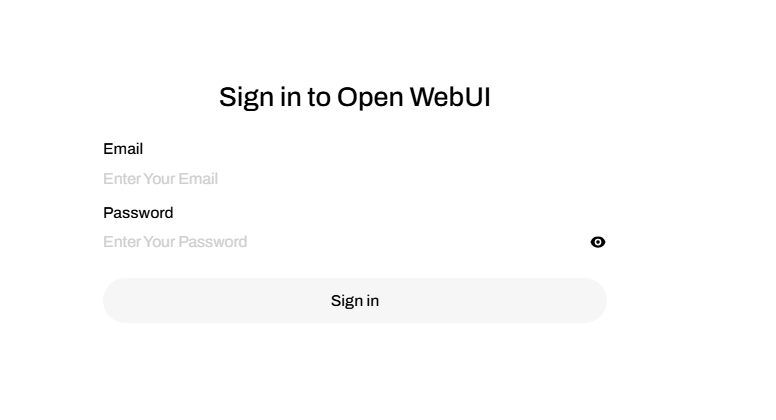
- Once logged in, click your profile icon in the bottom-left corner and select Admin Panel.
- Click Settings from the top menu, then select Connections on the left sidebar.
- Under OpenAI API, click the + icon to add a new connection.
- In the URL field, paste your Gateway endpoint:
https://gateway.ai.bluehost.com/. - Click the refresh/verify icon next to the connection to confirm it's reachable, then click Save.
- Open a new chat, select a model from the dropdown at the top, and start chatting.
Tip: Keep an eye on your AI credit balance in the Bluehost Portal. If your balance runs out, this connection will stop returning responses until you add more credits.
Test Your Connection
Once your AI Credits connection is configured, confirm it works before relying on it:
- Open a new chat in Open WebUI.
- Click the model selector dropdown at the top and choose a model from the connection you just configured.
- Send a test message, such as "Good Morning"
- If you get a response, the connection is working.
Troubleshooting
If your connection test doesn't work as expected, use the table below to identify the likely cause and next steps.
| Issue | Likely Cause | What to Check |
|---|---|---|
| "Insufficient credits" or similar error | AI credit balance is depleted | Check your balance in the Bluehost Portal AI Tooling page and add more credits |
| "Invalid API key" or connection fails to verify | Key was mistyped, expired, or deleted | Re-copy the key from the Bluehost Portal (or your provider) and re-enter it, then click the refresh/verify icon |
| No models appear in the dropdown | Connection wasn't saved, or the URL is missing /v1 |
Return to Admin > Settings > Connections and confirm the URL and key are both saved correctly |
| Chat sends but returns no output | No model selected, or the selected model belongs to a disconnected provider | Reopen the model selector dropdown and choose a model from an active, verified connection |
Summary
Open WebUI can run on AI Credits tied to your Bluehost account, using a single Gateway endpoint (https://gateway.ai.bluehost.com/) and API key from the Bluehost Portal's AI Tooling page. Configure it under Admin > Settings > Connections, then test it with a quick message in a new chat before relying on it.