 ChatGPT,
  Claude,
  Gemini,
  Grok — all four for
 Professional Email: How to Add DKIM Record
A DKIM record is a digital signature that is added to every email you send from your domain. It helps receiving mail servers confirm that a message really came from your domain and wasn't changed on the way, which can help keep your emails out of spam folders. This article explains how to get your DKIM record details from the Email Control Panel, add the record to your domain, and verify it.
What Is a DKIM Record?
When you send an email, Professional Email signs it with a private key. The matching public key is published in your domain's DNS settings as a TXT record. When another mail server receives your email, it looks up that public key to check the signature. DKIM works alongside other email security records, such as SPF and DMARC.
Before You Begin
- You need to be an admin of your email accounts to sign in to the Email Control Panel.
- The steps in this article add the record to your domain in your Bluehost account. They apply when your domain uses Bluehost nameservers. If your domain uses another provider's nameservers, add the record in that provider's DNS settings instead.
Get Your DKIM Record Details
- Log in to the Email Control Panel as an admin of your email accounts.
- In the left menu, click Email Reputation.
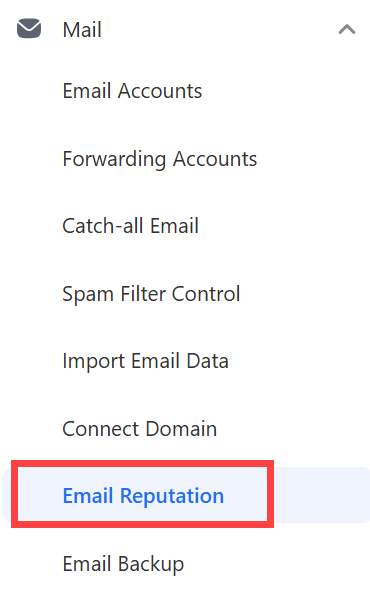
- Next to Add DKIM record, expand the Add option.

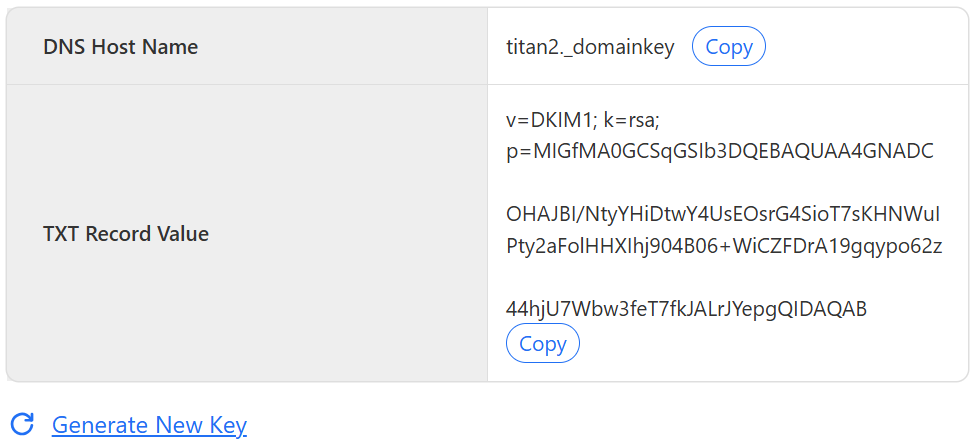
- Copy the DNS Host Name and the TXT Record Value. You'll need both in the next section.
Add the DKIM Record to Your Domain
- Log in to your Bluehost Portal.
- In the left-hand menu, click Domains.
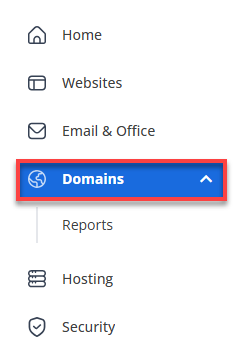
- If you have one domain in your account, you will be taken directly to the domain management panel.
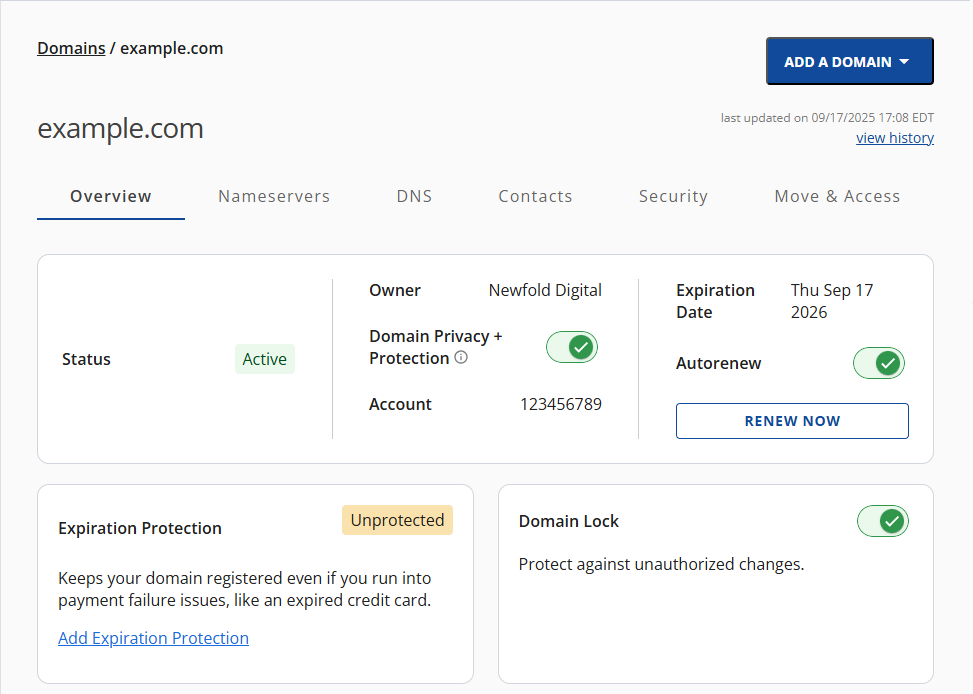
- If you have multiple domains in your account, click the domain you wish to manage to access the domain management panel.
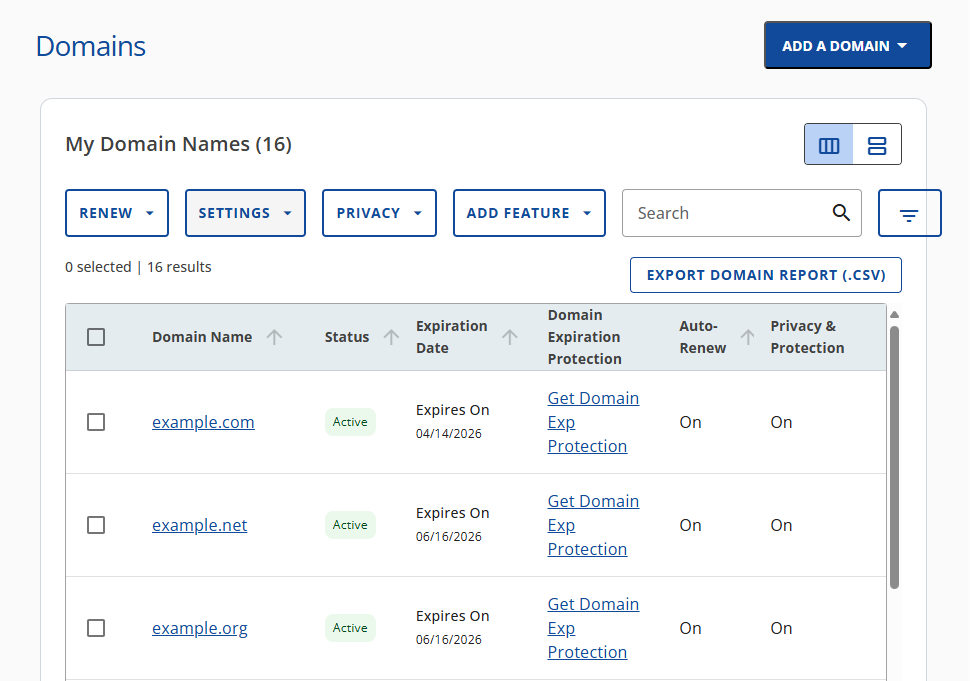
- If you have one domain in your account, you will be taken directly to the domain management panel.
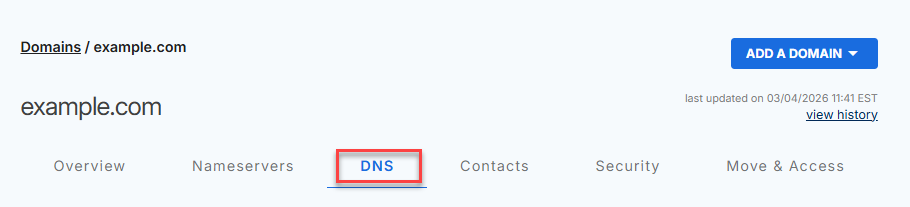
- Click the DNS tab.
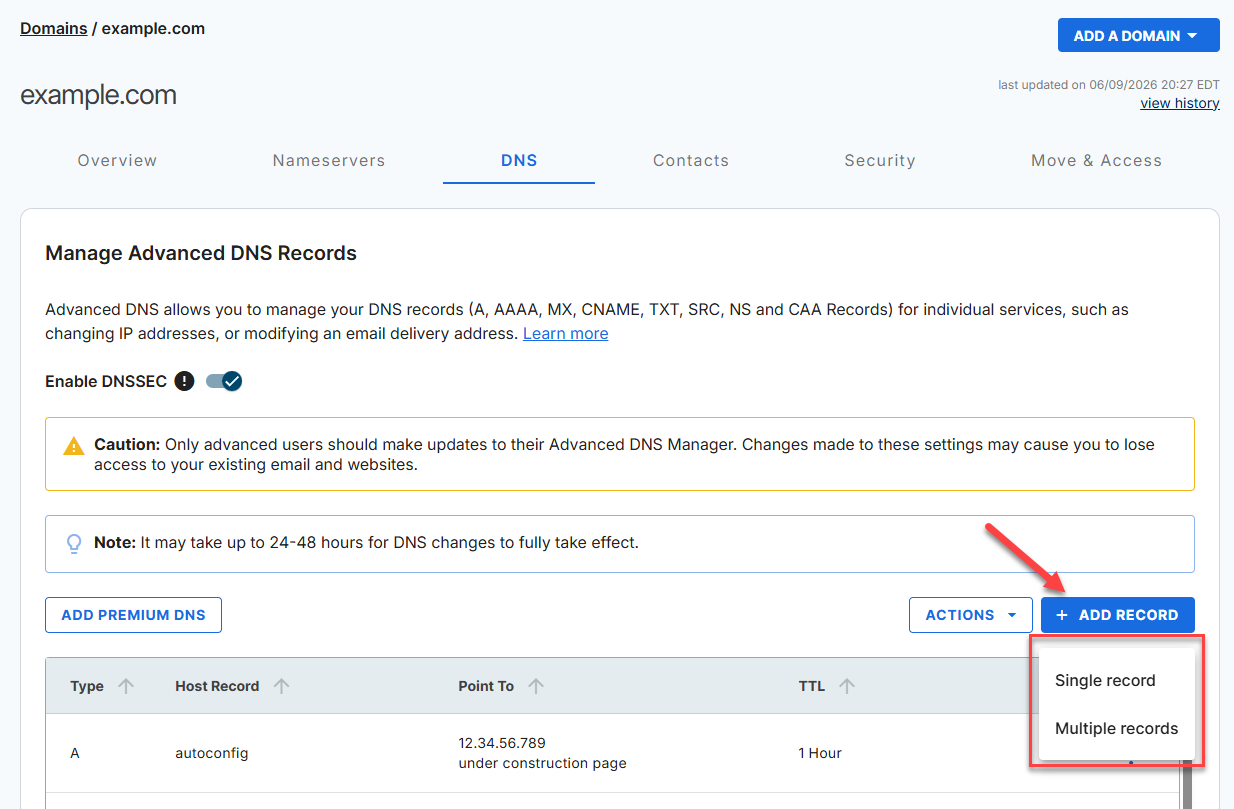
- Click Add Record. Select Single record.
- In the Add Advanced DNS Record window, enter the following:
- Type: Make sure TXT is selected.
- Refers to: Paste the DNS Host Name you copied.
- TXT Value: Paste the TXT Record Value you copied.
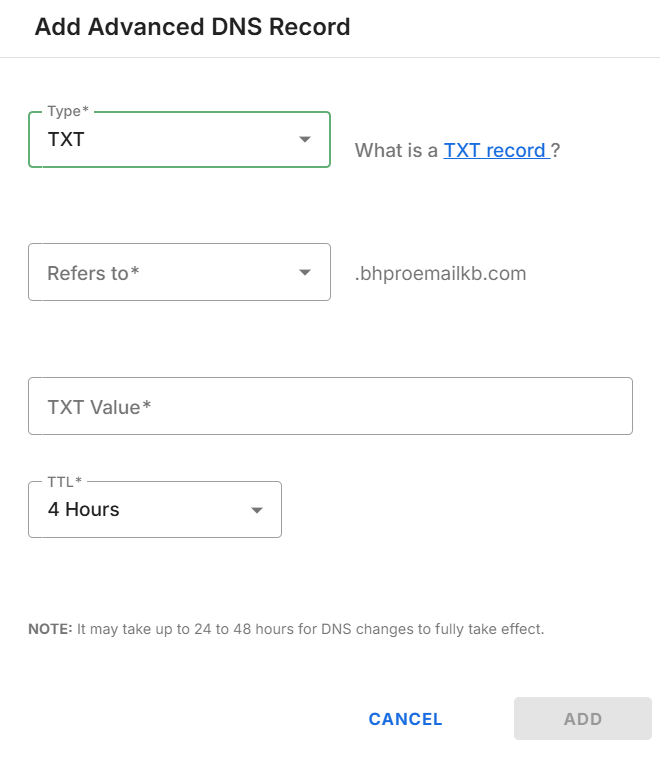
- Click Add.
DNS changes can take up to 24 to 48 hours to fully take effect.
Verify Your DKIM Record
- Return to the Email Reputation page in the Email Control Panel.
- Next to Add DKIM record, expand the Add option.
- Select the option confirming that you've added the TXT record, and then click Verify changes.
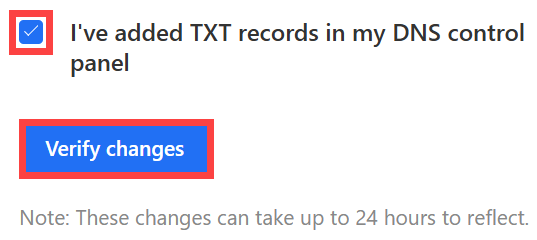
When the record is verified, DKIM Record shows VERIFIED at the top of the Email Reputation page. Your outgoing emails are then signed automatically, and there's nothing more to do.

If the record doesn't verify right away, wait a few hours and try again. DNS changes can take up to 24 to 48 hours to fully take effect, so verification may take longer in some cases.
Troubleshooting DKIM Problems
- The DKIM record isn't found: The record is missing from your DNS settings, often because of a mistake when adding it manually. Add the record again, and then try sending an email.
- The DKIM record format is invalid: The value in your DNS settings has a typo or is formatted incorrectly. Use the Copy buttons in the Email Control Panel to copy the exact values, and then replace the record.
- There is more than one DKIM record for the same host name: Only one DKIM TXT record should exist for the DNS Host Name. Delete any extra DKIM records for that host name so that only the one with the exact value from the Email Control Panel remains.
- The record is added but won't verify: Check that your domain uses Bluehost nameservers. If it doesn't, the record needs to be added in the DNS settings of the provider your nameservers point to.
Summary
A DKIM record signs your outgoing emails so that receiving servers can confirm they came from your domain. To set it up, log in to the Email Control Panel, open Email Reputation, and copy the DNS Host Name and TXT Record Value. Then add a TXT record with those values on the DNS tab of your domain, return to Email Reputation, and verify the record. Once it shows as verified, your emails are signed automatically.
If you need further assistance, Bluehost Chat Support is available 24 hours a day, 7days a week while Bluehost Phone Support is available 7 days a week from 7 am-12 midnight EST.
- Chat Support - While on our website, you should see a CHAT bubble in the bottom right-hand corner of the page. Click anywhere on the bubble to begin a chat session.
- Phone Support -
- US: 888-401-4678
- International: +1 801-765-9400
You may also refer to our Knowledge Base articles to help answer common questions and guide you through various setup, configuration, and troubleshooting steps.