 ChatGPT,
  Claude,
  Gemini,
  Grok — all four for
 Reimage Your Server for Chatwoot on Ubuntu 24.04 Installation
Reimaging your Self-Managed VPS or Virtual Dedicated Server (VDS) is like giving your server a clean slate. It completely resets your server—removing your current operating system, applications, configurations, and data—and installs the Chatwoot on Ubuntu 24.04 Application in a fresh, new environment.
When you reimage your server, we automatically install the newest version of the Chatwoot on Ubuntu 24.04 Application and the best operating system for it. Just keep in mind that, unlike the first time you set up your server, you won't be able to pick a specific operating system version this time.
Resource Requirements
Before deploying, ensure your server meets the following minimum hardware requirements. For a stable production deployment, we recommend using higher specifications than the minimum requirements.
- Do not purchase a server that only meets the minimum requirements. The minimum specifications represent the software's bare survival threshold and do not account for operating system overhead or production workloads. Running with only 2 CPUs and 4 GB RAM can result in severe performance slowdowns, system freezes, or unexpected crashes during traffic spikes.
- Bluehost Self-Managed VPS and VDS lack dedicated GPUs (VRAM). Running local LLMs entirely on their CPUs will cause extremely slow response times. For optimal performance, host your application on Bluehost but connect it to an external AI cloud provider (like OpenAI or Anthropic) via API.
- For a stable deployment, we recommend using at least 4 CPU cores and 8 GB RAM. While the minimum 20 GB SSD is sufficient for installation, consider allocating additional disk space if you plan to store recordings, logs, or other application data.
| Resources | Minimum Requirements | Recommended |
|---|---|---|
| CPU | 2 | 4 |
| Memory (RAM) | 4 GB | 8 GB |
| Disk | 20 GB | 20 GB |
When Should I Reimage My Server?
Reimaging is often the fastest and most effective way to resolve major server issues or prepare your server for an entirely new purpose. You might want to consider reimaging if:
- You are experiencing persistent errors or complex configuration issues.
- You need to thoroughly remove malware or recover from a security event.
- You have noticed a significant decline in overall server performance.
- You are starting a brand-new project and want an untouched environment.
- Your current server setup simply no longer fits your needs.
Benefits of Reimaging with the Chatwoot on Ubuntu 24.04 Application
Installing your application via a server reimage offers several great benefits:
- A Clean Environment: Clears out old files, unused applications, and misconfigurations.
- Improved Performance: Starts you off with a fresh, highly optimized installation.
- Enhanced Security: Eliminates potential vulnerabilities and unwanted software.
- Simplified Deployment: Automatically handles the installation of the application and the best OS for it.
- Latest Features: Ensures you are running the most up-to-date version available.
How to Reimage Your Server for Chatwoot on Ubuntu 24.04 Installation
This applies to both VPS and VDS.
- You can install only one application using the one-click installer.
- To change or delete your application, follow the guide: How to Change an Application. Create a backup of your existing applications or templates.
- To keep your current template, install the new application manually using SSH. Follow the same steps for both Self-Managed VPS and Virtual Dedicated Server (VDS). The system automatically selects the recommended operating system for Chatwoot.
- Log in to your Bluehost Portal.
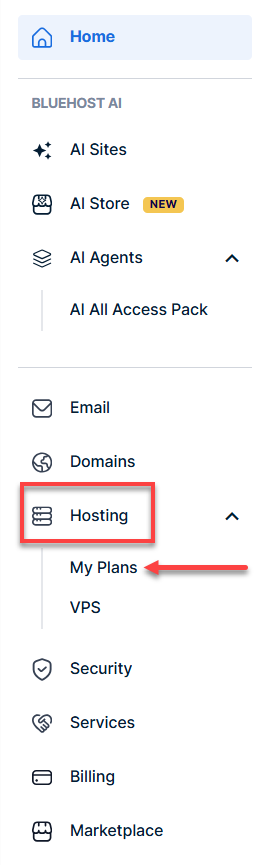
- In the left-hand menu, click Hosting, then select My Plans.
- Click the Manage the hosting package you want to reimage.

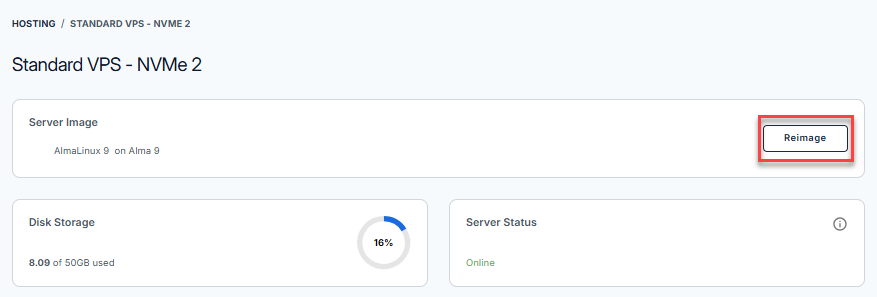
- Click the Reimage button.
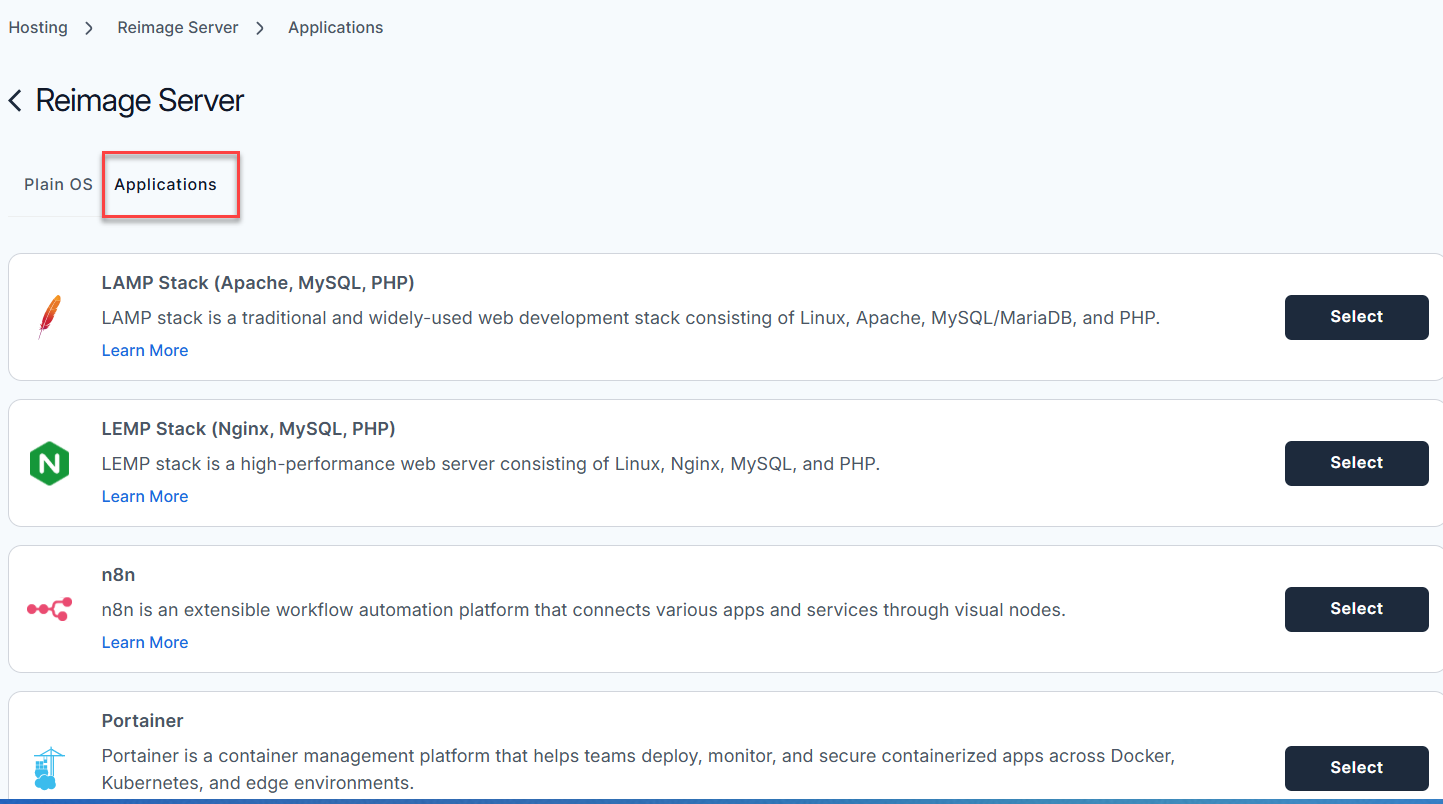
- Select the Applications tab.
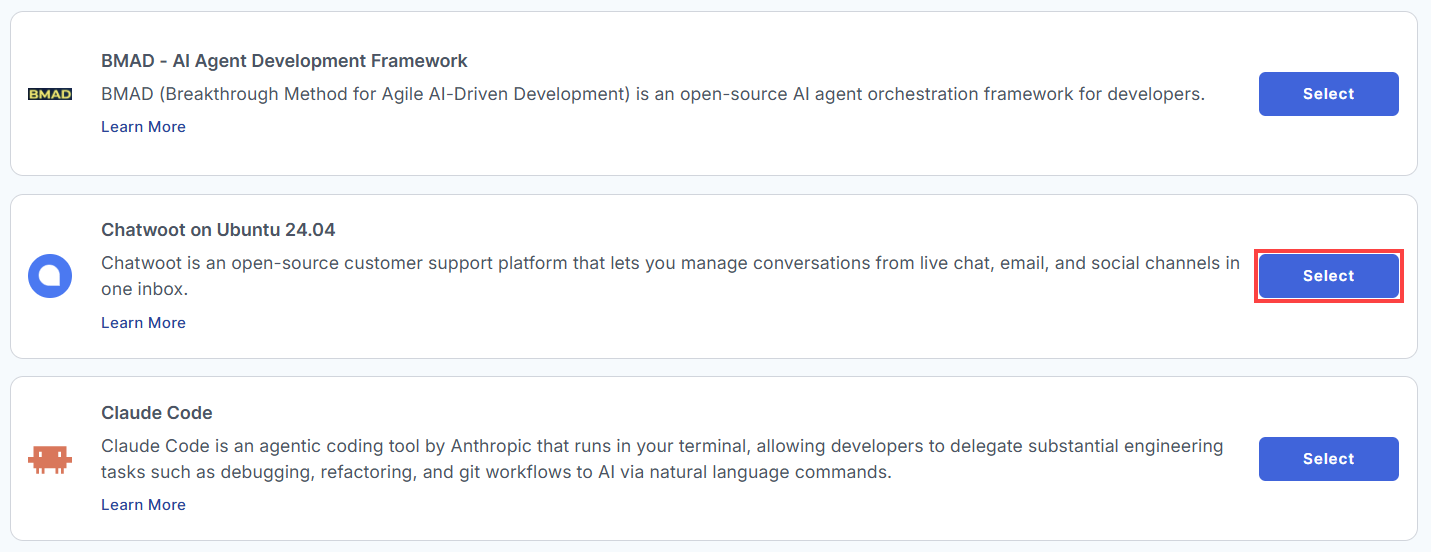
- From the list, locate Chatwoot on Ubuntu 24.04 and click Select.
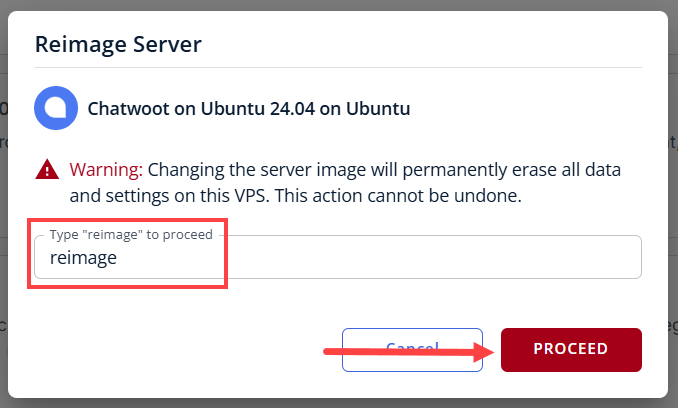
- To confirm, type "reimage" and then click Proceed to start the process.
- Wait a few minutes while the installation completes.

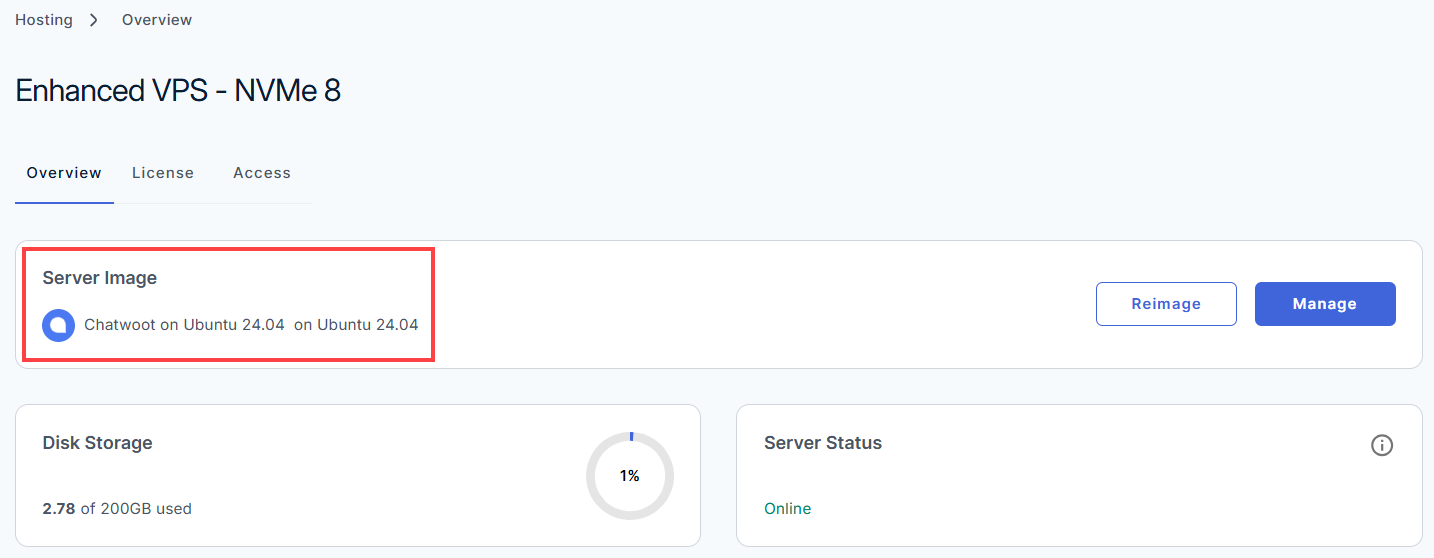
- Once completed, you will see Chatwoot on Ubuntu 24.04 listed in the Server Image section.
How to Set Up and Secure Your Chatwoot on Ubuntu 24.04 Server
Chatwoot is a powerful, open-source customer support platform, but it requires a few essential configuration steps before it is ready for production. This guide outlines the complete initial setup process. Follow the phases below to access the web interface, apply a valid SSL certificate, and adopt security best practices for managing your support workspace.
Phase 1: Reset Your Root Password
- Log in to your Bluehost Portal.
- In the left-hand menu, click Hosting, then select My Plans.
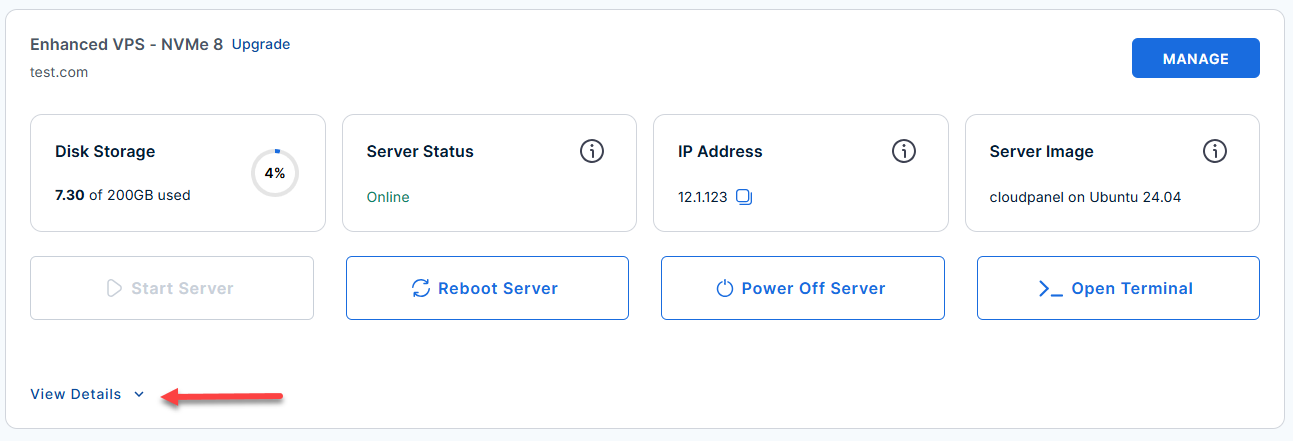
- Locate the server you want to manage, then click View Details in the bottom-left corner to expand the section and access additional server information.
- Click the Reset Password.
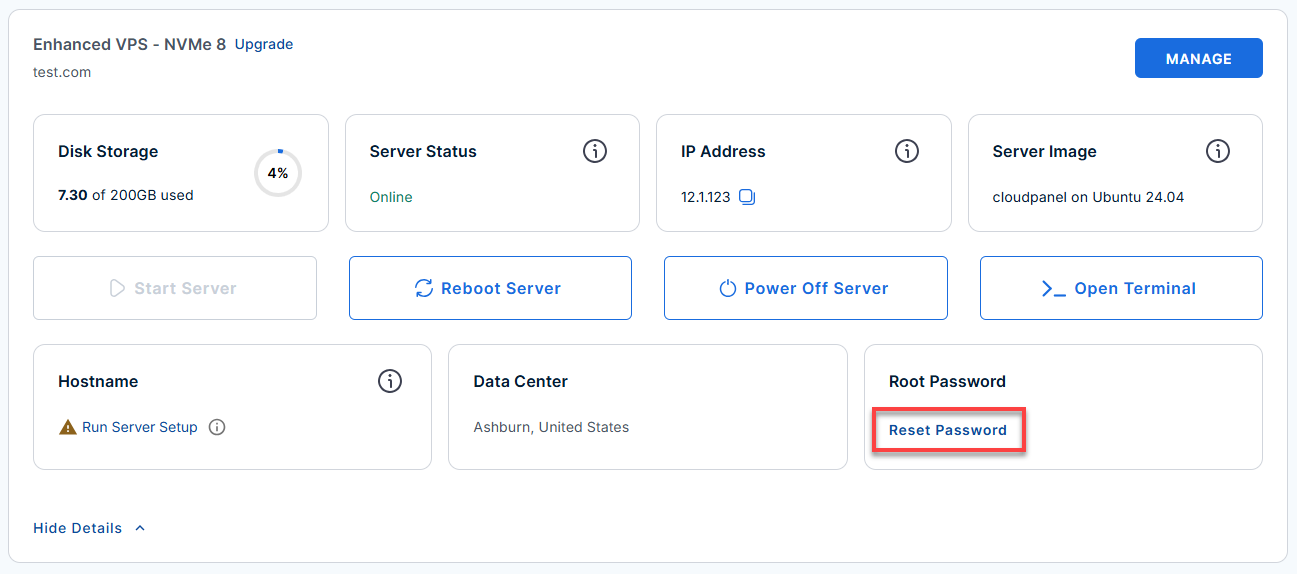
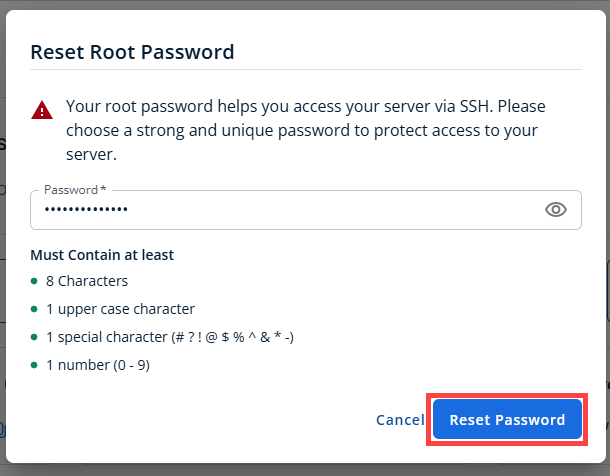
- In the pop-up window, type your new root password, then click Reset Password again to confirm and save the changes.
Phase 2: Connect To Your Server Through SSH
- Connect to your VPS via SSH.
Open your computer's terminal (or an SSH client like PuTTY) and run the following command to log into your server as the administrator, using your server's public IP address:Replaceyour_server_ipwith your actual server IP address.
Follow the prompts and enter the new root password you created in the step above.ssh root@your_server_ip - Wait for the automated background setup to complete. On the first boot, a background script automatically generates a fresh SECRET_KEY_BASE for the Rails app and stores it securely. If you ever need to quickly review the rotated Rails secret directly inside your server terminal, you can print it out by running:
grep CHATWOOT_SECRET_KEY_BASE /root/.app_passwords
Phase 3: Access the Web Panel
Now, you will leave the terminal for a moment and move to your web browser.
- Navigate to the panel: Go to http://(replace with your server's actual public IP address).
Example:
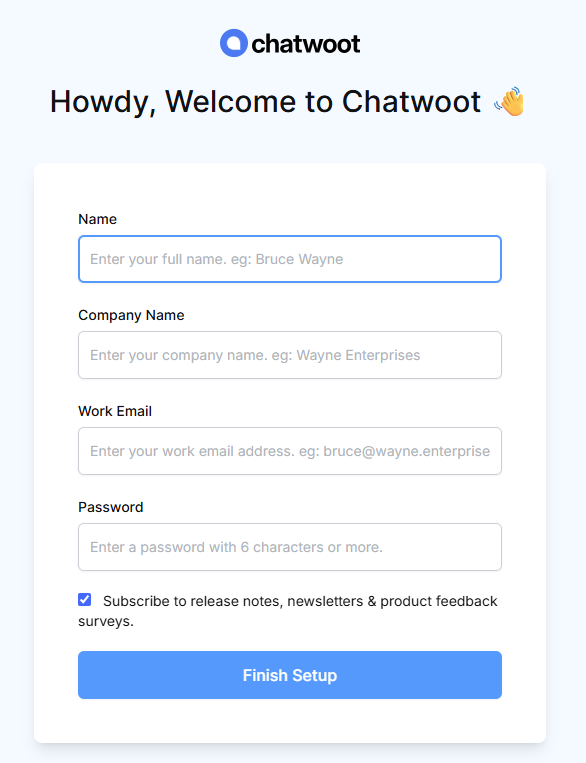
[http://12.3.456.789] (http://12.3.456.789) - Create your account: On the first screen, create your initial user account. The first account you create automatically becomes the Super Admin, which allows you to invite other agents.
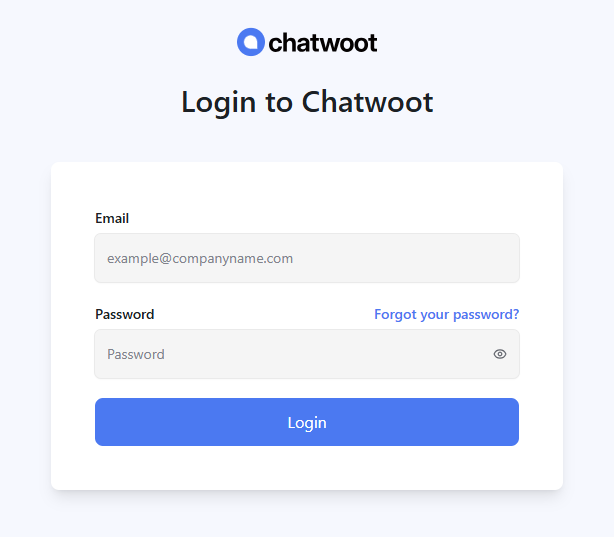
- After you create your account, the page will refresh and prompt you to log in with the credentials you created.
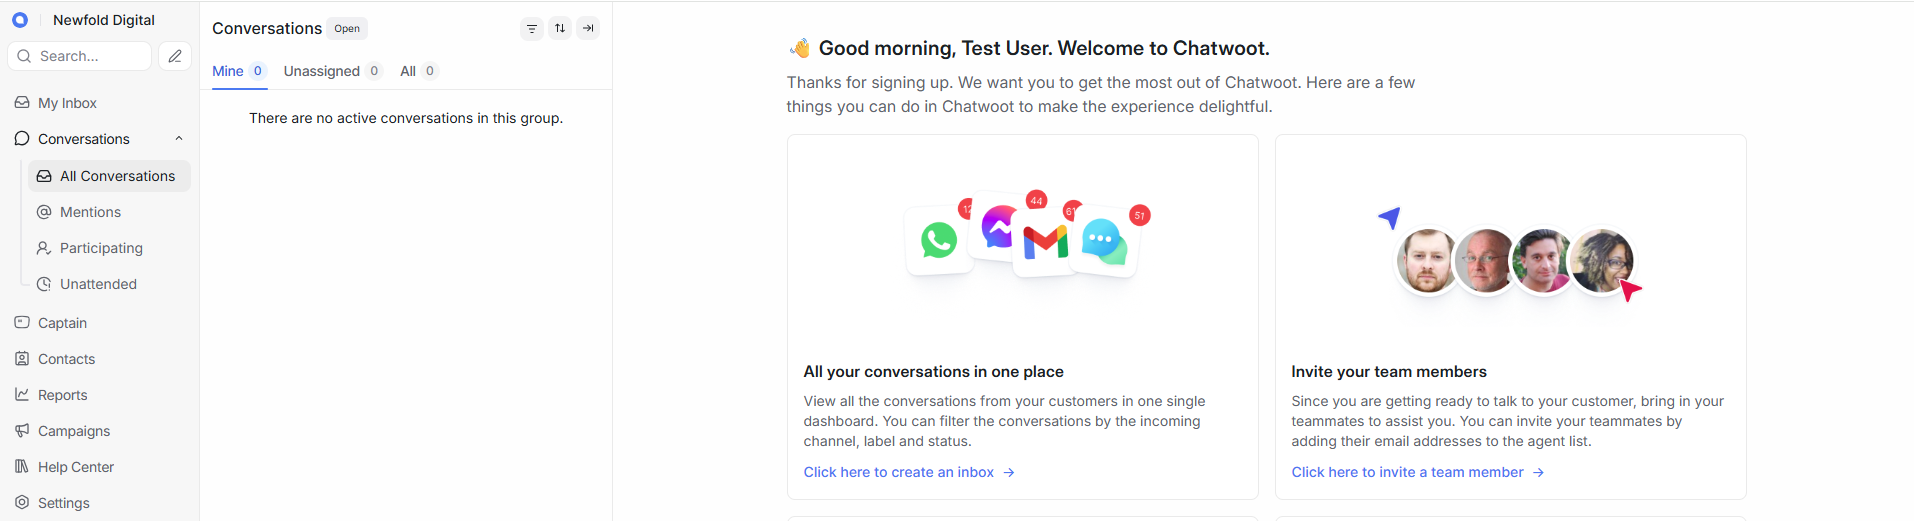
- You are now logged in to your Dashboard.
Phase 4: Connecting Your Custom Domain (Recommended)
By default, your Chatwoot instance is only accessible via a raw IP address over an unencrypted connection (HTTP). For a production environment, you will want to connect a custom domain (like support.yourcompany.com) and secure it with TLS/SSL.
- DNS Configuration: Create an A Record in your DNS provider's dashboard, pointing your chosen domain to your server's public IP address.
- Update Environment Variables:
- Log in to your server and update the FRONTEND_URL variable inside this directory.
/home/chatwoot/chatwoot/.envTo edit the file, you need to have the nano editor installed. If nano is not installed yet, run the following command:apt update apt install nano -y - Wait a few minutes for the installation to complete. Once complete, run this command.
nano /home/chatwoot/chatwoot/.env
Example Output:
GNU nano 7.2 /home/chatwoot/chatwoot/.env # Learn about the various environment variables at # https://www.chatwoot.com/docs/self-hosted/configuration/environment-variables/#rails-production-variables # Used to verify the integrity of signed cookies. so ensure a secure value is set # SECRET_KEY_BASE should be alphanumeric. Avoid special characters or symbols. # Use `rake secret` to generate this variable SECRET_KEY_BASE=examplet3st7ccc895635546ccf1fff6c6335167d1569ec2c4253e508737c1a78acb4381f773ebaf5fe7c6f491e75541060d4f7f0fe8441db26120edbc9ee4bdc # Active Record Encryption keys (required for MFA/2FA functionality) # Generate these keys by running: rails db:encryption:init # IMPORTANT: Use different keys for each environment (development, staging, production) # ACTIVE_RECORD_ENCRYPTION_PRIMARY_KEY= # ACTIVE_RECORD_ENCRYPTION_DETERMINISTIC_KEY= # ACTIVE_RECORD_ENCRYPTION_KEY_DERIVATION_SALT= # Replace with the URL you are planning to use for your app FRONTEND_URL=http://12.3.456.789 # To use a dedicated URL for help center pages # HELPCENTER_URL=http://0.0.0.0:3000 # If the variable is set, all non-authenticated pages would fallback to the default locale. # Whenever a new account is created, the default language will be DEFAULT_LOCALE instead of en # DEFAULT_LOCALE=en # If you plan to use CDN for your assets, set Asset CDN Host ASSET_CDN_HOST= # Force all access to the app over SSL, default is set to false FORCE_SSL=false # This lets you control new sign ups on your chatwoot installation # true : default option, allows sign ups # false : disables all the end points related to sign ups # api_only: disables the UI for signup, but you can create sign ups via the account apis ENABLE_ACCOUNT_SIGNUP=false # Redis config # specify the configs via single URL or individual variables # ref: https://www.iana.org/assignments/uri-schemes/prov/redis # You can also use the following format for the URL: redis://:password@host:port/db_number [ line 1/288 ( 0%), col 1/51 ( 1%), char 0/10563 ( 0%) ] ^G Help ^O Write Out ^W Where Is ^K Cut ^T Execute ^C Location M-U Undo M-A Set Mark M-] To Bracket M-Q Previous ^X Exit ^R Read File ^\ Replace ^U Paste ^J Justify ^/ Go To Line M-E Redo M-6 Copy ^Q Where Was M-W Next - Locate FRONTEND_URL and change it to your domain (e.g., https://support.yourdomain.com).
Nano acts a lot like a standard text editor (like Notepad).
- Move around: Use your keyboard's arrow keys to move the cursor to the line you want to change.Locate FRONTEND_URL and change it to your domain (e.g., https://support.yourdomain.com).
- Edit: Just start typing, or use Backspace/ Deleteto remove text.
- Save: Press Ctrl+O (the letter O, not zero). The bottom of the screen will ask you to confirm the file name—just press Enter.
- Exit: Press Ctrl+ Xto close the editor and return to the command line.
- Log in to your server and update the FRONTEND_URL variable inside this directory.
- Configure Nginx: Update the server_name directive in the Nginx configuration file located at:
/etc/nginx/sites-available/chatwoot- Edit the Nginx configuration:
nano /etc/nginx/sites-available/chatwoot
Example Output:
GNU nano 7.2 /etc/nginx/sites-available/chatwoot upstream chatwoot { server 127.0.0.1:3000; } server { listen 80 default_server; listen [::]:80 default_server; server_name _; client_max_body_size 50M; proxy_http_version 1.1; proxy_set_header Upgrade $http_upgrade; proxy_set_header Connection "upgrade"; proxy_set_header Host $host; proxy_set_header X-Real-IP $remote_addr; proxy_set_header X-Forwarded-For $proxy_add_x_forwarded_for; proxy_set_header X-Forwarded-Proto $scheme; location / { proxy_pass http://chatwoot; } location /cable { proxy_pass http://chatwoot; proxy_read_timeout 600s; proxy_send_timeout 600s; } } ^G Help ^O Write Out ^W Where Is ^K Cut ^T Execute ^C Location M-U Undo M-A Set Mark ^X Exit ^R Read File ^\ Replace ^U Paste ^J Justify ^/ Go To Line M-E Redo M-6 Copy - Update the server_name directive to match your domain. You can follow the same steps above on how to edit the file using nano editor.
- Edit the Nginx configuration:
- Run the command to automatically provision a free Let's Encrypt SSL certificate.
certbot --nginx -d your.domain
- Apply all these changes by running.
systemctl restart chatwoot.target nginx
Phase 5: Day-to-Day Management
The image also sets up tools to help you manage the server going forward. The firewall (UFW) is already configured to only allow essential traffic (Web and SSH), and daily log rotations are set up so your hard drive doesn't fill up with old data.
If you ever need to troubleshoot or restart the system, you can use these core commands:
- Check health:
systemctl status chatwoot.target
- Reboot the app:
systemctl restart chatwoot.target
- View error logs:
journalctl -u chatwoot-web.1 -n 100 --no-pager
Additional Information and Example Documentation Output
You can run cat /root/README.md to see more information and useful commands:
Example Output:
root@12-3-456-789:~# cat /root/README.md
# Chatwoot on Ubuntu 24.04

## Description

Chatwoot is an open-source customer support platform that lets you manage
conversations from live chat, email, and social channels in one inbox.

It supports team collaboration with agent assignment, canned responses,
conversation labels, and performance reporting, giving you a complete support
workspace you host and control yourself.

## Image contents

This template installs and configures:

* Chatwoot from the official upstream installer at `https://get.chatwoot.app/`
* PostgreSQL local database service
* Redis (used for Sidekiq queues and ActionCable)
* Nginx reverse proxy fronting Chatwoot on ports 80/443
* Ruby (via rbenv) and Node.js with pnpm
* `chatwoot` system user with source tree at `/home/chatwoot/chatwoot`
* Chatwoot env file at `/home/chatwoot/chatwoot/.env`
* systemd units `chatwoot-web.1.service` and `chatwoot-worker.1.service`,
  grouped under `chatwoot.target`
* Daily log rotation for `/home/chatwoot/chatwoot/log/*.log` (14 day retention)
* UFW firewall rules for SSH, HTTP, and HTTPS
* First-boot injection script at `/var/lib/cloud/scripts/per-instance/001_onboot`
* App password store at `/root/.app_passwords`

## Services

Service     | Ports     | Purpose
----------- | --------- | -----------------------------------------------------------
Nginx       | 80, 443   | Reverse proxy fronting Chatwoot
Chatwoot    | 3000      | Rails web app (bound locally, fronted by Nginx)
PostgreSQL  | local     | Database backend for Chatwoot
Redis       | local     | Sidekiq queue and ActionCable backend
OpenSSH     | 22        | Remote access

Ports are protected using UFW.

## First boot behavior

On the first boot, the cloud-init per-instance script
`/var/lib/cloud/scripts/per-instance/001_onboot`:

* generates a fresh `SECRET_KEY_BASE` for the Rails app
* stores it securely in `/root/.app_passwords`
* updates `/home/chatwoot/chatwoot/.env`
* waits for PostgreSQL readiness
* starts Chatwoot and Nginx

This guarantees that no Rails secret is shared between deployed images.

## First-time access (How-to-use)

After the VM boots, access Chatwoot at:

* `http://`

On the first screen, create the first account. The first account you create
becomes the Super Admin and can invite agents from the dashboard.

To serve Chatwoot on your own domain with TLS:

1. Point your DNS A record at the server IP.
2. Update the `FRONTEND_URL` in `/home/chatwoot/chatwoot/.env`.
3. Update `server_name` in `/etc/nginx/sites-available/chatwoot`.
4. Run `certbot --nginx -d your.domain` to issue a Let's Encrypt certificate.
5. Restart with `systemctl restart chatwoot.target nginx`.

## Useful commands

* Check Chatwoot status:
  `systemctl status chatwoot.target`
* Restart Chatwoot:
  `systemctl restart chatwoot.target`
* View web logs:
  `journalctl -u chatwoot-web.1 -n 100 --no-pager`
* View worker logs:
  `journalctl -u chatwoot-worker.1 -n 100 --no-pager`
* View Rails production log:
  `journalctl -u chatwoot-web.1.service -n 100 --no-pager`
* Show the rotated Rails secret:
  `grep CHATWOOT_SECRET_KEY_BASE /root/.app_passwords`

## Validation tests

The template includes a validation script at `/root/app_test/main.t` that checks:

* `postgresql`, `redis-server`, `nginx`, and `chatwoot.target` are enabled
* `/home/chatwoot/chatwoot` source tree exists
* `/home/chatwoot/chatwoot/.env` exists
* first-boot script exists and is executable
* `chatwoot-web.1` is active

## Minimum Resources

Resource | Minimum
---------|---------
Ram      | 4G
Disk     | 20G
CPU      | 2

## Links

* Manage: [http://{server_ip}](http://{server_ip})
* Chatwoot documentation: [https://www.chatwoot.com/docs](https://www.chatwoot.com/docs)
* Community forum: [https://github.com/chatwoot/chatwoot/discussions](https://github.com/chatwoot/chatwoot/discussions)
Summary
Resetting your server with the Chatwoot on Ubuntu 24.04 Application is a great way to start completely fresh. Because this process permanently deletes everything on your server, please make sure to save your settings and back up your important files before you begin!