 ChatGPT,
  Claude,
  Gemini,
  Grok — all four for
 Purchase a Self-Managed VPS with Chatwoot on Ubuntu 24.04 Installation
Chatwoot on Ubuntu 24.04 is a powerful, open-source customer engagement platform that enables secure, high-quality communication for teams, businesses, and communities. With a Self-Managed VPS from Bluehost, you can deploy Chatwoot quickly and easily, giving you full control over your support environment and privacy.
Whether you need to manage customer conversations, support tickets, or collaborative sessions, Chatwoot offers flexibility and reliability. Setting up Chatwoot on your own VPS ensures you can customize features, manage users, and scale your solution as your needs grow.
Why Choose Chatwoot on a Self-Managed VPS?
- Full Control: Manage your own Chatwoot server, customize settings, and ensure privacy for your users.
- Scalable Solution: Easily upgrade resources as your team or business grows.
- Open Source: Benefit from a robust, community-driven platform with no licensing fees.
- Secure Conversations: Host encrypted chats and protect sensitive information.
- Easy Integration: Connect Chatwoot with other tools and platforms to enhance collaboration.
- Cost-Effective: Avoid recurring SaaS fees by running your own customer engagement solution.
What Can You Do With Chatwoot?
- Manage Customer Conversations: Run secure, high-quality chat sessions for your team or clients.
- Support Tickets and Collaboration: Organize support requests, collaborate with your team, and resolve issues efficiently.
- Multi-Channel Integration: Connect Chatwoot to your business tools, websites, or apps.
- Manage Users: Control access, permissions, and chat settings for your organization.
- Automate Workflows: Enable automation for important conversations and support processes.
- Custom Integrations: Integrate Chatwoot with CRM, email, and other business tools.
Resource Requirements
Before deploying, ensure your server meets the following minimum hardware requirements. For a stable production deployment, we recommend using higher specifications than the minimum requirements.
- Do not purchase a server that only meets the minimum requirements. The minimum specifications represent the software's bare survival threshold and do not account for operating system overhead or production workloads. Running with only 2 CPUs and 4 GB RAM can result in severe performance slowdowns, system freezes, or unexpected crashes during traffic spikes.
- Bluehost Self-Managed VPS and VDS lack dedicated GPUs (VRAM). Running local LLMs entirely on their CPUs will cause extremely slow response times. For optimal performance, host your application on Bluehost but connect it to an external AI cloud provider (like OpenAI or Anthropic) via API.
- For a stable deployment, we recommend using at least 4 CPU cores and 8 GB RAM. While the minimum 20 GB SSD is sufficient for installation, consider allocating additional disk space if you plan to store recordings, logs, or other application data.
| Resources | Minimum Requirements | Recommended |
|---|---|---|
| CPU | 2 | 4 |
| Memory (RAM) | 4 GB | 8 GB |
| Disk | 20 GB | 20 GB |
How to Purchase a Self-Managed VPS with Chatwoot Installation

New to VPS or not sure where to start? No worries! At the top of the Self-Managed VPS purchase page, you’ll see the Pre-configured Setup section. This handy feature is perfect if you’re feeling a bit unsure—just pick the type of project you want, like WordPress Site, AI Agent/Claude Code, Dev/Staging, or eCommerce Store. We’ll take care of the rest by automatically filling in the best plan, operating system, and template for you.
- Super simple for beginners or anyone who just wants a quick setup
- Instantly get the recommended settings for your project
- Skip the guesswork and save time
- You can still customize things later if you want
- In your browser, go to https://www.bluehost.com/vps-hosting.
- Click the Choose Plan button under your preferred VPS hosting plan.
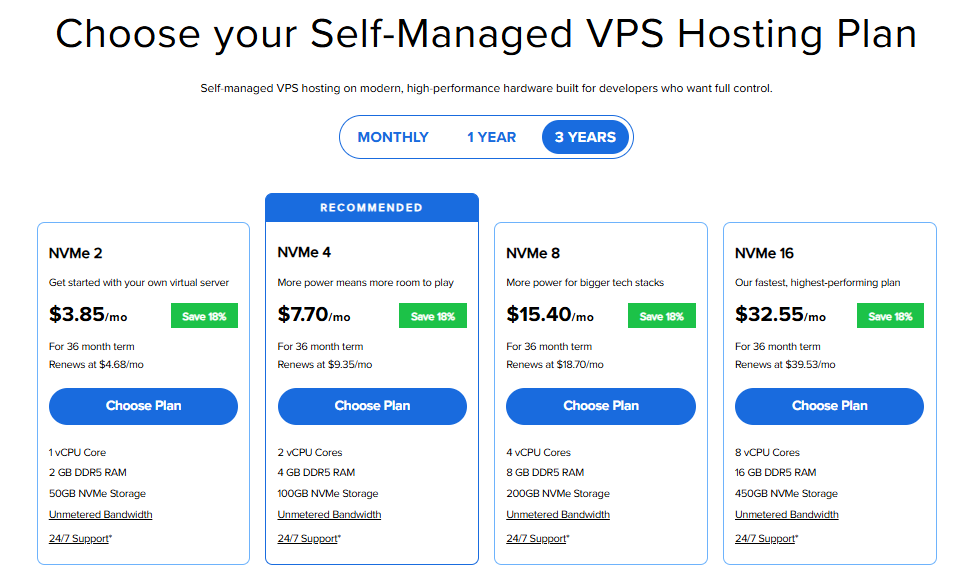
Important: Pricing is subject to change—please visit https://www.bluehost.com/vps-hosting for the current introductory/sign-up offer for Bluehost VPS Hosting. For the most up-to-date renewal pricing, visit your Bluehost Portal Renewal Center.
- Select your preferred Data Center location.

- On the Cart page, you can configure your server to fit your needs in the following section:
- Hardware:
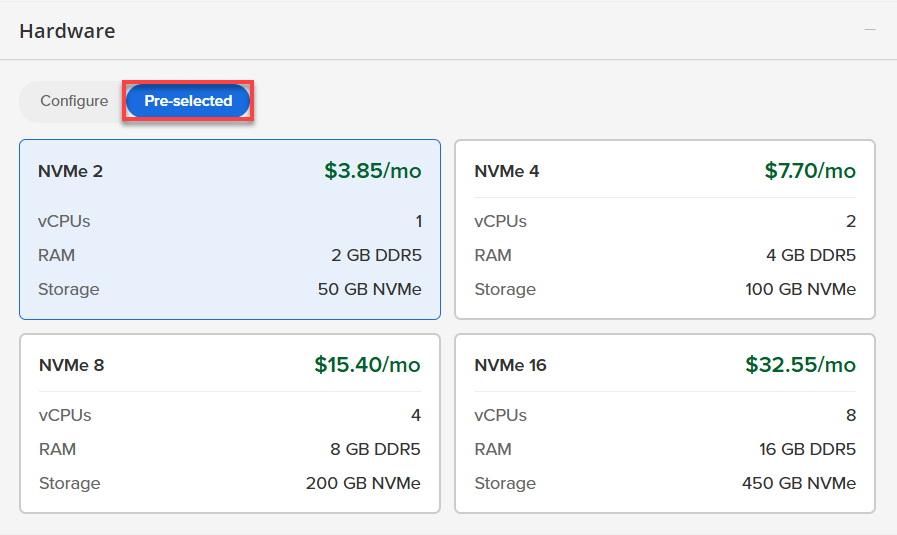
- Pre-selected:
You can select a different Self-Managed VPS plan in this section.
- Configure:
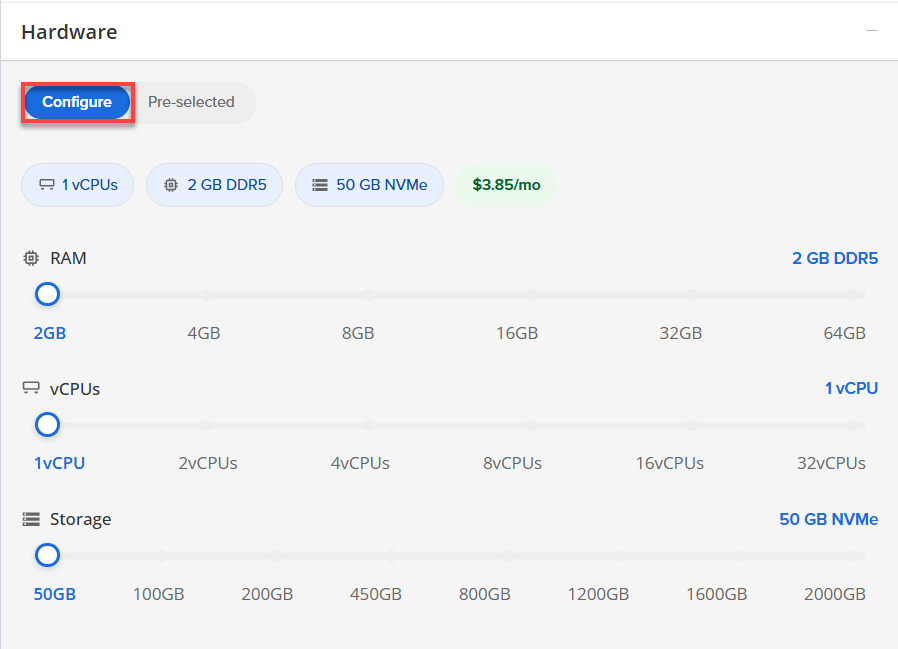
Click Configure to customize your package.
Note that your changes help customize your plan, and the overall cost will adjust accordingly to fit your needs.
- Pre-selected:
- Software:
If the selected plan does not meet the app's minimum requirements, the app will be grayed out.
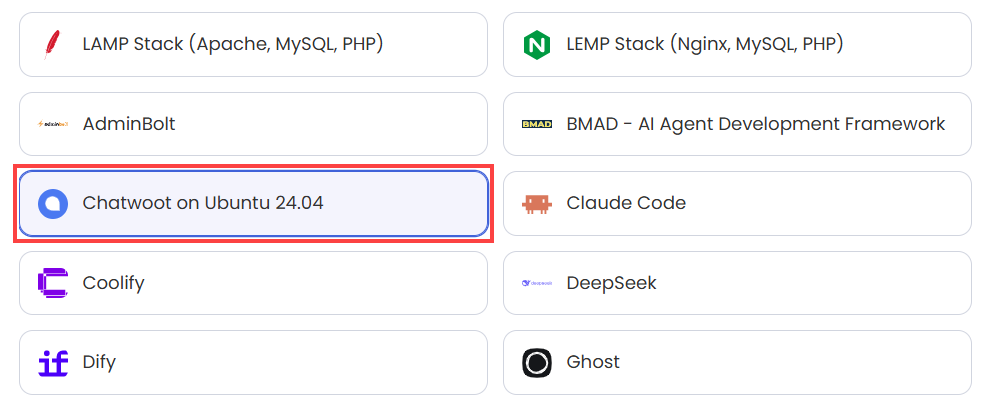
- Click the Application tab.
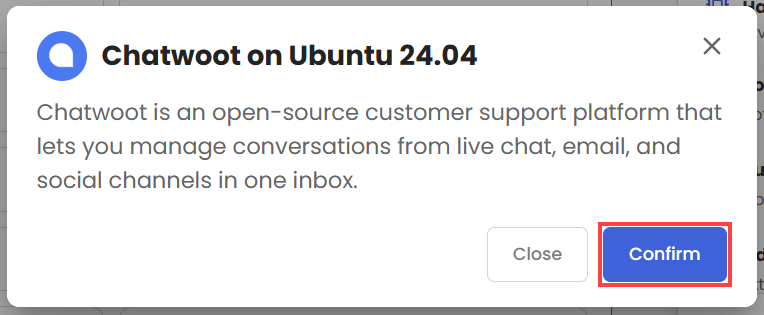
- Select Chatwoot on Ubuntu 24.04.
- In the pop-up, click Confirm.
- Hardware:
- Add-Ons: You can add Premium Support here, which gives you priority access to expert assistance and faster response times.

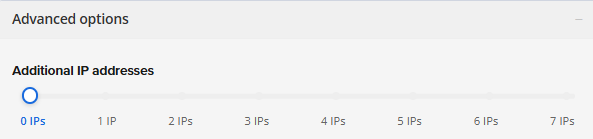
- In the Advanced options:
- Extra IP's: You can add extra IP addresses for an additional fee.
Pricing changes based on how many IPs you add. - Hostname: Assign a custom hostname to easily identify your server. This is optional.
- Extra IP's: You can add extra IP addresses for an additional fee.
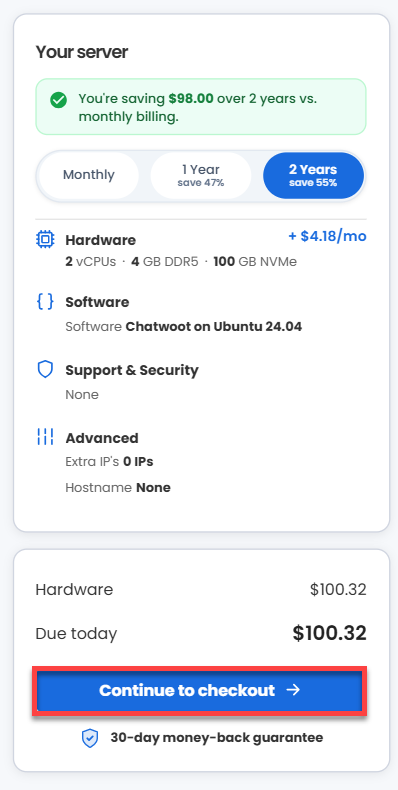
- Next, select your preferred billing term and review your Order Summary, then click Continue to Checkout.
- Do the following on the Checkout page:
If you're new with Bluehost:
- Create your Bluehost account by using your email address or by connecting with your Google, Apple, or GitHub account — whichever you prefer!

- Select your preferred payment method: credit card, Google Pay, or PayPal. Enter your billing information.

If you have an account with us, you will see your Bluehost login details when you are logged into your Bluehost Portal. If you are not logged in, please click the Log In link.

- Create your Bluehost account by using your email address or by connecting with your Google, Apple, or GitHub account — whichever you prefer!
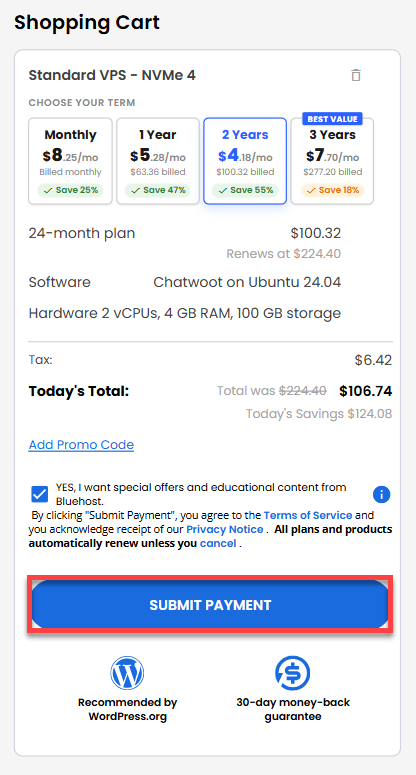
- In the Shopping Cart section, you can still adjust your billing term if needed.
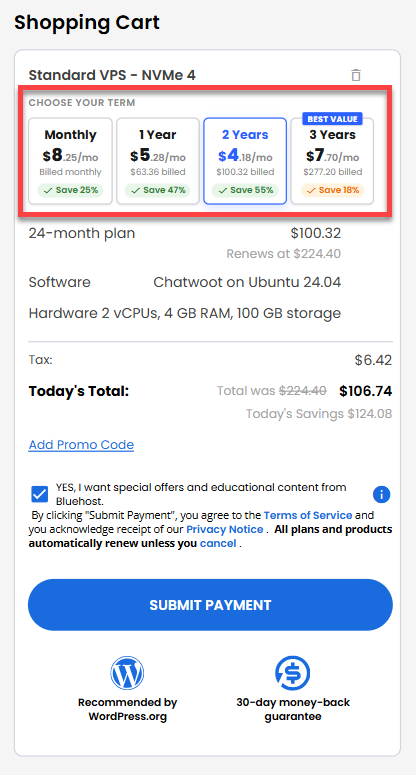
- Review the items in your cart, add a Promo Code if you have one, and then click Submit Payment to complete the purchase.
After completing the purchase, your VPS hosting will begin provisioning. You can access and manage your new VPS hosting in the Hosting tab of your Bluehost Portal.
How to Set Up and Secure Your Chatwoot on Ubuntu 24.04 Server
Chatwoot is a powerful, open-source customer support platform, but it requires a few essential configuration steps before it is ready for production. This guide outlines the complete initial setup process. Follow the phases below to access the web interface, apply a valid SSL certificate, and adopt security best practices for managing your support workspace.
Phase 1: Reset Your Root Password
- Log in to your Bluehost Portal.
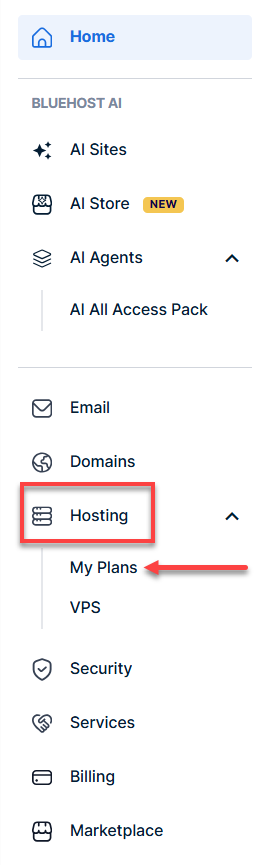
- In the left-hand menu, click Hosting, then select My Plans.
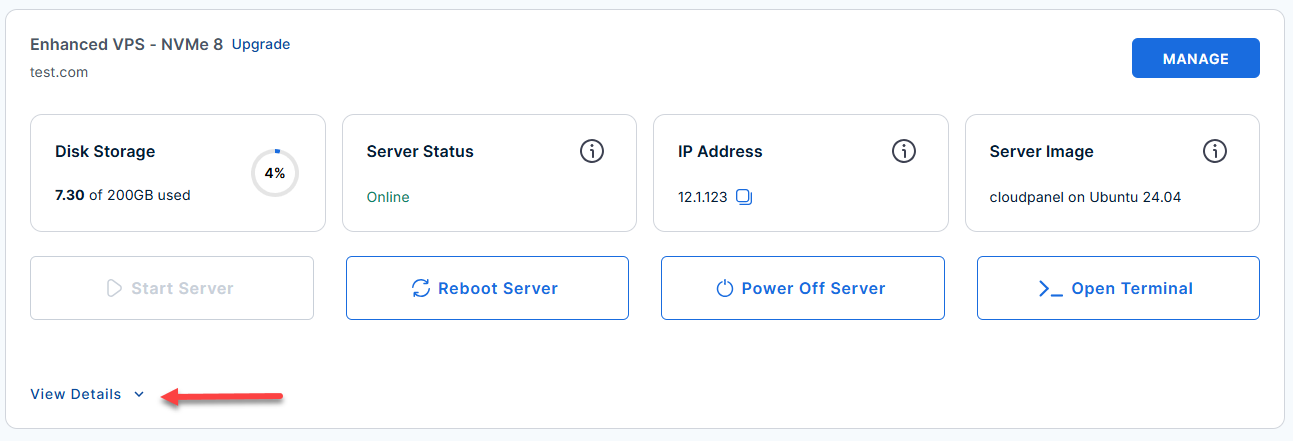
- Locate the server you want to manage, then click View Details in the bottom-left corner to expand the section and access additional server information.
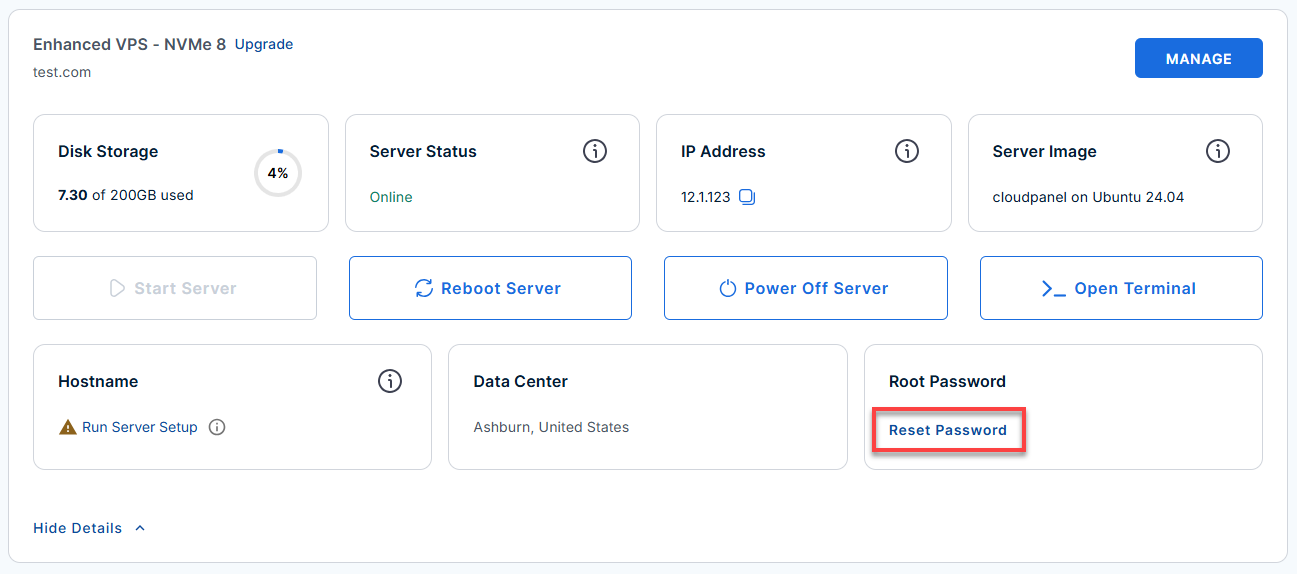
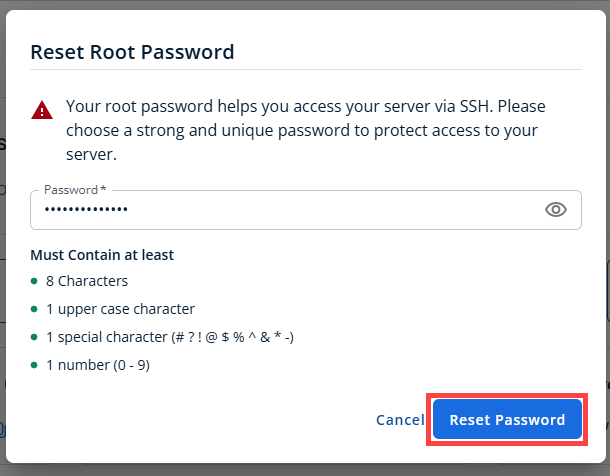
- Click the Reset Password.
- In the pop-up window, type your new root password, then click Reset Password again to confirm and save the changes.
Phase 2: Connect To Your Server Through SSH
- Connect to your VPS via SSH.
Open your computer's terminal (or an SSH client like PuTTY) and run the following command to log into your server as the administrator, using your server's public IP address:Replaceyour_server_ipwith your actual server IP address.
Follow the prompts and enter the new root password you created in the step above.ssh root@your_server_ip - Wait for the automated background setup to complete. On the first boot, a background script automatically generates a fresh SECRET_KEY_BASE for the Rails app and stores it securely. If you ever need to quickly review the rotated Rails secret directly inside your server terminal, you can print it out by running:
grep CHATWOOT_SECRET_KEY_BASE /root/.app_passwords
Phase 3: Access the Web Panel
Now, you will leave the terminal for a moment and move to your web browser.
- Navigate to the panel: Go to http://(replace with your server's actual public IP address).
Example:
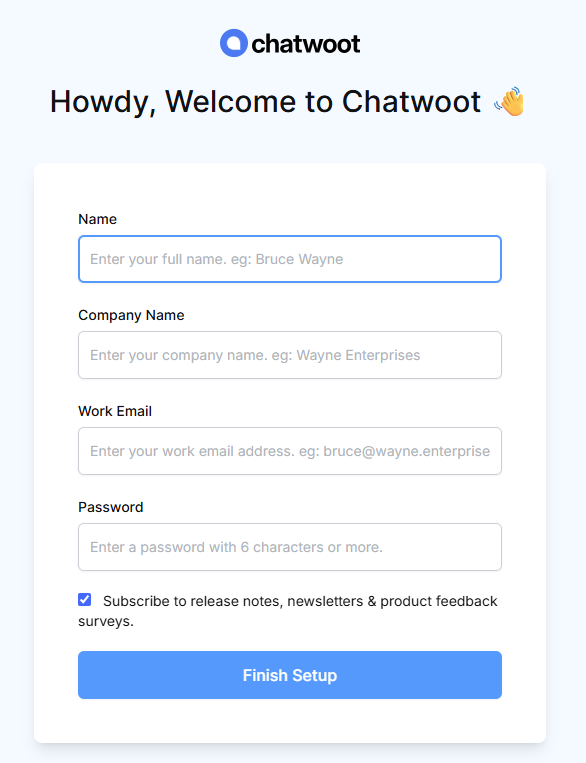
[http://12.3.456.789] (http://12.3.456.789) - Create your account: On the first screen, create your initial user account. The first account you create automatically becomes the Super Admin, which allows you to invite other agents.
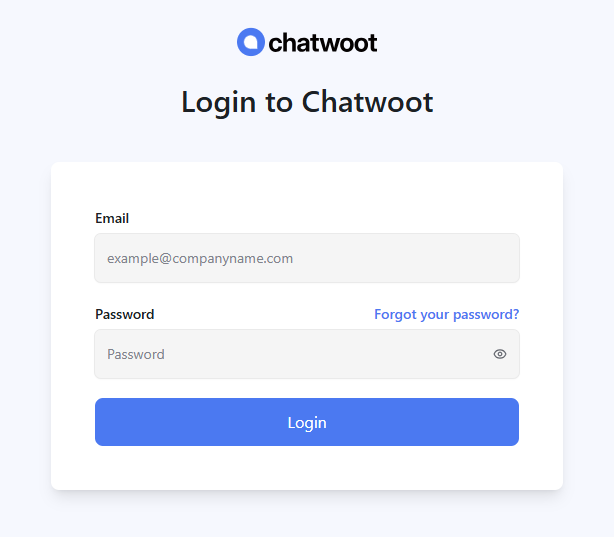
- After you create your account, the page will refresh and prompt you to log in with the credentials you created.
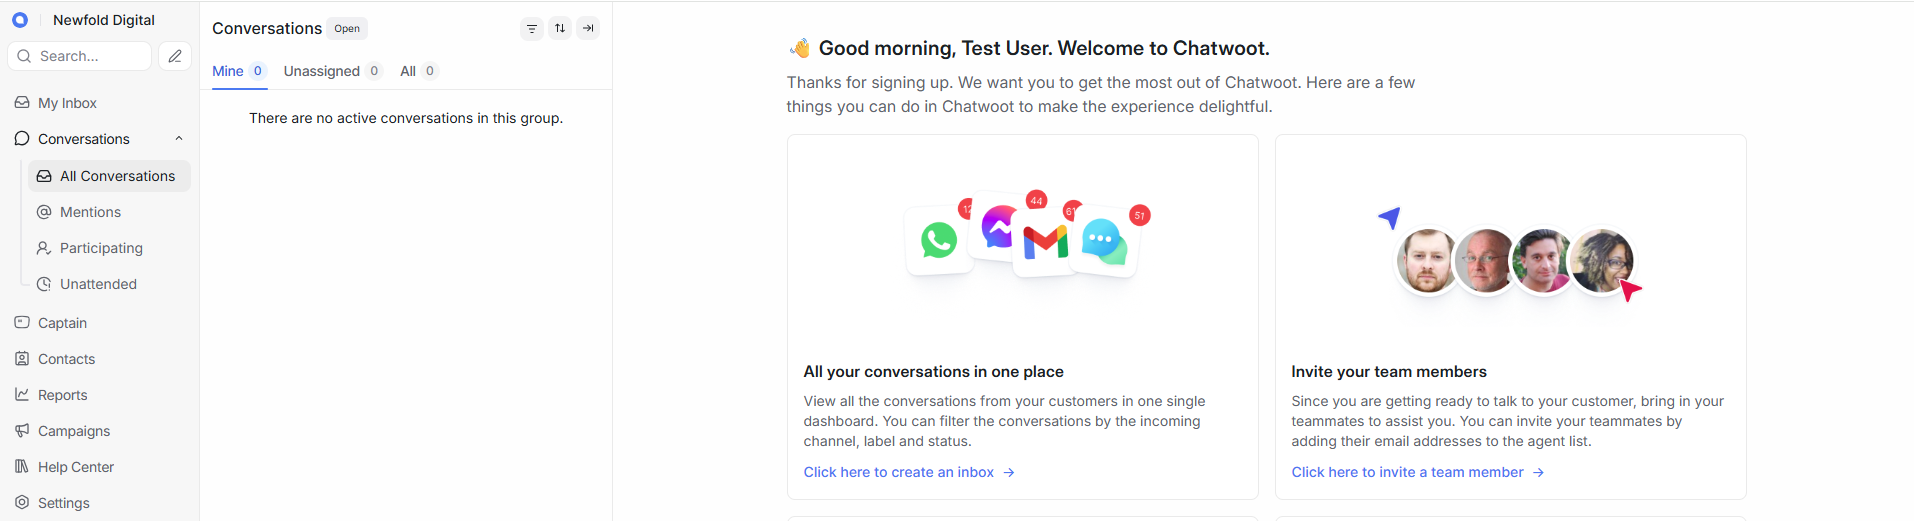
- You are now logged in to your Dashboard.
Phase 4: Connecting Your Custom Domain (Recommended)
By default, your Chatwoot instance is only accessible via a raw IP address over an unencrypted connection (HTTP). For a production environment, you will want to connect a custom domain (like support.yourcompany.com) and secure it with TLS/SSL.
- DNS Configuration: Create an A Record in your DNS provider's dashboard, pointing your chosen domain to your server's public IP address.
- Update Environment Variables:
- Log in to your server and update the FRONTEND_URL variable inside this directory.
/home/chatwoot/chatwoot/.envTo edit the file, you need to have the nano editor installed. If nano is not installed yet, run the following command:apt update apt install nano -y - Wait a few minutes for the installation to complete. Once complete, run this command.
nano /home/chatwoot/chatwoot/.env
Example Output:
GNU nano 7.2 /home/chatwoot/chatwoot/.env # Learn about the various environment variables at # https://www.chatwoot.com/docs/self-hosted/configuration/environment-variables/#rails-production-variables # Used to verify the integrity of signed cookies. so ensure a secure value is set # SECRET_KEY_BASE should be alphanumeric. Avoid special characters or symbols. # Use `rake secret` to generate this variable SECRET_KEY_BASE=examplet3st7ccc895635546ccf1fff6c6335167d1569ec2c4253e508737c1a78acb4381f773ebaf5fe7c6f491e75541060d4f7f0fe8441db26120edbc9ee4bdc # Active Record Encryption keys (required for MFA/2FA functionality) # Generate these keys by running: rails db:encryption:init # IMPORTANT: Use different keys for each environment (development, staging, production) # ACTIVE_RECORD_ENCRYPTION_PRIMARY_KEY= # ACTIVE_RECORD_ENCRYPTION_DETERMINISTIC_KEY= # ACTIVE_RECORD_ENCRYPTION_KEY_DERIVATION_SALT= # Replace with the URL you are planning to use for your app FRONTEND_URL=http://12.3.456.789 # To use a dedicated URL for help center pages # HELPCENTER_URL=http://0.0.0.0:3000 # If the variable is set, all non-authenticated pages would fallback to the default locale. # Whenever a new account is created, the default language will be DEFAULT_LOCALE instead of en # DEFAULT_LOCALE=en # If you plan to use CDN for your assets, set Asset CDN Host ASSET_CDN_HOST= # Force all access to the app over SSL, default is set to false FORCE_SSL=false # This lets you control new sign ups on your chatwoot installation # true : default option, allows sign ups # false : disables all the end points related to sign ups # api_only: disables the UI for signup, but you can create sign ups via the account apis ENABLE_ACCOUNT_SIGNUP=false # Redis config # specify the configs via single URL or individual variables # ref: https://www.iana.org/assignments/uri-schemes/prov/redis # You can also use the following format for the URL: redis://:password@host:port/db_number [ line 1/288 ( 0%), col 1/51 ( 1%), char 0/10563 ( 0%) ] ^G Help ^O Write Out ^W Where Is ^K Cut ^T Execute ^C Location M-U Undo M-A Set Mark M-] To Bracket M-Q Previous ^X Exit ^R Read File ^\ Replace ^U Paste ^J Justify ^/ Go To Line M-E Redo M-6 Copy ^Q Where Was M-W Next - Locate FRONTEND_URL and change it to your domain (e.g., https://support.yourdomain.com).
Nano acts a lot like a standard text editor (like Notepad).
- Move around: Use your keyboard's arrow keys to move the cursor to the line you want to change.Locate FRONTEND_URL and change it to your domain (e.g., https://support.yourdomain.com).
- Edit: Just start typing, or use Backspace/ Deleteto remove text.
- Save: Press Ctrl+O (the letter O, not zero). The bottom of the screen will ask you to confirm the file name—just press Enter.
- Exit: Press Ctrl+ Xto close the editor and return to the command line.
- Log in to your server and update the FRONTEND_URL variable inside this directory.
- Configure Nginx: Update the server_name directive in the Nginx configuration file located at:
/etc/nginx/sites-available/chatwoot- Edit the Nginx configuration:
nano /etc/nginx/sites-available/chatwoot
Example Output:
GNU nano 7.2 /etc/nginx/sites-available/chatwoot upstream chatwoot { server 127.0.0.1:3000; } server { listen 80 default_server; listen [::]:80 default_server; server_name _; client_max_body_size 50M; proxy_http_version 1.1; proxy_set_header Upgrade $http_upgrade; proxy_set_header Connection "upgrade"; proxy_set_header Host $host; proxy_set_header X-Real-IP $remote_addr; proxy_set_header X-Forwarded-For $proxy_add_x_forwarded_for; proxy_set_header X-Forwarded-Proto $scheme; location / { proxy_pass http://chatwoot; } location /cable { proxy_pass http://chatwoot; proxy_read_timeout 600s; proxy_send_timeout 600s; } } ^G Help ^O Write Out ^W Where Is ^K Cut ^T Execute ^C Location M-U Undo M-A Set Mark ^X Exit ^R Read File ^\ Replace ^U Paste ^J Justify ^/ Go To Line M-E Redo M-6 Copy - Update the server_name directive to match your domain. You can follow the same steps above on how to edit the file using nano editor.
- Edit the Nginx configuration:
- Run the command to automatically provision a free Let's Encrypt SSL certificate.
certbot --nginx -d your.domain
- Apply all these changes by running.
systemctl restart chatwoot.target nginx
Phase 5: Day-to-Day Management
The image also sets up tools to help you manage the server going forward. The firewall (UFW) is already configured to only allow essential traffic (Web and SSH), and daily log rotations are set up so your hard drive doesn't fill up with old data.
If you ever need to troubleshoot or restart the system, you can use these core commands:
- Check health:
systemctl status chatwoot.target
- Reboot the app:
systemctl restart chatwoot.target
- View error logs:
journalctl -u chatwoot-web.1 -n 100 --no-pager
Additional Information and Example Documentation Output
You can run cat /root/README.md to see more information and useful commands:
Example Output:
root@12-3-456-789:~# cat /root/README.md
# Chatwoot on Ubuntu 24.04

## Description

Chatwoot is an open-source customer support platform that lets you manage
conversations from live chat, email, and social channels in one inbox.

It supports team collaboration with agent assignment, canned responses,
conversation labels, and performance reporting, giving you a complete support
workspace you host and control yourself.

## Image contents

This template installs and configures:

* Chatwoot from the official upstream installer at `https://get.chatwoot.app/`
* PostgreSQL local database service
* Redis (used for Sidekiq queues and ActionCable)
* Nginx reverse proxy fronting Chatwoot on ports 80/443
* Ruby (via rbenv) and Node.js with pnpm
* `chatwoot` system user with source tree at `/home/chatwoot/chatwoot`
* Chatwoot env file at `/home/chatwoot/chatwoot/.env`
* systemd units `chatwoot-web.1.service` and `chatwoot-worker.1.service`,
  grouped under `chatwoot.target`
* Daily log rotation for `/home/chatwoot/chatwoot/log/*.log` (14 day retention)
* UFW firewall rules for SSH, HTTP, and HTTPS
* First-boot injection script at `/var/lib/cloud/scripts/per-instance/001_onboot`
* App password store at `/root/.app_passwords`

## Services

Service     | Ports     | Purpose
----------- | --------- | -----------------------------------------------------------
Nginx       | 80, 443   | Reverse proxy fronting Chatwoot
Chatwoot    | 3000      | Rails web app (bound locally, fronted by Nginx)
PostgreSQL  | local     | Database backend for Chatwoot
Redis       | local     | Sidekiq queue and ActionCable backend
OpenSSH     | 22        | Remote access

Ports are protected using UFW.

## First boot behavior

On the first boot, the cloud-init per-instance script
`/var/lib/cloud/scripts/per-instance/001_onboot`:

* generates a fresh `SECRET_KEY_BASE` for the Rails app
* stores it securely in `/root/.app_passwords`
* updates `/home/chatwoot/chatwoot/.env`
* waits for PostgreSQL readiness
* starts Chatwoot and Nginx

This guarantees that no Rails secret is shared between deployed images.

## First-time access (How-to-use)

After the VM boots, access Chatwoot at:

* `http://`

On the first screen, create the first account. The first account you create
becomes the Super Admin and can invite agents from the dashboard.

To serve Chatwoot on your own domain with TLS:

1. Point your DNS A record at the server IP.
2. Update the `FRONTEND_URL` in `/home/chatwoot/chatwoot/.env`.
3. Update `server_name` in `/etc/nginx/sites-available/chatwoot`.
4. Run `certbot --nginx -d your.domain` to issue a Let's Encrypt certificate.
5. Restart with `systemctl restart chatwoot.target nginx`.

## Useful commands

* Check Chatwoot status:
  `systemctl status chatwoot.target`
* Restart Chatwoot:
  `systemctl restart chatwoot.target`
* View web logs:
  `journalctl -u chatwoot-web.1 -n 100 --no-pager`
* View worker logs:
  `journalctl -u chatwoot-worker.1 -n 100 --no-pager`
* View Rails production log:
  `journalctl -u chatwoot-web.1.service -n 100 --no-pager`
* Show the rotated Rails secret:
  `grep CHATWOOT_SECRET_KEY_BASE /root/.app_passwords`

## Validation tests

The template includes a validation script at `/root/app_test/main.t` that checks:

* `postgresql`, `redis-server`, `nginx`, and `chatwoot.target` are enabled
* `/home/chatwoot/chatwoot` source tree exists
* `/home/chatwoot/chatwoot/.env` exists
* first-boot script exists and is executable
* `chatwoot-web.1` is active

## Minimum Resources

Resource | Minimum
---------|---------
Ram      | 4G
Disk     | 20G
CPU      | 2

## Links

* Manage: [http://{server_ip}](http://{server_ip})
* Chatwoot documentation: [https://www.chatwoot.com/docs](https://www.chatwoot.com/docs)
* Community forum: [https://github.com/chatwoot/chatwoot/discussions](https://github.com/chatwoot/chatwoot/discussions)
Summary
Chatwoot on a Self-Managed VPS gives you a secure, flexible, and cost-effective customer engagement solution. You have full control over your conversations, can scale as needed, and integrate with your business tools. With Bluehost, getting started is simple—just select Chatwoot during VPS setup and enjoy reliable, private communication for your organization.