 ChatGPT,
  Claude,
  Gemini,
  Grok — all four for
 Purchase a Virtual Dedicated Server with Hermes Agent + Open WebUI Installation
Hermes Agent + Open WebUI make it easy to create and manage a private, AI-powered workspace on your Virtual Dedicated Server (VDS). By pairing smart AI agents with a user-friendly web interface, you can interact with large language models (LLMs), automate routine tasks, and develop powerful AI-driven solutions without needing advanced technical expertise.
Whether you're building AI assistants, automating workflows, generating content, or exploring AI, this setup offers a secure and flexible environment with full control over your data.
This article explains how to purchase a Bluehost Virtual Dedicated Server (VDS) hosting plan with gstack installed.
Why Choose Hermes Agent + Open WebUI?
Getting started with AI can often be challenging due to the complexity of model management and infrastructure setup. Hermes Agent + Open WebUI simplify the experience by providing an intuitive, centralized dashboard that makes AI accessible to everyone. From a single interface, you can communicate with AI models, organize conversations, manage workflows, and deploy AI-powered tools with minimal effort.
Uses of Hermes Agent + Open WebUI
Here are some of the specific uses or skills of gstack.
- Build Custom AI Assistants - Create personalized AI assistants that can answer questions, generate content, provide insights, and support everyday business operations.
- Maintain Privacy and Control - Host your AI environment on your own VDS to keep conversations, data, and resources under your control while enhancing privacy and security.
- Boost Team Productivity - Provide teams with access to AI-powered tools through a shared web interface, making collaboration, knowledge sharing, and task management more efficient.
- Accelerate Content Creation - Generate emails, reports, articles, documentation, summaries, marketing materials, and other written content faster with AI assistance.
- Search and Analyze Information - Quickly review, summarize, and organize documents, research, knowledge bases, and project data to improve decision-making and productivity.
- Automate Repetitive Tasks - Use AI agents to handle routine tasks, retrieve information, and automate workflows, helping reduce manual effort and save time.
- Support Development and Testing - Experiment with prompts, workflows, and AI-powered applications in a dedicated environment designed for learning and development.
- Support Multiple Users - Enable secure and centralized access to AI tools for multiple team members through a web-based platform.
- Use a Simple, Intuitive Interface - Interact with AI models through a clean and easy-to-navigate dashboard without relying on command-line tools or complex configurations.
How to Purchase a Virtual Dedicated Server with Hermes Agent + Open WebUI Installation
- In your browser, go to https://www.bluehost.com.
- Click Hosting in the top menu, then select Virtual Dedicated Server.

You can also go to this link directly: https://www.bluehost.com/vds-hosting.
- On the Virtual Dedicated Server Hosting page, click Explore Plans. You can also scroll down to the hosting plans section.

- Choose a plan from either tab — Standard or High Performance — by clicking Choose Plan.
 Pricing is subject to change. Please visit https://www.bluehost.com/vds-hosting for the current introductory/sign-up offer for the Bluehost Virtual Dedicated Server hosting. For the most up-to-date renewal pricing, visit your Bluehost Portal's Renewal Center.
 - On the next page, configure your VDS hosting to meet your requirements. The configuration options are divided into the following sections:
- Location: Select your data center in this section.

- Hardware: This section shows your pre-selected plan. You can also switch to another Virtual Dedicated Server plan in this section

- Software:
If the selected plan does not meet the app's minimum requirements, the app will be grayed out.
- Under the Application tab, click on Hermes Agent + Open WebUI.
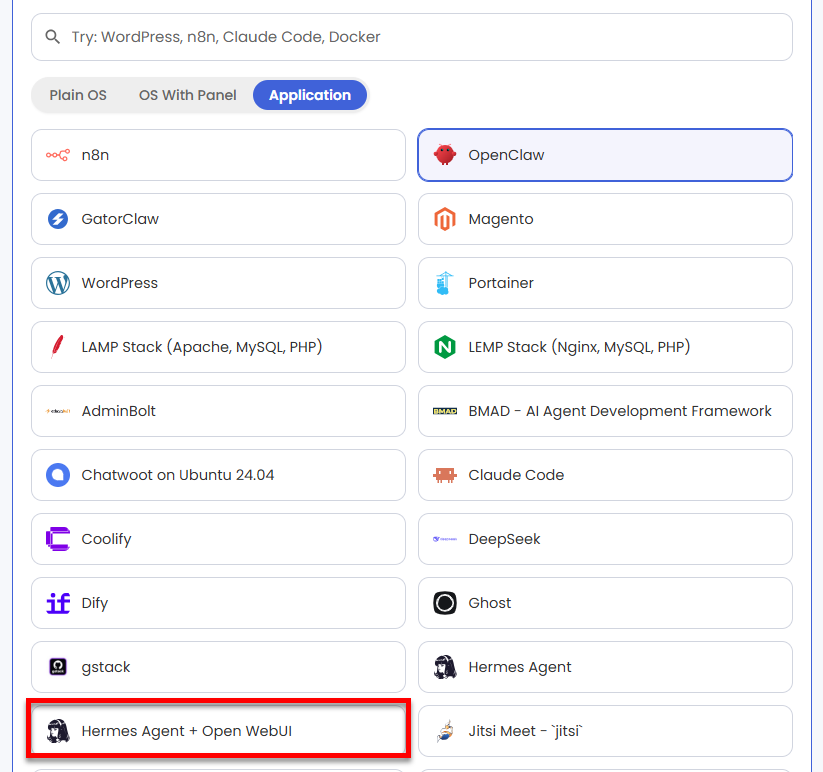 You can install only one application per purchase; the system will automatically select the best operating system for it.
 - In the pop-up, click Confirm.
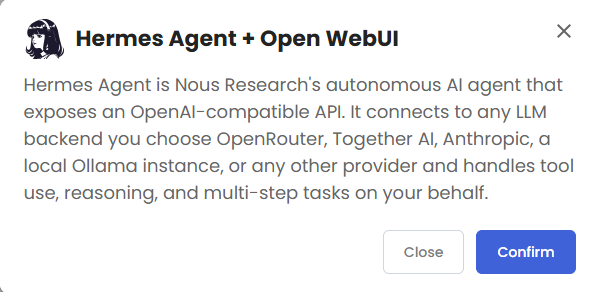
- Under the Application tab, click on Hermes Agent + Open WebUI.
- Support & Security: You can add Premium Support - Recurring, which provides priority access to expert assistance and faster response times.

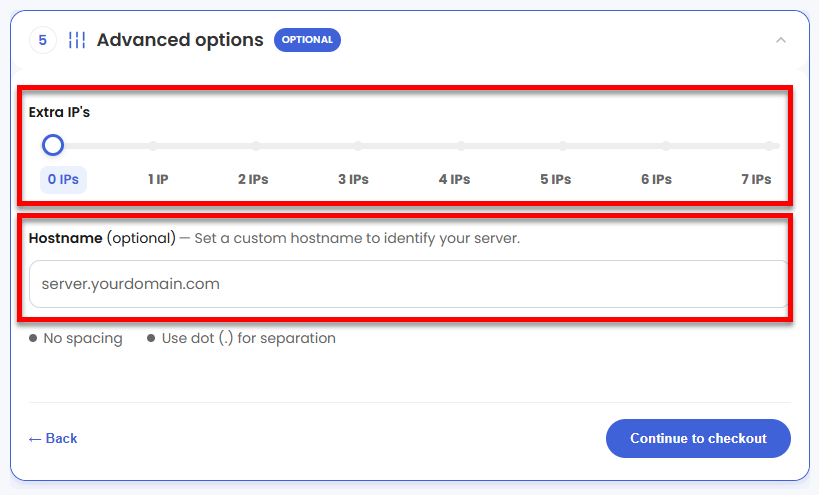
- Advanced Options:
- Extra IP's: You can add IP addresses for an additional fee. Pricing changes based on how many IPs you add.
- Hostname: Assign a custom hostname to identify your server. This is optional.
- Location: Select your data center in this section.
- Select your billing term and review your selected items on the right pane, along with the summarized total cost.
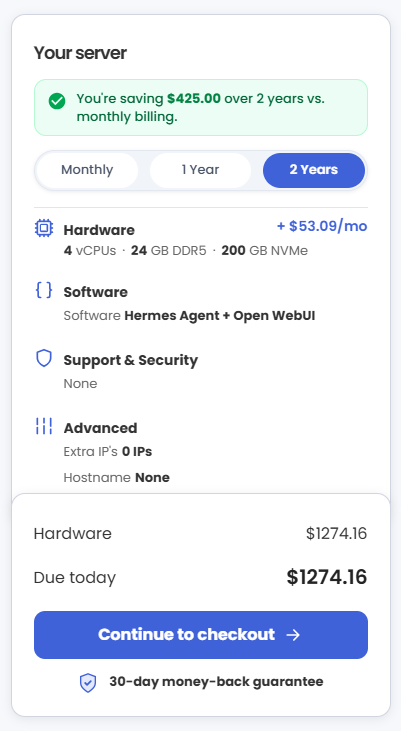
- Click Continue to checkout.
- Do the following on the Checkout page:
If you're new to Bluehost:- Create your Bluehost account by using your email address or by connecting with your Google, Apple, or GitHub account — whichever you prefer!

- Select your preferred payment method: credit card, Google Pay, or PayPal. Enter your billing information.

If you have an account with us, you will see your Bluehost login details when you are logged into your Bluehost Portal. If you are not logged in, please click the Log In link.

- Create your Bluehost account by using your email address or by connecting with your Google, Apple, or GitHub account — whichever you prefer!
- In the Shopping Cart, choose your billing term if you did not choose one on the previous page.
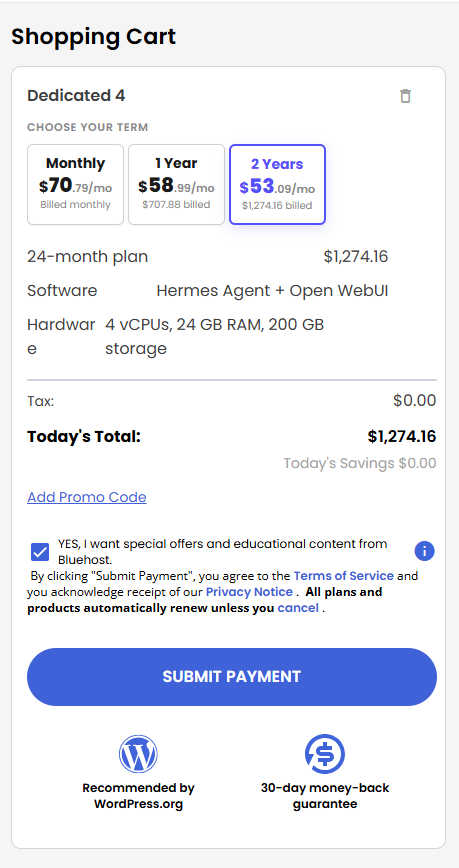
- Add a Promo code if you have one and then click Submit Payment to complete your purchase.
After completing the purchase, your VDS hosting will begin provisioning. You can access and manage your new VDS hosting in the Hosting tab of your Bluehost Portal.
How to Deploy and Configure Hermes Agent + Open WebUI
Here is your step-by-step walkthrough to get everything configured and running.
After installation completes:
Connect to your VDS via SSH.
Use your VDS IP and credentials with an SSH client, follow the prompts, and enter your root password when asked:
ssh root@your_server_ip
your_server_ip with your actual server IP address.Example Output:
  Welcome to Ubuntu 24.04.4 LTS (GNU/Linux 6.8.0-124-generic x86_64)
================================================================================

  Hermes Agent + Open WebUI

  The UFW firewall is enabled.
  Open ports: 22 (SSH), 80 (HTTP), 443 (HTTPS).

  The first thing to do is to configure an LLM model in Hermes:
    HOME=/var/lib/hermes-agent hermes model
    systemctl restart hermes-agent

  To manually configure a model using standard environment keys
  (GITHUB_TOKEN, OPENROUTER_API_KEY, ANTHROPIC_API_KEY, etc):
    nano /var/lib/hermes-agent/.hermes/.env
    systemctl restart hermes-agent

  After that is done, you can access (in a browser):
    Open WebUI:   https://12.2.2.123/

  Credentials:
    cat /root/.app_passwords

  Service logs:
    journalctl -u hermes-agent -f
    journalctl -u open-webui   -f

For more details, please see the README at /root/README.md
Step 1: Configure Your LLM Backend
Before you do anything in the browser, Hermes Agent needs an API key to talk to an actual LLM backend.
- Open the configuration file using the nano text editor:
nano /var/lib/hermes-agent/.hermes/.env
Example Output:
GNU nano 7.2 /var/lib/hermes-agent/.hermes/.env # Hermes Agent Configuration Environment Variables NODE_ENV=production PORT=8080 # API and Network Settings HERMES_API_URL=https://api.hermes-service.internal HERMES_AGENT_ID=agent_usr_11x24abc HERMES_AUTH_TOKEN=ghp_SecReTToKeN12343210abc # Logging and Performance LOG_LEVEL=info MAX_CONCURRENT_TASKS=5 TIMEOUT_MS=30000 # Database / Cache Connection (if local) REDIS_URL=redis://localhost:6379/0 ^G Help ^O Write Out ^W Where Is ^K Cut ^J Justify ^C Cur Pos ^X Exit ^R Read File ^\ Replace ^U Paste ^T To Spell ^_ Go To Line - Look for the API lines and add your provider keys.
- If using OpenRouter:
Example Output:
# OpenRouter OPENAI_API_KEY=sk-or-... OPENAI_API_BASE=https://openrouter.ai/api/v1 - If using Anthropic:
Example Output:
# Anthropic
ANTHROPIC_API_KEY=sk-ant-...
- If using OpenRouter:
- Restart the service to apply your changes:
systemctl restart hermes-agent
Step 2: Access the Web UI and Create an Account
To ensure a smooth login, please follow the steps below:
- Log In via Your Browser:
Open your preferred web browser and navigate to your server's IP .
http://your-server-ip/Replaceyour_server_ipwith your actual server IP address.
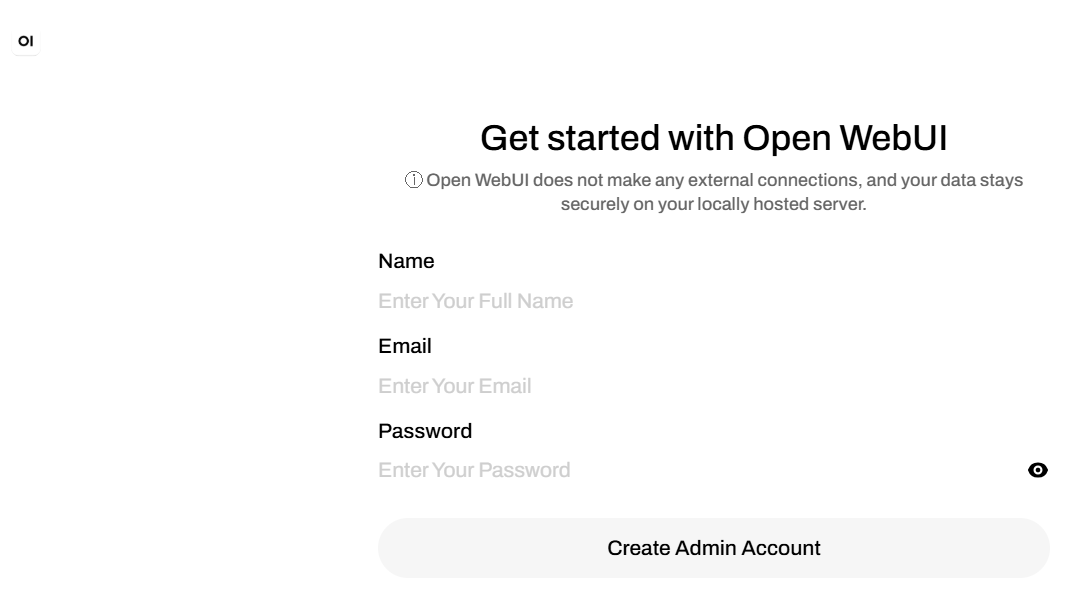
- Sign Up:
Create your account immediately. The first user to register automatically becomes the global Admin.
- Verify Settings:
Go to Admin → Settings → Connections in Open WebUI to ensure the pre-configured hermes-agent model is active and communicating.
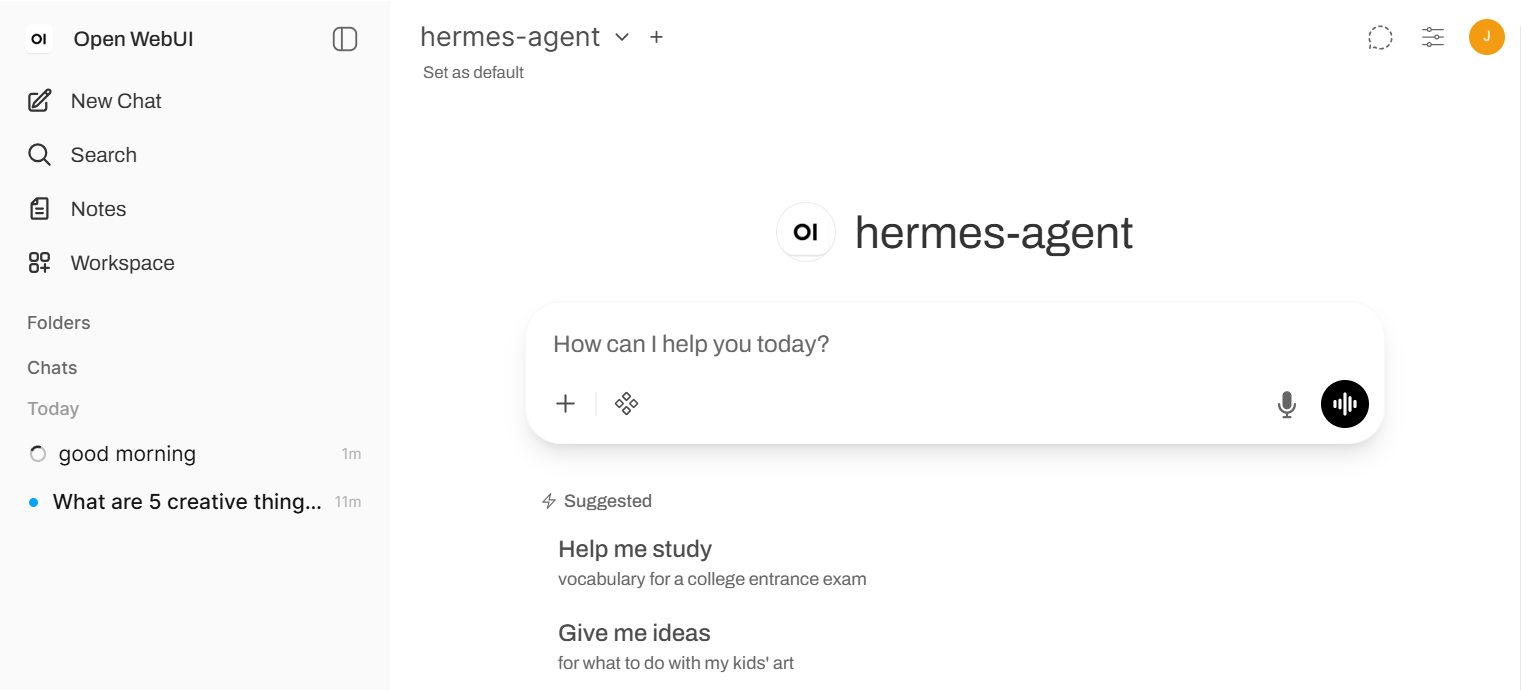
- Start Chatting:
Open a new chat, select hermes-agent from the top model dropdown menu, and test a prompt.
Step 3: Run Validation Tests
To make sure Open WebUI, Hermes Agent, and your backend connection are all talking to each other perfectly, run the built-in test suite:
Example Output:
root@server-123456:~# prove /root/app_test/main.t
/root/app_test/main.t .. ok
All tests successful.
Files=1, Tests=5,  2.34 wallclock secs ( 0.03 usr  0.01 sys +  0.42 cusr  0.12 csys = 0.58 CPU)
Result: PASS
Supporting Information and Sample Output
You can run cat /root/README.md to see more information and useful commands:
Example Output:
root@server-123456:~# cat /root/README.md
# Hermes Agent + Open WebUI

## Description

Hermes Agent is Nous Research's autonomous AI agent that exposes an
OpenAI-compatible API. It connects to any LLM backend you choose OpenRouter,
Together AI, Anthropic, a local Ollama instance, or any other provider and
handles tool use, reasoning, and multi-step tasks on your behalf.

Open WebUI is a polished, self-hosted chat interface that lets you interact
with AI models through a browser, with no data leaving your server.

This image combines both into a ready-to-use AI assistant stack: Open WebUI
provides the chat frontend, Hermes Agent powers the intelligence layer behind
it, and nginx handles HTTPS termination so you can reach everything securely
through a single URL. Connect your preferred LLM provider, create an account,
and start chatting no additional setup required.

Architecture:

  User Browser
      |
      v :80 / :443
    nginx  (reverse proxy + TLS termination)
      |
      v :8080 (internal)
    Open WebUI  (chat frontend)
      |
      v :8642 (internal, OpenAI-compatible API)
    Hermes Agent  (autonomous AI agent)
      |
      v
    LLM Backend  (configured by you: OpenRouter, Together AI, Ollama, etc.)


## Services

Service       | Ports           | Purpose
--------------|-----------------|--------
nginx         | 80, 443         | Reverse proxy with TLS termination (self-signed cert)
Open WebUI    | 8080 (internal) | Web chat frontend
Hermes Agent  | 8642 (internal) | Autonomous AI agent with OpenAI-compatible API
OpenSSH       | 22              | SSH

Ports are protected using ufw (22, 80, 443 open; 8080 and 8642 internal only).


## How-to-use

After first boot, open a browser and navigate to:

`http://your-server-ip/`

1. Create your **admin account** on the sign-up page (first user becomes admin)
2. The **hermes-agent** model is pre-configured under Admin -> Settings -> Connections
3. Select **hermes-agent** from the model dropdown in a new chat

Read generated credentials:

```
cat /root/.app_passwords      # HERMES_API_KEY and WEBUI_SECRET_KEY
cat /root/.app_info           # full connection info
```

Configure the LLM backend (edit then restart):

```
nano /var/lib/hermes-agent/.hermes/.env
systemctl restart hermes-agent
```

Example LLM provider entries:

```
# OpenRouter
OPENAI_API_KEY=sk-or-...
OPENAI_API_BASE=https://openrouter.ai/api/v1

# Anthropic
ANTHROPIC_API_KEY=sk-ant-...
```

Service management:

```
systemctl status hermes-agent
systemctl status open-webui
systemctl status nginx

journalctl -u hermes-agent -f
journalctl -u open-webui   -f
tail -f /var/log/hermes-agent/gateway.log
tail -f /var/log/open-webui/webui.log
```

Run validation tests:

```
prove /root/app_test/main.t
```

Replace the self-signed certificate:

```
cp your-cert.crt /etc/ssl/hermes-openwebui/server.crt
cp your-key.key  /etc/ssl/hermes-openwebui/server.key
chmod 0644 /etc/ssl/hermes-openwebui/server.crt
chmod 0640 /etc/ssl/hermes-openwebui/server.key
systemctl reload nginx
```


## Links

Documentation: [https://hermes-agent.nousresearch.com/docs/](https://hermes-agent.nousresearch.com/docs/)
Manage: [http://{serve
Summary
Learn how to purchase, deploy, and configure a Bluehost Virtual Dedicated Server (VDS) with Hermes Agent + Open WebUIm a self-hosted AI platform that combines smart AI agents with an intuitive web interface. This guide covers selecting and purchasing a VDS plan, configuring your server, connecting an LLM provider, accessing Open WebUI, creating an admin account, and validating the installation. With this setup, you can build AI assistants, automate workflows, generate content, boost productivity, and securely manage AI-powered tools while maintaining full control over your data and environment.