 ChatGPT,
  Claude,
  Gemini,
  Grok — all four for
Purchase a Virtual Dedicated Server with Nanoclaw Installation
Nanoclaw is a powerful yet easy-to-use platform that helps businesses securely automate tasks and manage server operations. It enables developers to handle processes, such as file management, transaction processing, and workflow automation while integrating smoothly with existing applications. With its flexible and customizable design, Nanoclaw makes complex operations simpler for both technical and non-technical users.
This article explains how to purchase a Bluehost Virtual Dedicated Server (VDS) hosting plan with Nanoclaw.
Why Choose Nanoclaw?
Nanoclaw puts security first. Every task runs inside an isolated, secure environment, giving your assistant access only to the data and systems you approve. This enables organizations to benefit from intelligent automation while keeping sensitive information protected..
Uses of Nanoclaw
- Secure Automation – Safely run scripts, file transfers, and system commands in isolated environments.
- Smart Approvals – Review and approve sensitive actions directly from messaging platforms with just one click.
- Custom Integrations – Connect assistants to tools like Slack, Telegram, and internal databases..
- Secure Data Processing – Analyze and manage sensitive business data without exposing it to unnecessary risks.
- Enterprise Assistants – Build AI-powered chatbots and virtual assistants that follow user permissions and access controls.
How to Purchase a Virtual Dedicated Server with Nanoclaw Installation
To set up Nanoclaw on Bluehost, start by purchasing a Virtual Dedicated Server (VDS). Follow the steps below.
- In your browser, go to https://www.bluehost.com.
- Click Hosting in the top menu, then select Virtual Dedicated Server.

You can also go to this link directly: https://www.bluehost.com/vds-hosting.
- On the Virtual Dedicated Server Hosting page, click Explore Plans. You can also scroll down to the hosting plans section.

- Choose a plan from either tab — Standard or High Performance — by clicking Choose Plan.
 Pricing is subject to change. Please visit https://www.bluehost.com/vds-hosting for the current introductory/sign-up offer for the Bluehost Virtual Dedicated Server hosting. For the most up-to-date renewal pricing, visit your Bluehost Portal's Renewal Center.
 - On the next page, configure your VDS hosting to meet your requirements. The configuration options are divided into the following sections:
- Location: Select your data center in this section.

- Hardware: This section shows your pre-selected plan. You can also switch to another Virtual Dedicated Server plan in this section

- Software:
- Under the Application tab, click on Nanoclaw.
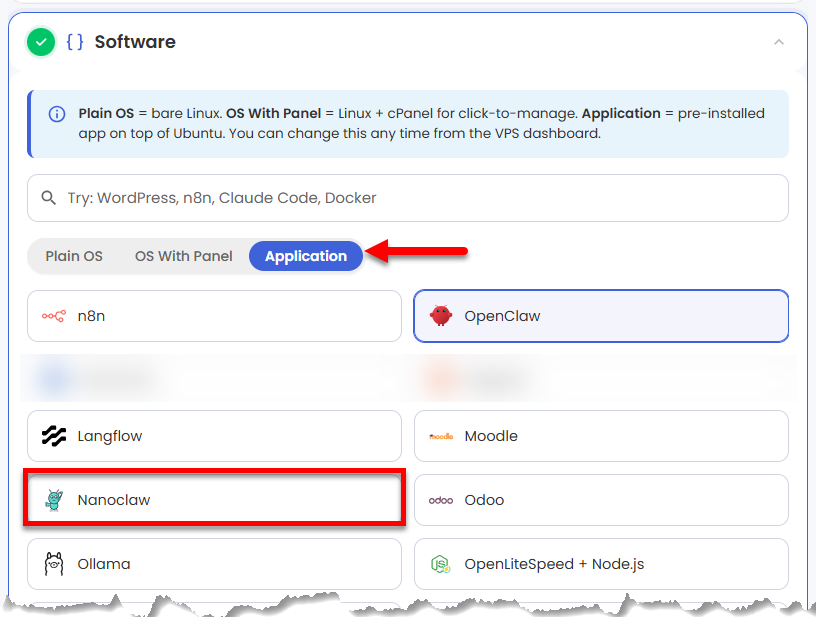 You can install only one application per purchase; the system will automatically select the best operating system for it.
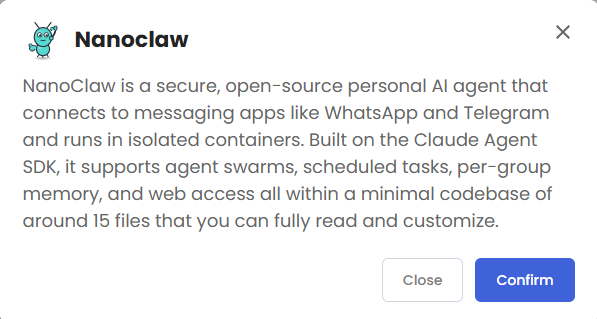
 - In the pop-up, click Confirm.
- Under the Application tab, click on Nanoclaw.
- Support & Security: You can add Premium Support - Recurring, which provides priority access to expert assistance and faster response times.

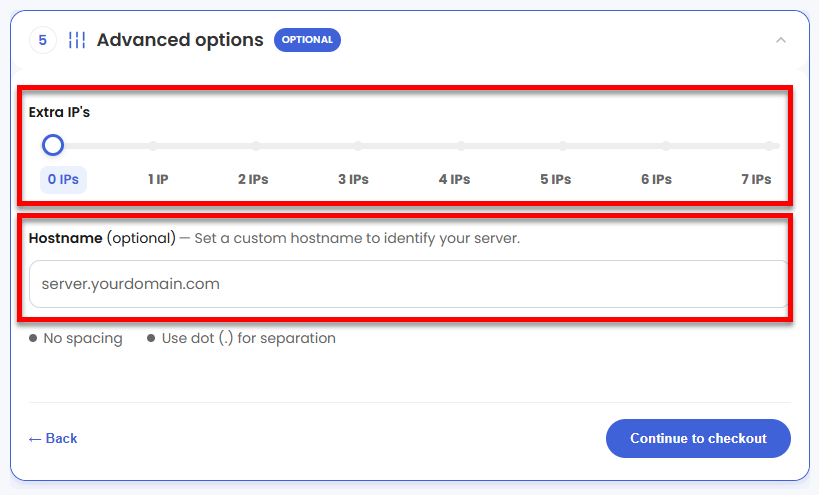
- Advanced Options:
- Extra IP's: You can add IP addresses for an additional fee. Pricing changes based on how many IPs you add.
- Hostname: Assign a custom hostname to identify your server. This is optional.
- Location: Select your data center in this section.
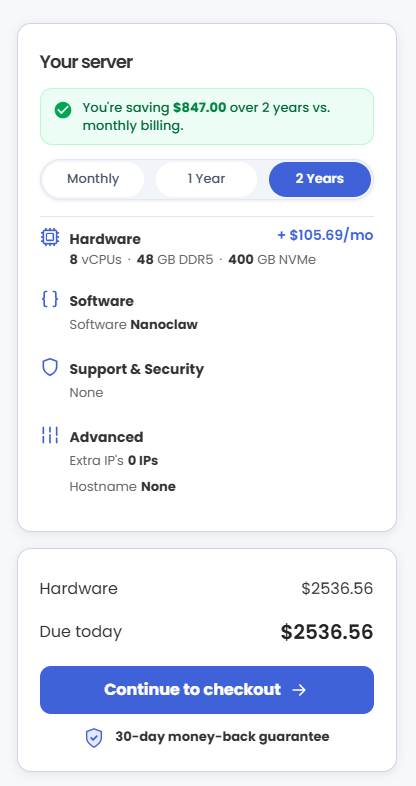
- Select your billing term and review your selected items on the right pane, along with the summarized total cost.
- Click Continue to checkout.
- Do the following on the Checkout page:
If you're new to Bluehost:- Create your Bluehost account by using your email address or by connecting with your Google, Apple, or GitHub account — whichever you prefer!

- Select your preferred payment method: credit card, Google Pay, or PayPal. Enter your billing information.

If you have an account with us, you will see your Bluehost login details when you are logged into your Bluehost Portal. If you are not logged in, please click the Log In link.

- Create your Bluehost account by using your email address or by connecting with your Google, Apple, or GitHub account — whichever you prefer!
- In the Shopping Cart, choose your billing term if you did not choose one on the previous page.
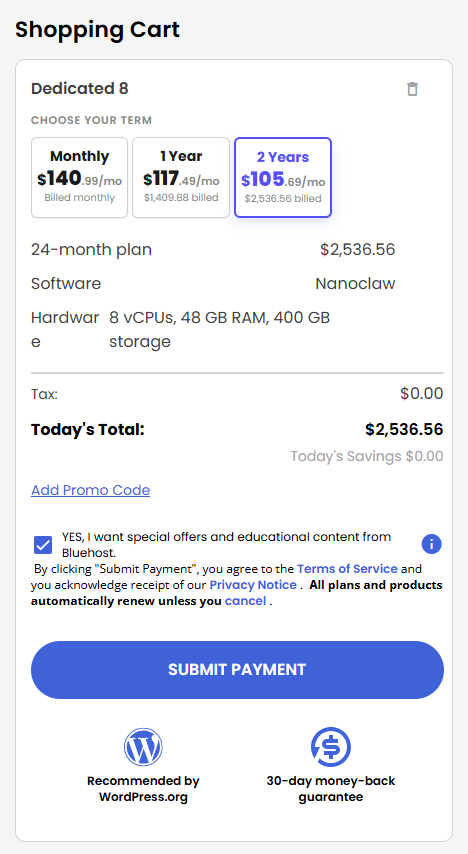
- Add a Promo code if you have one and then click Submit Payment to complete your purchase.
After completing the purchase, your VDS hosting will begin provisioning. You can access and manage your new VDS hosting in the Hosting tab of your Bluehost Portal.
How to Set up and Manage Nanoclaw
- Log in to your server via SSH.
When you connect to your server via SSH for the first time, a welcome message is displayed containing the key commands and instructions needed to set up Nanoclaw. It looks similar to the following:Welcome to Ubuntu 24.04.4 LTS (GNU/Linux 6.8.0-124-generic x86_64) ******************************************************************************** Nanoclaw AI Agent installed but NOT started -- initial setup required. -------------------------------------------------------------------------------- FIRST-TIME SETUP -------------------------------------------------------------------------------- Step 1 -- on the HOST (as root), enter the nanoclaw user session: machinectl shell nanoclaw@ The remaining steps run INSIDE the machinectl shell: Step 2 -- run the setup script: cd ~/nanoclaw bash nanoclaw.sh During setup, Nanoclaw generates a long-lived OAuth token and prints: export CLAUDE_CODE_OAUTH_TOKEN=<token> Step 3 -- copy and run that export command in the same shell once setup finishes: export CLAUDE_CODE_OAUTH_TOKEN=<token-shown-above> -------------------------------------------------------------------------------- RETURNING USERS (2nd login onwards) -------------------------------------------------------------------------------- Nanoclaw auto-starts on every boot (linger is enabled). To use Claude Code (INSIDE machinectl shell nanoclaw@): machinectl shell nanoclaw@ <-- run on the HOST claude <-- run inside machinectl shell /exit <-- to exit Claude Code -------------------------------------------------------------------------------- TROUBLESHOOTING (all commands run INSIDE machinectl shell nanoclaw@) -------------------------------------------------------------------------------- Enter user session first (on the HOST): machinectl shell nanoclaw@ Check service status: systemctl --user list-unit-files | grep nanoclaw systemctl --user status 'nanoclaw-v2-*' --no-pager -l View live logs: journalctl --user -u 'nanoclaw-v2-*' -f Restart service: systemctl --user restart 'nanoclaw-v2-*' Re-run setup (e.g. "FATAL: No channels connected"): cd ~/nanoclaw && bash nanoclaw.sh -------------------------------------------------------------------------------- Files & Documents -------------------------------------------------------------------------------- App : /home/nanoclaw/nanoclaw Env : /home/nanoclaw/nanoclaw/.env README : /home/nanoclaw/README.md | /root/README.md Nanoclaw AI Agent : https://nanoclaw.dev/ ******************************************************************************** To delete this MOTD: rm -rf /etc/update-motd.d/99-nanoclaw - Enter the
nanoclawuser session:machinectl shell nanoclaw@root@server-123456:~# machinectl shell nanoclaw@ Connected to the local host. Press ^] three times within 1s to exit session. nanoclaw@server-123456:~$ - Run the setup script inside the
nanoclawshell:cd ~/nanoclaw bash nanoclaw.sh◆ How would you like to begin? │ ● Standard setup │ ○ Advanced (override default)- Standard setup: Recommended for fast, guided experience (defaults + prompts).
- Advanced (override default): Manual config for custom ports, environments, expert needs.
- Wait for sandbox and vault creation, and handle OneCLI prompt:
│ Your assistant lives in its own sandbox. It can only see what you explicitly share. ... ◆ Found an existing OneCLI at http://172.17.0.1:10254. What would you like to do? │ ● Use the existing instance (recommended) │ ○ Install a fresh instance for NanoClaw- Use the existing instance: Maintains compatibility for all apps (recommended).
- Install a fresh instance: Creates a new, isolated vault (if required).
- Connect to Claude:
◆ How would you like to connect to Claude? │ ● Sign in with my Claude subscription (recommended if you have Pro or Max) │ ○ Paste an OAuth token I already have (sk-ant-oat…) │ ○ Paste an Anthropic API key (pay-per-use via console.anthropic.com) │ ○ Skip — I'll connect later (not recommended)- Sign in with my Claude subscription: Easiest and provides full access (Pro/Max).
- Paste an OAuth token: Use with a token from another device/account.
- Paste an Anthropic API key: Metered/easy per-use billing (via Anthropic Console).
- Skip — I'll connect later: Not recommended; delays complete setup.
Example outputs for each selection:
- Sign in with my Claude subscription
Open the browser to sign in… Launching: https://claude.ai/oauth?session=abc123 When sign-in completes: ✓ OAuth grant confirmed ✓ Linked to Claude subscription as [email protected] - Paste an OAuth token I already have (sk-ant-oat…)
Paste the OAuth token: sk-ant-oat-xxxxxxxxxxxxxxxxxxxxxxxxxxxxxxx ✓ Token accepted. Linked to Claude account. - Paste an Anthropic API key
Paste your Anthropic API key: sk-ant-xxxxxxxxxxxxxxxxxxxxxxxxxxxxxxxx ✓ API key accepted. Claude Code API rate limits/billing apply. - Skip — I'll connect later
◆ Skip Claude sign-in? The agent won't be able to run until you connect, and we won't be able to help debug setup errors. │ ○ Yes / ● No- If they select Yes (skip):
⚠ Warning: Skipped Claude sign-in.
NanoClaw cannot run until Claude is connected!
Setup will finish, but Claude features unavailable.
- If they select Yes (skip):
- Once Claude is set up, set your assistant’s display name:
◇ Access rules set. (0s) ◇ NanoClaw is running. (4s) ◆ What should your assistant call you? │ nanoclaw - Allow sandbox to warm up. If ping test fails, follow troubleshooting message. You may be prompted to sign into Claude CLI, then set timezone:
Assistant wired up. (1s) ... ◇ Your assistant didn't reply in time. (30s) ◇ Skipping the first chat ───────────── │ No reply from your assistant within 30 seconds. Check `logs/nanoclaw.log` for clues, then try `pnpm run chat hi`. ... ◆ Claude CLI isn't signed in. Sign in now? (a browser will open) │ ● Yes / ○ No ◇ Timezone set. (0s) ◆ Your system reports UTC as the timezone. Is that right, or are you somewhere else? │ ● Keep UTC (remote server / happy with UTC) │ ○ I'm somewhere else - Connect messaging/chat platforms (Telegram, Discord, etc.):
◆  Want to chat with your assistant from your phone?
│  ● Yes, connect Telegram (recommended)
│  ○ Yes, connect Discord
│  ○ Yes, connect WhatsApp
│  ○ Yes, connect Signal (needs signal-cli installed)
│  ○ Yes, connect iMessage (experimental) (remote Photon only)
│  ○ Yes, connect Slack (experimental) (needs public URL)
│  ○ Yes, connect Microsoft Teams (complex setup)
│  ○ Other… (install via /add- after setup)
│  ○ Skip for now (I'll just use the terminal)
Example outputs and official setup/token documentation links for each selection:
- Connect Telegram
To create a Telegram bot and get an HTTP API access token, review the Telegram BotFather Setup Guide.
Opening Telegram linking flow… Send the following code to @nanoclaw_bot in Telegram: /start dcaf-1234 ✓ Telegram account linked. - Connect Discord
To create a Discord bot and obtain your Application Token, follow the steps in the Discord Developer Getting Started Guide.
Open Discord and message @nanoclaw#1234 the code: dcaf-5678 ✓ Discord account linked. - Connect WhatsApp
To set up a WhatsApp Business platform connection and generate a permanent token, reference the Meta WhatsApp Cloud API Setup Guide.
A QR code has been generated. Scan it in WhatsApp to connect. ✓ WhatsApp linked to your nanoclaw agent. - Connect Signal
Signal integration requires signal-cli. See the docs: https://nanoclaw.dev/docs/signal - Connect iMessage
iMessage is only supported on remote Photon deployments. - Connect Slack
To configure bot permissions and generate a Bot User OAuth Token, see the Slack API Authentication Guide.
Paste your Slack public Webhook URL to complete the link: - Connect Microsoft Teams
Teams integration is advanced—see full setup guide: https://nanoclaw.dev/docs/teams - Other…
To add other platforms, use the /add-<name> command after setup. - Skip for now
No messaging integration selected.
You can chat via terminal only for now; add integrations any time later.
- Connect Telegram
- Finish and test your assistant:
You're ready! Chat with `pnpm run chat hi`.- To chat from the terminal:
pnpm run chat hi - If you enabled chat integration, try messaging your assistant from your linked device as well.
- To chat from the terminal:
Supporting Information and Sample Output
You can run cat /root/README.md to see more information and useful commands:
Example Output:
root@server-123456:~# cat /root/README.md
# Nanoclaw

## Description

NanoClaw is a secure, open-source personal AI agent that connects to messaging apps like WhatsApp and Telegram and runs in isolated containers. Built on the Claude Agent SDK, it supports agent swarms, scheduled tasks, per-group memory, and web access all within a minimal codebase of around 15 files that you can fully read and customize.

This image installs:

- Docker (required container runtime)
- Node.js
- Claude Code CLI
- OneCLI credential gateway
- Nanoclaw application source and dependencies

> **Important:** Nanoclaw is **installed but intentionally not auto-started**.
> Initial setup must be completed first. If started before setup, Nanoclaw exits with:
>
> - `FATAL: No channels connected`

---

## Minimum Requirements

| Resource | Minimum | Recommended |
|----------|---------|-------------|
| RAM      | 4 GB    | 4 GB        |

> **Important:** Claude Code requires at least 4 GB of RAM. Running setup with less will OOM-kill Claude before setup can complete.

---

## Services

| Service | Port | Purpose |
|---------|------|---------|
| OpenSSH | 22   | SSH |

All other ports are blocked by UFW except the explicitly allowed ports.

---

## What Gets Installed

| Component | Version | Notes |
|----------|---------|------|
| Node.js | 22.x | Installed via NodeSource |
| Claude Code | latest | Global CLI (`@anthropic-ai/claude-code`) |
| OneCLI | latest | Credential gateway |
| Docker | latest | Required container runtime |
| Nanoclaw | latest | Cloned from `nanocoai/nanoclaw` |

Nanoclaw is installed to:

```text
/home/nanoclaw/nanoclaw
Summary
Learn how to deploy Nanoclaw on a Bluehost Virtual Dedicated Server (VDS) with this step-by-step guide. You'll learn how to purchase and configure your server, install Nanoclaw, and complete the initial setup process. The article also covers connecting messaging platforms and managing your Nanoclaw environment after deployment.