 ChatGPT,
  Claude,
  Gemini,
  Grok — all four for
 Purchase a Virtual Dedicated Server with Ollama Installation
Ollama is a platform that lets you run and manage AI models locally on your server with full control and privacy. It makes it easy to download, deploy, and interact with large language models, enabling you to build AI-powered applications, automate tasks, and process data without relying on external services.
This article explains how to purchase a Bluehost Virtual Dedicated Server (VDS) hosting plan and set up and manage your Ollama Assistant.
Why Choose Ollama?
Running Ollama on a VDS keeps your AI models online and ready 24/7, so you can query them from your phone, laptop, or any app without keeping your own computer switched on. You get dedicated server resources instead of sharing your personal machine's power, and you keep full control over your data since nothing gets sent to a third-party API. It also gives you a stable setup you can plug into your own apps or automations, scale up as needed, and secure however you like.
Uses of Ollama
There are many applications of Ollama in different fields:
- Customer Support: Automate your customer support replies using conversational AI.
- Content Creation: Generate articles, marketing copy, and creative writing effortlessly.
- Data Analysis: Summarize big pieces of text, highlight important points, and translate text into other languages.
- Development: Integrate AI-driven language capabilities into apps, chatbots, and virtual assistants.
- Education: Assist in tutoring, language learning, and interactive training through intelligent dialogues.
This versatility makes Ollama a valuable asset for companies looking to harness the power of AI-driven communication.
System Requirements
Before deploying, ensure your server meets the requirements below. For a stable production deployment, we recommend using higher specifications than the Approximate Size requirements.
Important:
- Do not purchase a server that only meets Approximate Size requirements. The Approximate Size specifications represent the software's bare survival threshold and do not account for operating system overhead or production workloads. Running with minimal resources can result in severe performance slowdowns, system freezes, or unexpected crashes during traffic spikes.
- For a stable deployment, we recommend allocating additional resources beyond basic installation levels, especially if you plan to store recordings, logs, or other application data.
Recommended Plans:
Ollama AI Model Storage Requirements
Ensure your server has sufficient disk space available to download and store the specific AI models you plan to run locally in Ollama:
| AI Model | Approximate Size | Description |
|---|---|---|
| TinyLlama | 637 MB | The starter model that comes pre-downloaded on first boot. |
| Llama 3.2 | 2 GB | A slightly larger, more capable model example. |
| 7B Parameter Models | 4 – 8 GB | The general disk space range required for standard 7-billion-parameter models. |
How to Purchase a Virtual Dedicated Server with Ollama Installation
Ollama can be installed on a Bluehost Virtual Dedicated Server (VDS). You can choose to have Ollama installed during the initial VDS purchase or install it manually at a later time.
- In your browser, go to https://www.bluehost.com.
- Click Hosting in the top menu, then select Virtual Dedicated Server.

You can also go to this link directly: https://www.bluehost.com/vds-hosting.
- On the Virtual Dedicated Server Hosting page, click Explore Plans. You can also scroll down to the hosting plans section.

- Choose a plan from either tab — Standard or High Performance — by clicking Choose Plan.

Pricing is subject to change. Please visit https://www.bluehost.com/vds-hosting for the current introductory/sign-up offer for the Bluehost Virtual Dedicated Server hosting. For the most up-to-date renewal pricing, visit your Bluehost Portal's Renewal Center. - On the next page, configure your VDS hosting to meet your requirements. The configuration options are divided into the following sections:
- Location: Select your data center in this section.

- Hardware: This section shows your pre-selected plan. You can also switch to another Virtual Dedicated Server plan in this section

- Software:
If the selected plan does not meet the app's minimum requirements, the app will be grayed out.
- Under the Application tab, click on Ollama.
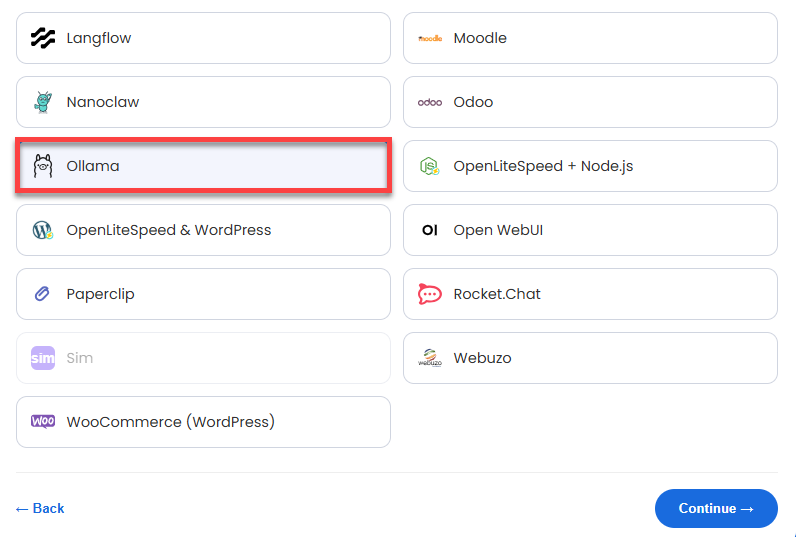 You can install only one application per purchase; the system will automatically select the best operating system for it.
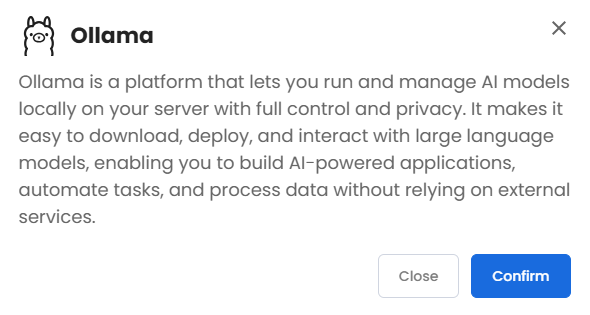
 - In the pop-up, click Confirm.
- Under the Application tab, click on Ollama.
- Support & Security: You can add Premium Support - Recurring, which provides priority access to expert assistance and faster response times.

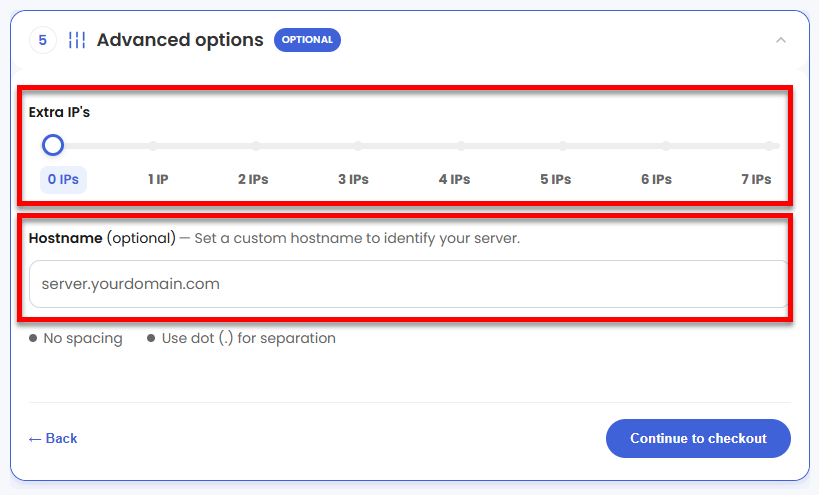
- Advanced Options:
- Extra IP's: You can add IP addresses for an additional fee. Pricing changes based on how many IPs you add.
- Hostname: Assign a custom hostname to identify your server. This is optional.
- Location: Select your data center in this section.
- Select your billing term and review your selected items on the right pane, along with the summarized total cost.
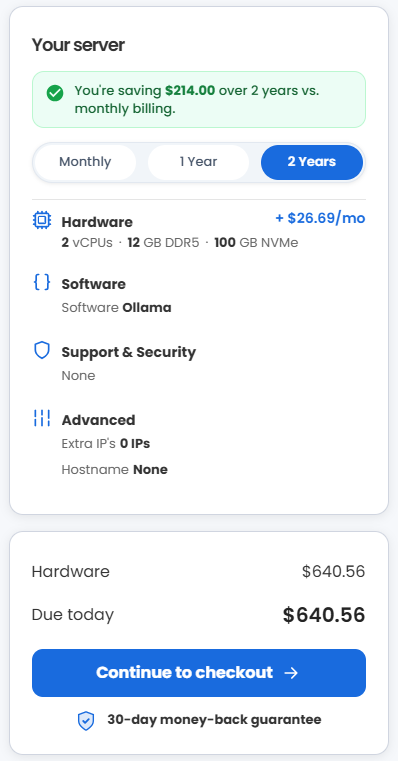
- Click Continue to checkout.
- Do the following on the Checkout page:
If you're new to Bluehost:- Create your Bluehost account by using your email address or by connecting with your Google, Apple, or GitHub account — whichever you prefer!

- Select your preferred payment method: credit card, Google Pay, or PayPal. Enter your billing information.

If you have an account with us, you will see your Bluehost login details when you are logged into your Bluehost Portal. If you are not logged in, please click the Log In link.

- Create your Bluehost account by using your email address or by connecting with your Google, Apple, or GitHub account — whichever you prefer!
- In the Shopping Cart, choose your billing term if you did not choose one on the previous page.
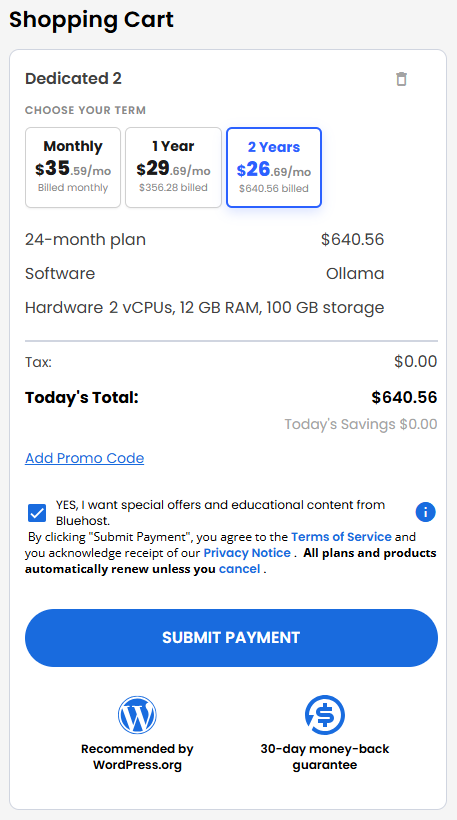
- Add a Promo code if you have one, and then click Submit Payment to complete your purchase.
After completing the purchase, your VDS hosting will begin provisioning. You can access and manage your new VDS hosting in the Hosting tab of your Bluehost Portal.
How to Get and Set Up Ollama
After the installation is complete, follow the steps below to set up the application.
- Log in to your Bluehost Portal.
- In the left-hand menu, click Hosting, then select My Plans.
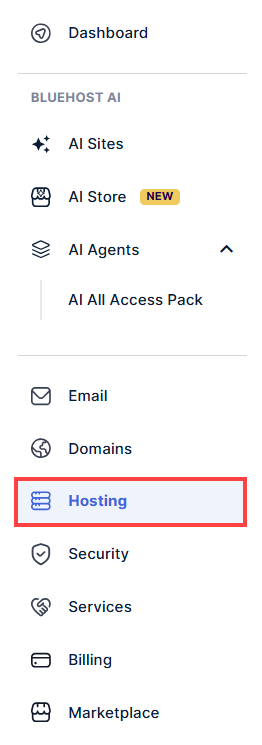
- Locate the server you want to manage, then click View Details in the bottom-left corner to expand the section and access additional server information.
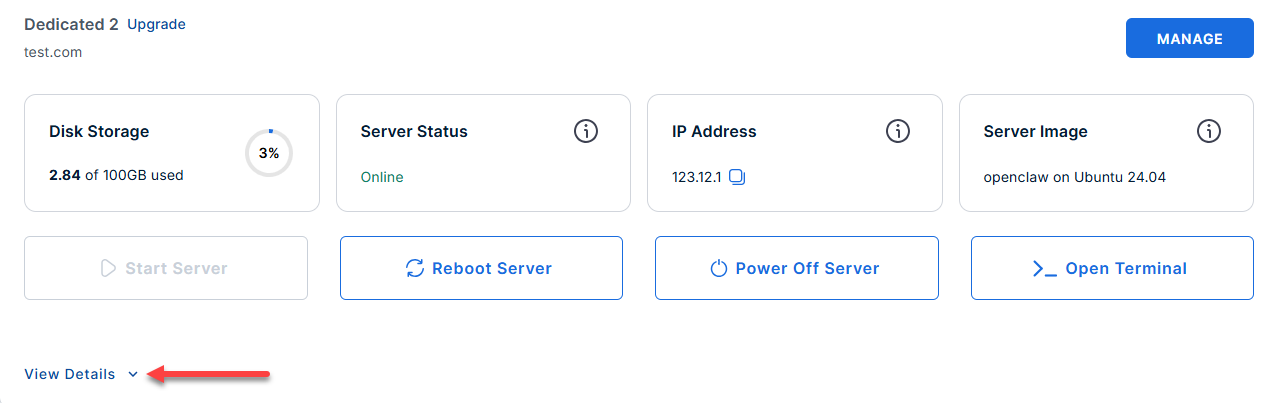
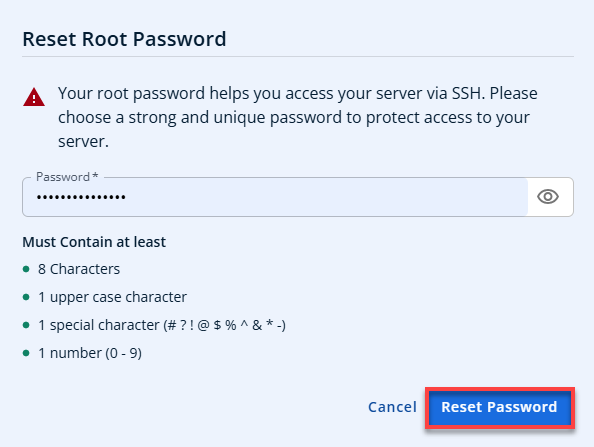
- Click the Reset Password.
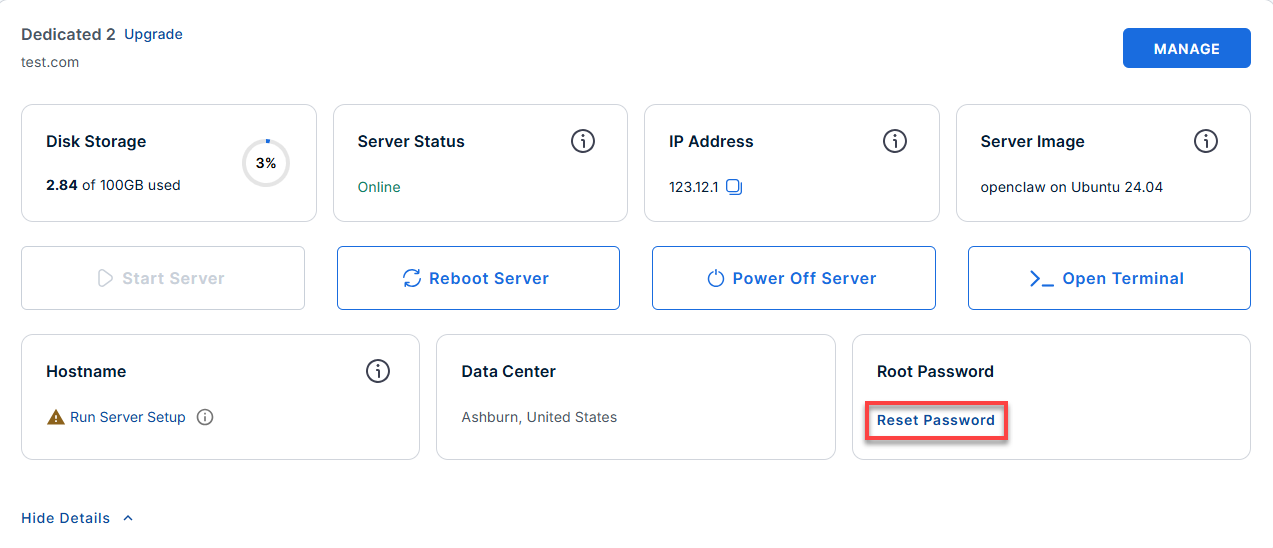
- In the pop-up window, type your new root password, then click Reset Password again to confirm and save the changes.
- Log in to your server via SSH.
When you log in to your server for the first time, you're greeted with a welcome message that includes all the essential commands and instructions for managing Ollama. The content looks like this:Replaceyour_server_ipwith your actual server IP address.ssh root@your_server_ipExample Output
Welcome to Ubuntu 24.04.4 LTS (GNU/Linux 6.8.0-111-generic x86_64) ******************************************************************************** Ollama is running on this server. The UFW firewall is enabled. All ports are BLOCKED except 22 (SSH) and 11434 (Ollama API). API endpoint: http://localhost:11434 Common commands: ollama list # list downloaded models ollama pull llama3.2 # download a model (~2GB) ollama pull tinyllama # download a small starter model (~637MB) ollama run tinyllama # start an interactive chat session REST API examples: curl http://localhost:11434/api/version curl http://localhost:11434/api/tags curl -X POST http://localhost:11434/api/generate \ -d '{"model":"tinyllama","prompt":"Hello","stream":false}' On the server: Models are stored in /var/lib/ollama/.ollama/models Service config: /etc/systemd/system/ollama.service.d/override.conf For more details please see /root/README.md To delete this message of the day: rm -rf /etc/update-motd.d/99-ollama - Check installed and available models via the CLI.
Example Output:ollama list
NAME ID SIZE MODIFIED tinyllama sha256:e5562a3b… 637 MB 3 minutes ago - Pull a model (tinyllama is preinstalled on first boot):
Example Output:ollama pull llama3.2
pulling manifest pulling 2.0 GB model ... success - Start an interactive session with a model:
Example Output:ollama run tinyllama
>>> Hello, how can I help you today? (type /exit to quit) - Remove a model to free up disk space:
Example Output:ollama rm tinyllama
Deleted model 'tinyllama' - Interact with the Ollama REST API
- Check Ollama version:
Example Output:curl http://localhost:11434/api/version
{"version": "0.1.25"} - List available models (tags):
Example Output:curl http://localhost:11434/api/tags
{"models":[{"name":"tinyllama","modified_at":"2024-06-18T10:17:22.093Z"}]} - Generate a non-streaming completion:
Example Output:curl -X POST http://localhost:11434/api/generate \ -H 'Content-Type: application/json' \ -d '{"model":"tinyllama","prompt":"Why is the sky blue?","stream":false}'
{"response":"The sky looks blue because of the way sunlight interacts with Earth's atmosphere...","model":"tinyllama",...} - Start a chat session via API:
Example Output:curl -X POST http://localhost:11434/api/chat \ -H 'Content-Type: application/json' \ -d '{"model":"tinyllama","messages":[{"role":"user","content":"Hello"}]}'
{"message":{"role":"assistant","content":"Hello! How can I help you?"}, ...}
- Check Ollama version:
- Model storage location
Models are stored in/var/lib/ollama/.ollama/modelsBefore pulling large models, make sure you have sufficient disk space (7B models may need 4-8 GB free space).
- Service config and logs
- Service configuration is at
/etc/systemd/system/ollama.service.d/override.conf
- For logs or troubleshooting, see:
cat /root/README.md
- Service configuration is at
Links
Supporting Information and Sample Output
You can run cat /root/README.md to see more information and useful commands:
Example Output:
root@12-1-1-123:~# cat /root/README.md
# Ollama

## Description

Ollama is a platform that lets you run and manage AI models locally on
your server with full control and privacy. It makes it easy to
download, deploy, and interact with large language models, enabling
you to build AI-powered applications, automate tasks, and process data
without relying on external services.


## Services

Service    | Ports   | Purpose
-----------|---------|---------
ollama API | 11434   |
OpenSSH    | 22      | SSH

Ports are protected using ufw. Port 11434 is open to allow external API access.


## How-to-use

On first boot the image will automatically pull **tinyllama** (~637 MB) as a starter
model so the API is ready to use without any manual steps.

### Interacting via CLI

SSH into the server and use the `ollama` command:

```bash
ollama list                    # list downloaded models
ollama pull llama3.2           # pull a model (~2 GB)
ollama pull tinyllama          # pull a small model (~637 MB)
ollama run tinyllama           # start an interactive session
ollama rm tinyllama            # remove a model
```

### Interacting via REST API

The API is accessible from outside the server on port 11434:

```bash
# Check version
curl http://localhost:11434/api/version

# List available models
curl http://localhost:11434/api/tags

# Generate a completion (non-streaming)
curl -X POST http://localhost:11434/api/generate \
     -H 'Content-Type: application/json' \
     -d '{"model":"tinyllama","prompt":"Why is the sky blue?","stream":false}'

# Chat endpoint
curl -X POST http://localhost:11434/api/chat \
     -H 'Content-Type: application/json' \
     -d '{"model":"tinyllama","messages":[{"role":"user","content":"Hello"}]}'
```

### Model storage

Models are stored in `/var/lib/ollama/.ollama/models`. Ensure your volume has
sufficient space before pulling large models (7B parameter models are typically 4-8 GB).


## Links

Documentation: [https://docs.ollama.com/](https://docs.ollama.com/)
Summary
Ollama on a Bluehost Virtual Dedicated Server (VDS) puts AI models on your own server, so you get full privacy and round-the-clock access without sending data to outside APIs. You can add Ollama when you buy your VDS or install it later, picking your data center, hardware, and any extras like premium support. Once it's running, you manage models with a few simple SSH commands and connect your own apps through the built-in REST API. Just make sure you pick a plan with enough storage—small models like TinyLlama need under a gigabyte, while 7B models need 4-8 GB, plus room to grow.