 ChatGPT,
  Claude,
  Gemini,
  Grok — all four for
Purchase a Virtual Dedicated Server with Paperclip Installation
Paperclip is an open-source platform that lets you run teams of AI agents to automate complex tasks and workflows. You give each agent a clear role and a shared goal, so they can collaborate and carry out tasks on their own, turning individual AI tools into a coordinated system that manages projects and processes with minimal effort on your part.
This article explains how to purchase a Bluehost Virtual Dedicated Server (VDS) hosting plan and set up and manage your Paperclip Assistant.
Why Choose Paperclip?
Running Paperclip on a VDS gives your AI agents a dedicated server to work from, so they're always on and ready without tying up your own computer. You give each agent a clear role and a shared goal, and they collaborate to carry out tasks on their own, without you managing every step. Since it's your own dedicated hardware, you get guaranteed resources instead of sharing power with other sites, and your data stays fully under your control. This setup turns your VDS into a coordinated system that handles entire projects and processes for you, with room to scale as your needs grow.
Uses of Paperclip
Paperclip's functionality is widely applicable in web development projects:
- User Profile Management: Upload and manage profile pictures or avatars.
- Document Handling: Upload, validate, and store PDFs, Word documents, and other file formats.
- Image Processing: Generate thumbnails, resize images, and convert formats automatically.
- Content Management Systems (CMS): Attach various media files to posts or pages.
- E-commerce Platforms: Manage product images and downloadable resources.
Whatever your project, Paperclip helps you handle file uploads and media with less custom code.
How to Purchase a Virtual Dedicated Server with Paperclip Installation
Paperclip can be installed on a Bluehost Virtual Dedicated Server (VDS). You can choose to have Paperclip installed during the initial VDS purchase or install it manually at a later time.
- In your browser, go to https://www.bluehost.com.
- Click Hosting in the top menu, then select Virtual Dedicated Server.

You can also go to this link directly: https://www.bluehost.com/vds-hosting.
- On the Virtual Dedicated Server Hosting page, click Explore Plans. You can also scroll down to the hosting plans section.

- Choose a plan from either tab — Standard or High Performance — by clicking Choose Plan.

Pricing is subject to change. Please visit https://www.bluehost.com/vds-hosting for the current introductory/sign-up offer for the Bluehost Virtual Dedicated Server hosting. For the most up-to-date renewal pricing, visit your Bluehost Portal's Renewal Center. - On the next page, configure your VDS hosting to meet your requirements. The configuration options are divided into the following sections:
- Location: Select your data center in this section.

- Hardware: This section shows your pre-selected plan. You can also switch to another Virtual Dedicated Server plan in this section

- Software:
If the selected plan does not meet the app's minimum requirements, the app will be grayed out.
- Under the Application tab, click on Paperclip.
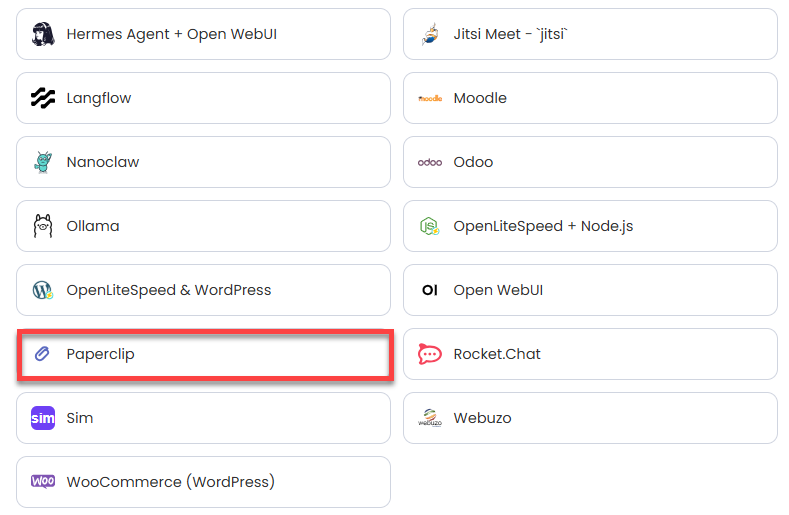
You can install only one application per purchase; the system will automatically select the best operating system for it. - In the pop-up, click Confirm.
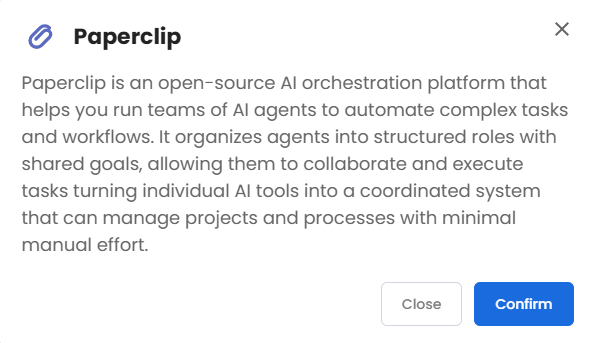
- Under the Application tab, click on Paperclip.
- Support & Security: You can add Premium Support - Recurring, which provides priority access to expert assistance and faster response times.

- Advanced Options:
- Extra IP's: You can add IP addresses for an additional fee. Pricing changes based on how many IPs you add.
- Hostname: Assign a custom hostname to identify your server. This is optional.
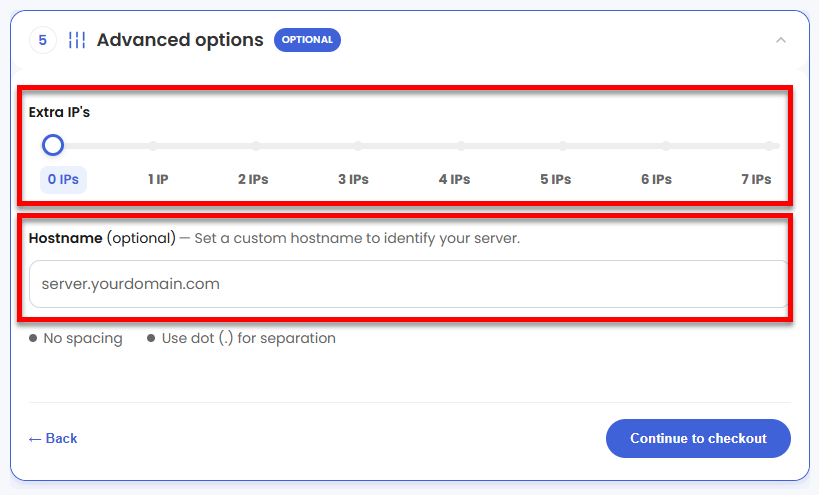
- Location: Select your data center in this section.
- Select your billing term and review your selected items on the right pane, along with the summarized total cost.
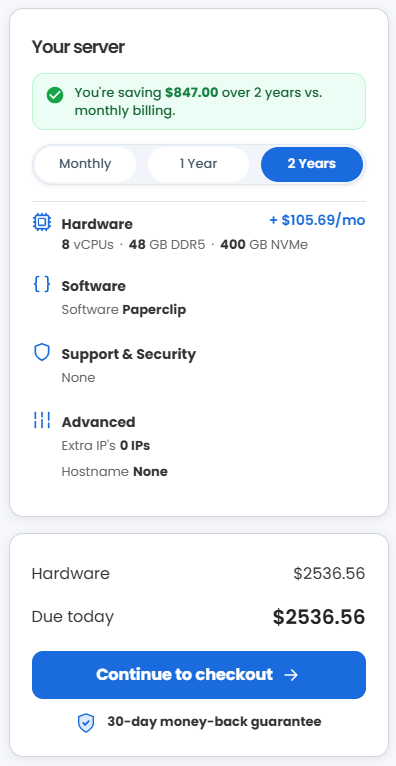
- Click Continue to checkout.
- Do the following on the Checkout page:
If you're new to Bluehost:- Create your Bluehost account by using your email address or by connecting with your Google, Apple, or GitHub account — whichever you prefer!

- Select your preferred payment method: credit card, Google Pay, or PayPal. Enter your billing information.

If you have an account with us, you will see your Bluehost login details when you are logged into your Bluehost Portal. If you are not logged in, please click the Log In link.

- Create your Bluehost account by using your email address or by connecting with your Google, Apple, or GitHub account — whichever you prefer!
- In the Shopping Cart, choose your billing term if you did not choose one on the previous page.
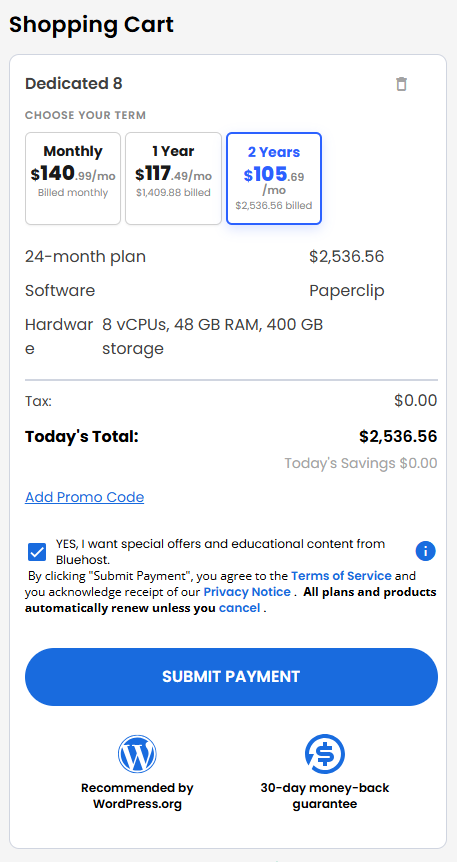
- Add a Promo code if you have one, and then click Submit Payment to complete your purchase.
After completing the purchase, your VDS hosting will begin provisioning. You can access and manage your new VDS hosting in the Hosting tab of your Bluehost Portal.
How to Set Up and Configure Paperclip
Welcome to Paperclip! Follow this step-by-step guide to set up your AI orchestration platform, configure your server, and launch your first agent team.
After installation completes:
Step 1: Reset Your Root Password
- Log in to your Bluehost Portal.
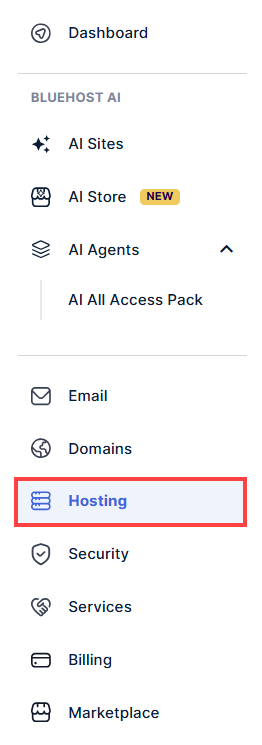
- In the left-hand menu, click Hosting, then select My Plans.
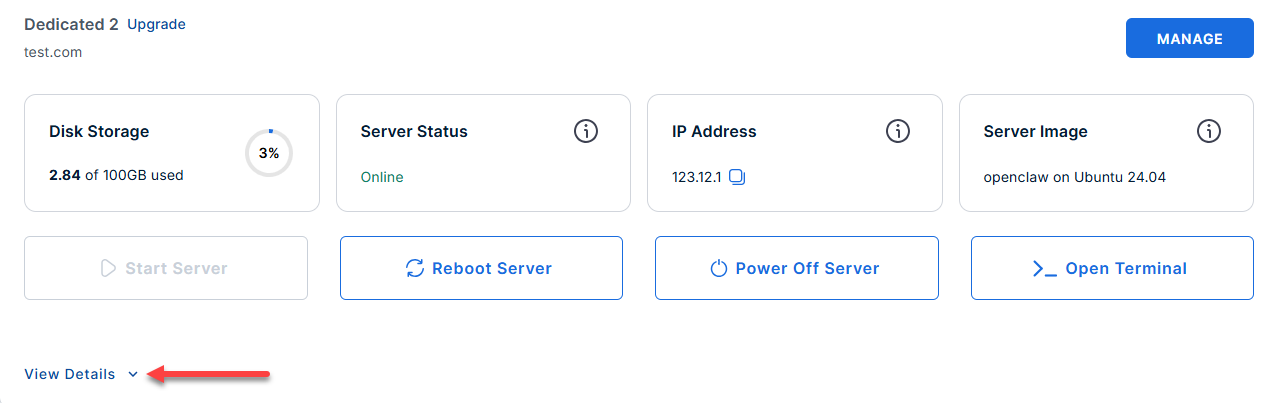
- Locate the server you want to manage, then click View Details in the bottom-left corner to expand the section and access additional server information.
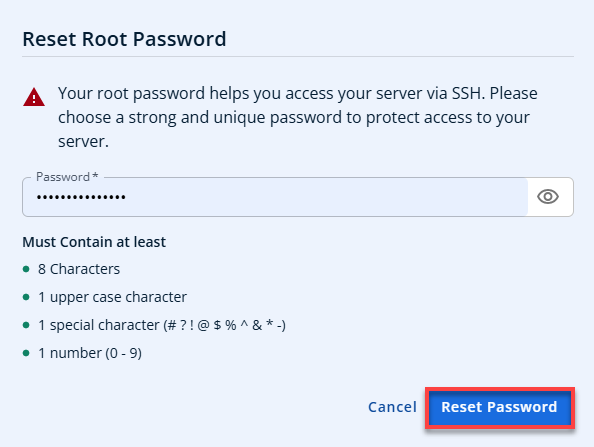
- Click the Reset Password.
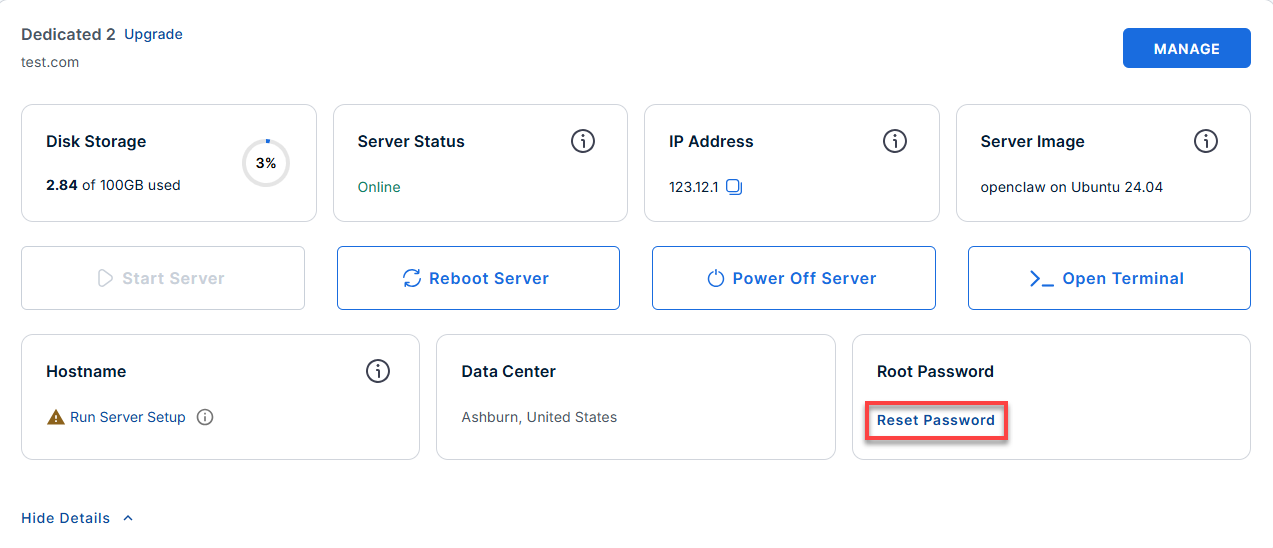
- In the pop-up window, type your new root password, then click Reset Password again to confirm and save the changes.
Step 2: Connect To Your Server Through SSH
Connect to your server via SSH.
Use your server IP and credentials with an SSH client, follow the prompts, and enter your Root Password when asked:
your_server_ip with your actual server IP address.
ssh root@your_server_ip
Example Output:
Welcome to Ubuntu 24.04.4 LTS (GNU/Linux 6.8.0-111-generic x86_64)
********************************************************************************

Paperclip AI coding assistant is running on this server.

The UFW firewall is enabled.
All ports are BLOCKED except 22 (SSH) and 3100 (Paperclip).

Web UI:
  http://12.1.1.123:3100

First-time setup (run once after provisioning):

  1. Reload the service (this helps refreshing the env vars):
     systemctl restart paperclip

  2. Configure the server:
     sudo -u paperclip env HOME=/opt/paperclip bash -c "cd /opt/paperclip/app && pnpm paperclipai configure"

     When prompted, use these settings:
       Section          → Server
       Reachability     → Custom
       Port             → 3100
       Auth mode        → Authenticated
       Exposure profile → Public internet
       Bind host        → 12.1.1.123
       Public base URL  → http://12.1.1.123:3100

  3. Bootstrap the CEO account:
     sudo -u paperclip env HOME=/opt/paperclip bash -c "cd /opt/paperclip/app && pnpm paperclipai auth bootstrap-ceo"


Service management:
  systemctl status paperclip        # check service status
  systemctl restart paperclip       # restart the service
  journalctl -u paperclip -f        # follow service logs

File locations:
  Application:  /opt/paperclip/app
  Service unit: /etc/systemd/system/paperclip.service
  Runtime env:  /etc/systemd/system/paperclip.service.d/override.conf

For more details please refer /root/README.md

To delete this message of the day: rm -rf /etc/update-motd.d/99-paperclip
Step 3: Complete the Instance Setup
Once you log in, run these commands to complete the core configuration.
- Restart the Paperclip Service:
Refresh the system environment variables by restarting the service.
systemctl restart paperclip - Run the Interactive Configuration:
Initialize your server settings by running the configuration wizard.
sudo -u paperclip env HOME=/opt/paperclip bash -c "cd /opt/paperclip/app && pnpm paperclipai configure"Example Output:
Last login: Tue Jun 23 17:10:23 2026 from 182.74.165.114 root@123456:~# systemctl restart paperclip root@123456:~# sudo -u paperclip env HOME=/opt/paperclip bash -c "cd /opt/paperclip/app && pnpm paperclipai configure" > paperclip@ paperclipai /opt/paperclip/app > node cli/node_modules/tsx/dist/cli.mjs cli/src/index.ts "configure" ██████╗ █████╗ ██████╗ ███████╗██████╗ ██████╗██╗ ██╗██████╗ ██╔══██╗██╔══██╗██╔══██╗██╔════╝██╔══██╗██╔════╝██║ ██║██╔══██╗ ██████╔╝███████║██████╔╝█████╗ ██████╔╝██║ ██║ ██║██████╔╝ ██╔═══╝ ██╔══██║██╔═══╝ ██╔══╝ ██╔══██╗██║ ██║ ██║██╔═══╝ ██║ ██║ ██║██║ ███████╗██║ ██║╚██████╗███████╗██║██║ ╚═╝ ╚═╝ ╚═╝╚═╝ ╚══════╝╚═╝ ╚═╝ ╚═════╝╚══════╝╚═╝╚═╝ ─────────────────────────────────────────────────────── Open-source orchestration for zero-human companies ┌ paperclip configure │ ◆ Which section do you want to configure? │ ● LLM Provider │ ○ Database │ ○ Logging │ ● Server │ ○ Storage │ ○ Secrets └ -
When the wizard prompts you, select or type the following exact settings:
Learn how to configure your Bootstrap admin dashboard for executive access in this setup guide.
- Section: Server
- Reachability: Custom
- Port: 3100
- Auth mode: Authenticated
- Exposure profile: Public internet
- Bind host: Enter your server's IP address
- Public base URL: http://your_server_ip:3100
- Create the Admin (CEO) Account:
Create your primary administrative account by running the bootstrap command.
sudo -u paperclip env HOME=/opt/paperclip bash -c "cd /opt/paperclip/app && pnpm paperclipai auth bootstrap-ceo"Example Output:
Last login: Tue Jun 23 19:29:23 2026 from 180.190.7.66 root@123456:~# sudo -u paperclip env HOME=/opt/paperclip bash -c "cd /opt/paperclip/app && pnpm paperclipai auth bootstrap-ceo" > paperclip@ paperclipai /opt/paperclip/app > node cli/node_modules/tsx/dist/cli.mjs cli/src/index.ts "auth" "bootstrap-ceo" │ ● Deployment mode is local_trusted. Bootstrap CEO invite is only required for authenticated mode. -
Copy the unique Invite URL from the terminal output. The output will resemble the following format:
> paperclip@ paperclipai /opt/paperclip/app > node cli/node_modules/tsx/dist/cli.mjs cli/src/index.ts "auth" "bootstrap-ceo" │ ◆ Created bootstrap CEO invite. │ │ Invite URL: http://12.1.1.123:3100/invite/pcp_bootstrap_caff3cd4dd81126a9dd0a15ea0040139e5bfb8a2e07ad73f │ │ Expires: 2026-06-26T21:12:13.183Z - Open your preferred web browser and paste the unique invite URL.
- Create your account.
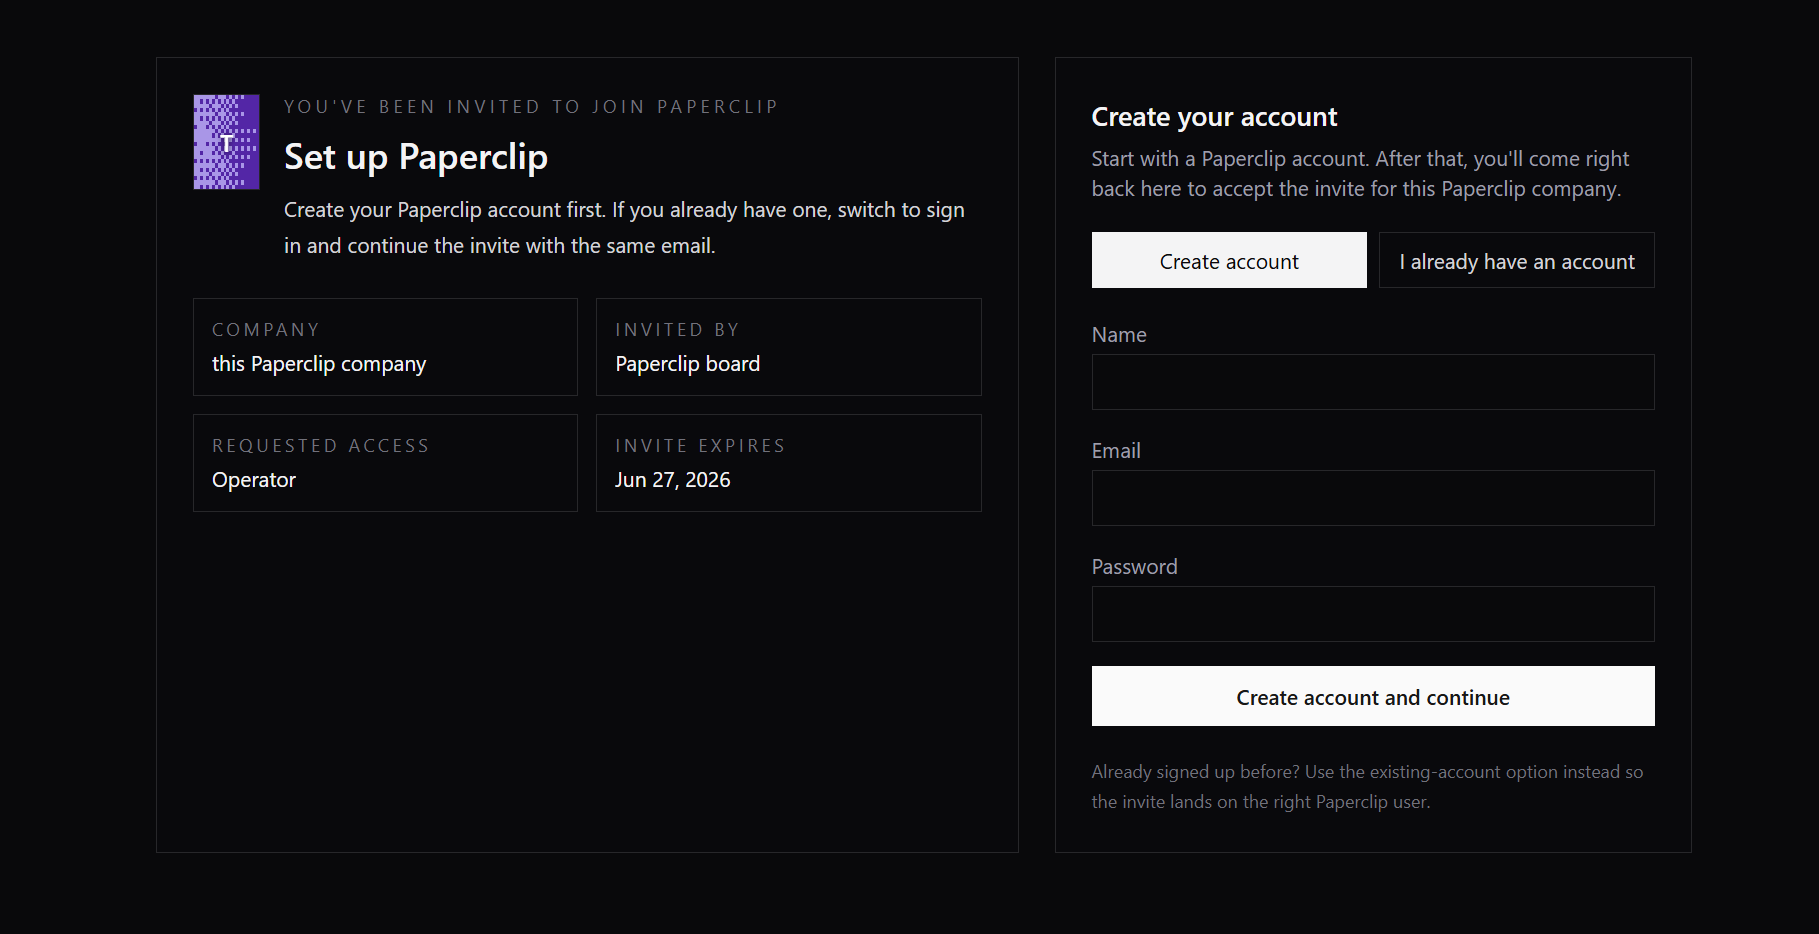
- Fill out the initialization form.

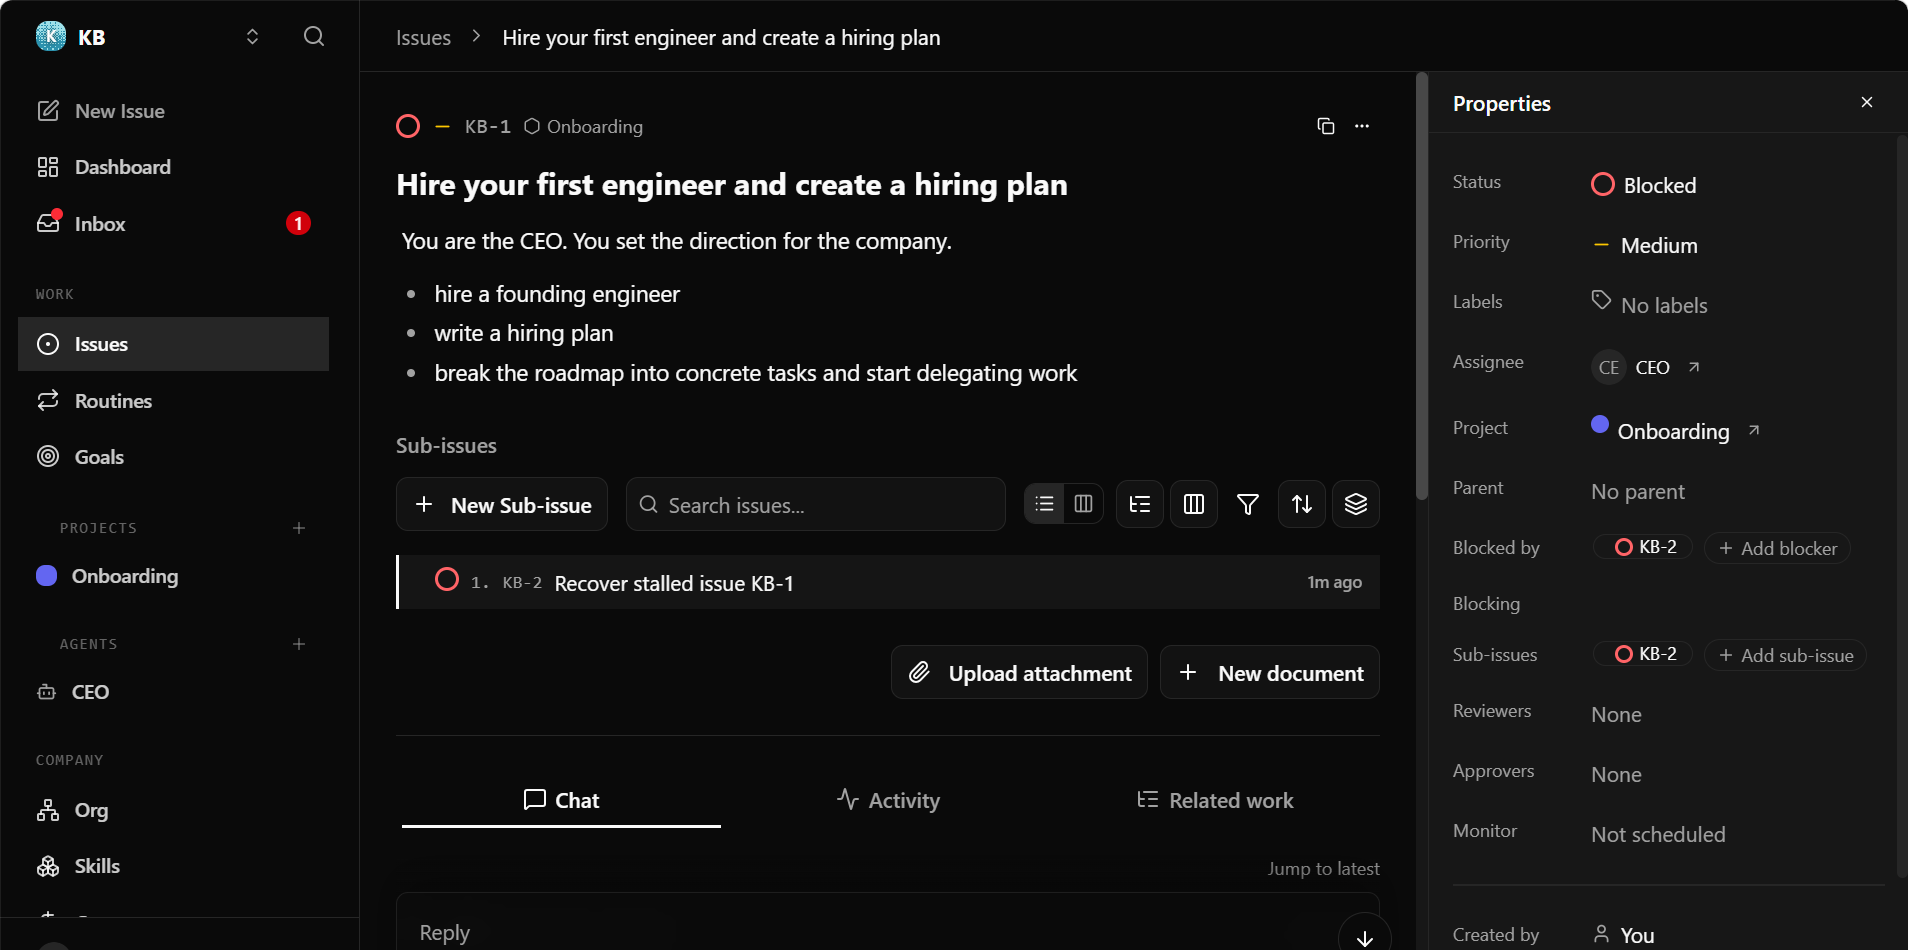
- From here, you can log into your newly created Admin/CEO account and start managing your AI agents.
Step 4: Access your Paperclip Dashboard
Now that the backend is configured, you can leave the terminal and head to your browser.
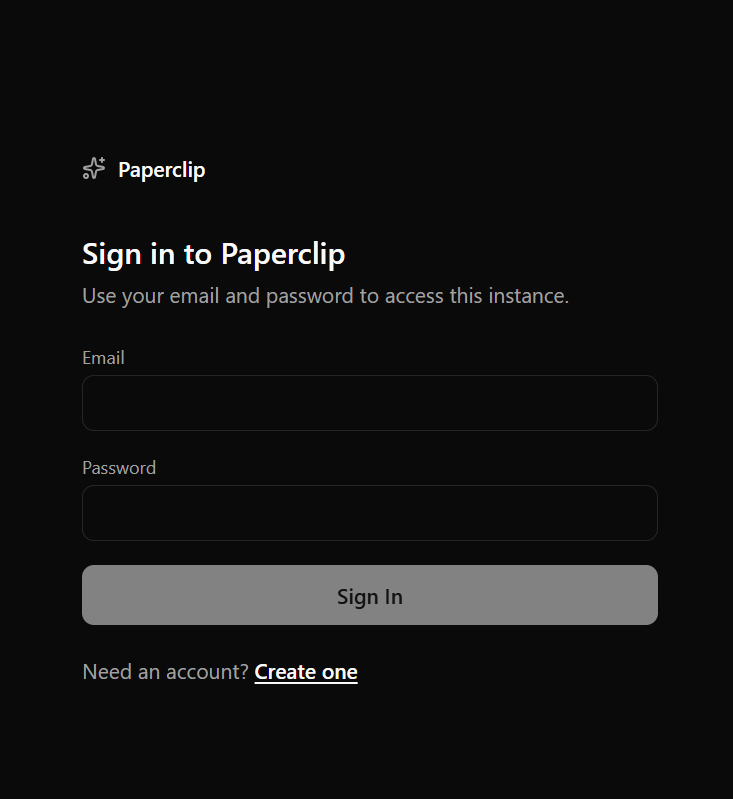
- Open your browser and navigate to:
Replace
your_server_ipwith your actual server IP address.http://your_server_ip:3100 - Use the CEO credentials you generated in Step 3 to log in.
Quick Reference Guide
Now that you are up and running, use these quick reference commands to manage and maintain your platform.
Controlling the Service
Use standard system commands to control Paperclip directly from your SSH terminal:
- Check Status:
systemctl status paperclip
- Stop Service:
systemctl stop paperclip
- Start Service:
systemctl start paperclip
- View Live Logs:
journalctl -u paperclip -f
Connecting Your Code Editor
To connect your favorite IDE (VS Code, JetBrains, Neovim, etc.), point your editor's Paperclip extension directly to your server URL:
Updating to the Latest Version
Whenever you want to pull the latest features and updates from the official repository, run the following sequence:
Supporting Information and Sample Output
You can run cat /root/README.md to see more information and useful commands:
root@123456:~# cat /root/README.md
# Paperclip

## Description

Paperclip is an open-source AI orchestration platform that helps you
run teams of AI agents to automate complex tasks and workflows. It
organizes agents into structured roles with shared goals, allowing
them to collaborate and execute tasks turning individual AI tools into
a coordinated system that can manage projects and processes with
minimal manual effort.


## Services

Service       | Ports   | Purpose
--------------|---------|---------
Paperclip     | 3100    | Web UI and API
Paperclip     | 13100   | Paperclip Vite HMR
OpenSSH       | 22      | SSH

All other ports are blocked by UFW.


## What Gets Installed

| Component | Version | Notes |
|-----------|---------|-------|
| Node.js   | 20.x    | Installed via NodeSource |
| pnpm      | latest  | Global package manager |
| Paperclip | latest  | Cloned from `paperclipai/paperclip` |

Paperclip is installed to `/opt/paperclip/app` and runs as the dedicated `paperclip` system user.


## First Boot - How the VM Starts

When the VM is first booted after provisioning, a one-time cloud-init script runs automatically
(`/var/lib/cloud/scripts/per-instance/001_onboot`). It performs the following steps:

1. Detects the server's primary IP address.
2. Generates a random `BETTER_AUTH_SECRET` and writes it (along with `BETTER_AUTH_BASE_URL`) to
   a systemd drop-in at `/etc/systemd/system/paperclip.service.d/override.conf`.
3. Starts the Paperclip service and waits for it to become ready.
4. Runs the following configuration commands as the `paperclip` user:
   ```bash
   pnpm paperclipai allowed-hostname server-ip
   pnpm paperclipai context set --api-base http://server-ip:3100
   pnpm paperclipai onboard --yes
   ```
5. Restarts the service with the updated configuration.

After first boot completes, Paperclip is fully accessible from the server's external IP.

### On instance setup (run once after provisioning):

  1. Reload the service (this helps refreshing the env vars):
   ```bash
     systemctl restart paperclip
   ```

  2. Configure the server:
   ```bash
     sudo -u paperclip env HOME=/opt/paperclip bash -c \
       "cd /opt/paperclip/app && pnpm paperclipai configure"
   ```
     When prompted, use these settings:
       Section            : Server
       Reachability       : Custom
       Port               : 3100
       Auth mode          : Authenticated
       Exposure profile   : Public internet
       Bind host          : $myip
       Public base URL    : http://$myip:3100

  3. Bootstrap the CEO account:
   ```bash
     sudo -u paperclip env HOME=/opt/paperclip bash -c \
       "cd /opt/paperclip/app && pnpm paperclipai auth bootstrap-ceo"
   ```

The one-time script removes itself on completion so it does not re-run on subsequent boots.


## Message of the Day (MOTD)

On every SSH login, the MOTD displays the server IP, port, and useful commands. To remove it:

```bash
rm /etc/update-motd.d/99-paperclip
```


## Firewall

UFW is enabled with the following rules:

| Port | Protocol | Description |
|------|----------|-------------|
| 22   | TCP      | SSH (rate-limited) |
| 3100 | TCP      | Paperclip |


## How to Use

### Connect via SSH

```bash
ssh root@server-ip
```

---

### Access the Web UI

Open a browser and navigate to:

```
http://server-ip:3100
```

Create your admin account on first visit.

---

### Service Management

```bash
# Check service status
systemctl status paperclip

# Start the service
systemctl start paperclip

# Stop the service
systemctl stop paperclip

# Restart the service
systemctl restart paperclip

# Follow live logs
journalctl -u paperclip -f
```

---

### Connecting an Editor

Point your editor's Paperclip extension to the server address:

```
http://server-ip:3100
```

Refer to the [Paperclip documentation](https://github.com/paperclipai/paperclip) for
editor-specific configuration steps (VS Code, JetBrains, Neovim, etc.).

---


## File Locations

| Path | Description |
|------|-------------|
| `/opt/paperclip/app` | Paperclip application source |
| `/opt/paperclip` | Home directory for the `paperclip` system user |
| `/etc/systemd/system/paperclip.service` | Systemd service unit |
| `/etc/systemd/system/paperclip.service.d/override.conf` | Runtime env vars (IP, secrets) |
| `/etc/update-motd.d/99-paperclip` | Login message of the day |


## Updating Paperclip

To pull the latest version of Paperclip:

```bash
cd /opt/paperclip/app
git pull
pnpm install
systemctl restart paperclip
```

## Environment Variables

The service unit sets the following environment variables. Static variables are set in the service
file; runtime variables (IP-dependent or secret) are written to the drop-in override on first boot.

| Variable | Set At | Description |
|----------|--------|-------------|
| `NODE_ENV` | Build time | Node.js environment (`production`) |
| `PORT` | Build time | Port Paperclip listens on (`3100`) |
| `HOME` | Build time | Home directory for the service user (`/opt/paperclip`) |
| `HOST` | Build time | Bind address (`0.0.0.0` - all interfaces) |
| `BETTER_AUTH_SECRET` | First boot | Randomly generated authentication secret |
| `BETTER_AUTH_BASE_URL` | First boot | Server's primary IP address |

To override any variable after first boot:

```bash
systemctl edit paperclip
# Add or change Environment= lines in the [Service] section
systemctl restart paperclip
```

## Links

Documentation: [https://github.com/paperclipai/paperclip?tab=readme-ov-file#what-is-paperclip](https://github.com/paperclipai/paperclip?tab=readme-ov-file#what-is-paperclip)

Manage: [http://{server_ip}:3100](http://{server_ip}:3100)
Summary
This article walks you through purchasing a Bluehost Virtual Dedicated Server (VDS) with Paperclip pre-installed, so you can start running your own AI agent teams right away. You'll configure your server, bootstrap your admin account, and access your dashboard with just a few commands over SSH. From there, you manage, restart, and update Paperclip directly from your terminal, with full control over your dedicated hardware.