ChatGPT,
  Claude,
  Gemini,
  Grok — all four for
 Purchase a Self-Managed VPS with cPanel Installation
Managing your own server offers unmatched freedom and flexibility, but we know that manual configurations—from databases and security settings to email accounts—can be complex and time-consuming.
To help you get the absolute most out of your Bluehost Self-Managed VPS, we offer cPanel. It is an industry-leading control panel designed to streamline your workflow, giving you a powerful, intuitive dashboard that simplifies server management while keeping you in complete control.
Why Choose cPanel?
While a VPS typically requires deep technical knowledge and command-line expertise, cPanel bridges that gap. It provides a centralized, user-friendly interface that lets you handle essential hosting tasks without the need for manual configuration.
Whether you are a developer, an agency, or a business owner, cPanel saves you time and reduces complexity, allowing you to focus on building and growing your projects with confidence.
Key Capabilities
With cPanel, you have a comprehensive suite of tools right at your fingertips:
- Host Multiple Websites: Manage multiple domains, subdomains, and sites from one cohesive dashboard.
- Manage Email Accounts: Easily create professional email addresses and manage mail settings for all your domains.
- Control Databases: Effortlessly create and manage MySQL databases, users, and permissions.
- One-Click Application Deployment: Deploy popular CMS platforms and applications in seconds.
- Secure Your Presence: Manage and install SSL certificates to ensure your site is secure and your customer data is protected.
- Manage Domains & DNS: Quickly configure DNS zones, redirects, and domain settings.
- File Management: Upload, organize, and edit your website files using an intuitive built-in File Manager.
- Protect Your Data: Create and manage automated backups of your files, databases, and account settings.
- Monitor Performance: Keep an eye on your server's resource usage to ensure your hosting environment stays optimized.
How to Purchase a Self-Managed VPS with cPanel Installation
To set up and operate cPanel effectively, start by getting a Self-Managed VPS Hosting plan from Bluehost, then proceed with the following steps:

New to VPS or not sure where to start? No worries! At the top of the Self-Managed VPS purchase page, you’ll see the Pre-configured Setup section. This handy feature is perfect if you’re feeling a bit unsure—just pick the type of project you want, like WordPress Site, AI Agent/Claude Code, Dev/Staging, or eCommerce Store. We’ll take care of the rest by automatically filling in the best plan, operating system, and template for you.
- Super simple for beginners or anyone who just wants a quick setup
- Instantly get the recommended settings for your project
- Skip the guesswork and save time
- You can still customize things later if you want
- In your browser, go to https://www.bluehost.com/vps-hosting.
- Click the Choose Plan button under your preferred VPS hosting plan.
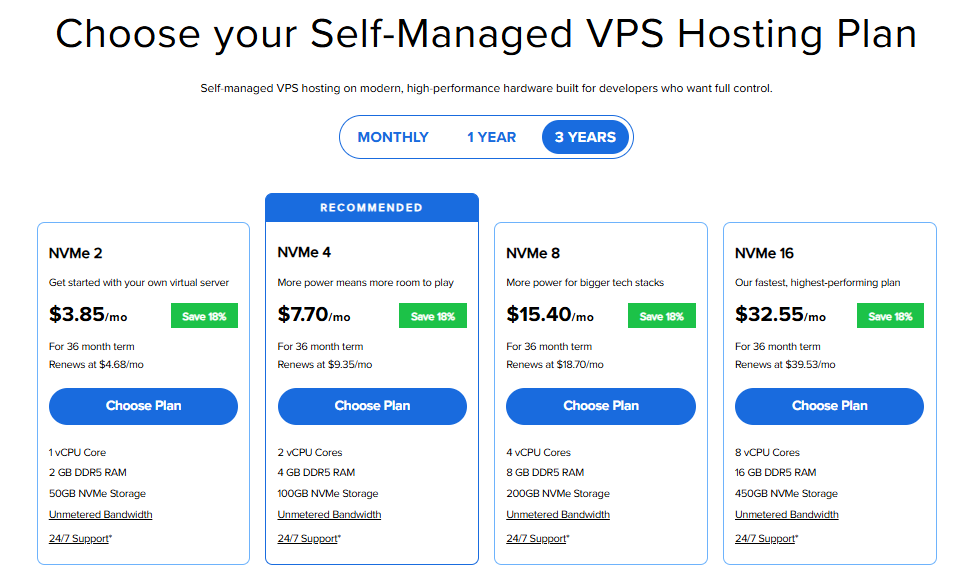
Important: Pricing is subject to change—please visit https://www.bluehost.com/vps-hosting for the current introductory/sign-up offer for Bluehost VPS Hosting. For the most up-to-date renewal pricing, visit your Bluehost Portal Renewal Center.
- Select your preferred Data Center location.

- On the Cart page, you can configure your server to fit your needs in the following section:
- Hardware:
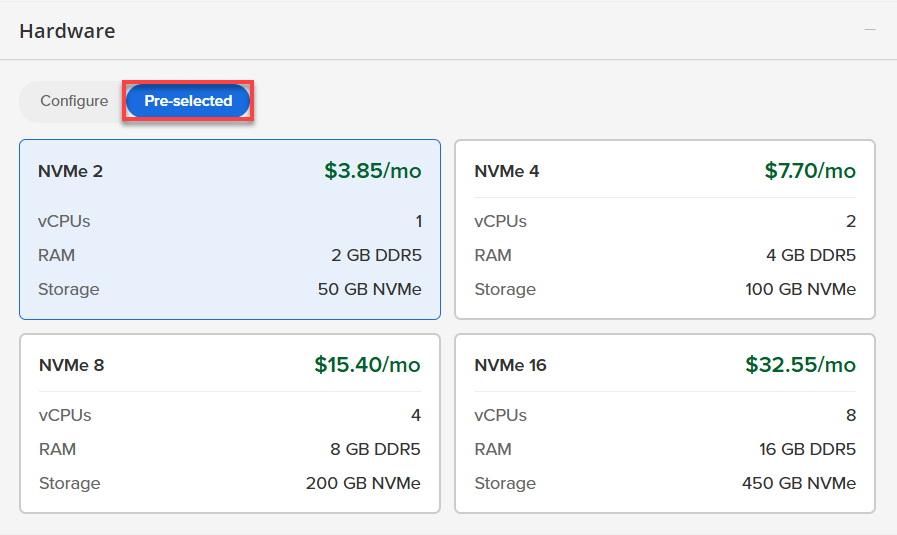
- Pre-selected:
You can select a different Self-Managed VPS plan in this section.
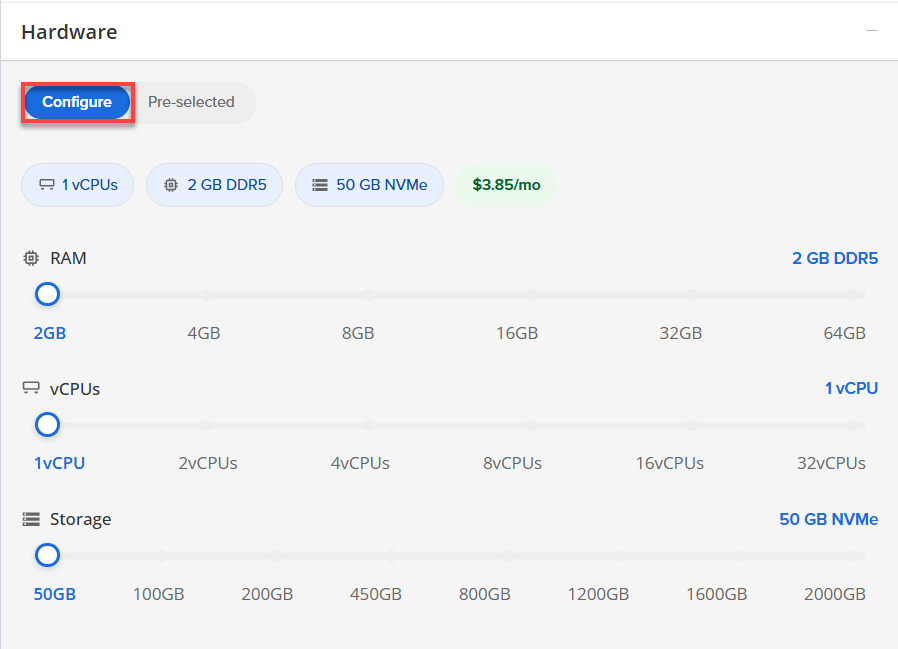
- Configure:
Click Configure to customize your package.
Note that your changes help customize your plan, and the overall cost will adjust accordingly to fit your needs.
- Pre-selected:
- Software:
If the selected plan does not meet the app's minimum requirements, the app will be grayed out.
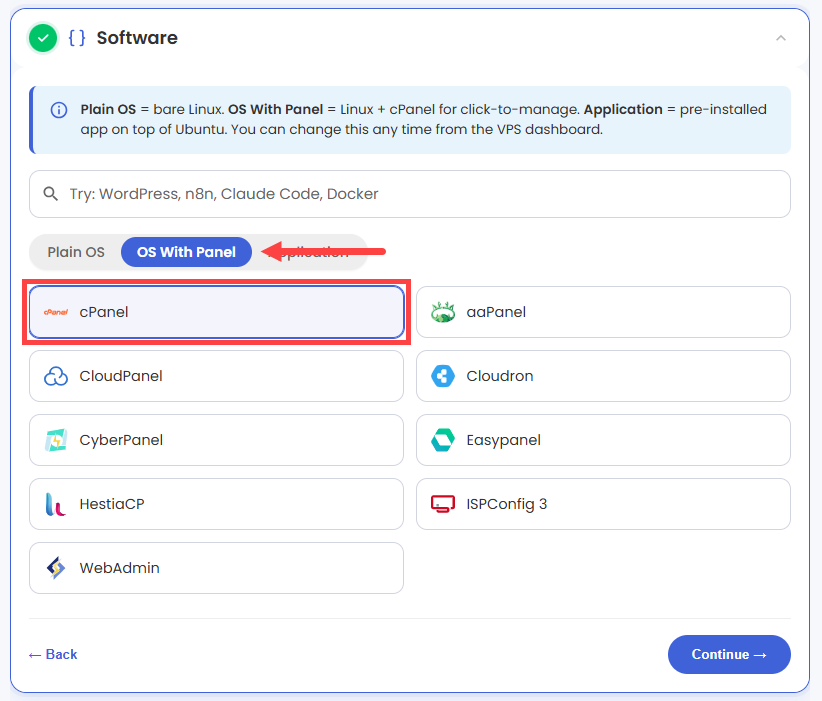
- Click the OS With Panel tab.
- Select cPanel.
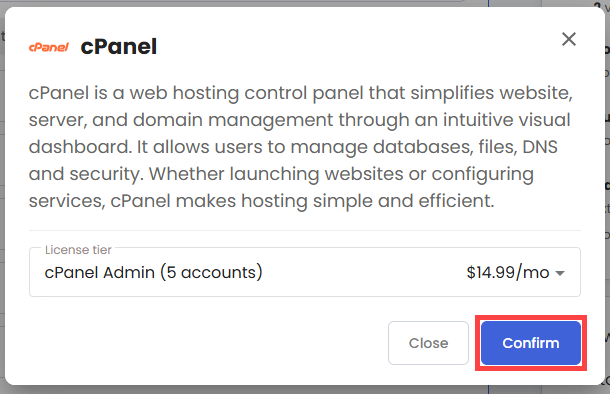
- In the pop-up, choose the number of license tier you need, then click Confirm.
- Hardware:
- Add-Ons: You can add Premium Support here, which gives you priority access to expert assistance and faster response times.

- In the Advanced options:
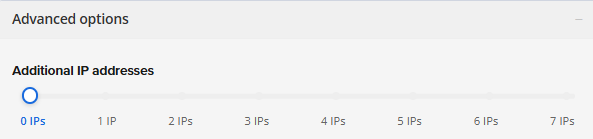
- Extra IP's: You can add extra IP addresses for an additional fee.
Pricing changes based on how many IPs you add. - Hostname: Assign a custom hostname to easily identify your server. This is optional.
- Extra IP's: You can add extra IP addresses for an additional fee.
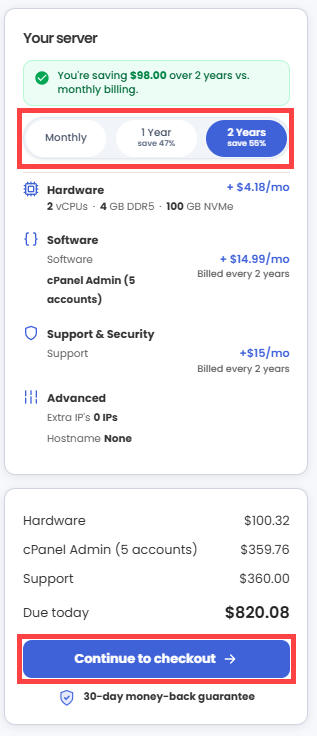
- Next, select your preferred billing term and review your Order Summary, then click Continue to Checkout.
- Do the following on the Checkout page:
If you're new to Bluehost:
- Create your Bluehost account by using your email address or by connecting with your Google, Apple, or GitHub account — whichever you prefer!

- Select your preferred payment method: credit card, Google Pay, or PayPal. Enter your billing information.

If you have an account with us, you will see your Bluehost login details when you are logged into your Bluehost Portal. If you are not logged in, please click the Log In link.

- Create your Bluehost account by using your email address or by connecting with your Google, Apple, or GitHub account — whichever you prefer!
- In the Shopping Cart section, you can still adjust your billing term if needed.
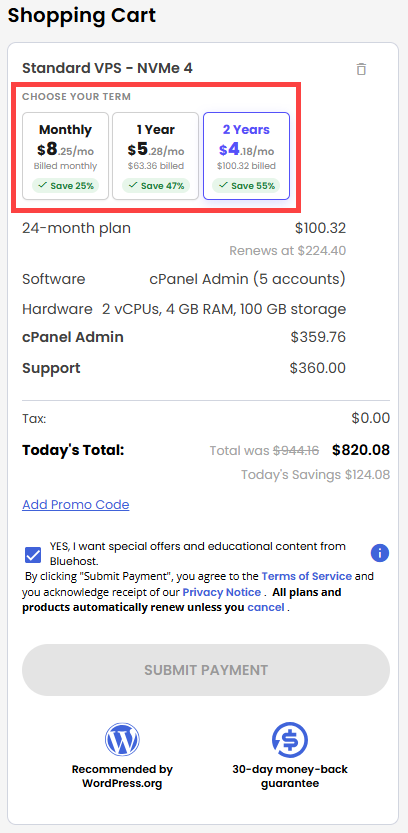
- Review the items in your cart, add a Promo Code if you have one, and then click Submit Payment to complete the purchase.
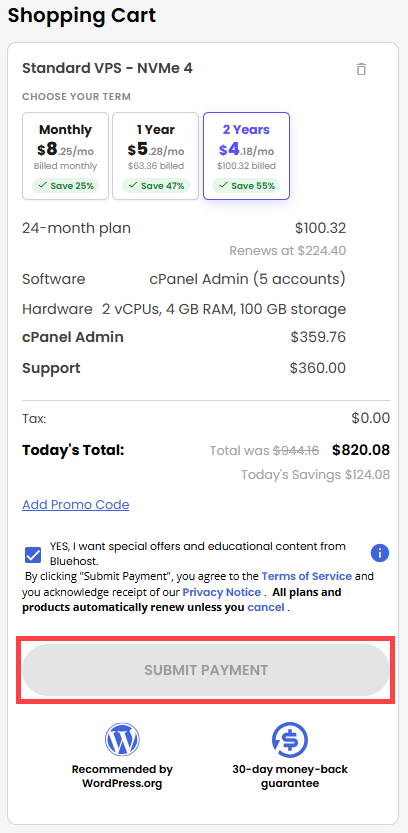
After completing the purchase, your VPS hosting will begin provisioning. You can access and manage your new VPS hosting in the Hosting tab of your Bluehost Portal.
Access Your cPanel Dashboard
After installation completes, follow these steps to log into your server and complete your initial configuration. Make sure you have your account login credentials ready before proceeding.
Step 1: Reset Your Root Password
Before you begin, set your root password so you can log into your server.
- Log in to your Bluehost Portal.
- In the left-hand menu, click Hosting, then select My Plans.
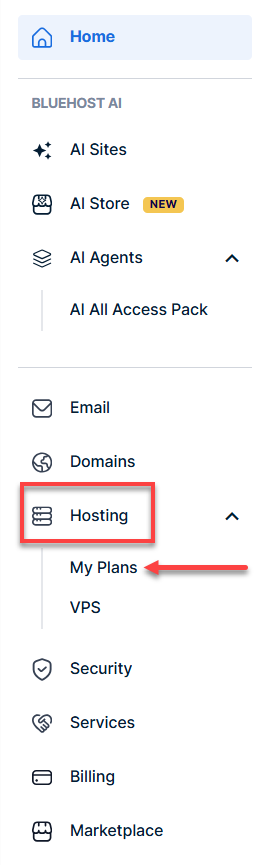
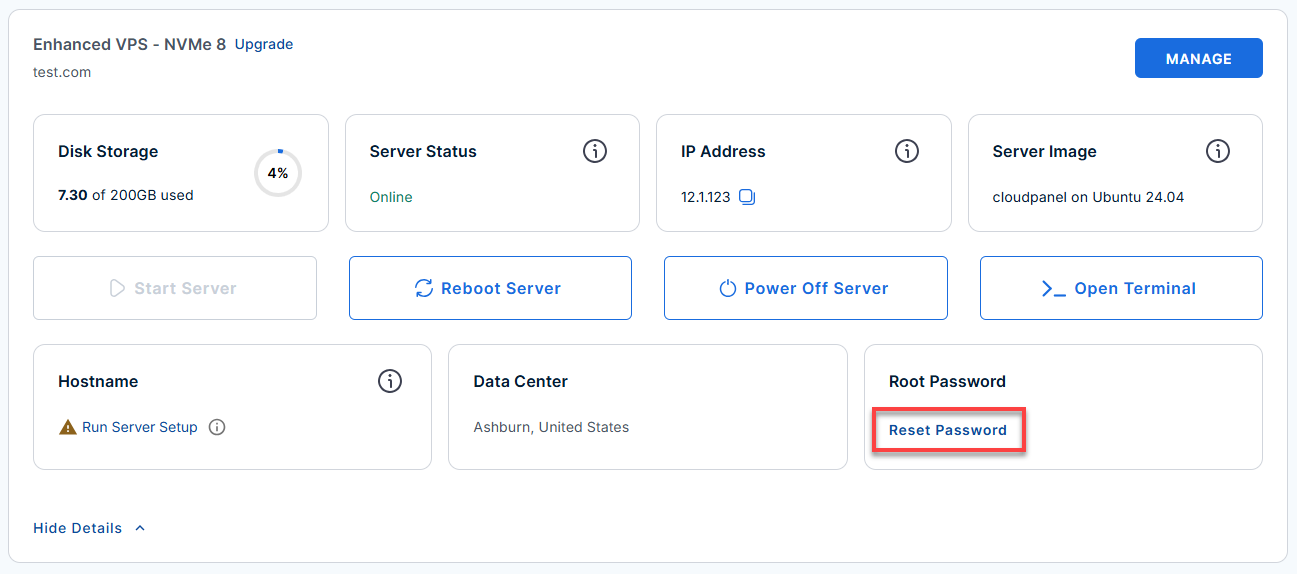
- Locate the server you want to manage, then click View Details in the bottom-left corner to expand the section and access additional server information.
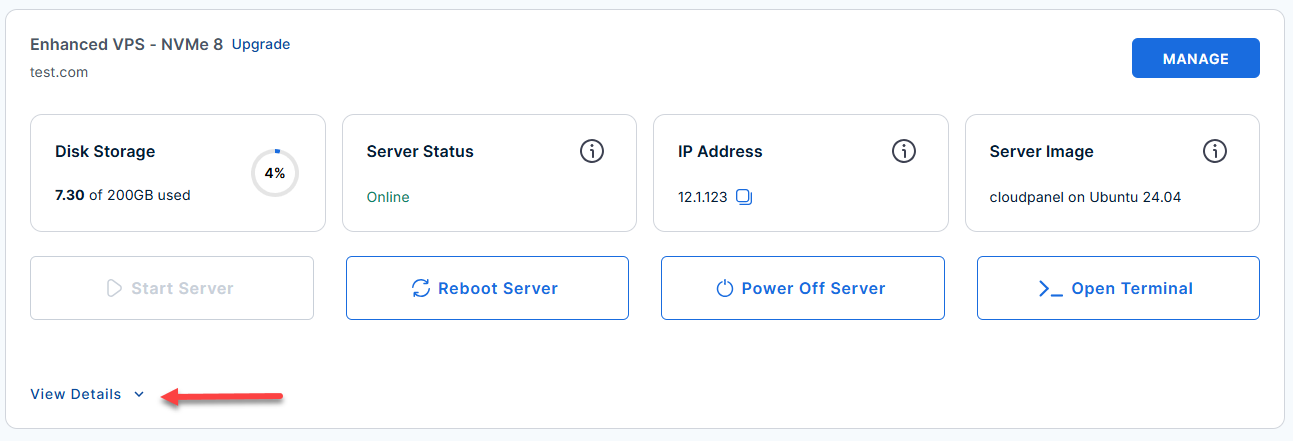
- Click the Reset Password.
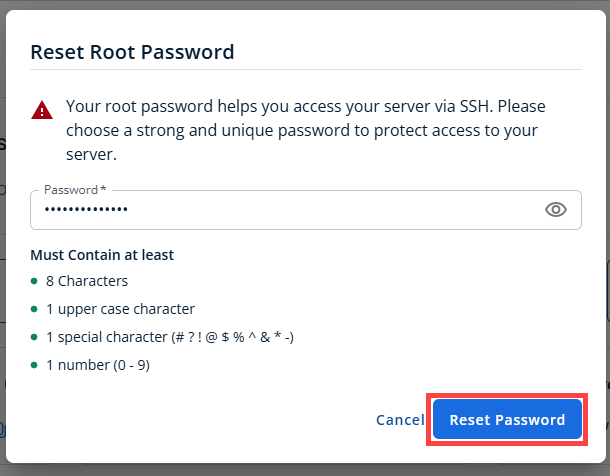
- In the pop-up window, type your new root password, then click Reset Password again to confirm and save the changes.
Step 2: Set up Your cPanel
Once your password is set, you can access your account dashboard to begin configuring cPanel.
- Log in to your Bluehost Portal.
- In the left-hand menu, click Hosting, then select My Plans.
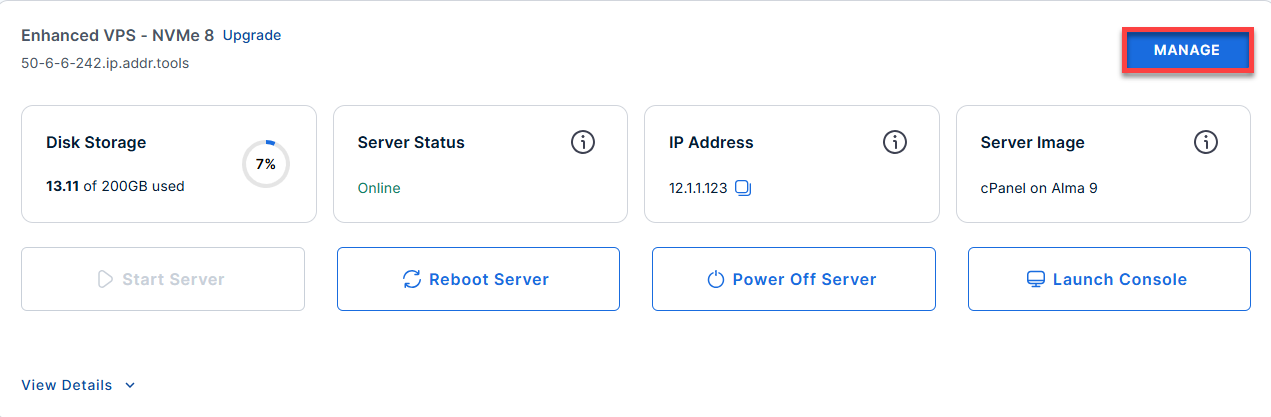
- Select the Self-Managed VPS package where cPanel is installed, and click Manage.
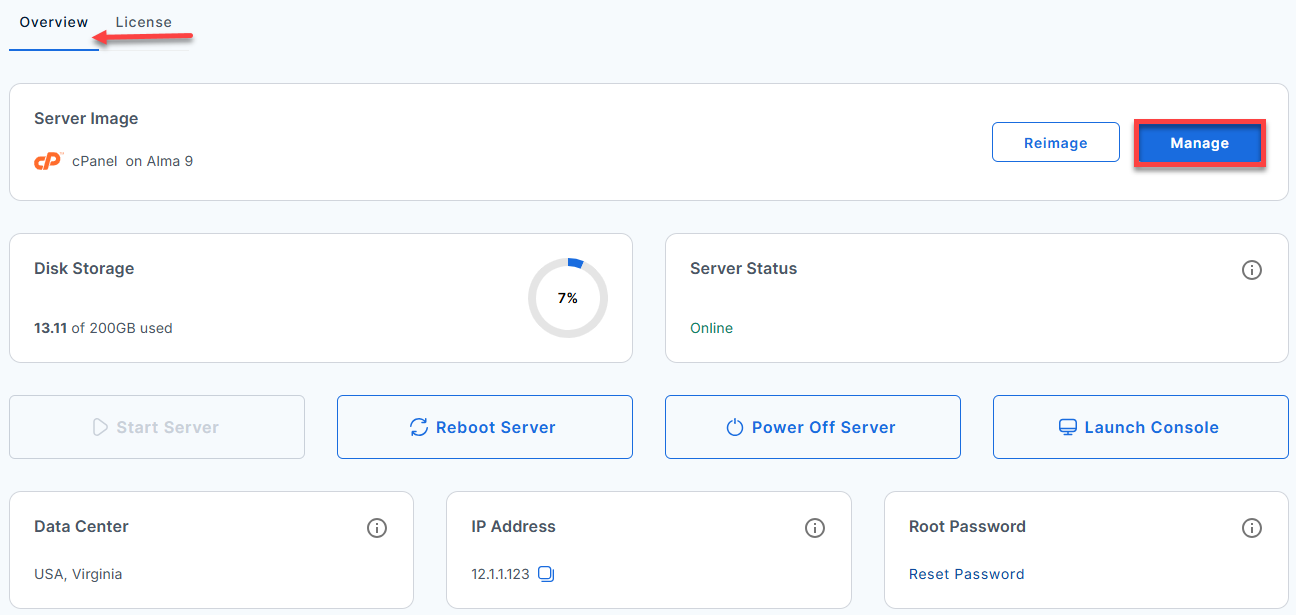
- In the Overview tab, click Manage under the Server Image tab.
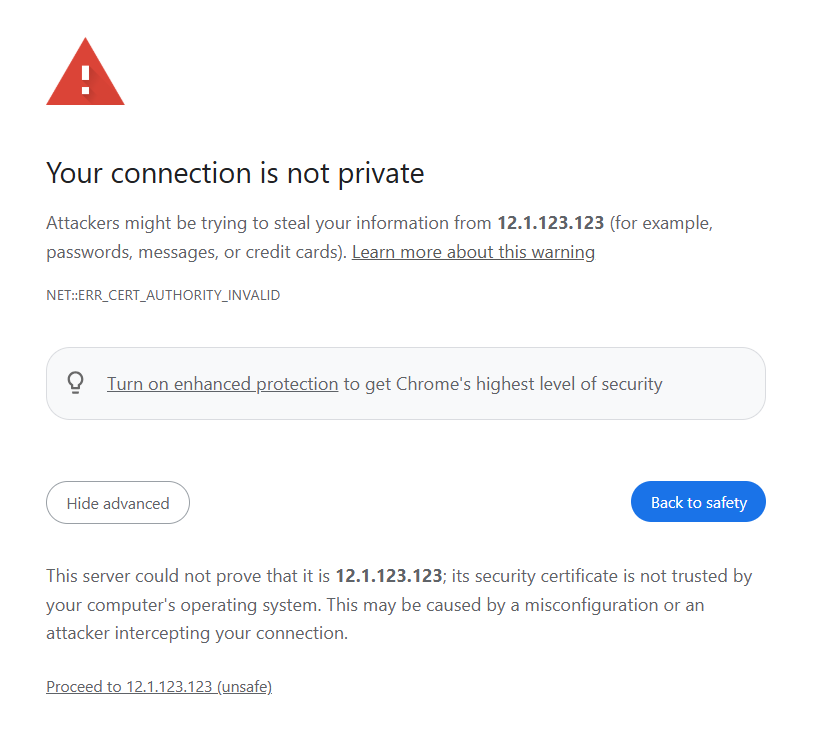
- Click Advanced, then select Proceed to 12.1.123.123 (unsafe) to open the page.
Note: This grants access for your current session, but your browser will still show a "Not Secure" warning in the address bar.
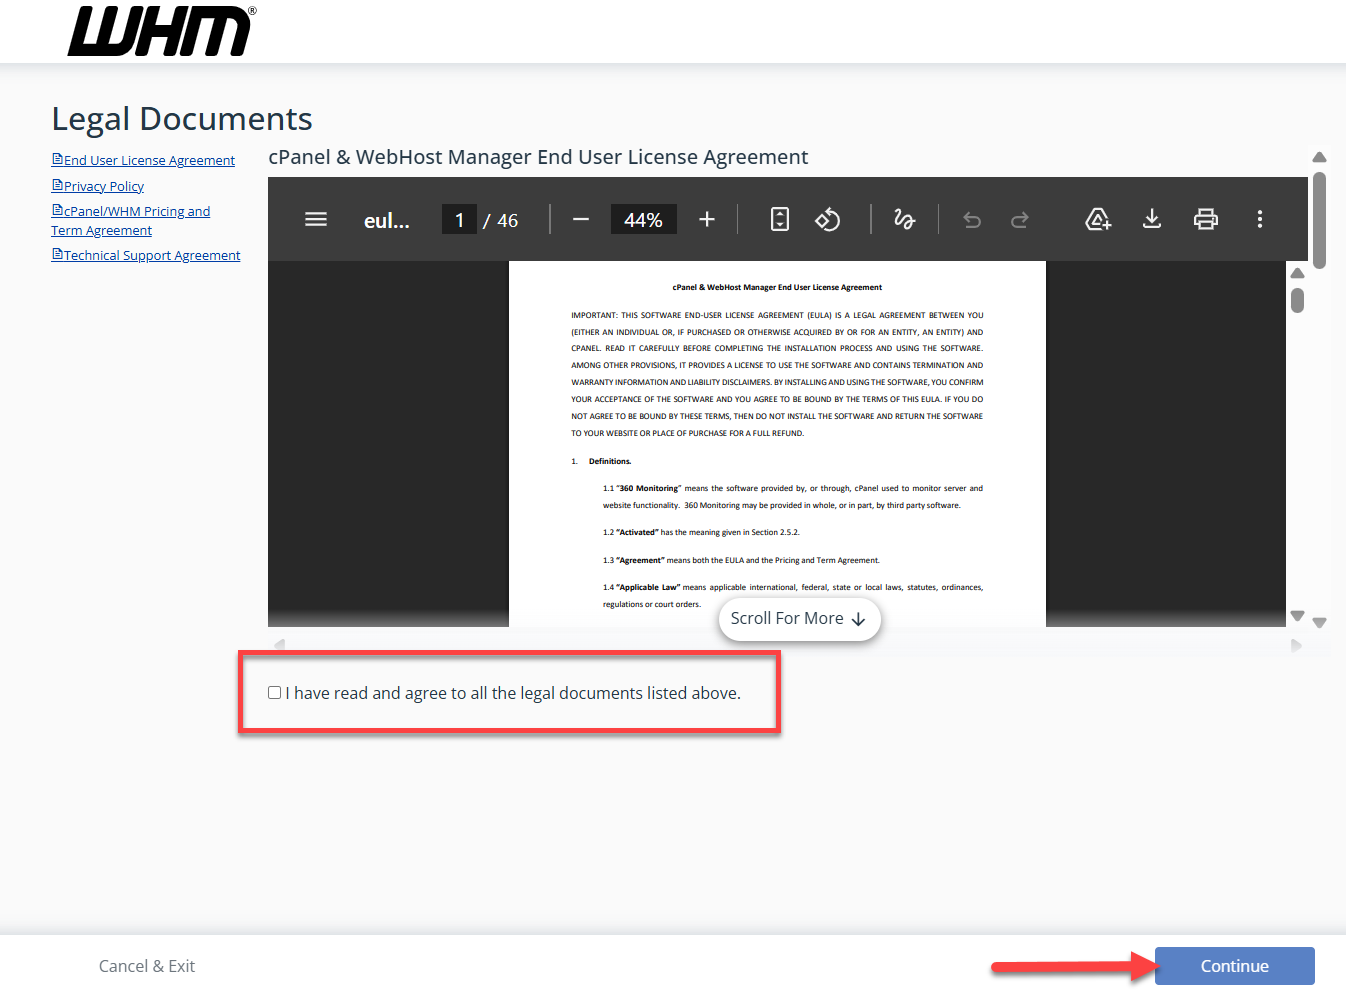
- Check the box for I have read and agree to all the legal documents listed above, then click Continue.
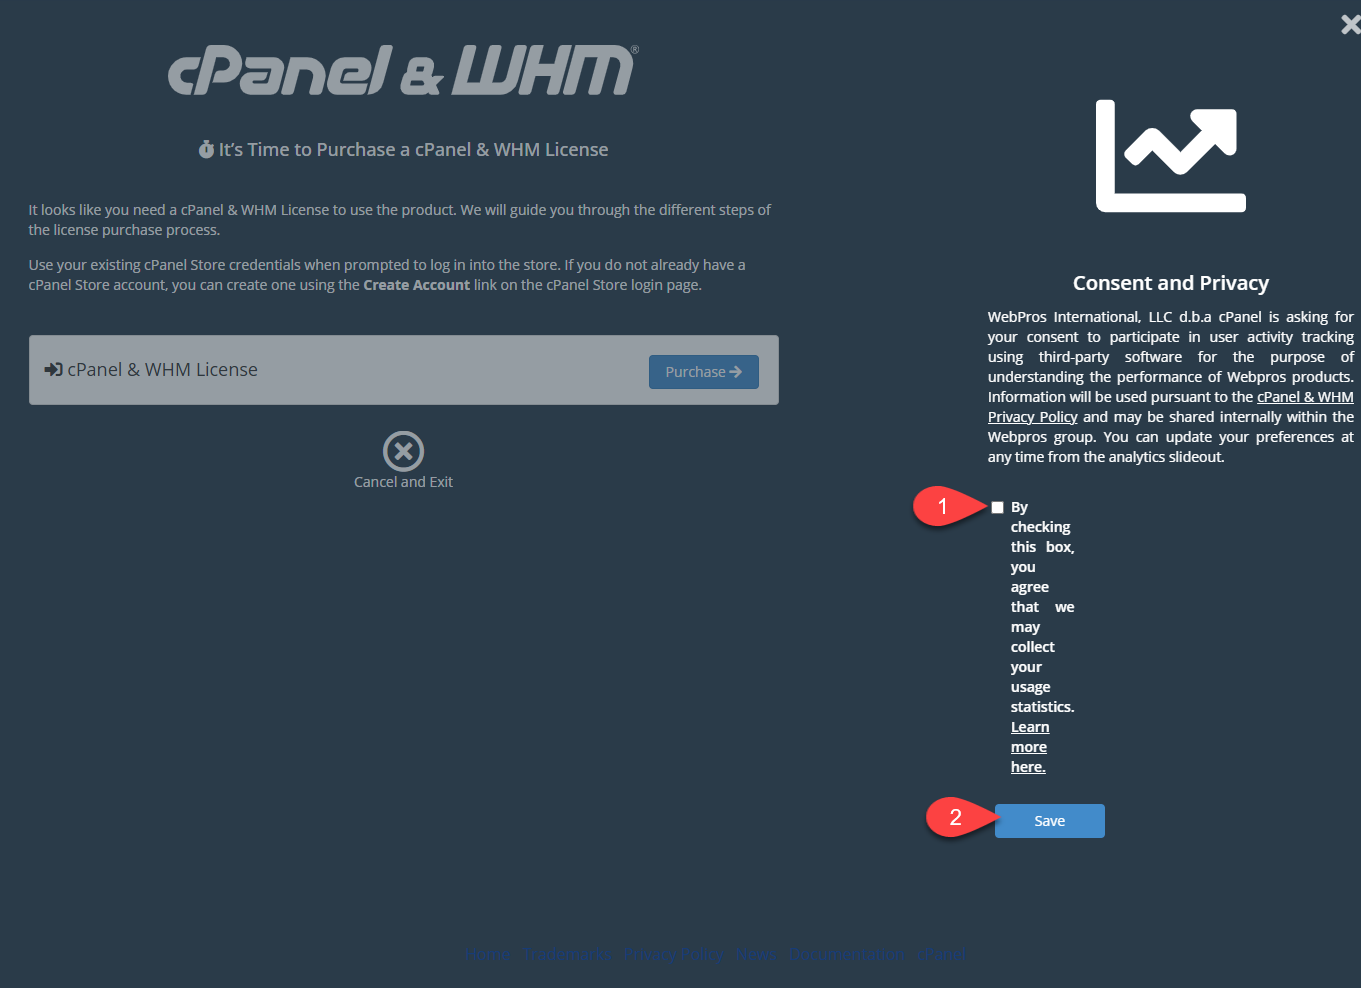
- Check the Consent and Privacy box if you agree to share usage statistics, then click Save.
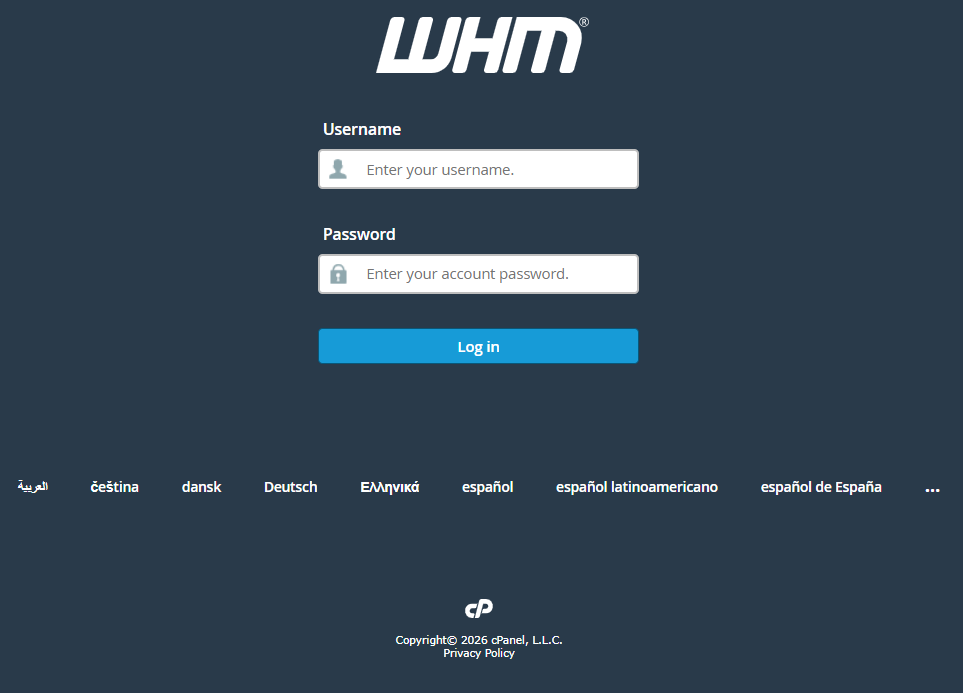
- Log in to your Root account.
- Username: root
- Password: Password you created.
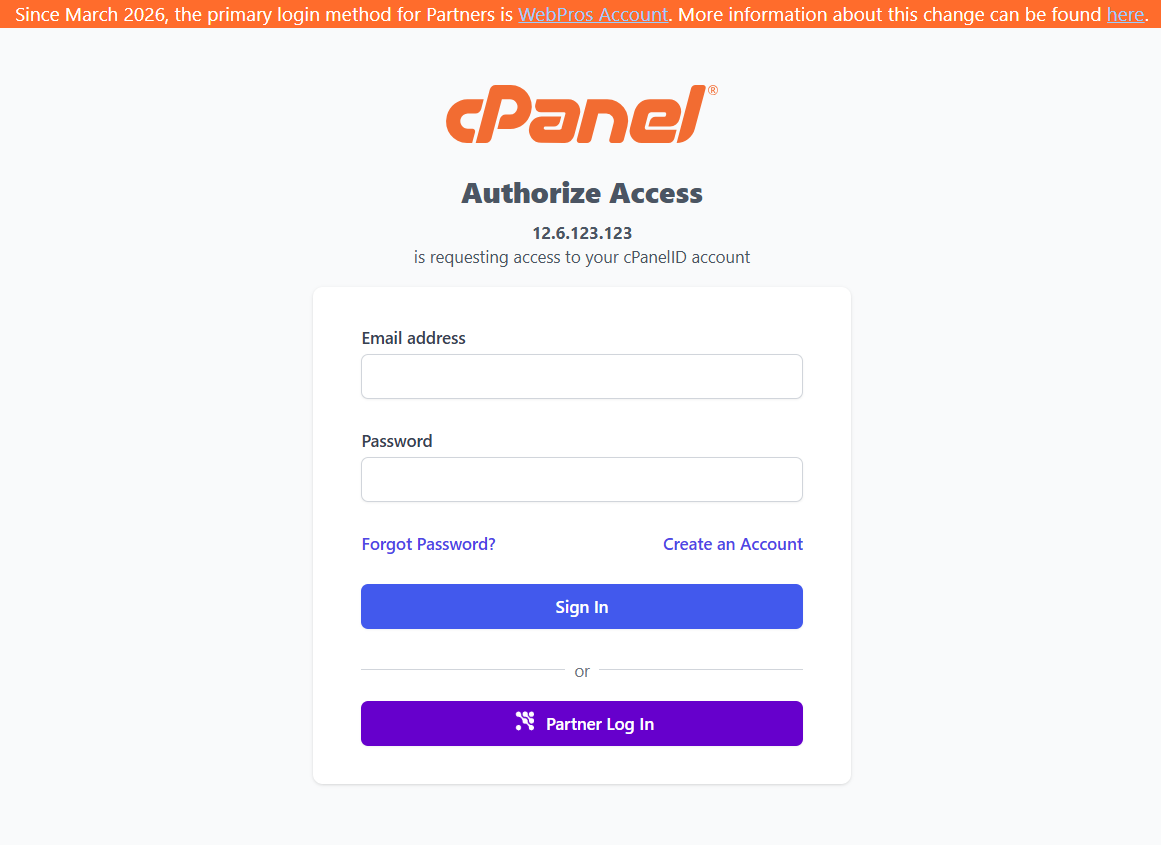
- Enter your cPanel Store credentials and click Sign In if you already have an account, or click Create an Account to set one up.
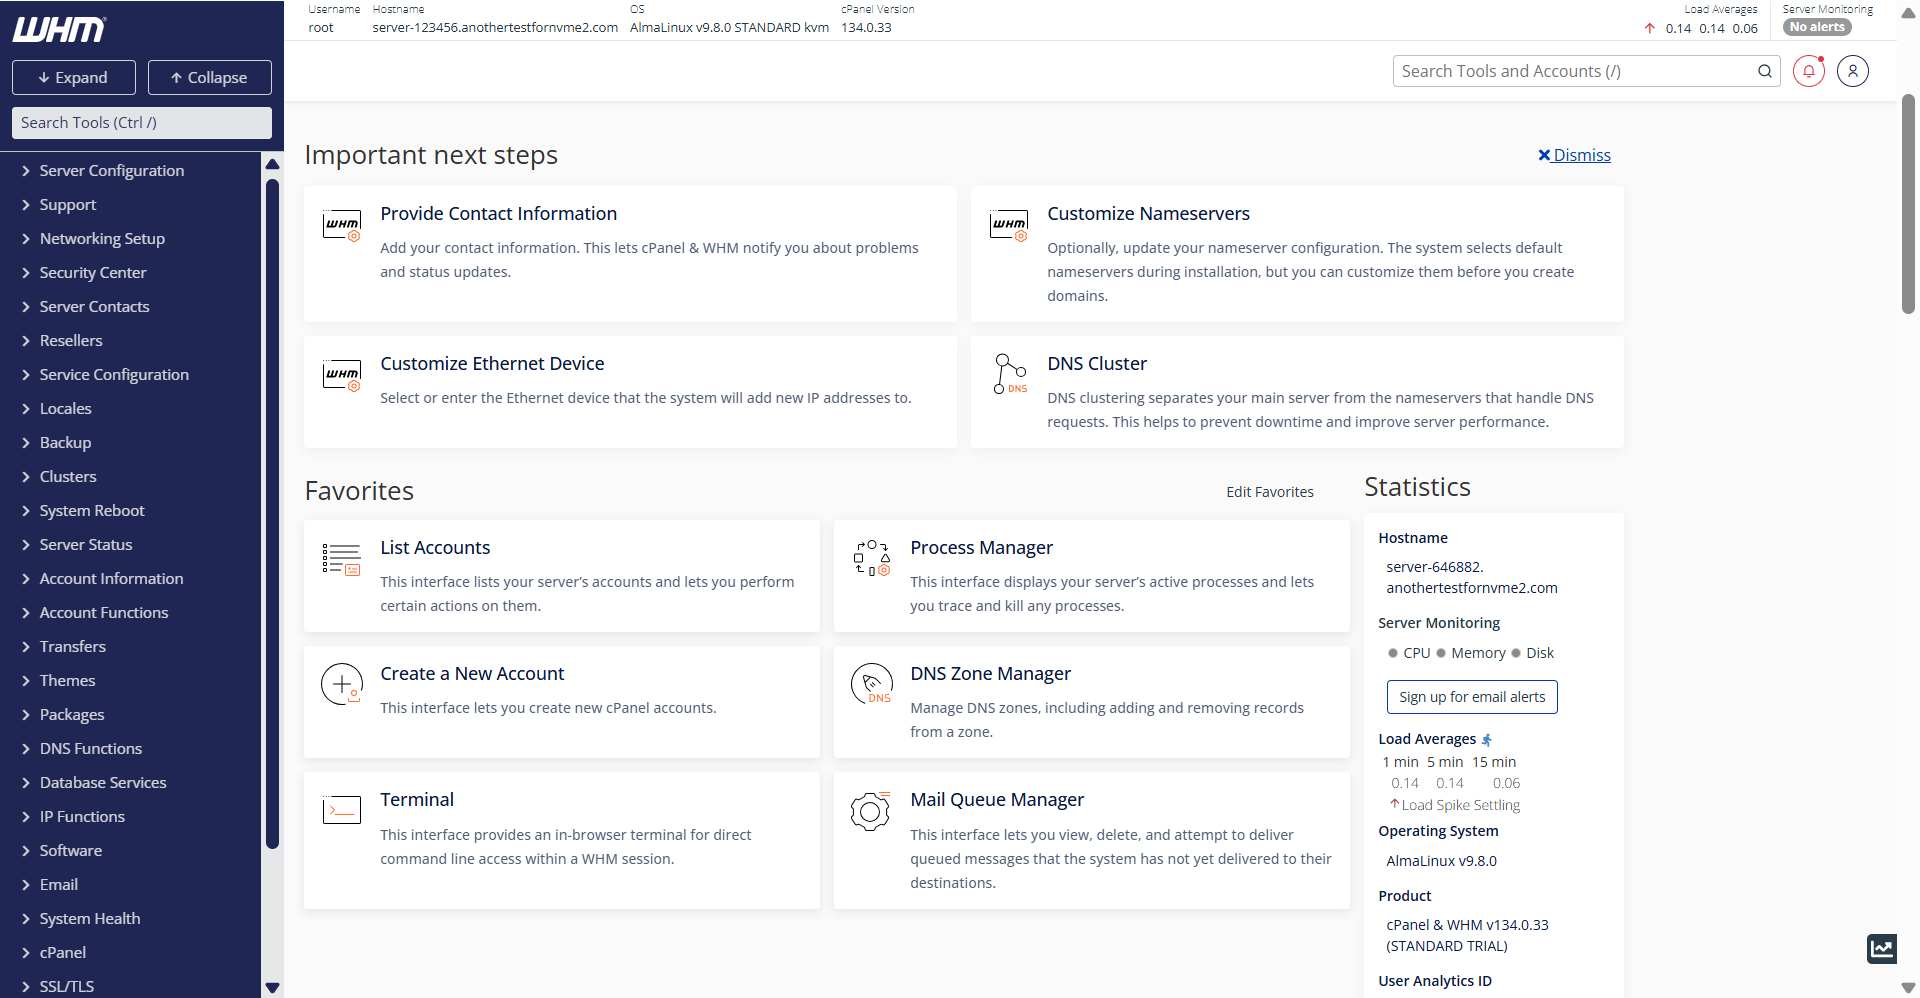
- You have successfully logged in to your WHM dashboard!