 ChatGPT,
  Claude,
  Gemini,
  Grok — all four for
 Purchase Self-Managed VPS with GatorClaw Installation
GatorClaw is a highly sophisticated software system that facilitates the collection of information, conducting fieldwork, and analyzing results. GatorClaw includes several features that help collect data from sensors or manually, analyze collected data in real time, and visualize it. The application is widely applied in scientific and corporate environments and educational institutions.
Main pros include auto-fetching data, real-time analytics, and customizable workflows. GatorClaw works as a central hub for data collection, analysis, and visualization, which makes it an essential tool for organizations and researchers handling loads of information or data. GatorClaw features intuitive interfaces designed for both technical and non-technical audiences.
Watch this short video for a quick guide on purchasing Self-Managed VPS with GatorClaw installation.
Why Use GatorClaw?
As the amount of data increases in both research and operations, it becomes imperative to have powerful software to automate the data gathering and analysis process. With GatorClaw, users can reduce human error, speed up processes, and gain insights faster.
Uses of GatorClaw
GatorClaw finds applications in various domains, including:
- Field Research: Collect environmental or experimental data via connected devices or manual entry.
- Data Analytics: Process and visualize large datasets to identify patterns or anomalies.
- Academic Studies: Conduct scientific experiments by collecting and recording data meticulously.
- Enterprise Monitoring: Continuously track the vital statistics of an organization’s operations.
- Custom Data Solutions: Develop workflows that match organizational requirements for handling data.
How to Purchase a Self-Managed VPS with GatorClaw Installation

New to VPS or not sure where to start? No worries! At the top of the Self-Managed VPS purchase page, you’ll see the Pre-configured Setup section. This handy feature is perfect if you’re feeling a bit unsure—just pick the type of project you want, like WordPress Site, AI Agent/Claude Code, Dev/Staging, or eCommerce Store. We’ll take care of the rest by automatically filling in the best plan, operating system, and template for you.
- Super simple for beginners or anyone who just wants a quick setup
- Instantly get the recommended settings for your project
- Skip the guesswork and save time
- You can still customize things later if you want
GatorClaw can be installed on a Bluehost Self-Managed VPS. You can add GatorClaw during the initial purchase of your VPS or by manually installing it after purchase.
- In your browser, go to https://www.bluehost.com/vps-hosting.
- Click the Choose Plan button under your preferred VPS hosting plan.
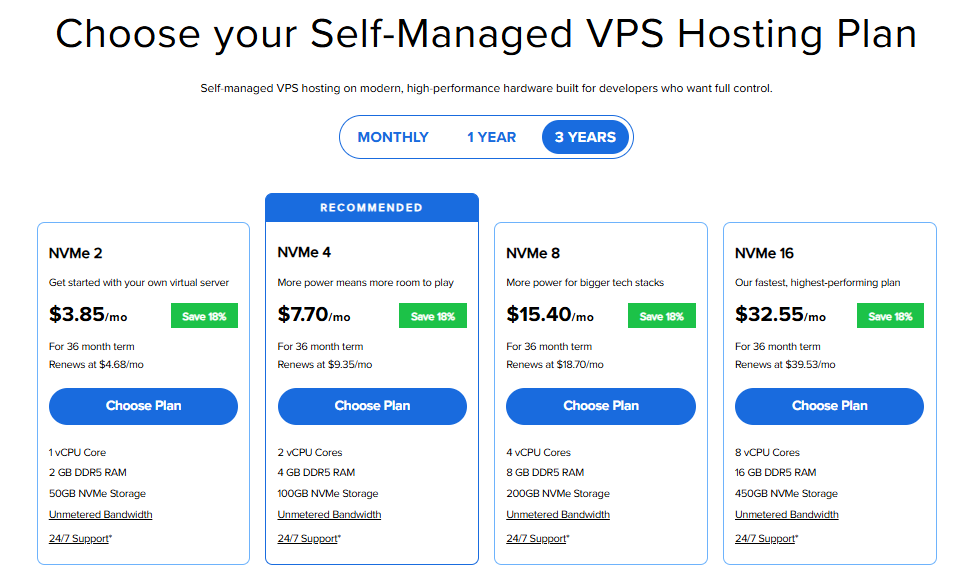
Important: Pricing is subject to change—please visit https://www.bluehost.com/vps-hosting for the current introductory/sign-up offer for Bluehost VPS Hosting. For the most up-to-date renewal pricing, visit your Bluehost Portal Renewal Center.
- Select your preferred Data Center location.

- On the Cart page, you can configure your server to fit your needs in the following section:
- Hardware:
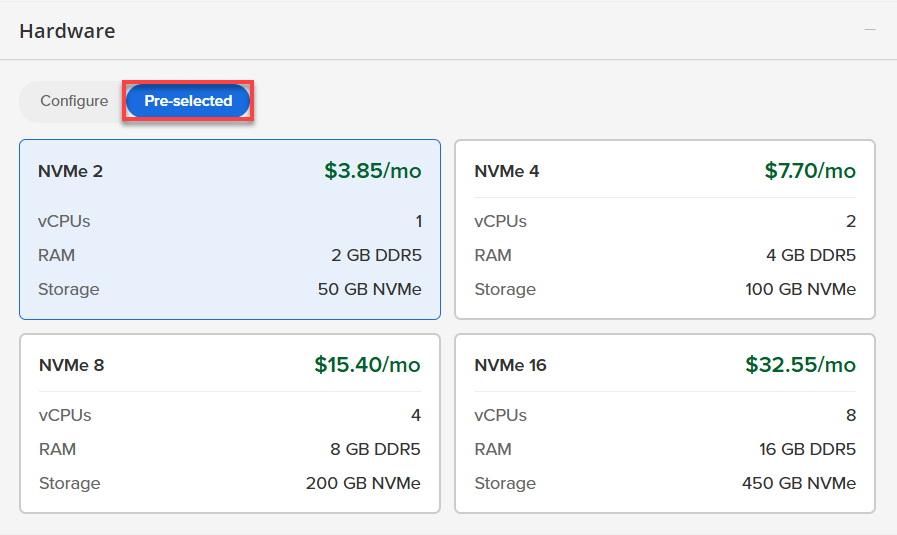
- Pre-selected:
You can select a different Self-Managed VPS plan in this section.
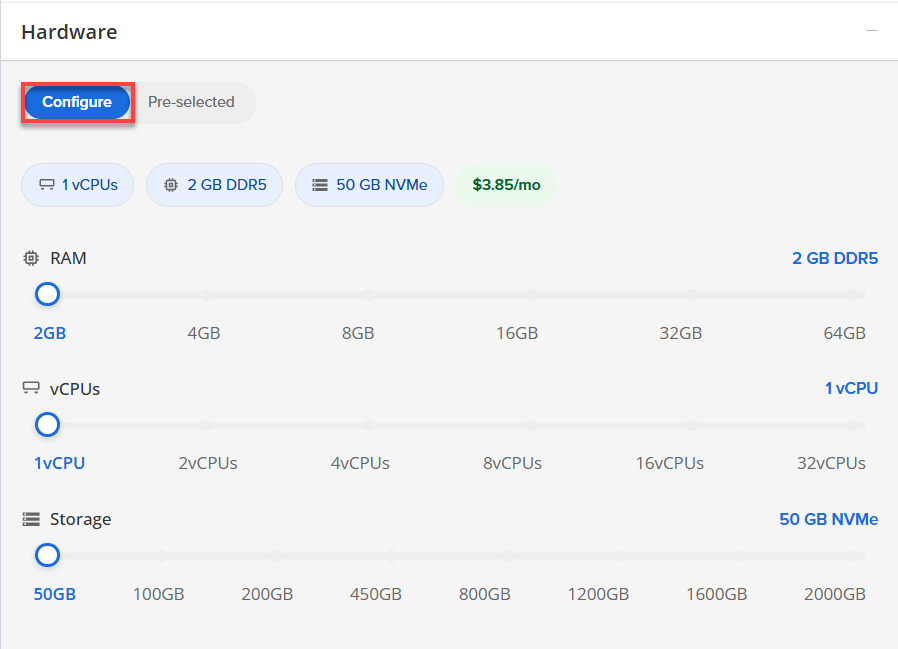
- Configure:
Click Configure to customize your package.
Note that your changes help customize your plan, and the overall cost will adjust accordingly to fit your needs.
- Pre-selected:
- Software:
If the selected plan does not meet the app's minimum requirements, the app will be grayed out.
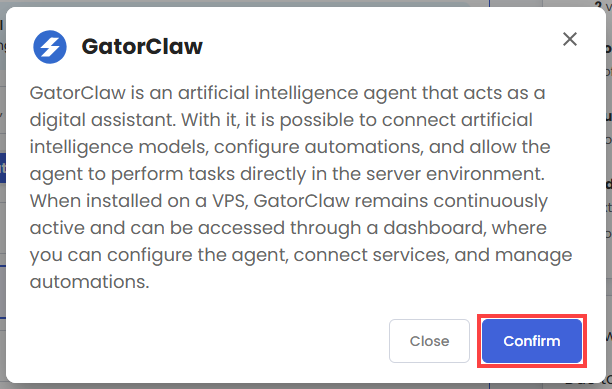
- Click the Application tab.
- Select GatorClaw.
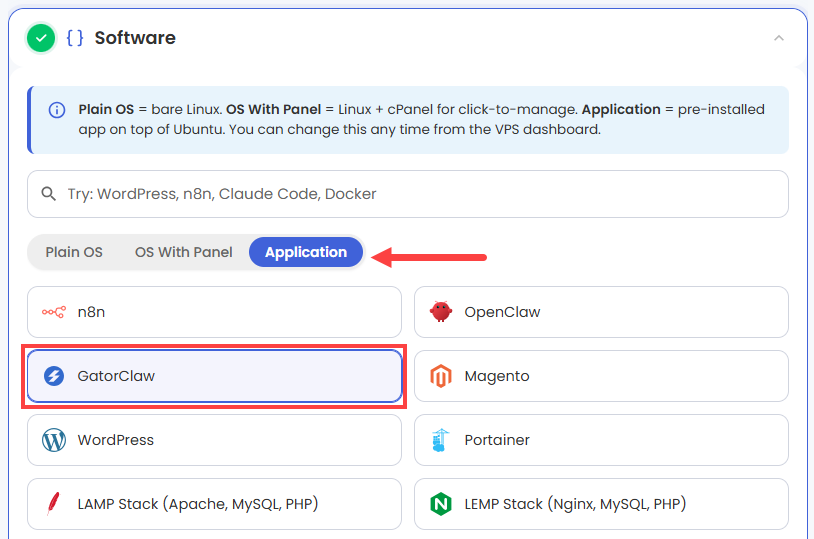
- In the pop-up, click Confirm.
- Hardware:
- Add-Ons: You can add Premium Support here, which gives you priority access to expert assistance and faster response times.

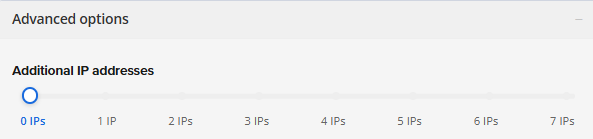
- In the Advanced options:
- Extra IP's: You can add extra IP addresses for an additional fee.
Pricing changes based on how many IPs you add. - Hostname: Assign a custom hostname to easily identify your server. This is optional.
- Extra IP's: You can add extra IP addresses for an additional fee.
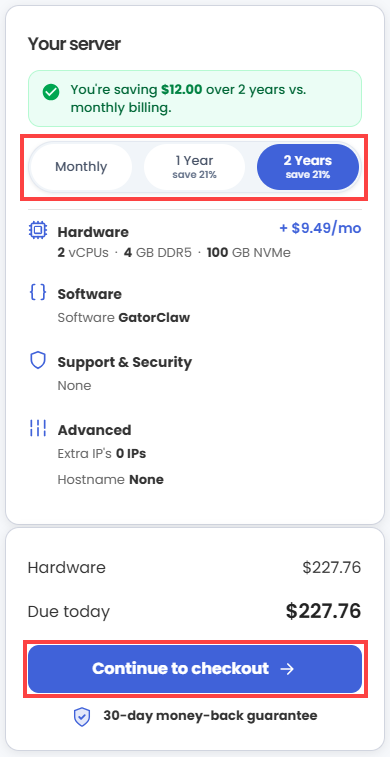
- Next, select your preferred billing term and review your Order Summary, then click Continue to Checkout.
- Do the following on the Checkout page:
If you're new with Bluehost:
- Create your Bluehost account by using your email address or by connecting with your Google, Apple, or GitHub account — whichever you prefer!

- Select your preferred payment method: credit card, Google Pay, or PayPal. Enter your billing information.

If you have an account with us, you will see your Bluehost login details when you are logged into your Bluehost Portal. If you are not logged in, please click the Log In link.

- Create your Bluehost account by using your email address or by connecting with your Google, Apple, or GitHub account — whichever you prefer!
- In the Shopping Cart section, you can still adjust your billing term if needed.
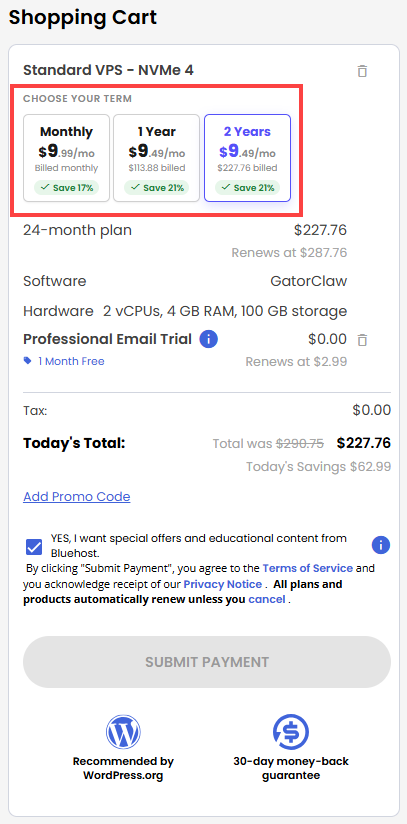
- Review the items in your cart, add a Promo Code if you have one, and then click Submit Payment to complete the purchase.
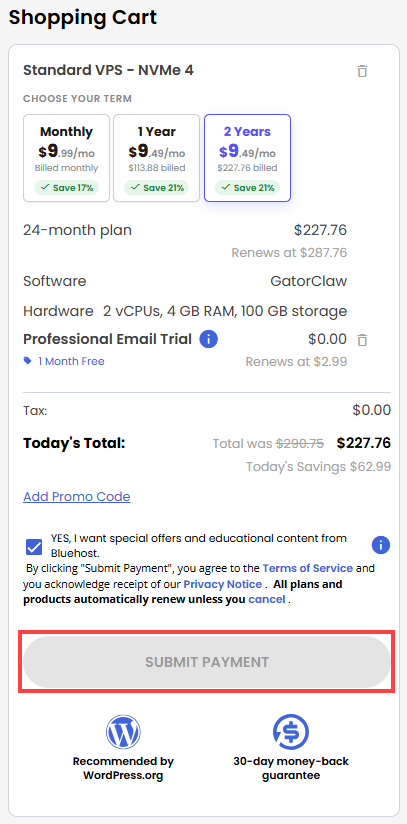
After completing the purchase, your VPS hosting will begin provisioning. You can access and manage your new VPS hosting in the Hosting tab of your Bluehost Portal.
Setting Up and Managing Your GatorClaw Assistant
Welcome to GatorClaw! Follow this step-by-step guide to complete your initial setup and learn how to manage your new AI digital assistant.
Access the Setup Dashboard
To complete the installation, open your preferred web browser and navigate to the initial setup page using your server's IP address:
- Log In via Your Browser:
Replace
your_server_ipwith your actual server IP address.http://your-server-ip:47716/setupImportant!Make sure you use https:// and include the trailing slash after your panel path.
- Bypass the Browser Security Warning
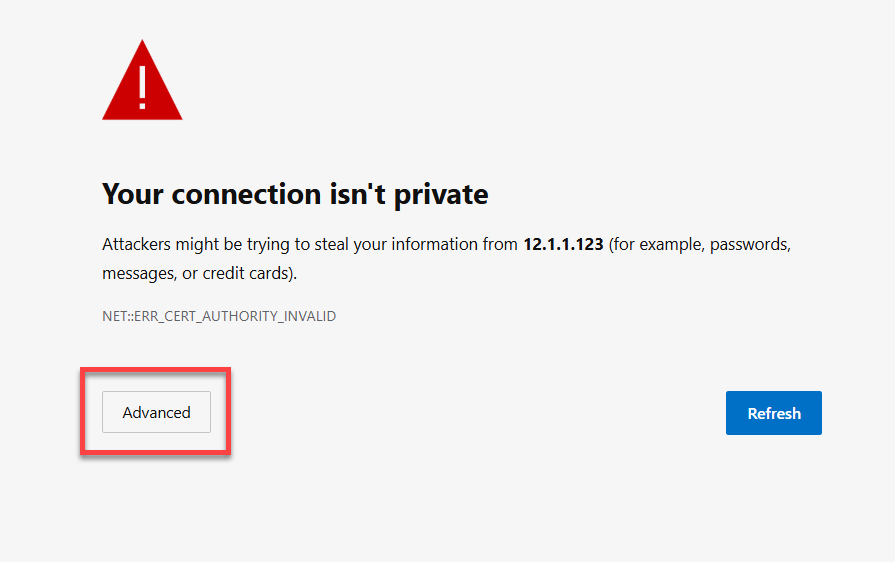
GatorClaw uses a temporary self-signed SSL certificate, your browser will flag it. Click Advanced and then Proceed/Continue to bypass it safely.
- Once the Bypass is done:
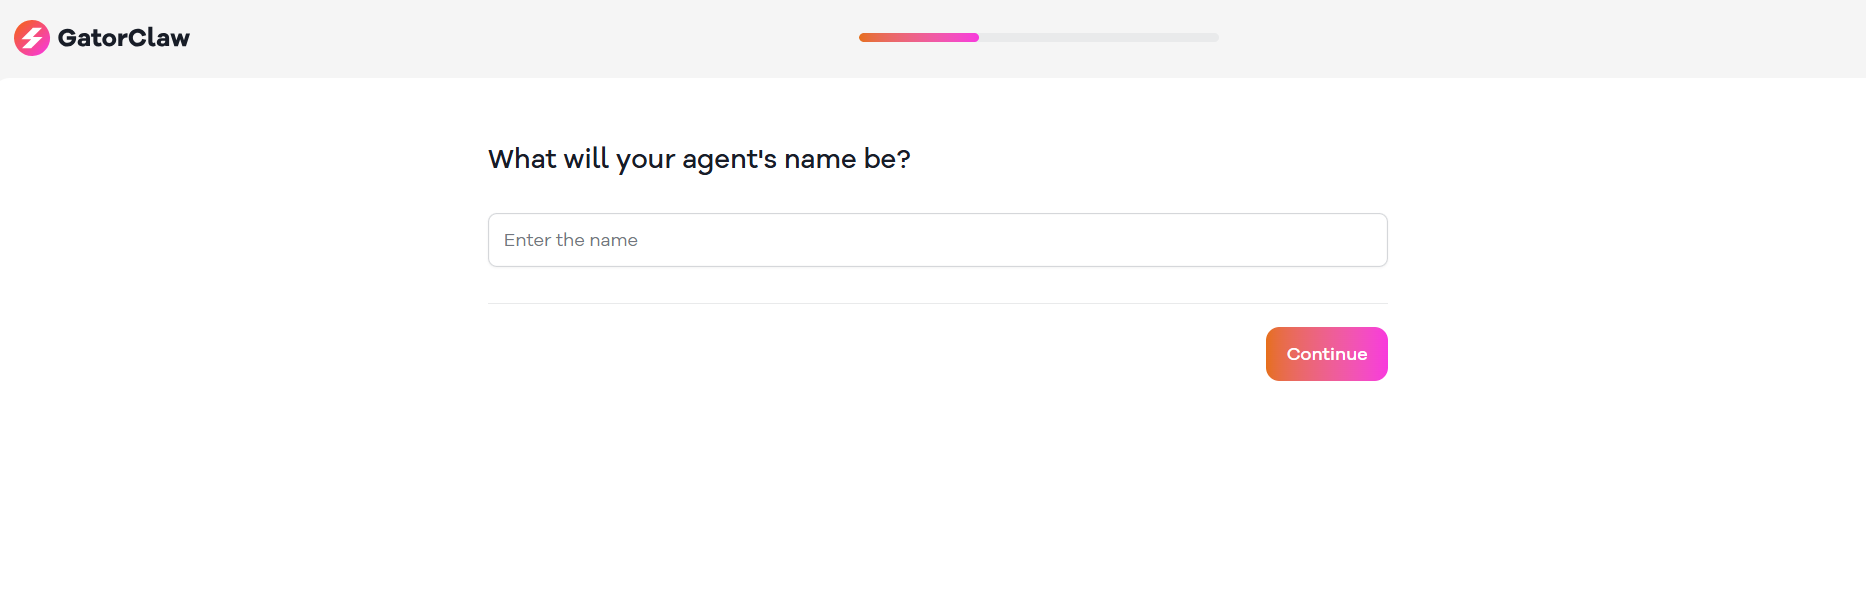
You will be routed to GatorClaw Set up page:
Your server uses a built-in firewall (ufw) to keep your connections secure. By default, GatorClaw communicates safely over port 47716 for the WebUI and port 22 for Secure Shell (SSH) access.
Configure Your Agent
Follow the on-screen prompts in the dashboard setup wizard to:
- Connect your preferred artificial intelligence models.
- Configure your automation workflows.
- Grant permission for the agent to execute tasks directly within your server environment.
Once configured, GatorClaw remains continuously active in the background, ready to assist you.
Verify the Health of the Application
If you want to ensure everything is running perfectly via the command line, SSH into your server (on Port 22) and check the status of GatorClaw.
- Check GatorClaw application status:
gatorclaw health
- Check the process manager status:
GatorClaw uses PM2 to keep its processes continuously active. You can check its running status by executing:
Example Output:pm2 statusroot@server-123456:~# pm2 status ┌────┬────────────────────┬──────────┬──────┬───────────┬──────────┬──────────┐ │ id │ name │ mode │ ↺ │ status │ cpu │ memory │ ├────┼────────────────────┼──────────┼──────┼───────────┼──────────┼──────────┤ │ 0 │ devclaw │ fork │ 0 │ online │ 0% │ 35.1mb │ └────┴────────────────────┴──────────┴──────┴───────────┴──────────┴──────────┘ root@server-123456:~#
Additional Useful Operational Commands
Should you ever need to inspect or manage application data directly, you can find all core files stored securely on your server at:
If you ever need to check on your system, view logs, or restart services, connect to your server via SSH (Port 22) and use the following operational commands:
- Monitor Live Logs:
View real-time logs and troubleshoot issues:
Example Output:pm2 logs devclawroot@server-123456:~# pm2 logs devclaw [TAILING] Tailing last 15 lines for [devclaw] process (change the value with --lines option) /opt/devclaw/logs/error.log last 15 lines: /opt/devclaw/logs/out.log last 15 lines: 0|devclaw | 2026-05-04T19:39:54: │ Open: http://10.0.2.15:47716/setup │ 0|devclaw | 2026-05-04T19:39:54: ╰──────────────────────────────────────────────╯ 0|devclaw | 2026-05-04T19:39:54: 0|devclaw | 2026-05-04T19:39:54: time=2026-05-04T19:39:54.715Z level=INFO msg="web UI starting" component=webui address=:47716 0|devclaw | 2026-06-25T21:21:19: 0|devclaw | 2026-06-25T21:21:19: ╭──────────────────────────────────────────────╮ 0|devclaw | 2026-06-25T21:21:19: │ 🐊 GatorClaw — First Run Setup │ 0|devclaw | 2026-06-25T21:21:19: │ │ 0|devclaw | 2026-06-25T21:21:19: │ No config.yaml found. │ 0|devclaw | 2026-06-25T21:21:19: │ Starting web setup wizard... │ 0|devclaw | 2026-06-25T21:21:19: │ │ 0|devclaw | 2026-06-25T21:21:19: │ Open: http://12.3.456.789:47716/setup │ 0|devclaw | 2026-06-25T21:21:19: ╰──────────────────────────────────────────────╯ 0|devclaw | 2026-06-25T21:21:19: 0|devclaw | 2026-06-25T21:21:19: time=2026-06-25T21:21:19.272Z level=INFO msg="web UI starting" component=webui address=:47716 - Restart the Agent:
Reboot the background application if you make configuration updates:
Example Output:pm2 restart devclawroot@server-123456:~# pm2 restart devclaw Use --update-env to update environment variables [PM2] Applying action restartProcessId on app [devclaw](ids: [ 0 ]) [PM2] [devclaw](0) ✓ ┌────┬────────────────────┬──────────┬──────┬───────────┬──────────┬──────────┐ │ id │ name │ mode │ ↺ │ status │ cpu │ memory │ ├────┼────────────────────┼──────────┼──────┼───────────┼──────────┼──────────┤ │ 0 │ devclaw │ fork │ 1 │ online │ 0% │ 28.1mb │ └────┴────────────────────┴──────────┴──────┴───────────┴──────────┴──────────┘ root@server-123456:~#
Additional Information and Example Documentation Output
You can run cat /root/README.md to see more information and useful commands:
Example Output:
Last login: Thu Jun 25 22:57:54 2026 from 123.45.567.890
root@server-123456:~# cat /root/README.md
# GatorClaw

## Description

GatorClaw is an artificial intelligence agent that acts as a digital
assistant.  With it, it is possible to connect artificial intelligence
models, configure automations, and allow the agent to perform tasks
directly in the server environment.  When installed on a VPS,
GatorClaw remains continuously active and can be accessed through a
dashboard, where you can configure the agent, connect services, and
manage automations.

The image prepares `/opt/gatorclaw`, downloads the current release
bundle and installer, runs the non-interactive installation, validates
that the WebUI setup endpoint is reachable, and exposes the default
GatorClaw port.


## Services

Service         | Ports | Purpose
----------------|-------|---------
GatorClaw WebUI | 47716 | Provides a browser based interface to setup and maintain GatorClaw
OpenSSH         | 22    | SSH

Ports are protected using ufw.


## How-to-use

After the instance boots, access the initial setup page at:

`http://server-ip:47716/setup`

Useful operational commands:

* `gatorclaw health`
* `pm2 status`
* `pm2 logs devclaw`
* `pm2 restart devclaw`

Application files are stored under `/opt/gatorclaw`.


## Links

Repository: [`LATAMD/repos/ansible-app-installer/ubuntu/roles/gatorclaw`](https://stash.newfold.com/projects/LATAMD/repos/ansible-app-installer/browse/ubuntu/roles/gatorclaw)

Manage: [http://{server_ip}:47716](http://{server_ip}:47716)root@server-650882:~#
Summary
GatorClaw is a robust, automated data collection and analysis platform suitable for research, enterprise, and academic use. By deploying GatorClaw on a Bluehost Self-Managed VPS, users gain full control over their data workflows, benefit from real-time analytics, and can tailor the system to their unique requirements. The purchase and setup process is straightforward, ensuring you can get started quickly and efficiently.