 ChatGPT,
  Claude,
  Gemini,
  Grok — all four for
 Purchase a Virtual Dedicated Server with GatorClaw Installation
GatorClaw is a powerful data collection and analysis platform designed to simplify the process of gathering, managing, and interpreting information. It enables users to collect data from sensors or through manual input, analyze it in real time, and visualize results using intuitive tools and dashboards. Because of its versatility, GatorClaw is widely used in scientific research, business operations, and educational environments.
This article explains how to purchase a Bluehost Virtual Dedicated Server (VDS) hosting plan and set up and manage your GatorClaw Assistant.
Why Choose GatorClaw?
As organizations and researchers work with increasingly large amounts of data, having the right tools to collect, manage, and analyze that information is more important than ever. GatorClaw streamlines these processes by automating data collection and analysis, helping users save time, reduce manual errors, and uncover valuable insights more quickly.
Hosting GatorClaw on a Virtual Dedicated Server (VDS) provides dedicated resources that help maintain consistent performance. This means your workflows remain responsive and reliable, regardless of activity from other users on the same physical server.
Uses of GatorClaw
GatorClaw supports a wide range of applications across research, analytics, and operational environments:
- Field Research - Capture environmental, observational, or experimental data through connected devices or manual data entry.
- Data Analytics - Analyze and visualize complex datasets to uncover trends, patterns, and potential anomalies.
- Academic Research - Facilitate scientific studies by enabling accurate and systematic data collection and documentation.
- Enterprise Monitoring - Monitor critical operational metrics in real time to support informed decision-making and performance tracking.
- Custom Data Management Solutions - Create tailored workflows that align with organizational requirements for collecting, processing, and managing data.
How to Purchase a Virtual Dedicated Server with GatorClaw Installation
GatorClaw can be installed on a Bluehost Virtual Dedicated Server (VDS). You can choose to have GatorClaw installed during the initial VDS purchase or install it manually at a later time.
- In your browser, go to https://www.bluehost.com.
- Click Hosting in the top menu, then select Virtual Dedicated Server.

You can also go to this link directly: https://www.bluehost.com/vds-hosting.
- On the Virtual Dedicated Server Hosting page, click Explore Plans. You can also scroll down to the hosting plans section.

- Choose a plan from either tab — Standard or High Performance — by clicking Choose Plan.
 Pricing is subject to change. Please visit https://www.bluehost.com/vds-hosting for the current introductory/sign-up offer for the Bluehost Virtual Dedicated Server hosting. For the most up-to-date renewal pricing, visit your Bluehost Portal's Renewal Center.
 - On the next page, configure your VDS hosting to meet your requirements. The configuration options are divided into the following sections:
- Location: Select your data center in this section.

- Hardware: This section shows your pre-selected plan. You can also switch to another Virtual Dedicated Server plan in this section

- Software:
- Under the Application tab, click on GatorClaw.
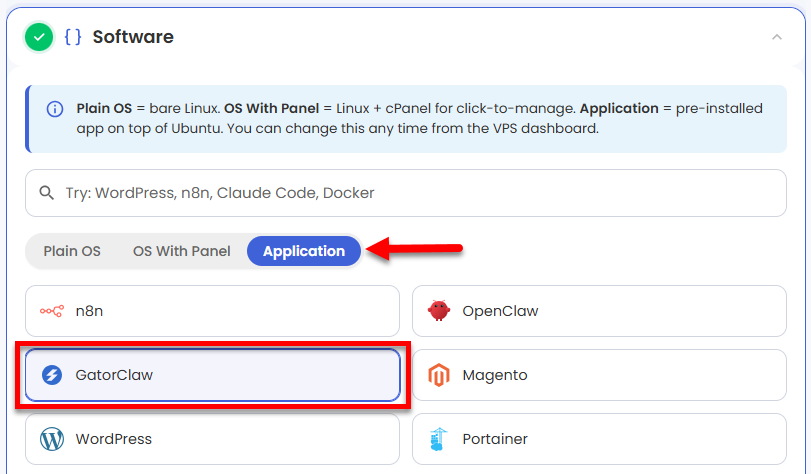 You can install only one application per purchase; the system will automatically select the best operating system for it.
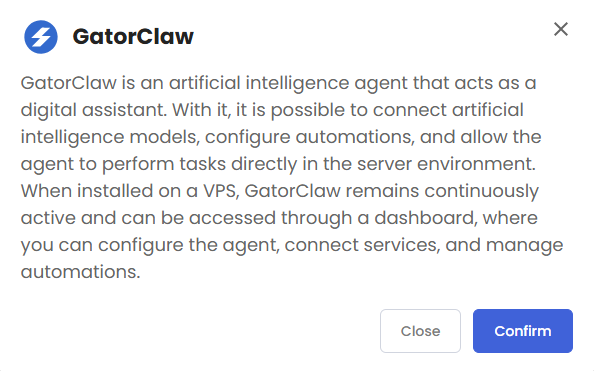
 - In the pop-up, click Confirm.
- Under the Application tab, click on GatorClaw.
- Support & Security: You can add Premium Support - Recurring, which provides priority access to expert assistance and faster response times.

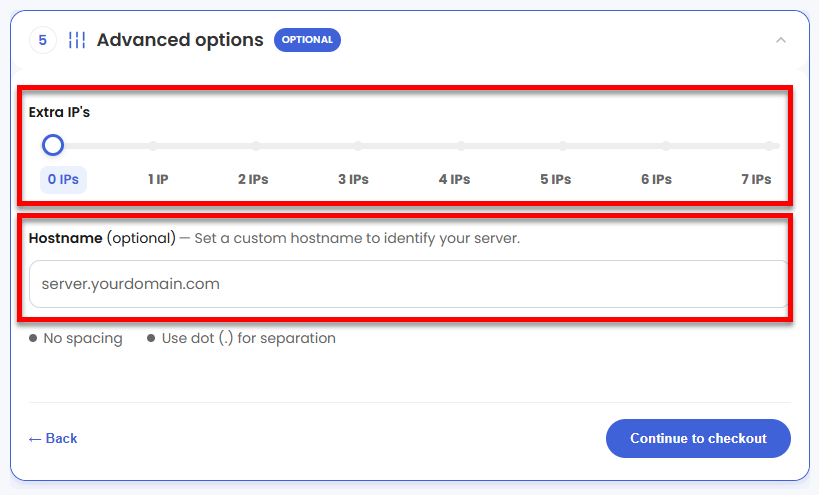
- Advanced Options:
- Extra IP's: You can add IP addresses for an additional fee. Pricing changes based on how many IPs you add.
- Hostname: Assign a custom hostname to identify your server. This is optional.
- Location: Select your data center in this section.
- Select your billing term and review your selected items on the right pane, along with the summarized total cost.
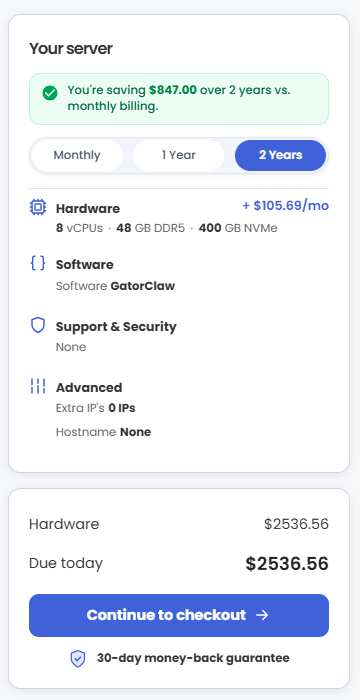
- Click Continue to checkout.
- Do the following on the Checkout page:
If you're new to Bluehost:- Create your Bluehost account by using your email address or by connecting with your Google, Apple, or GitHub account — whichever you prefer!

- Select your preferred payment method: credit card, Google Pay, or PayPal. Enter your billing information.

If you have an account with us, you will see your Bluehost login details when you are logged into your Bluehost Portal. If you are not logged in, please click the Log In link.

- Create your Bluehost account by using your email address or by connecting with your Google, Apple, or GitHub account — whichever you prefer!
- In the Shopping Cart, choose your billing term if you did not choose one on the previous page.
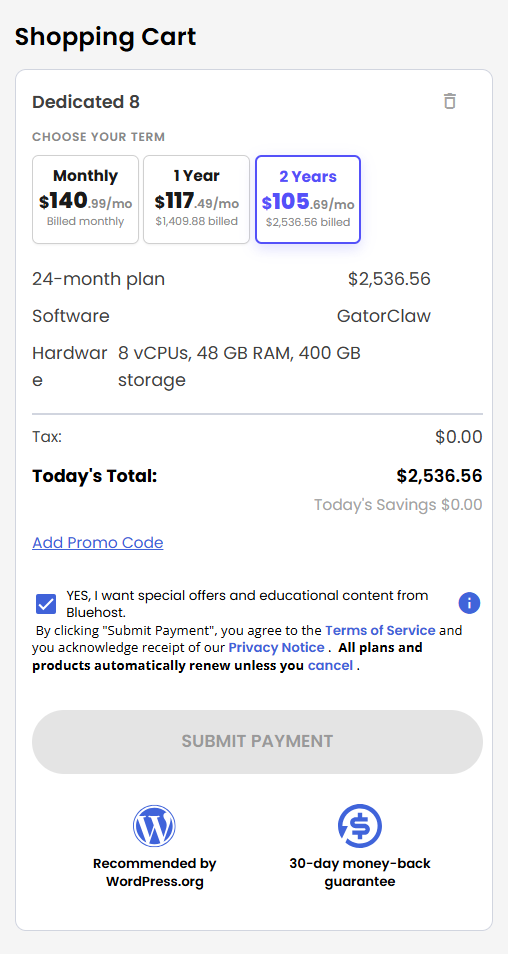
- Add a Promo code if you have one and then click Submit Payment to complete your purchase.
After completing the purchase, your VDS hosting will begin provisioning. You can access and manage your new VDS hosting in the Hosting tab of your Bluehost Portal.
How to Set Up and Manage Your GatorClaw Assistant
Follow this step-by-step guide to complete your initial setup and learn how to manage your new AI digital assistant.
Access the Setup Dashboard
- In your browser, navigate to the initial setup page using your server's IP address:
https://your-server-ip:47716/setupImportant!Make sure you use https:// and include the trailing slash after your panel path.
- Bypass the browser's Security Warning.
GatorClaw uses a temporary self-signed SSL certificate during initial setup. Because of this, your browser may display a security warning. Click Advanced, then Proceed or Continue to bypass it safely.
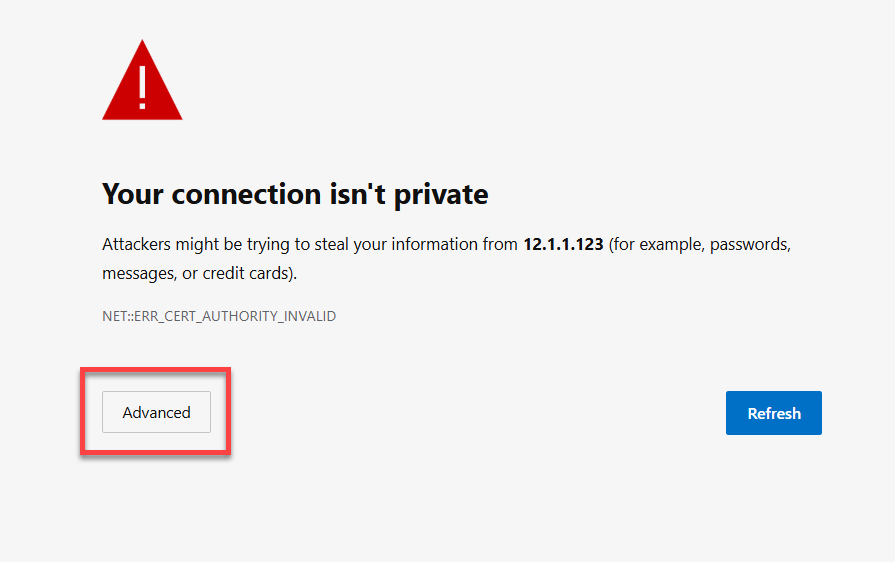
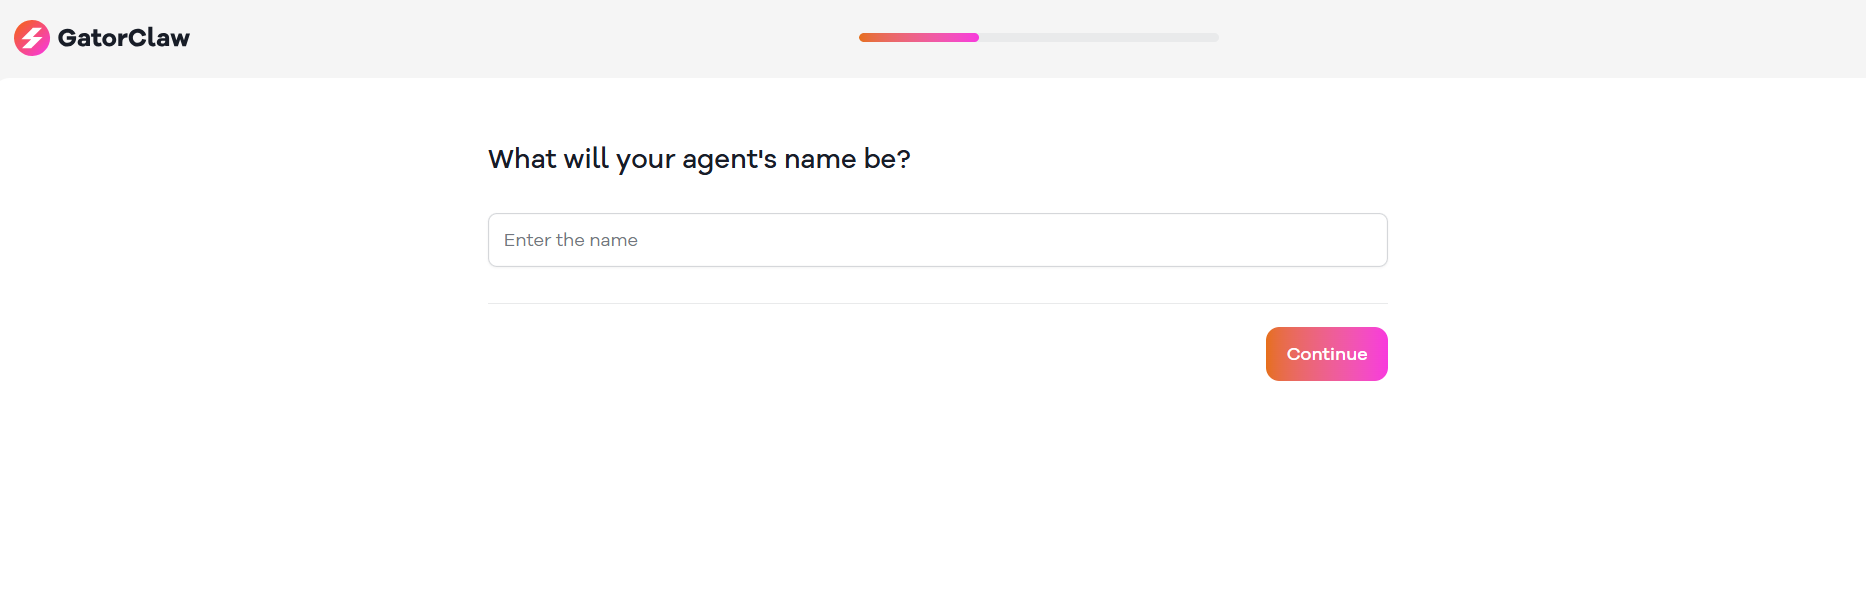
- Once you bypass the warning, you will be redirected to the GatorClaw setup page.
Configure Your Agent
Follow the on-screen prompts in the setup wizard to:
- Connect your preferred AI models.
- Configure your automation workflows.
- Grant permissions required for the agent to execute tasks within your server environment.
Once configured, GatorClaw remains continuously active in the background, ready to assist you.
Verify the Health of the Application
If you want to ensure everything is running perfectly via the command line, SSH into your server (on Port 22) and check the status of GatorClaw.
- Check the GatorClaw application status:
gatorclaw health - Check the process manager status:
GatorClaw uses PM2 to keep its processes continuously active. You can check its running status by executing:
Example Output:pm2 statusroot@server-123456:~# pm2 status ┌────┬────────────────────┬──────────┬──────┬───────────┬──────────┬──────────┐ │ id │ name │ mode │ ↺ │ status │ cpu │ memory │ ├────┼────────────────────┼──────────┼──────┼───────────┼──────────┼──────────┤ │ 0 │ devclaw │ fork │ 0 │ online │ 0% │ 35.1mb │ └────┴────────────────────┴──────────┴──────┴───────────┴──────────┴──────────┘ root@server-123456:~#
Additional Operational Commands
If you need to inspect or manage application data directly, all core GatorClaw files are stored in:
/opt/gatorclaw
To monitor system activity, review logs, or restart services, connect to your server using SSH (port 22) and use the commands below.
- Monitor Live Logs:
View real-time logs and troubleshoot issues:
Example Output:pm2 logs devclawroot@server-123456:~# pm2 logs devclaw [TAILING] Tailing last 15 lines for [devclaw] process (change the value with --lines option) /opt/devclaw/logs/error.log last 15 lines: /opt/devclaw/logs/out.log last 15 lines: 0|devclaw | 2026-05-04T19:39:54: │ Open: http://10.0.2.15:47716/setup │ 0|devclaw | 2026-05-04T19:39:54: ╰──────────────────────────────────────────────╯ 0|devclaw | 2026-05-04T19:39:54: 0|devclaw | 2026-05-04T19:39:54: time=2026-05-04T19:39:54.715Z level=INFO msg="web UI starting" component=webui address=:47716 0|devclaw | 2026-06-25T21:21:19: 0|devclaw | 2026-06-25T21:21:19: ╭──────────────────────────────────────────────╮ 0|devclaw | 2026-06-25T21:21:19: │ 🐊 GatorClaw — First Run Setup │ 0|devclaw | 2026-06-25T21:21:19: │ │ 0|devclaw | 2026-06-25T21:21:19: │ No config.yaml found. │ 0|devclaw | 2026-06-25T21:21:19: │ Starting web setup wizard... │ 0|devclaw | 2026-06-25T21:21:19: │ │ 0|devclaw | 2026-06-25T21:21:19: │ Open: http://12.3.456.789:47716/setup │ 0|devclaw | 2026-06-25T21:21:19: ╰──────────────────────────────────────────────╯ 0|devclaw | 2026-06-25T21:21:19: 0|devclaw | 2026-06-25T21:21:19: time=2026-06-25T21:21:19.272Z level=INFO msg="web UI starting" component=webui address=:47716 - Restart the Agent:
Reboot the background application if you make configuration updates:
Example Output:pm2 restart devclawroot@server-123456:~# pm2 restart devclaw Use --update-env to update environment variables [PM2] Applying action restartProcessId on app [devclaw](ids: [ 0 ]) [PM2] [devclaw](0) ✓ ┌────┬────────────────────┬──────────┬──────┬───────────┬──────────┬──────────┐ │ id │ name │ mode │ ↺ │ status │ cpu │ memory │ ├────┼────────────────────┼──────────┼──────┼───────────┼──────────┼──────────┤ │ 0 │ devclaw │ fork │ 1 │ online │ 0% │ 28.1mb │ └────┴────────────────────┴──────────┴──────┴───────────┴──────────┴──────────┘ root@server-123456:~#
Supporting Information and Sample Output
Run cat /root/README.md to view additional information and useful commands:
cat /root/README.md
Example Output:
Last login: Thu Jun 25 22:57:54 2026 from 123.45.567.890
root@server-123456:~# cat /root/README.md
# GatorClaw

## Description

GatorClaw is an artificial intelligence agent that acts as a digital
assistant.  With it, it is possible to connect artificial intelligence
models, configure automations, and allow the agent to perform tasks
directly in the server environment.  When installed on a VPS,
GatorClaw remains continuously active and can be accessed through a
dashboard, where you can configure the agent, connect services, and
manage automations.

The image prepares `/opt/gatorclaw`, downloads the current release
bundle and installer, runs the non-interactive installation, validates
that the WebUI setup endpoint is reachable, and exposes the default
GatorClaw port.


## Services

Service         | Ports | Purpose
----------------|-------|---------
GatorClaw WebUI | 47716 | Provides a browser based interface to setup and maintain GatorClaw
OpenSSH         | 22    | SSH

Ports are protected using ufw.


## How-to-use

After the instance boots, access the initial setup page at:

`http://server-ip:47716/setup`

Useful operational commands:

* `gatorclaw health`
* `pm2 status`
* `pm2 logs devclaw`
* `pm2 restart devclaw`

Application files are stored under `/opt/gatorclaw`.


## Links

Repository: [`LATAMD/repos/ansible-app-installer/ubuntu/roles/gatorclaw`](https://stash.newfold.com/projects/LATAMD/repos/ansible-app-installer/browse/ubuntu/roles/gatorclaw)

Manage: [http://{server_ip}:47716](http://{server_ip}:47716)root@server-650882:~#
Summary
GatorClaw is a powerful data collection and analysis platform that helps users gather, manage, and visualize information in real time across research, education, and business environments. This guide explains how to purchase Bluehost Virtual Dedicated Server hosting, install GatorClaw, and complete the initial setup. Hosting GatorClaw on Virtual Dedicated Server hosting provides dedicated resources that support reliable performance, improved responsiveness, and consistent operation. The article also covers essential management tasks, including health checks, log monitoring, and service maintenance.