Key highlights
- Learn how to use WordPress, the most popular content management system.
- Discover the difference between WordPress.com, WordPress.org and WordPress VIP.
- Explore themes and plugins to customize your WordPress website easily.
- Follow step-by-step instructions to build a WordPress website from scratch.
- Get practical and easy-to-follow WordPress usage tips specifically tailored for beginners.
- Start your own WordPress website and grow it into a blog, store or business in Bluehost WordPress hosting
Thinking about building a website but not sure where to start? You’re not alone. A lot of beginners feel overwhelmed by the technical stuff: domains, hosting, design and content.
That’s precisely why WordPress exists.
WordPress makes it easy for anyone – even if you’ve never written a line of code – to create a beautiful, professional website. If you want to launch a blog, open an online store or create a portfolio, WordPress has you covered.
In this WordPress beginner guide, we’ll show you how to use WordPress step by step.
From picking the right plan to choosing the perfect theme and adding content, we’ll break it all down. If you’ve been looking for a no-fluff, beginner-friendly WP tutorial for beginners, this is it.
Let’s dive in, and by the end, you’ll be ready to launch your very own WordPress website.
What is WordPress?
WordPress is a free, open-source Content Management System (CMS) that allows you to create and manage websites without any coding knowledge.
It’s used by beginners and professionals alike to build blogs, business sites, portfolios and even full-scale eCommerce websites.
If you’re exploring WordPress basics, there are two main versions of WordPress:
There are two main versions of WordPress:
- WordPress.org: Also known as self-hosted WordPress, it gives you full control. You can choose your own hosting provider, install any WordPress theme or plugin and customize everything.
- WordPress.com: A hosted platform that’s easier to start with but has more limitations, especially for customization and monetization.
WordPress stands out because it’s flexible, beginner-friendly and scalable. According to research by W3Techs, WordPress is used by around 61.2% of websites, making up about 43.5% of all websites overall.
That’s why so many WordPress for beginners resources recommend starting here.
Also read: What is WordPress and What is it Used for?
Choosing a website platform: WordPress.org vs WordPress.com vs WordPress VIP
When you’re ready to build a WordPress website, one of the first decisions you’ll face is which version of WordPress to use. This section of our WordPress guide will help you make an informed choice.
Before you learn how to use WordPress, it’s essential to understand the difference between WordPress.com, WordPress.org and WordPress VIP.
Understanding these differences is key if you’re following a WordPress beginner guide or searching for a solid WP tutorial for beginners.
| Features | WordPress.org | WordPress.com | WordPress VIP |
| Hosting | Requires your own hosting provider | Hosting included | Fully managed enterprise hosting |
| Domain name | Requires purchase | Free subdomain (custom available) | Custom domain with enterprise setup |
| Customization | Full access to themes & plugins | Limited (more with paid plans) | Extensive customization with support |
| Ease of use | Moderate setup, high control | Easiest for beginners | Designed for developers/enterprises |
| Cost | Cost of hosting plan + domain | Free basic, paid upgrades | Premium pricing (custom quote) |
| Ideal for | Bloggers, small businesses, developers | Personal bloggers, hobbyists | High-traffic, large-scale websites |
| Support | Community + hosting provider | Limited (more with upgrades) | Dedicated enterprise support |
While they share the same name, WordPress.org, WordPress.com and WordPress VIP offer very different experiences. All three allow you to build a WordPress website suited to your needs.
Here’s a quick breakdown:
1. WordPress.org (self-hosted)
WordPress.org is best for users who want full control over their WordPress website. It allows you to customize every part of your site.
- Requires a hosting provider and domain name: You’ll need to choose your own web host and purchase a domain name, which gives you ownership and flexibility.
- Full access to themes, plugins and customizations: You can install any WordPress theme, use third-party or custom plugins and even edit the site’s code.
- Ideal for all types of websites: Whether you’re building an eCommerce website, a blog, a portfolio or a business site, WordPress.org gives you room to grow.
2. WordPress.com (hosted)
WordPress.com is excellent for beginners who want an easy and managed way to start a WordPress site. It handles hosting for you.
- Hosting and domain name are included: You can start with a free WordPress.com subdomain or upgrade to use your own custom domain.
- Limited customization unless you upgrade: Free plans come with fewer WordPress themes and no plugin support unless you move to a paid plan.
- Perfect for personal or hobby sites: If you’re creating a simple WordPress blog or want to try blogging without a technical setup, this is a good option.
3. WordPress VIP
WordPress VIP is designed for enterprises and high-traffic websites that need world-class performance and security.
- Fully managed and optimized hosting: It handles everything from performance tuning to automatic updates.
- Comes with premium features and support: Includes built-in security, expert support and scalable infrastructure.
- Used by top companies and publishers: WordPress VIP is trusted by large brands and content management system teams that run global websites.
Which CMS should you choose?
For most users, WordPress.org is the ideal option. It offers the perfect balance of flexibility, control and long-term growth.
What are WordPress themes?
WordPress themes control the design, layout and overall look of your WordPress website. They allow you to quickly change how your site appears without touching any code.
Here’s what you need to know:
- Themes define your site’s style: A theme manages elements like fonts, colors, headers, menus and page structure. Choosing the right theme helps your brand stand out.
- You can choose from thousands of free and premium themes: WordPress offers a huge library of free themes in the official repository. Premium themes often come with advanced features, customization options and dedicated support.
- Most WordPress themes are mobile responsive: That means your site will look great on desktops, tablets and mobile devices, a must for today’s users.
- Installing a theme is simple: From your WordPress dashboard, you can browse, preview and install themes with just a few clicks. You can also upload custom themes if you have one.
- Theme installation can be changed anytime: You’re never locked into one design. You can switch themes or customize them further using the WordPress Customizer or page builder plugins.
Your theme is the starting point for building a polished and professional website with WordPress.
For beginners, it’s a brilliant idea to start with a simple, lightweight theme that’s easy to customize.
Also read: Getting Started with WordPress Themes
What are WordPress plugins?
WordPress plugins are tools that add new features and functionality to your WordPress website without needing to write any code. They’re one of the biggest reasons why WordPress is so flexible and popular.
Here’s what plugins can do for your WordPress site:
- Extend your site’s capabilities: Want to add a contact form, improve security, optimize for search engines or set up an online store? There’s a plugin for that.
- Thousands of free and premium options: The WordPress Plugin Directory has thousands of free plugins and many developers offer premium plugins with advanced tools and support.
- Easy to install: From your WordPress dashboard, you can search for plugins and install and activate them with just a few clicks.
- Must-have plugins for beginners: Some essential plugins include Yoast SEO for optimization, Jetpack for performance and security and WooCommerce for building an eCommerce website.
- Manage plugins easily: You can deactivate or delete plugins at any time, giving you full control over your site’s performance and design.
If you’re learning how to use WordPress, installing the right plugins is a simple way to enhance your site. They give your visitors a better experience without needing a web developer.
These WordPress usage tips will help WordPress beginners pick plugins that are highly important and necessary.
Also read: Installing Plugins
What is WordPress used for?
WordPress is used to create all types of websites: from simple blogs to complex online stores and corporate sites.
Here are the most common ways people use WordPress:
- Blogs and personal websites: WordPress started as a blogging platform, and it’s still a top choice for writing and publishing blog posts or running a full WordPress blog.
- Business websites: Small businesses and freelancers use WordPress to build professional websites that showcase their services, portfolios or brands.
- eCommerce websites: With plugins like WooCommerce, you can turn your WordPress site into a powerful online store, perfect for selling products, managing orders and accepting payments.
- Portfolio and resume sites: Creatives such as photographers, designers and writers often use WordPress to showcase their work beautifully.
- Educational and membership sites: Plugins can be used to build courses, offer memberships or restrict content to logged-in users.
- News and magazine sites: Media companies and publishers use WordPress for its scalable architecture and content management tools.
WordPress is an open-source CMS for creating any site, from landing pages to full eCommerce. You don’t need to hire a web developer to get started.
WordPress for beginners: How to use WordPress?
By now, you’ve seen what WordPress is, what it can do and who’s using it: from small bloggers to major brands like NASA and Sony Music.
If you’re looking for a WordPress for beginners tutorial, this section will walk you through each step.
Think of it as a hands-on WordPress guide where you’ll learn to use WordPress from scratch.
Whether your goal is blogging, selling products or building a portfolio, you’ll also learn WordPress step by step without needing any technical skills.
So the next big question is: how do you actually get started?
In this section, we’ll walk you through the practical steps to create your own WordPress website, no coding or prior experience needed.
No matter if your goal is to start a blog, launch a business website or build an online store. Here’s how to use WordPress in 10 easy steps:
The 10 steps to build a WordPress website
- Define your goals
- Select a WordPress plan
- Choose your domain name and hosting provider
- Install WordPress
- Choose your WordPress website theme
- Install plugins to your WordPress website
- Add posts and pages to your WordPress website
- Publish high-quality content
- Optimize your WordPress website for speed
- Promote your WordPress website
Let’s take a closer look at each step so you can start building your site with confidence.
Step 1: Define your goals
To follow this WordPress beginner guide effectively, it’s important to start by defining clear goals for your site
Are you launching a blog, building an online store, or creating a portfolio? Identifying your purpose early will shape key decisions like theme selection and content layout.
This first step sets the direction for everything that follows.
Ask yourself:
- Are you building a personal blog, a portfolio or a full-scale eCommerce website?
- Do you want to generate leads, showcase your work or sell products online?
- Who is your target audience, and what kind of experience do you want to give them?
Defining your goals helps you:
- Choose the right theme and features
- Decide which plugins you’ll need
- Plan your website pages (like Home, About, Contact or Shop)
- Pick a layout and content style that fits your purpose
Write down your main goal. This will help you stay focused as you complete the rest of the setup process.
Step 2: Select a WordPress plan
Before you build a WordPress website, you’ll need to decide which version of WordPress works best for you.
If you’re going with WordPress.org (self-hosted), you can skip ahead to the next step. You’ll just need to choose a hosting provider and register a domain name. This approach is the best answer for anyone looking for how to use WordPress.org with full freedom.
This option gives you full control over your website, including custom themes, plugins and monetization features.
Below is a breakdown of the available plans on WordPress.com, in case you opt for the hosted option:
- Personal ($4/month): Great for individuals starting out with a simple website. It includes a custom domain, an ad-free experience and access to premium themes.
- Premium ($8/month): Ideal if you want more creative freedom. You get advanced design tools, Google Analytics integration and the ability to upload videos.
- Business ($25/month): Best for growing websites. It unlocks plugin installation, SFTP access and additional tools for customization, performance and SEO.
- Commerce ($45/month): Tailored for eCommerce websites. Along with Business features, you get access to premium store themes, WooCommerce optimization and tools for selling products online.
- Enterprise (custom pricing): Designed for large-scale sites with complex needs. It includes advanced security, scalability and personalized support for high-traffic organizations.
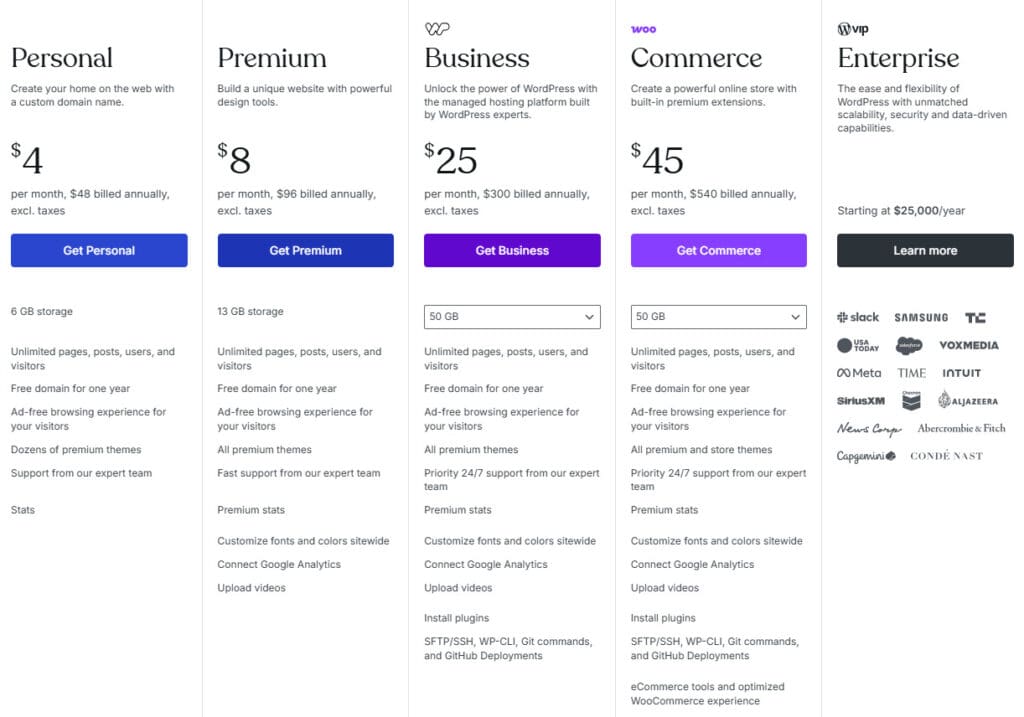
Disclaimer: Prices are subject to change. For the most current details, please refer to the official websites of WordPress.com.
No matter which plan you choose for your WordPress site, make sure it aligns with your long-term goals.
If you’re blogging for fun or building a business, the right plan sets the foundation for your website’s success.
Step 3: Choose your domain name and hosting provider
Every great website starts with a name and a place to live online.
Your domain name gives your site its identity, while your hosting provider ensures it’s fast, secure and always accessible.
Find the perfect domain name for your website
Your domain name is more than just a URL: it’s your digital first impression.
A strong, brandable domain helps people remember you, build trust and come back.
Bluehost makes this process easy for beginners. With our free Domain Name Search Tool, you can quickly discover available domain names that fit your brand, niche or business goals.
Just enter a few keywords and we’ll provide both availability results and creative suggestions.
Here’s what to keep in mind:
- Keep it short, clear and easy to spell
- Use keywords that reflect your business or niche
- Stick to well-known extensions like .com or .net for credibility
- Avoid hyphens, numbers or anything confusing
Just type in a few words, and we’ll show you available domain names, plus creative suggestions you might not have thought of.
You can search by industry, keyword or even get inspiration if your first idea is already taken. And once you find the perfect name, you can register it instantly and connect it to your WordPress website in just a few clicks.
Choose a hosting provider that simplifies WordPress
Now that you have your domain, it’s time to choose your web hosting provider, and not all hosting is created equal.
Bluehost WordPress hosting is built specifically for WordPress users. Being a recommended host by WordPress.org, Bluehost provides reliable and easy-to-use hosting solutions for creating and managing sites.
If you’re a blogger, small business owner or starting your first eCommerce site, our hosting plans make everything simple, secure and scalable.
Here’s what you get with Bluehost WordPress hosting:
- A free domain name for the first year
- One-click WordPress installation, no tech skills required
- A custom WordPress dashboard to manage your site easily
- Automatic updates, malware protection and free SSL for peace of mind
- 24/7 expert support to help you whenever you need it
- Compatibility with top WordPress themes and plugins
We also offer a variety of hosting plans to match your website’s size and needs. This way, you can start small and upgrade anytime as your site grows.
Whether you’re launching a new website or moving from another platform, Bluehost makes it easy to get up and running quickly.
Step 4: Install WordPress
Once you’ve secured your domain name and set up hosting, it’s time to install WordPress: the engine that powers your website.
If you’re looking for a practical way to learn WordPress step by step, Bluehost’s one-click installation makes it simple.
This is also the easiest path if you’ve been searching for clear instructions on how to install WordPress on Bluehost.
The good news? With Bluehost, it’s incredibly easy.
One-click WordPress installation (Bluehost makes it simple)
If you’ve chosen Bluehost WordPress hosting, you don’t have to worry about downloading or configuring anything manually.
As soon as you log into your hosting account, you’ll be guided through a one-click WordPress installation process.
Here’s how to install WordPress with Bluehost:
- Log in to your Bluehost Account Manager.
- Navigate to the ‘Hosting’ tab from the left menu.
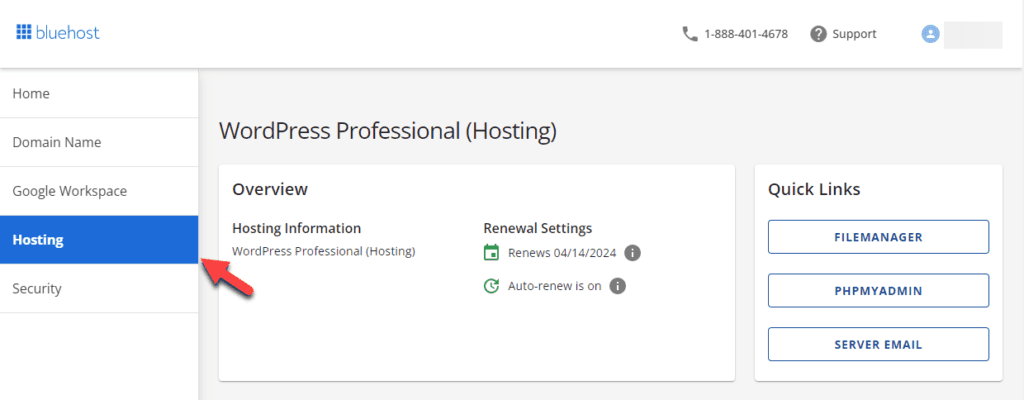
- Click on ‘Add Site’ to begin the WordPress installation.
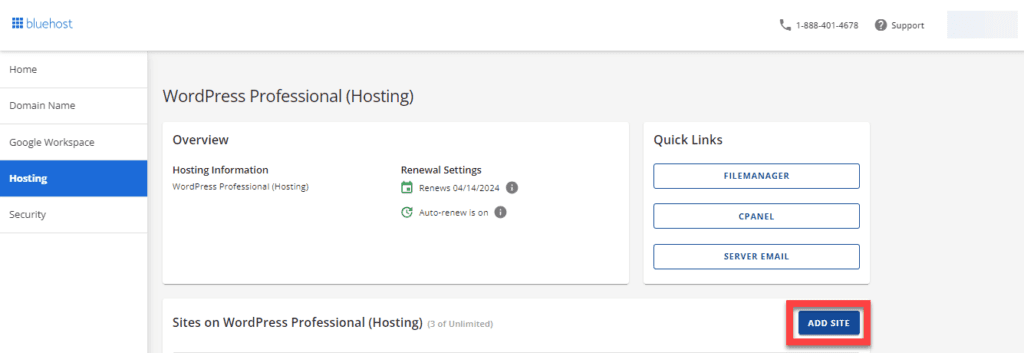
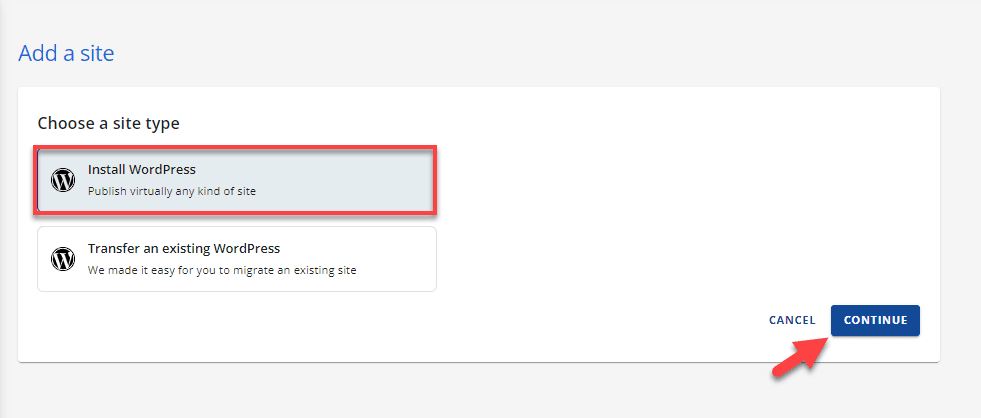
- Now, select ‘Install WordPress’ and press ‘Continue’.
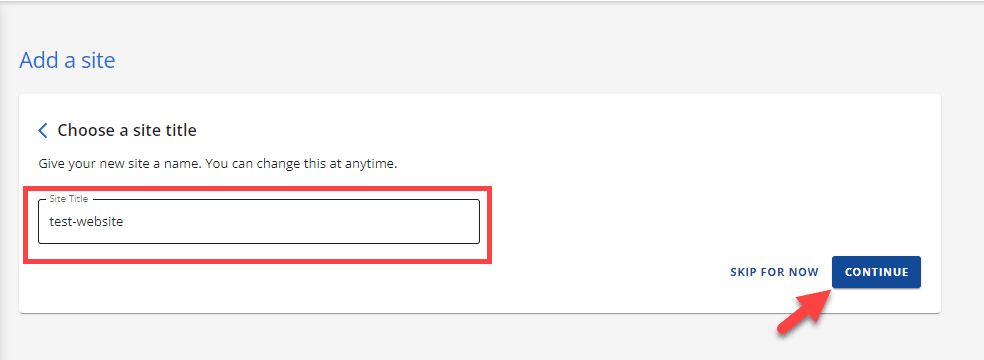
- Enter your website’s name in the ‘Site Title’ field. If unsure, you can choose ‘Skip for Now’.
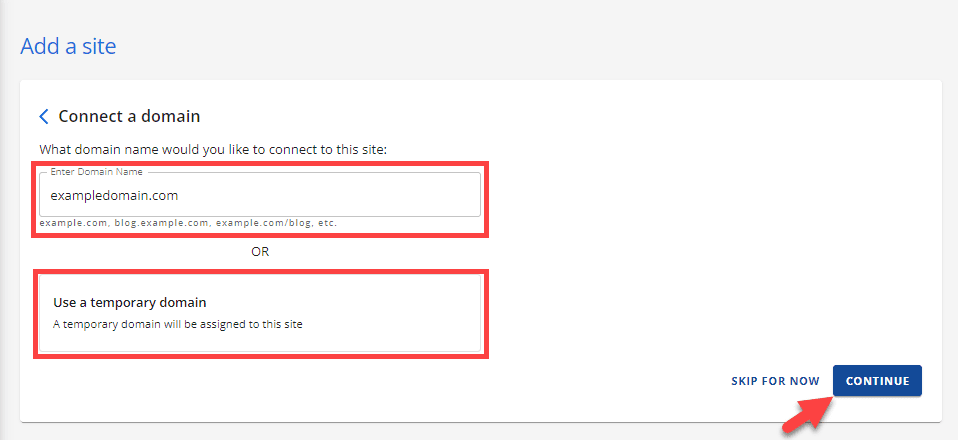
- Provide your domain name or choose a temporary domain. Click ‘Continue’ to proceed.
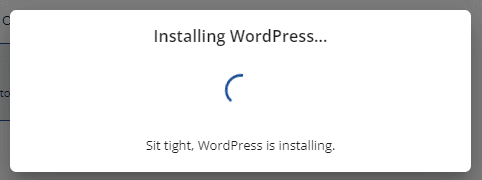
- Wait for installation to complete, which may take a few minutes.
- Access your WordPress dashboard by clicking ‘Log into WordPress’.
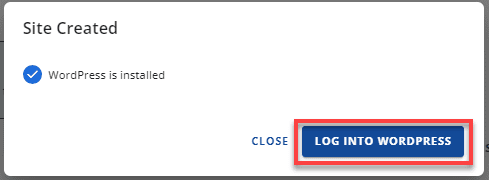
That’s it! You’ll now have access to your WordPress dashboard, where you can start customizing your site, uploading content and installing themes and plugins.
Step 5: Choose your WordPress website theme
Choosing the right theme is critical when you build a WordPress website.
Your theme controls the design, layout and overall look and feel of your website.
Here’s what to consider when picking a theme:
- Style and purpose: Select a theme that fits your website’s goals, whether it’s a blog, portfolio, business site or eCommerce website. Themes vary widely in design and features, so choose one that matches your brand.
- Responsiveness: Most visitors use mobile devices today, so your theme must be mobile-friendly and look great on all screen sizes.
- Customization options: Look for themes that let you easily change colors, fonts and layouts without needing to code. Many themes work with the WordPress Customizer or drag-and-drop page builders.
- Performance: A lightweight, well-coded theme helps your site load faster and improves user experience and search engine optimization.
- Compatibility: Ensure the theme supports popular plugins you plan to use, like SEO tools, contact forms or WooCommerce for selling online.
How to install a WordPress theme?
- Go to ‘Appearance’ > ‘Themes’ in the admin dashboard.
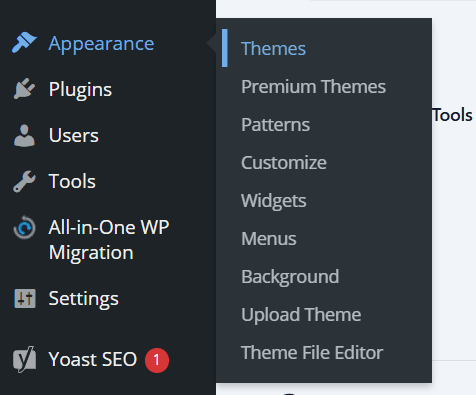
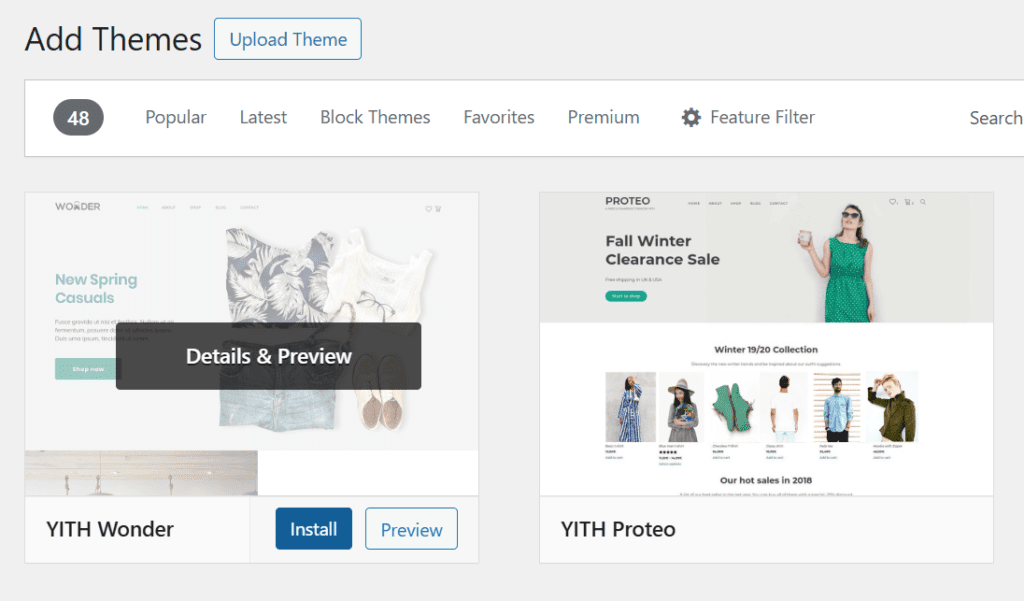
- Click ‘Add New Theme’ to browse through available themes.
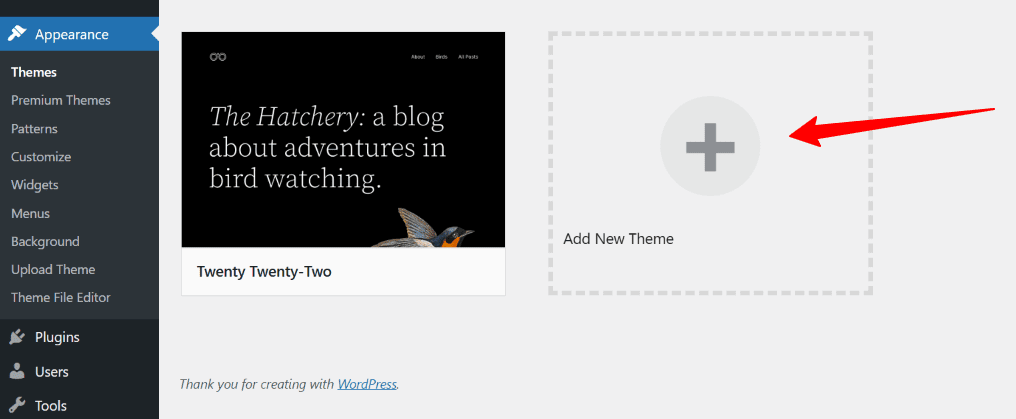
- Choose the theme that fits your brand, click ‘Install’, then ‘Activate’.
Pro tip: Start with lightweight, beginner-friendly themes to ensure faster loading speeds and easier customization.
Step 6: Install plugins on your WordPress website
Plugins add powerful features to your website, letting you customize functionality without coding.
Here’s what to consider when picking a plugin:
- Purpose and functionality: Choose plugins that solve specific needs, like SEO, security or adding contact forms. Avoid installing plugins that overlap or add unnecessary bloat.
- Compatibility: Make sure the plugin works well with your WordPress version and your chosen theme.
- Reviews and ratings: Look for plugins with high ratings and positive reviews from the WordPress community.
- Support and updates: Opt for plugins that are regularly updated and supported by their developers.
- Performance impact: Some plugins can slow down your site, so pick lightweight plugins whenever possible.
How to install a plugin?
- Navigate to ‘Plugins’ > ‘Add New Plugin’.
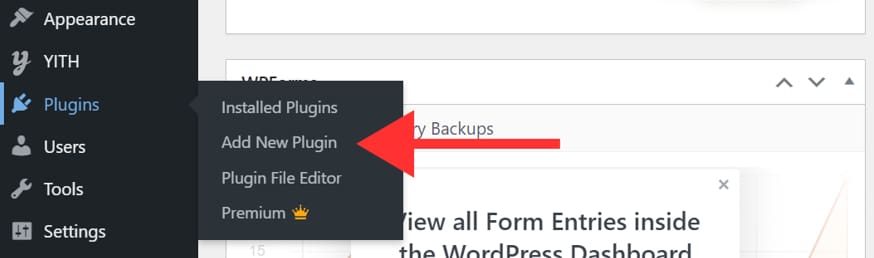
- Search for the plugin you want, click ‘Install Now’, then ‘Activate’.
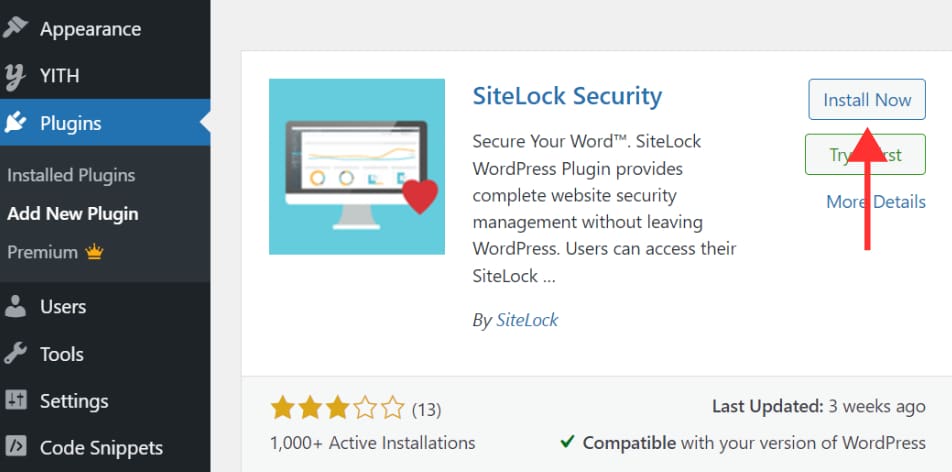
- Some essential plugins for beginners include SiteLock for security and Yoast SEO for optimizing for search engines.
Pro tip: Only install plugins critical to keep your website running smoothly and avoid conflicts.
Also read: How to use Yoast WordPress SEO Plugin
Step 7: Add posts and pages to your WordPress website
Content is the heart of your website, and adding posts and pages is how you share your message with the world.
Here’s what to know about posts and pages:
- Posts are timely entries, typically used for blog updates, news or articles. They appear in reverse chronological order and are great for content that changes regularly.
- Pages are static and timeless, ideal for essential site sections like About, Contact or Services.
Here are the key pages to include:
- Home page: The first thing visitors see when they land on your site. Make it welcoming and informative.
- About page: Share your story, mission or what your business is all about.
- Contact page: Provide ways for visitors to get in touch, such as a contact form, phone number or email address.
- Privacy policy: Explain how you collect and protect user data to comply with regulations.
- Product or service pages: Highlight your offerings with clear descriptions, images and pricing.
- Thank you page: Acknowledge visitors after they complete an action, like a purchase or sign-up.
- FAQ page: Address common questions to help users and reduce support requests.
- Terms and conditions: Outline the rules and legal agreements for using your site.
How to create a new page?
- Go to ‘Pages’ > ‘Add New Page’ in the admin dashboard.

- On the new page, enter your page title and content.
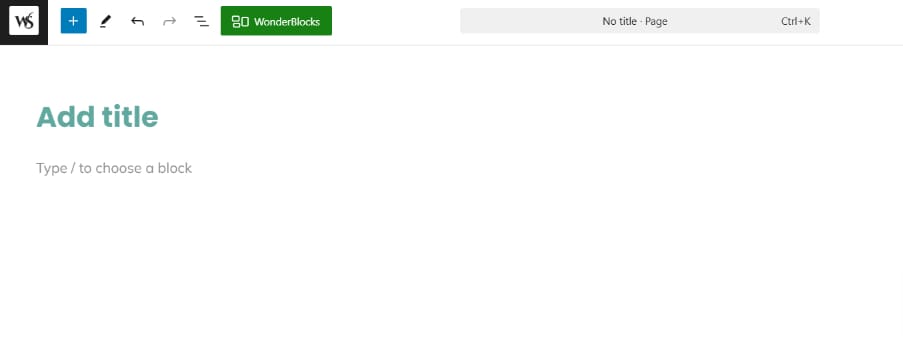
- With Bluehost web hosting plans, you get an additional ‘WonderBlocks’ feature. It comes with pre-built templates and patterns that make it easy to start creating a new page.
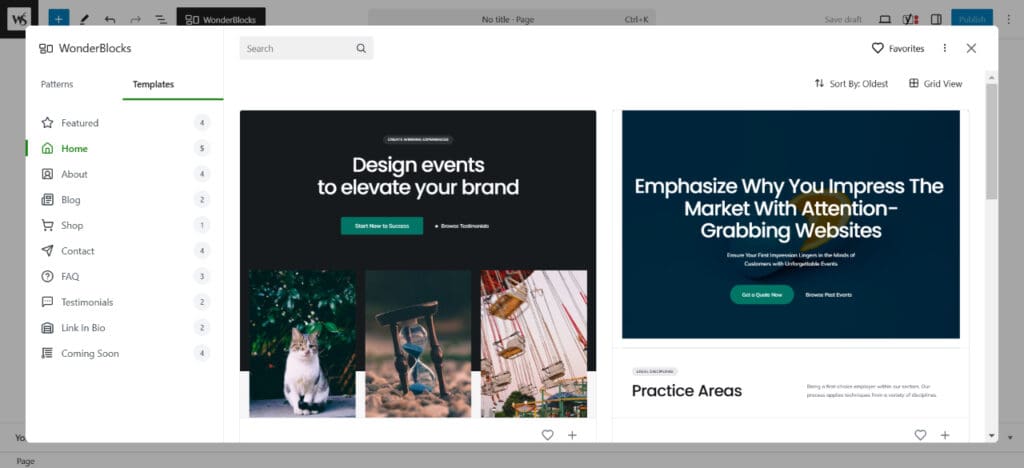
- To use any template, click on the plus (+) button. Now, you can customize every aspect of this layout to give it a personalized touch.
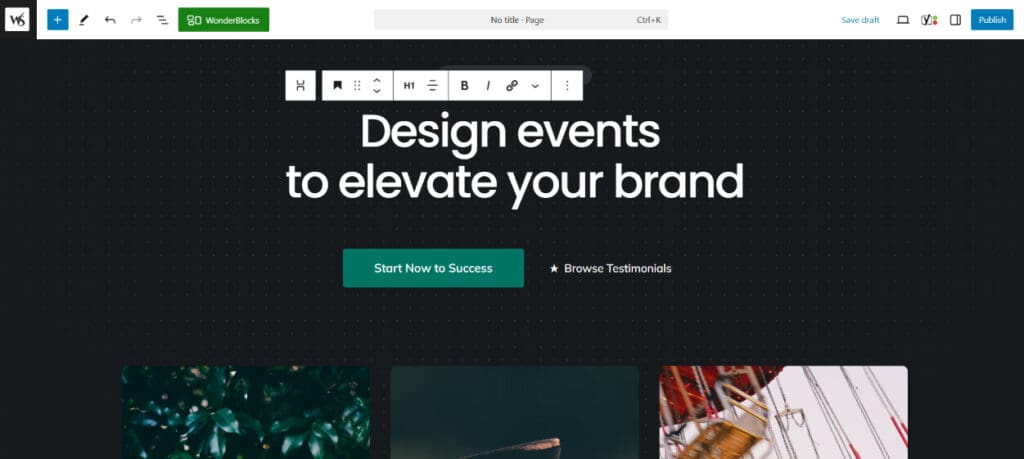
- Once you are done editing, click ‘Publish’ to make the page live.

Pro tip: Consistent content creation helps attract visitors and improve your site’s search engine optimization.
Step 8: Publish high-quality content
Creating and publishing high-quality content is essential for attracting visitors and keeping them engaged on your website.
Whether you’re running a blog page, business site or online store, valuable content helps build trust and improve your search engine rankings.
Here’s what to focus on when publishing content:
- Understand your audience: Create content that answers their questions, solves problems or entertains them.
- Use clear and concise language: Keep sentences short and easy to read, especially if you’re targeting beginners.
- Incorporate your keywords naturally: Use your primary keyword like ‘how to use WordPress’ and relevant terms from your niche without stuffing.
- Mix different content types: Use blog posts, videos, images and infographics to make your site engaging.
- Optimize for SEO: Use tools like Yoast SEO to help improve your content’s visibility on search engines.
- Regularly update your site: Fresh content encourages visitors to return and helps your site rank better.
How to publish a new post on WordPress?
- Go to ‘Posts’ > ‘Add New Post’ in your WordPress dashboard.

- Enter your blog title and content.
- Add images or videos and format your post using the editor.
- Once satisfied, click ‘Publish’ to make your post live.
Pro tip: Consistency is key. Aim to publish regularly to build an engaged audience and improve your site’s performance.
Also read: How to Write and Publish Your First Blog Post in 10 Steps
Step 9: Optimize your WordPress website for speed
Understanding the importance of speed is important when you build a WordPress website.
A fast-loading website provides a better experience for your visitors and improves your search engine rankings. Slow sites can frustrate users and increase bounce rates, so optimizing your WordPress site’s speed is crucial.
Here are some practical ways to boost your website’s performance:
- Choose a lightweight theme: Start with a fast, well-coded theme that doesn’t overload your site with unnecessary features.
- Use caching plugins: Plugins like WP Super Cache or W3 Total Cache can speed up your site by storing static versions of your pages.
- Optimize images: Compress images before uploading to reduce file size without losing quality.
- Enable a Content Delivery Network (CDN): A CDN distributes your content across global servers, so visitors load your site from the nearest location.
- Limit plugins: Only keep essential plugins active to avoid slowing down your site.
- Use reliable hosting: A good hosting service, and a hosting provider like Bluehost, offers fast servers optimized for performance.
Pro tip: Regularly test your site speed using tools like Google PageSpeed Insights and make adjustments accordingly.
Step 10: Promote your WordPress website
Building your website is just the beginning, promoting it is key to attracting visitors and growing your online presence.
Here are some practical ways to promote your site:
- Leverage social media: Share your blog posts and updates on platforms like Facebook, Instagram and X (formerly Twitter) to reach a wider audience.
- Optimize for search engines: Use SEO best practices and plugins like Yoast SEO to improve your site’s visibility on Google and other search engines.
- Engage with your audience: Encourage comments, respond to questions and build a community around your content.
- Use email marketing: Collect visitor emails and send newsletters to keep your audience informed and engaged.
- Run paid ads: Consider Google Ads or social media advertising to drive targeted traffic quickly.
- Collaborate and guest post: Partner with other bloggers or websites in your niche to expand your reach.
Pro tip: Consistent promotion combined with regular high-quality content can dramatically increase your website traffic and help your site succeed.
Also read: How to Fix WordPress Not Sending Emails
What websites use WordPress?
WordPress is trusted by individuals, organizations and global brands alike.
Here are three notable examples of well-known websites built using WordPress:
1. Sony Music
One of the world’s largest music entertainment companies, Sony Music, uses WordPress to showcase artists, new releases and multimedia content.
Their site highlights how brands can use WordPress for sleek design and powerful content delivery.
2. NASA
The National Aeronautics and Space Administration (NASA) uses WordPress to publish research updates, mission news and educational resources.
It’s a great example of how a government-backed, high-traffic organization can use WordPress for effective public outreach.
3. The Walt Disney Company
The Walt Disney corporate site runs on WordPress to share press releases, company news and leadership information.
This proves that even iconic brands rely on WordPress for professional content management.
These examples show just how flexible and capable websites can be: whether you’re a solo blogger or a global organization.
WordPress website tips and tricks
Once you build a website, maintaining and optimizing it is key to success.
Managing a website with WordPress means more than publishing content, it involves smart choices and regular care.
Whether you’re new to WordPress or have some experience, these WordPress usage tips under our WordPress beginner guide will help you grow your site.
Here are 10 essential tips every beginner should follow:
- Follow official WordPress tutorials: Use trusted WordPress tutorials to learn how to install WordPress and customize your site.
- Keep WordPress software updated: Regularly update your WordPress software and WordPress files to keep your site secure and running smoothly.
- Explore the WordPress admin area: Learn to use the WordPress admin area to manage content, plugins and settings effectively.
- Look at different WordPress websites for ideas: Check out different WordPress site examples to inspire your own design and features.
- Start with free WordPress themes: Begin with a free WordPress theme to get comfortable before moving to premium options.
- Install WordPress directly with Bluehost: Use Bluehost to install WordPress directly with one click, making setup easy and fast.
- Use WordPress as a content management system: WordPress is a top content management system that powers millions of websites worldwide.
- Optimize site speed and performance: Choose lightweight themes and only essential plugins to keep your site fast.
- Back up your WordPress files regularly: Always back up your WordPress files and database to avoid data loss.
- Join the WordPress community: Engage in forums and groups to learn from others and stay updated on best practices.
By following these tips, you’ll keep your site running smoothly and set yourself up for long-term success.
Final thoughts
Building your own website and learning how to use WordPress is easier than you think with the right guidance and tools.
This entire blog is meant as a WordPress guide for anyone who wants to learn WordPress step by step. From themes to plugins to hosting, the process is structured so you can move forward with confidence.
From choosing your domain and hosting to picking themes and plugins, WordPress gives you the flexibility to create a site that grows with you.
To get started confidently, Bluehost offers WordPress hosting optimized for speed and ease, with one-click installation and a free domain for the first year. You’ll also have access to 24/7 expert support whenever you need it.
For anyone looking for a straightforward WP tutorial for beginners, Bluehost WordPress hosting and resources make launching your site easier than ever. If you’ve been wondering how to make a website, Bluehost is here for you.
Launch your WordPress site today with Bluehost and experience hosting made simple.
Get started with Bluehost WordPress hosting!
FAQs
WordPress is the most popular CMS for building websites without coding. It’s designed for beginners who want to learn how to use WordPress with ease. You can use it for blogs, online stores or business sites. Once installed, you log in, customize your theme, add plugins and start creating pages or posts. It covers all the WordPress basics you need to manage your site effectively.
To set up your first website, start by choosing hosting. The easiest way is to install WordPress on Bluehost with one click. Then, pick a theme, add essential plugins and create your first pages like Home, About and Contact. A simple step by step guide helps you go from setup to launch smoothly.
Here’s a quick WordPress tutorial to get started:
1. Log in to your WordPress admin dashboard.
2. Choose a theme.
3. Install plugins for extra features.
4. Add posts or pages.
5. Click the publish button at the top right corner to go live.
Once live, you can visit your site to preview changes instantly. This step by step guide works for blogs, portfolios and online shops.
The WordPress admin dashboard is where you control everything. On the left, you’ll see menus for posts, pages, tags and categories. The top right corner gives quick access to settings and your profile. Use the editor to add or edit content, then hit the publish button when ready. If you make an error, WordPress lets you edit or update instantly.
You can find a detailed WordPress tutorial on the official WordPress site or on hosting providers like Bluehost. These tutorials include text and video tutorials for better clarity. They cover how to make a website, manage plugins and optimize themes. Bookmark them as a note for easy reference.
Yes, WordPress is easy to use even if you’re new. It has a simple editor, a clear publish button and options for tags and categories. Beginners can quickly create time sensitive content like blog posts, add media and update pages. With basics like themes and plugins, you can manage different purposes without coding.
No, WordPress is not hard to learn. Once you get familiar with the WordPress admin dashboard and follow a beginner-friendly WordPress tutorial, it becomes straightforward. Features like the visual editor, plugins and themes are designed for ease of use. Most users can start building their first website in just a few hours.
Yes, WordPress software is free to download and use. The only cost is for hosting and a domain name. Some premium themes or plugins may add extra cost, depending on your needs.
The easiest way is with Bluehost’s one-click installer. Log in, select your domain and choose “Install WordPress.” Wait for the installation to complete, then click ‘LOG INTO WORDPRESS’ to start configuring your site.

Write A Comment