Key highlights
- Learn how to migrate from WooCommerce to Shopify to improve performance, simplify management and scale your online store faster.
- Discover tools like the Shopify Store Importer, Matrixify or Cart2Cart for structured and efficient data transfer during your Shopify migration.
- Understand how to avoid import errors by downloading export files carefully and tracking your generated file formats (especially CSV or Excel).
- Master choosing specific customers, orders or product data to migrate from your WooCommerce to Shopify. Many tools let you filter or list multiple statuses separately.
- Explore how to maintain SEO-friendly links by monitoring URL attributes and additional URL parameters during the WooCommerce to Shopify process.
- Know how to connect Shopify with third-party tools like Matrixify by generating API key credentials or a Shopify API key.
If you’re reading this, chances are your WooCommerce store is starting to feel more like a burden than a solution.
Maybe it’s the endless plugin updates or the tech headaches that come with maintaining your site daily. You might’ve started with WooCommerce because it was flexible and familiar, but now you’re craving simplicity and growth.
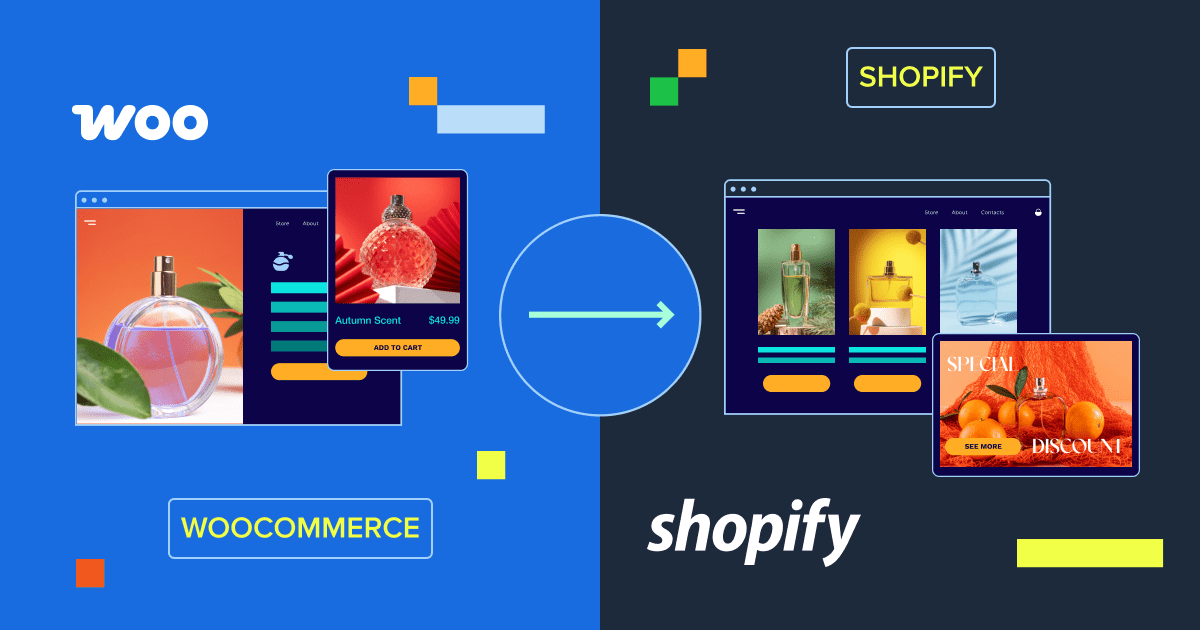
That’s where Shopify comes in. Known for its simplicity and scalability, Shopify lets you focus on running your business, not troubleshooting your site.
Switching from WooCommerce to Shopify might seem daunting, but you’re not alone. This guide breaks down each step to help you migrate your WooCommerce store to Shopify quickly and safely – without the tech stress.
Why switch from WooCommerce to Shopify?
Before you begin exploring how to migrate from WooCommerce to Shopify, it’s important to understand how the two platforms differ.
Each offers unique strengths, but Shopify often wins when it comes to ease, automation and smoothly scaling your business. If you’re considering switching from WooCommerce to Shopify, here’s why:
- Ease of use: Shopify is built for ease. Its dashboard is intuitive and the setup process is quick, even for beginners. WooCommerce is more flexible, but it requires you to manage plugins, themes and technical tasks manually.
- Hosting and maintenance: Shopify is fully hosted, meaning it handles security, updates and backups in the background. With WooCommerce, you’re responsible for hosting, server management and regular site maintenance – either on your own or via a provider.
- Scalability and features: Shopify’s app store offers seamless integrations for marketing, inventory, payments and customer support. WooCommerce offers extensive customization, but it depends on third-party plugins that often need frequent updates and checks.
- Performance and reliability: Shopify’s cloud-based platform ensures fast loading speeds and high reliability during traffic spikes. WooCommerce’s performance depends on your hosting provider, which can impact speed and uptime during peak times.
Also read: Shopify Pros and Cons: A Beginner-Friendly eCommerce Platform
WooCommerce vs Shopify: Key differences
If you’re still weighing your options, this quick breakdown of Shopify vs WooCommerce will help clarify which platform fits your business needs better.
| Feature | WooCommerce | Shopify |
| Ease of use | Requires manual setup, plugin/theme management | Beginner-friendly with an intuitive dashboard |
| Hosting & maintenance | Self-hosted, you manage hosting, security & updates | Fully hosted – automatic updates, backups & security |
| Scalability | Flexible but plugin-dependent for advanced features | Scales effortlessly with built-in tools and app support |
| Speed & performance | Depends on your hosting provider and server configuration | Optimized cloud infrastructure for faster load times |
| App integrations | Plugin-based; requires individual updates | Unified app store with thousands of integrations |
While WooCommerce offers flexibility through plugins and custom development, it requires more manual effort to manage and maintain. Shopify, on the other hand, simplifies store management with a fully hosted and intuitive platform.
Also read: WooCommerce vs. Shopify: Which eCommerce Solution Is Right for You
WooCommerce to Shopify pre-migration checklist
Before you begin the migration process, it’s important to prepare your WooCommerce store for a seamless transition.
Here’s a quick checklist to follow before moving your WooCommerce store to Shopify:
- Backup your WooCommerce store
- Evaluate your current store setup
- Choose the right Shopify plan
Having a strong foundation makes switching from WooCommerce to Shopify less stressful and ensures that when you import products from WooCommerce to Shopify, nothing important slips through.
1. Backup your WooCommerce store
First things first – back up your entire WooCommerce store. This includes products, customers, orders and content.
You can use plugins like UpdraftPlus, Jetpack Backup or BlogVault to create full-site backups easily.
But if you’re a Bluehost user, then you can access automatic backups through your control panel.
Having a backup means peace of mind in case anything goes wrong during your WooCommerce to Shopify migration
2. Evaluate your current store setup
Take stock of everything running on your WooCommerce site – products, themes, payment gateways and key plugins.
Are you using WooCommerce Subscriptions, Product Add-Ons or Advanced Custom Fields? Make a list.
This helps identify what you need to replicate in your new Shopify store. Also, what you might want to simplify or replace when you migrate products from WooCommerce to Shopify.
3. Choose the right Shopify plan
Shopify offers several plans, from Basic to Advanced, depending on your store’s size and features.
If you need reports, multiple staff accounts or lower payment fees, consider a higher-tier plan from the start.
Not sure which Shopify plan is best? Use their free trial to explore features like staff accounts, advanced reports or international selling options—then upgrade as your store grows.
Step-by-step guide to migrating from WooCommerce to Shopify
Migrating may sound daunting, but step-by-step guidance makes it simple to migrate products from WooCommerce to Shopify.
Here’s a complete step-by-step breakdown for your WooCommerce to Shopify migration:
1. Setting up your Shopify store
With your WooCommerce store prepped, it’s time to build your new Shopify store. Here’s a complete step-by-step breakdown for your WooCommerce to Shopify migration:
Create a Shopify account
If you haven’t already, create an account on Shopify.com. Shopify offers a 3-day free trial, giving you time to explore its features.

- Enter your email, password and desired store name.
- Shopify will generate a URL like [yourstorename]. [myshopify].[com]..

- Once signed up, you’ll be redirected to the Shopify admin dashboard.
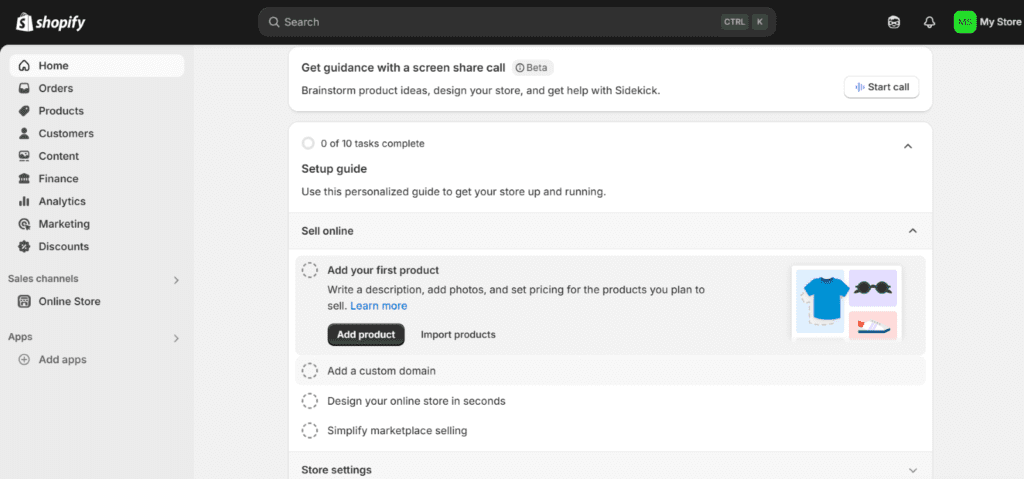
- Set up Shopify Payments or integrate PayPal, Stripe or other gateways.
- Define shipping methods based on regions, rates and carriers.
Once your basic setup is complete, it’s time to move your WooCommerce shop data to Shopify.
2. Export data from WooCommerce
Before importing to Shopify, you need to download your existing WooCommerce store data. When exporting your store data, ensure that your product and category links are preserved.
2.1 Export product data
- Go to your ‘WordPress dashboard’ > ‘Tools’ > ‘Export’.

- Select the options from the given list.

- Click ‘Download Export File’.

2.2 Export customers and orders
- Navigate to ‘Tools’> ‘Export’.
- Choose to export customer or order data and download the respective CSV files.
- For more control, use plugins like ‘Customer/Order CSV Export’, ‘WP All Export’ or ‘Advanced Order Export For WooCommerce’. These plugins can also help you prepare data for import using the WooCommerce API.
2.3 Export other content
- Use the built-in ‘WordPress Export Tool’ (‘Tools’ > ‘Export’) to download blog posts, pages or other site content you want to move.
- This is helpful if your site has a blog or custom pages that need to be recreated on Shopify.
- Make sure to keep all CSV files, especially any Matrixify-generated excel file, organized in a folder for easy upload later.
3. Understand your migration options
Before you import products from WooCommerce to Shopify, choose a migration method. This should fit your store size and comfort level.
3.1 Manual migration
- Suitable for small stores with limited products and no complex structure.
- You’ll upload CSV files manually into Shopify.
- Best if you want full control and have time to check everything, especially if you’re handling WooCommerce shop data yourself.
3.2 Shopify’s store importer app (Free)
- Works for standard WooCommerce stores
- Allows quick import of products, customers and orders
- Located in your ‘Shopify Admin’ → ‘Apps’ → ‘Store Importer’
3.3 Third-party migration tools
- Ideal for larger stores or advanced needs
- Apps like Cart2Cart, LitExtension or Matrixify allow:
- Selecting only specific data entities
- Scheduling imports
- Migrating reviews, images, product categories, etc.
- Using WooCommerce API credentials for real-time syncing
4. Importing data into Shopify
Once your WooCommerce data is ready, follow these steps to bring it into Shopify. This is when you migrate products from WooCommerce to Shopify.
Option A: Using Shopify’s store importer
- From Shopify Admin, go to ‘Apps’ > ‘Store Importer’
- Select ‘WooCommerce’ as your source platform
- Click ‘Add file’ and upload your exported product, customer and order CSVs
- Click ‘Continue Import’
- Review the preview and click ‘Start import’
Option B: Manual CSV upload
Import product data
- Go to ‘Products’ > ‘Import’
- Click ‘Add File’, then upload your CSV
- Click ‘Continue’ > ‘Import Products’
Import customer data
- Go to ‘Customers’ > ‘Import Customers’
- Upload your WooCommerce customer CSV file
Import orders
- Orders cannot be imported manually
- Use Matrixify or similar apps to import orders with status, date and customer info.
Option C: Use a third-party app
- Install ‘Cart2Cart’ from the ‘Shopify App Store’.
- Launch the wizard and select ‘WooCommerce’ as the source cart
- Enter your WooCommerce store URL and generate API credentials such as customer key
- Choose data types to migrate: Products, customers, orders, reviews, categories
- Map fields if needed and start the migration
Now that your WooCommerce data has been successfully moved into Shopify, your products, customers and orders are all in place. It’s time to bring your store to life.
5. Design your Shopify store
WooCommerce themes aren’t compatible with Shopify, so designing your Shopify store from scratch is a key part of your eCommerce platform switch. Here’s how to do it:
5.1 Choose a Shopify theme
- Explore the Shopify Theme Store to choose from 100+ free and paid themes tailored for different industries and store sizes.
- Use Shopify’s preview tool to see how the theme looks with product images and menus.
- Once you’ve found a theme that fits your brand, click ‘Add’ to install it and then begin customizing.
5.2 Add branding elements
- Upload your logo in the header area to create a recognizable storefront.
- If you’re rebranding your WooCommerce store, update your color palette, fonts and buttons to maintain or modernize your visual identity.
5.3 Customize page layouts
- Use Shopify’s drag-and-drop theme editor to personalize your homepage and product pages.
- Add banners, featured collections, customer testimonials and promotional sections.
- You can also edit the collection body HTML code to fine-tune how your product groups are displayed or styled on collection pages.
- Make sure your layout looks great on both desktop and mobile for the best shopping experience.
Post-migration considerations
Once your Shopify store is set up and data is in place, you’ll want to tie up loose ends and prepare for a smooth launch. That includes redirecting URLs, running final tests and making sure your customer experience is flawless from day one.
Redirecting URLs
301 redirects are critical for SEO during a platform migration. According to Moz, websites that fail to implement proper redirects during a migration may experience a 30–50% drop in organic traffic after launch. This happens because search engines and visitors trying to access your old URLs will encounter broken links or 404 errors. This can severely impact your site’s authority, ranking and user experience.
When moving from WooCommerce to Shopify, remember that each platform uses different URL structures. If your old product or collection links change after the migration, users who visited bookmarked pages may not reach the intended content. They may land on 404 error pages. This can negatively impact both user experience and search engine ranking.
Here’s how to fix that:
- Step 1: Identify important URLs on your WooCommerce store
- Step 2: Match URLs with their new Shopify versions
- Step 3: Set up 301 redirects in Shopify
- Step 4: Submit your new sitemap to Google
Also read: Easy Ways to Redirect a Website URL in WordPress
Testing and launching your Shopify store
Before making your Shopify store live, it’s important to test everything, like a customer would. You want to catch any bugs, broken links or design issues before your real shoppers do.
Before you go live, test every major function of your store:
- Browse product and collection pages
- Add products to cart and complete a test order
- Check customer registration, email notifications and checkout flow
- Test on desktop and mobile devices
If everything looks good, remove the storefront password in Preferences and officially launch your Shopify store.
Best tools to migrate from WooCommerce to Shopify (Free and paid options)
Migrating from WooCommerce to Shopify doesn’t have to be complicated. While manual methods are possible, they can be time-consuming and prone to error, especially if your store has lots of data or custom features.
These tools help you migrate your eCommerce site efficiently and import products from WooCommerce to Shopify seamlessly. This works whether you’re a solo entrepreneur or managing a large product catalog.
WooCommerce to Shopify migration tools comparison
Before diving into each tool, here’s a quick overview to help you decide what might be best for your store setup:
| Tool | Free or paid | Best for | Key features |
| Shopify Store Importer | Free | Beginners with standard stores | Quick import for products, customers and orders |
| Cart2Cart | Paid | All users, especially large stores | Supports SEO URLs, reviews, scheduled imports |
| LitExtension | Paid | Non-tech users needing post-migration sync | Automates entire process, keeps SEO & metadata intact |
| Matrixify | Freemium | Advanced users or developers | Bulk upload, blogs, redirects, metafields, advanced CSV control |
1. Shopify store importer app (Free)
If your store is relatively simple with standard product listings, customer records and past orders, you don’t need a complex solution.
Key features:
- Free to use
- Supports products, customers and orders
- Easy to access from ‘Shopify Admin’ > ‘Apps’ > ‘Store Importer’
2. Cart2Cart

Cart2Cart is one of the most popular tools for store migration. It supports over 80 eCommerce platforms, including WooCommerce and Shopify and handles all major data types. It even works with the WooCommerce API for live data transfer during your WooCommerce to Shopify migration.
Why it’s valuable:
- Migrate products, categories, orders, reviews, SEO URLs and more
- Preview migrations before executing
- Live chat and ticket support during migration
- No downtime required
3. LitExtension

LitExtension is known for its accuracy, automation and excellent post-migration support. It offers a smooth step-by-step migration wizard, allowing store owners to migrate without touching a line of code.
What makes it useful:
- Migrates data entities, including custom fields and product variations
- Keeps SEO and metadata intact
- Allows post-migration syncing (for stores still making sales during migration)
4. Matrixify app (formerly Excelify)
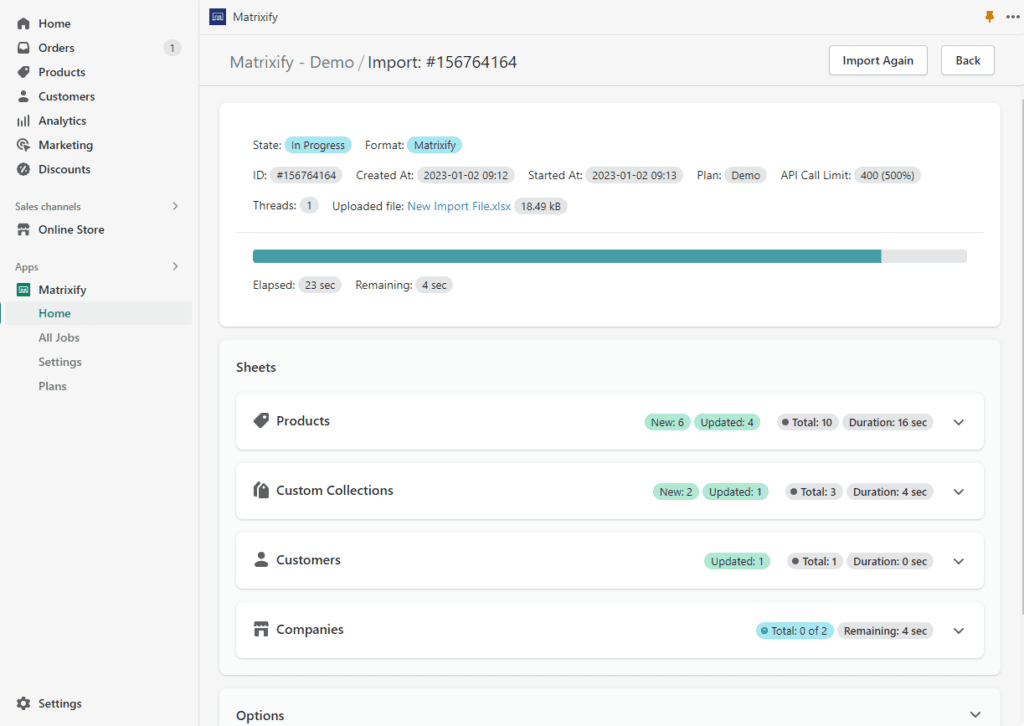
Matrixify is ideal for advanced users or developers who want full control over data migration using CSV files. It handles not just product and customer data but also blog posts, pages, redirects and meta fields. It works seamlessly with Matrixify-generated Excel file exports and supports WooCommerce API connections for custom data pulls.
Highlights:
- Supports bulk data migration and export/import
- Ideal for stores with detailed customization
- Full documentation and support for power users
Pro tip: According to Cart2Cart, over 70,000 stores have successfully migrated using their platform. Shopify recommends tools like Matrixify for bulk data migration and custom object mapping.
How can Bluehost help you during and after data migration?
Whether you’re moving from WooCommerce to Shopify on your own or with professional help, solid hosting and domain support make a major difference.
Bluehost continues to be your migration-ready partner, offering secure backups, email continuity, DNS management and even design help—all while your storefront transitions to Shopify.
Domain + DNS help
Your domain is the digital front door to your store. If it’s registered with Bluehost, connecting it to your new Shopify store is quick and straightforward.
- Log in to your Bluehost dashboard and access your domain settings
- Update DNS records (like A records and CNAME) to point to Shopify’s servers. This ensures your domain works perfectly with your new platform.

Also read: What is DNS Management?
Business email hosting
Shopify doesn’t include built-in email hosting. But with Bluehost, you can continue using your professional email (like [support]@[yourstore]. [com]) without reconfiguration or extra fees, keeping customer communications seamless.
This means:
- No disruption in customer support emails
- No need to switch providers
- Continued access to webmail or email clients like Gmail and Outlook
Whether you’re handling customer service, newsletters or order queries, Bluehost helps keep your communication streamlined and professional.
Pro Design Services
Migrating platforms is the perfect time to reimagine your brand. Whether you want a new store or just a fresh look, Bluehost Pro Design Services can craft a stunning Shopify storefront.
Their team helps ensure your brand identity is reflected through visuals that enhance design, layout and user experience across devices.
Data backup and security before migration
Before you start your WooCommerce to Shopify migration, it is essential to back up your existing WordPress store. This will protect you from accidental data loss during the transition.
Bluehost offers:
- Automatic backup options (available on certain hosting plans)
- Seamless integration with tools like Jetpack
- Manual download options via your control panel
Expert support
Are you unsure how to update DNS records? Do you need help pointing your domain to Shopify? Do you want to create a subdomain for your WordPress blog? The Bluehost support team is available 24/7 via live chat and phone to help with:
- Domain connection and propagation
- SSL setup and HTTPS redirects
- Email troubleshooting or migration
- Hosting configuration and backups
Final thoughts
Making the decision to migrate from WooCommerce to Shopify is a big step, but also a smart one for simplicity.
This guide provides every step you need to make your WooCommerce to Shopify migration a success, from data prep to final launch.
Whether you’re still planning or ready to move your online store, Bluehost gives you the foundation and flexibility to succeed at every stage.
Start your store’s next chapter with expert-backed tools. Migrate from WooCommerce to Shopify confidently with Bluehost today.
FAQs
For small stores, the entire process can be completed in a few hours. Larger sites with complex stores may take 1–3 days, especially if you use an automated tool like Matrixify to migrate from WooCommerce to Shopify.
First, check your file formatting. Missing collection featured images, broken image links listed or mismatched time zones can cause display issues. Tools like Matrixify provide a detailed error log for every generated file to help you correct issues.
Yes. While Shopify doesn’t support direct blog import from WordPress, you can manually copy your content or use apps like BlogFeeder. You may need to export posts using the download export file option from WordPress and recreate them with formatting, image links and combining URL attributes where needed. This ensures your blog remains intact when you switching from WooCommerce to Shopify.
To migrate Woocommerce stores safely, start by backing up your WooCommerce site. Then export your product, order and customer data using CSV files WooCommerce api or migration tools like Matrixify or Cart2Cart. After setting up your Shopify store, you can import the data and customize your design before launching.
The safest way to migrate your eCommerce site is to use a structured tool like Matrixify or Cart2Cart. These tools reduce data loss by importing products, categories, customers and order history accurately.
Your SEO rankings can remain stable if you properly redirect old URLs using 301s, retain meta tags and product descriptions and submit a new sitemap to Google. Use tools like Matrixify to preserve product slugs and Cart2Cart to keep SEO metadata intact.
When you choose to migrate WooCommerce through an automated tool or a WooCommerce plugin, you may need to generate new API credentials, including a consumer key. These ensure secure access, allowing your WooCommerce products and order history to be transferred directly into Shopify.
Yes, you can migrate specific customers by filtering datasets before importing. Most migration tools allow you to apply filters like customer tags, date range or only completed orders, ensuring that data migrated aligns with your current business needs.
Clean your Shopify store of any incomplete data from the previous Shopify migration process. Export fresh files from WooCommerce with updated time date attributes. Keep detailed logs as your own reference to avoid repeating the same errors.
Export product variations by selecting “Variable Products” in your WooCommerce export settings. You can list multiple statuses separated by commas – active, inactive or out-of-stock variations. Tools like Matrixify handle complex variation structures during import.

Write A Comment