Key highlights
- WooCommerce categories organize your online store by grouping similar products together.
- Adding new categories involves naming, setting parent-child hierarchy and uploading thumbnails.
- Assigning products to all categories can be done from the product editor or quick edit options.
- Customizing category pages involves theme settings, page builders or custom code tweaks.
- Well-optimized WooCommerce category hierarchy supports parent and child categories to create a logical product structure.
Ever felt overwhelmed trying to organize products in your WooCommerce store? You’re not alone. A well-structured store can make a lasting impression on visitors and help them find what they need faster, but getting there takes a bit of strategy.
That’s where WooCommerce categories step in. They act like aisles in a store, guiding your customers to the right products and shaping how your site looks, feels and functions.
When your store runs on an optimized WooCommerce hosting environment, managing categories, testing layouts and scaling your catalog becomes significantly easier because performance and compatibility are already handled in the background.
In this guide we will walk you through every step of working with all categories. From learning how to setup product categories to SEO and customization to optimization – we’ve got you covered.
Let’s begin by understanding what WooCommerce categories are and why they matter for your online store.
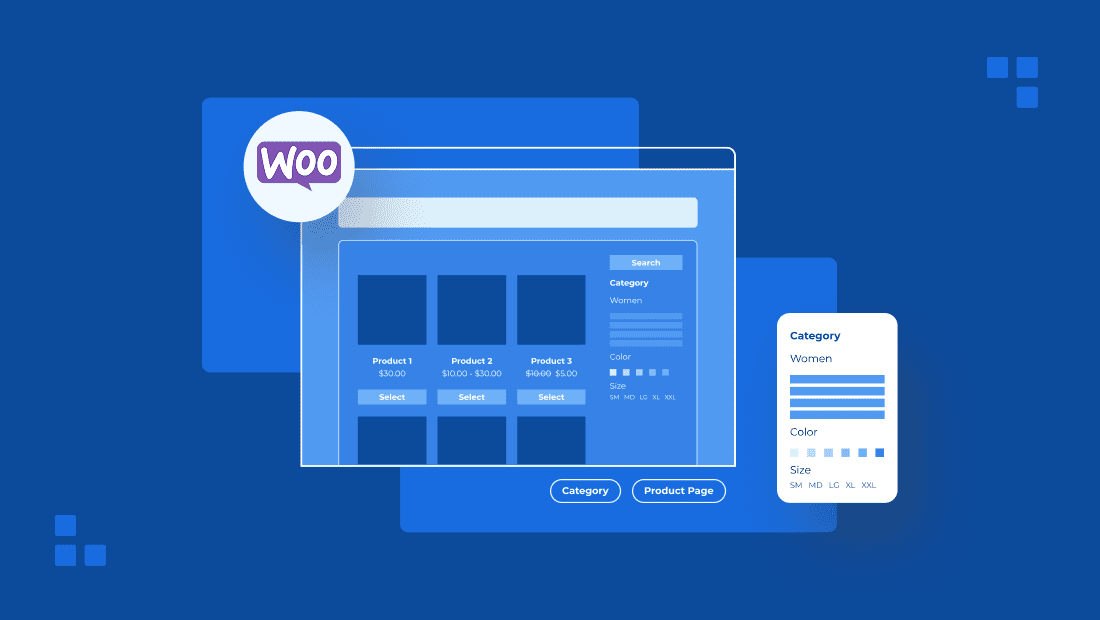
What are WooCommerce categories?

In WooCommerce, categories are used to group similar products together so customers can easily browse items based on type, purpose or style. Think of them as the main sections of your online store – like “Men’s Clothing,” “Home Decor” or “Electronics.” These categories not only improve your site’s navigation but also help streamline product discovery and help search engines better understand your store structure.
You can create a parent category to hold broader product types and then add subcategories under it for more specific groupings. For example, a parent category called “Shoes” could have subcategories like “Running Shoes” or “Formal Shoes.”
WooCommerce treats categories as core functionality, meaning they are built into your dashboard and easy to manage. Each category can have a name, description, image and even a URL-friendly version called a slug.
Understanding how categories work is key to organizing your store effectively. But before we move forward, let’s understand how categories are different from tags and attributes.
WooCommerce Categories vs Tags vs Attributes
When organizing products, it’s important to understand that not every label in your store serves the same purpose. Categories, tags and attributes all help structure your catalog, but they affect navigation, filtering and search visibility in different ways. Using them correctly keeps your store clean and makes it easier for customers to find products quickly.
| Element | Main purpose | Structure type | Example | Where customers see it |
|---|---|---|---|---|
| Categories | Organize products into main sections | Hierarchical | Clothing → Shirts | Menus, shop page navigation |
| Tags | Describe product topics or features | Non-hierarchical | lightweight, summer | Search and related products |
| Attributes | Define product characteristics & filters | Structured data | Size: M, Color: Blue | Filters and variations |
In simple terms, categories build your store layout, tags improve discovery and attributes power filtering and variations. When each is used for its intended role, your store becomes easier to browse, scales better and performs stronger in search results.
Now let’s look at how to add categories in WooCommerce the right way.
Also read: WordPress Categories vs Tags: Which One Is Right for Your Site?
How to add categories in WooCommerce?
Once your product categories are set up, the next step is making sure they’re visible where it matters most. WooCommerce gives you several ways to display WooCommerce categories – on the shop page, in menus or in sidebars using widgets and blocks.
With Bluehost WooCommerce hosting, category setup becomes more reliable thanks to an environment optimized for WordPress and WooCommerce compatibility. You can configure structures, test layouts and manage large catalogs smoothly without performance interruptions during edits.
Here’s how to display your product categories:
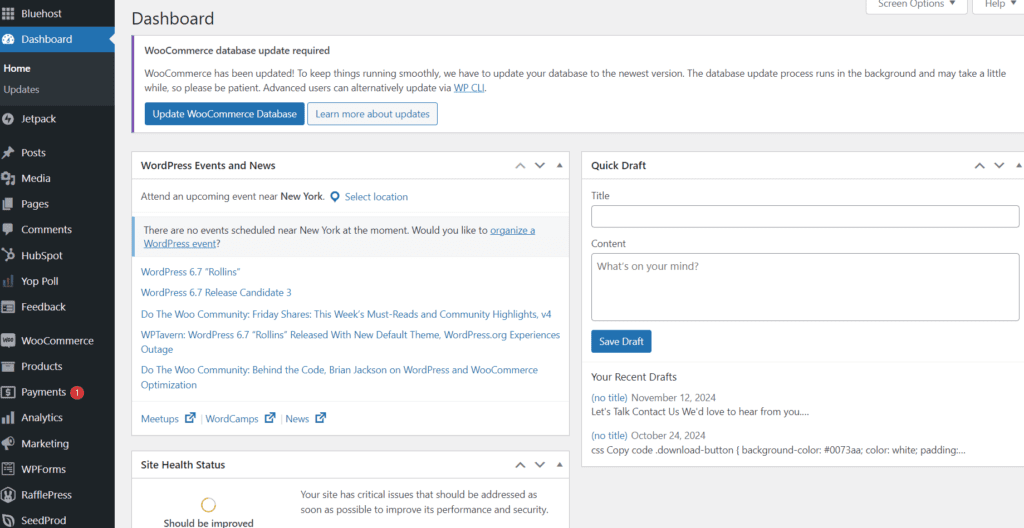
Step 1: Log into your admin panel
Start by logging into the Bluehost admin panel and go to your WordPress dashboard. From the left-hand menu, hover over Products, then click on Categories.
Step 2: Fill in category details
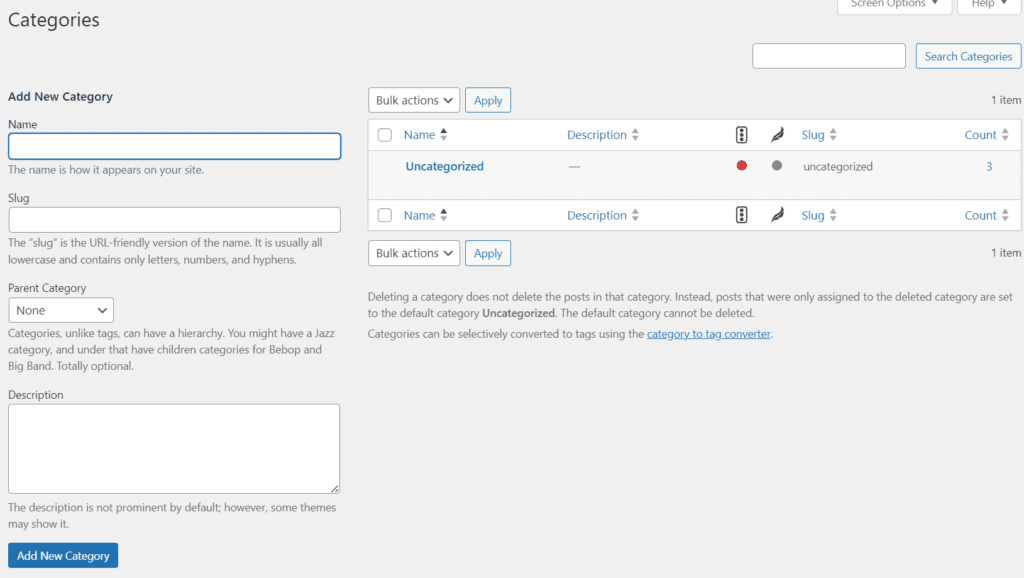
You’ll see a form on the left side of the screen. Enter the following details:
- Name: Enter the title to display for your product category.
- Slug: Create a URL-friendly version of the category name.
- Parent category: Choose a parent if you’re adding a subcategory.
- Description: Add a short summary to describe the category.
- Category image: Upload an image to represent the category visually.
Step 3: Click “Add new category”
Once your details are filled in, click “Add New Category”. Your category will now appear in the list on the right.
Step 4: Assign products to categories
Go to Products > All Products, click to edit a product and on the right-hand panel, check the box next to your desired category.
That’s it – your WooCommerce product categories are now live.
Also read: What is WooCommerce? A Comprehensive Guide
Next, let’s explore how to display WooCommerce categories on different parts of your store.
How to display categories in WooCommerce using Bluehost hosting?
Once you’ve created your WooCommerce categories, the next important step is making sure they’re easy for visitors to find. Bluehost’s WooCommerce hosting provides an integrated WordPress admin experience designed for stable performance, helping category layouts, menus and filters load consistently even as your product inventory grows.
Facing difficulties navigating the admin panel?
Contact Us
Here’s how to display all categories in WooCommerce step by step:
Step 1: Show categories on the shop page
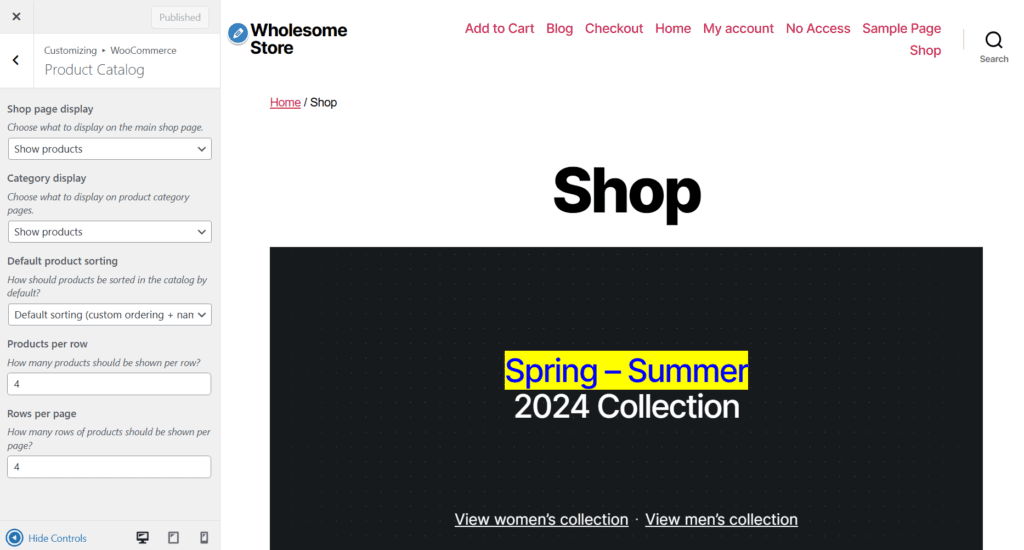
- Go to your WordPress dashboard.
- Navigate to Appearance > Customize.
- Select WooCommerce > Product Catalog.
- Under Shop page display, choose Show Categories.
- Click Publish.
This is ideal for stores with many products or departments.
Step 2: Add product categories to navigation menus
- Go to Appearance > Menus.
- At the top, click Screen Options and check the box for Product Categories.
- Select your desired categories and click Add to Menu.
- Arrange them as needed and click Save Menu.
Step 3: Use the Product Categories widget
- Go to Appearance > Widgets.
- Drag and drop the Product Categories widget into your sidebar or footer.
- Customize its settings (dropdown display, show product count, hide empty categories).
Step 4: Display categories using blocks (for Gutenberg users)
Using the block editor, you can insert:
- Product Categories List block
- Products by Category block
These blocks give you visual control over category display on any page, post or homepage template.
Now that you’ve arranged how to show categories, let’s look at how to remove WooCommerce categories you no longer need.
How to remove categories in WooCommerce?
As your product lineup changes, you might want to delete unused or empty categories to keep your site neat. Our hosting solutions make this process smooth by giving you direct access to your WordPress tools and a staging environment for safe testing.
Here’s how to remove categories in WooCommerce:
Step 1: Access WooCommerce Categories
- From the WordPress dashboard, go to Products > Categories.
- You’ll see all your current WooCommerce categories listed.
Step 2: Delete a category
- Hover over the category you want to delete
- Click Delete
- Confirm if prompted
Tip: If the deleted category is a parent category, its subcategories won’t be deleted but may appear without a parent. Products linked to the deleted category will become uncategorized, so it’s a good idea to assign them to another desired category first.
Step 3: Use Bluehost’s staging environment (optional but recommended)
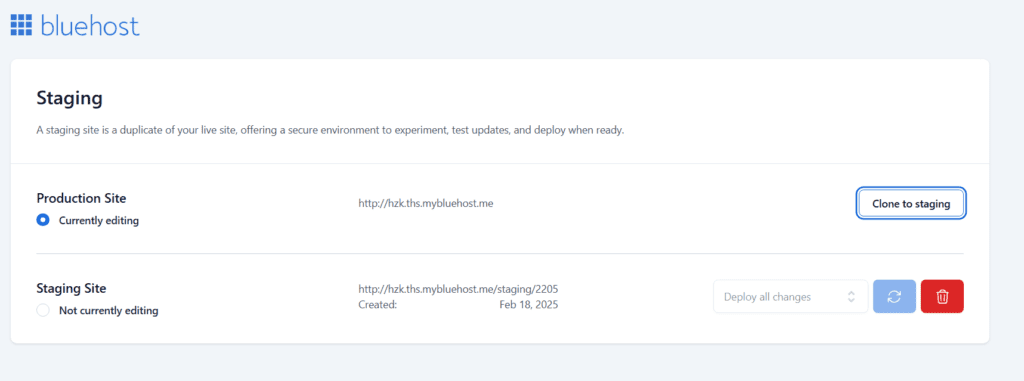
Before making big structural changes, Bluehost lets you clone your site using a staging environment. This lets you preview what happens when categories are removed – without disrupting your live store.
Read more: How to Create a Staging WordPress Site
By removing unnecessary categories, your catalog becomes clearer for both users and search engines. Up next, let’s explore how to customize the WooCommerce category page for better design and conversions.
How to customize WooCommerce category page?
Your WooCommerce category page is more than just a product list – it’s a landing zone where customers decide whether to keep browsing or bounce. Customizing this page helps you align it with your brand and improve the shopping experience.
Here’s how to customize your WooCommerce category pages:
Step 1: Choose a compatible WooCommerce theme
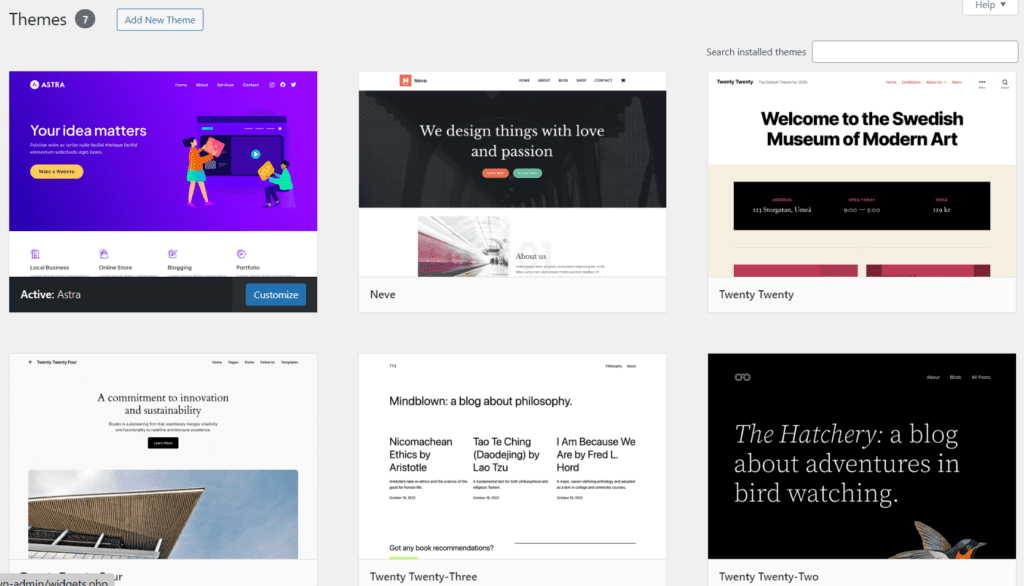
- From the WordPress dashboard, go to Appearance > Themes.
- Select or install a theme that supports custom WooCommerce templates.
- Activate the theme.
Step 2: Customize via the WordPress Customizer
- Go to Appearance > Customize > WooCommerce > Product Catalog.
- Adjust settings like category display type (example – grid or list) and what appears first – categories or products.
- Publish your changes.
Step 3: Edit the category layout using a page builder (optional)
- Use Spectra or Elementor page builders.
- Design unique layouts for each product category page.
- Add visual blocks, filters, banners or even SEO-friendly category descriptions and headings.
Step 4: Add custom code or use a child theme
- For advanced edits (like changing how product titles or category images appear), use a child theme.
- Navigate to Appearance > Theme File Editor, then edit WooCommerce templates such as archive-product.php or content-product_cat.php.
- Always test these changes on your staging site first.
Step 5: Use category-specific plugins
Plugins like WooCommerce Customizer or Product Category Designs for WooCommerce can help with:
- Displaying different layouts for each specific category.
- Adding product filters, sorting options or badges.
- Showing sub categories, icons or custom banners.
Customizing your category landing pages doesn’t just make your store look good – it helps guide users to the right products faster.
Now that we know how to add, remove and customize categories, let’s explore some best practices for WooCommerce category management.
What are the best practices for category management?
Efficiently managing your WooCommerce categories is essential for a smooth shopping experience, improved SEO and optimized product discovery. Following best practices helps maintain a clean, organized product catalog and provides better navigation for your customers.
Here’s how to manage your WooCommerce product categories effectively:
- Use parent and subcategories strategically: Group products under clear parent and subcategories for easy navigation. Avoid overly broad or overly specific categories.
- Optimize category descriptions for SEO: Write unique descriptions for each product category page. By including relevant keywords, you will help customers boost SEO.
- Make category navigation intuitive: Use category widgets, drop-down menus or sidebar lists to help users browse quickly and easily.
- Apply appropriate category images: Use high-quality, SEO-optimized images for each category to improve both visual appeal and loading speed.
- Hide empty categories: Avoid displaying product categories with no items to keep your store clean and organized.
- Add custom filters: Enable filters for size, color, price and rating to help customers narrow down product choices easily.
- Refine category pages for mobile: Ensure category pages are responsive and tested on multiple screen sizes for a smooth mobile shopping experience.
- Integrate WooCommerce product blocks: Use WooCommerce blocks to create dynamic, customizable layouts for your product categories.
- Track and refine with analytics: Use tools like Google Analytics or WooCommerce reports to monitor and optimize category performance based on user behavior.
Also read: How to Make Mobile Friendly Website on WordPress
With these best practices in place, you’ll be well on your way to optimizing your WooCommerce categories for a better user experience and higher conversion rates.
How to optimize WooCommerce category pages for SEO?
Well-optimized category pages help search engines understand product relevance and guide shoppers toward multiple options instead of a single item.
- Write a concise intro: Add a short, helpful description explaining what the category contains and who it’s for.
- Use clear naming: Keep category titles simple and aligned with real search terms.
- Add internal links: Connect related categories and supporting guides to strengthen topical relevance.
- Control indexing: Allow the main category page to index, but avoid indexing filter combinations that create duplicates.
- Improve engagement signals: Use sorting, filters and fast-loading images so users browse longer.
- Keep content updated: Remove unavailable products and refresh descriptions when inventory changes.
Small structural improvements like these help category pages rank more consistently and stay useful for customers.
7 common WooCommerce category mistakes you should avoid
Many ranking and usability problems come from structure rather than products. Fixing these mistakes often improves performance quickly.
1. Creating too many categories
Why it’s a problem?
- Categories with very few products have weak relevance.
- Customers hesitate because choices feel scattered.
- Search engines struggle to identify important pages.
Better approach: Keep categories broad at the start and expand only when enough products exist to justify a new section.
2. Turning filters into categories
Why it’s a problem?
- Generates many thin or duplicate pages
- Splits ranking signals across similar URLs
- Makes navigation unnecessarily complex
Better approach: Use attributes for things like color, size and material and reserve categories only for product types.
3. Duplicate or overlapping categories
Why it’s a problem?
- Search engines cannot determine which page should rank.
- Internal competition reduces visibility.
- Users see confusing or repetitive navigation.
Better approach: Merge similar categories and keep naming consistent across the store.
4. Deep category hierarchy
Why it’s a problem?
- Slower browsing experience
- Reduced crawl efficiency
- Lost authority of pages
Better approach: Limit hierarchy to 2–3 levels and rely on filters for further narrowing.
5. Leaving empty categories visible
Why it’s a problem?
- Creates low-value indexed pages
- Makes the store appear incomplete
- Weakens overall site quality signals
Better approach: Hide or temporarily disable categories until products are available.
6. Using categories instead of attributes
Why it’s a problem?
- Breaks filtering functionality
- Complicates store organization
- Reduces scalability as catalog grows
Better approach: Keep categories for grouping products and attributes for describing them.
7. Not maintaining category pages
Why it’s a problem?
- Outdated listings reduce trust.
- Seasonal products remain irrelevant.
- Navigation gradually becomes cluttered.
Better approach: Regularly review and clean up categories to keep them accurate and useful.
By avoiding structural mistakes and applying optimization best practices, your category pages can act as reliable entry points that support both browsing and purchasing decisions.
Final thoughts
Creating a seamless shopping experience with well-managed WooCommerce categories is essential for any successful online store. As you fine-tune your store’s structure, it’s important to ensure that everything from category display to optimization is handled efficiently. The tools you use to manage your store can make all the difference in saving time, boosting performance and enhancing the overall user experience.
With Bluehost, you’ll find everything you need to build, grow and optimize your store – all backed by industry-leading performance. With enhanced performance and monitoring capabilities, we help keep your category pages stable as your catalog grows, minimizing slowdowns during edits or updates.
Ready to elevate your WooCommerce store?
Explore the transformative possibilities with Bluehost WooCommerce hosting and unlock a faster, more efficient way to manage your store.
FAQs
WooCommerce categories are used to group products into different sections, making it easier for customers to navigate your online store. They can be broad or specific and you can also create subcategories to organize your products in more detail.
To view all WooCommerce categories, go to WordPress Dashboard > Products > Categories. Here, you’ll see a list of all your product categories, including the category names, descriptions and the number of products within each category.
WooCommerce blocks are modular elements that allow you to display your product categories and products in an engaging way. For example, you can use the Product Categories block or Featured Products block to highlight specific product categories on your store pages.
WooCommerce introduced four new product categories to offer more flexibility for store owners: Virtual Products, Downloadable Products, Grouped Products and External/Affiliate Products. These categories cater to different types of products, including services, digital goods and affiliate-linked items.


Write A Comment