
Key highlights
- Discover what a WordPress widget is and how adding widgets like menus, calendars and social feeds enhances your site’s functionality.
- Place widgets in sidebars, footers and other areas without needing to write any code.
- Access a variety of pre-installed widgets or expand your options through the plugin directory.
- Customize and arrange WordPress widgets to improve navigation and enhance user experience.
- Use WordPress widgets to customize your site layout for any website type.
WordPress widgets add vital features and functions to almost any WordPress website. These modular blocks are designed to hold various add-ons – such as navigation menus, calendars, text areas or social media feeds-and can be placed in specific locations on your site without requiring any technical coding expertise.
Most themes come with a set of standard WordPress widgets ready for immediate use. You can also expand your collection by installing plugins from the WordPress directory. Easy to configure and arrange, widgets give you significant control over the appearance and functionality of your site.
What are widgets in WordPress and why do you need them?
A WordPress widget is a small, pre-built block of content or functionality that lives in specific areas of your site – typically the sidebar or footer. It lets you customize your layout and extend functionality without writing any code.
Here is why you need widgets in WordPress:
- Ease of customization: Widgets let you add elements like text, images, navigation menus and recent posts to tailor your site to your needs.
- Easy WordPress widget management: Control all your WordPress widgets directly from your dashboard, adding or removing them without any coding knowledge required.
- WordPress widgets add powerful functionality: Quickly integrate interactive features including social media feeds, email subscription forms and event calendars to extend your WordPress site capabilities.
- Layout control: Arrange and rearrange content blocks in designated widget areas to create your ideal layout.
- Improved user experience: Provide quick access to important information and navigation tools to help visitors find what they need.
- Promotion and advertising: Use widgets to display ad banners, featured products or special offers in high-visibility areas.
- Increased engagement: Encourage interaction by displaying recent comments or popular posts to build a community.
- Efficient updates: Swiftly update sidebars and footers across your entire site from a single management screen.
WordPress widgets vs. plugins
While plugins and widgets work together, they serve different purposes. Understanding the distinction helps you utilize both effectively.
Plugins
- Extend core site functionality or add new features.
- Handle tasks like SEO, security, backups or eCommerce systems.
- Often operate in the background or affect the entire site.
- Can function without any visual output.
WordPress widgets
- Visual blocks placed in specific widget-ready areas like sidebars.
- Display specific content like search bars or newsletter forms.
- Focus on placing functionality in visible layout zones.
- Can be default features or WordPress custom widgets added by plugins.
Difference between a WordPress widget and a sidebar
Think of the sidebar as a bookshelf and the widgets as the books. Here is how they differ:
Sidebar
- A designated container or location defined by your theme.
- Determines where content can be displayed.
- Part of the structural layout of the page.
- Can appear on the left, right or even in the footer.
WordPress widgets
- The actual content blocks (search, recent posts, forms) that fill the space.
- Modular elements you can move or remove easily.
- Determine what appears in the sidebar location.
- Include both built-in options and any custom WordPress widget you install.
When to use WordPress widgets?
WordPress widgets offer versatile functionality that can transform how users interact with your website. Consider using widgets in these key scenarios:
- To add functionality to sidebars and footer areas without coding
- When you need to display dynamic content across multiple pages
- To enhance navigation and improve user experience
- For displaying social media feeds, recent posts or popular content
- When you want to add search functionality or contact forms
Why include a widget on a WordPress page or post?
WordPress widgets provide powerful functionality to enhance your site’s usability and design. Discover the key advantages these customizable tools offer:
- Support conversion goals through strategically placed signup forms and call-to-action blocks
- Gather leads unobtrusively with signup form widgets
- Direct traffic to landing pages using call-to-action blocks
- Provide unique tools like calculators or booking forms through custom WordPress widgets
- Enhance user engagement without cluttering your main content
Using content discovery widgets to boost engagement
Discovery tools like “Recent Posts” or “Popular Posts” serve as strategic assets for your website. When you add these WordPress widgets to your sidebar, you create pathways for visitors to find content they might have missed, keeping them engaged and helping to lower your bounce rate.
Strategic placement tips:
- Position sidebar widgets to catch readers’ attention mid-article
- Use footer widgets to offer final engagement opportunities before visitors leave
- Place popular content widgets where they’re most visible
- Add category-specific widgets to guide users to related topics
Understanding how WordPress widgets work
Your theme defines the structure of your site. Widgets fill that structure with flexible, configurable content blocks. You add, remove and reorder them without touching your site’s core code. This is why hosting matters – dynamic widgets like social feeds and signup forms each make a server request. Bluehost WordPress hosting is built to handle these requests reliably, so your widgets load without slowing your pages down.
Key benefits of using WordPress widgets include:
- Flexible placement in sidebars, headers and footers.
- Individual customization settings for each widget.
- Simple drag-and-drop repositioning.
- Ability to add complex functionality without coding.
- Instant updates across all pages where the widget area appears.
Does WordPress still use widgets?
Yes, WordPress still uses widgets, though the system has evolved. In modern block themes, everything is a block, but the concept is similar: small units of content placed in global template areas. If you prefer classic widgets, you can also use the Legacy Widget block to keep using older widget options in the block editor.
Activating widgets in WordPress
To start using widgets, follow these simple steps:
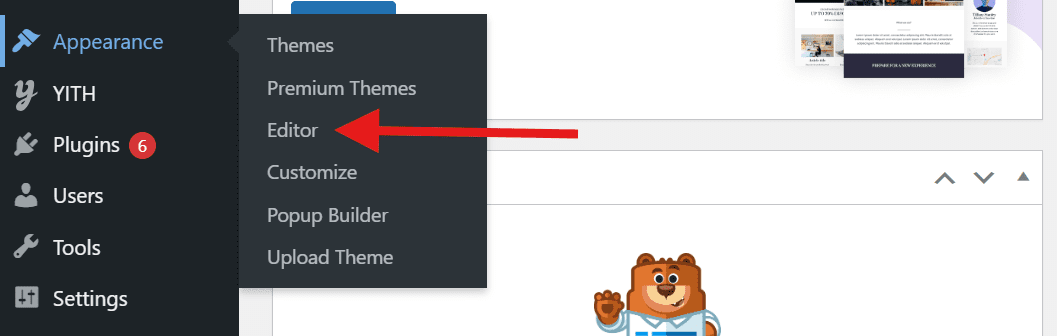
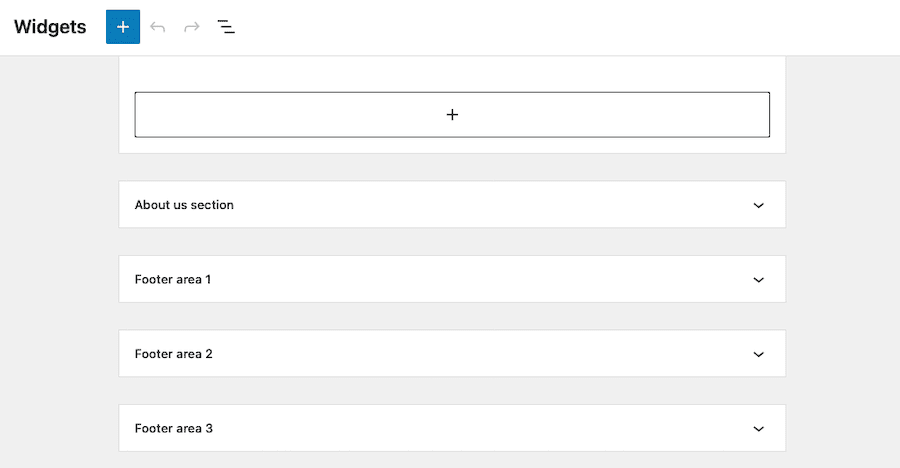
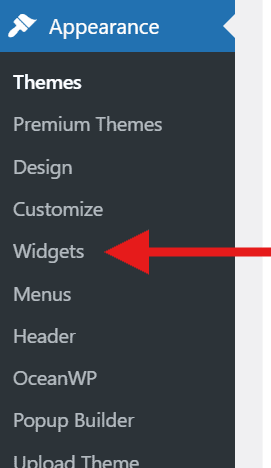
- Go to Appearance > Widgets in your WordPress dashboard.
(In some block themes, you may need to go to Appearance > Editor instead.)
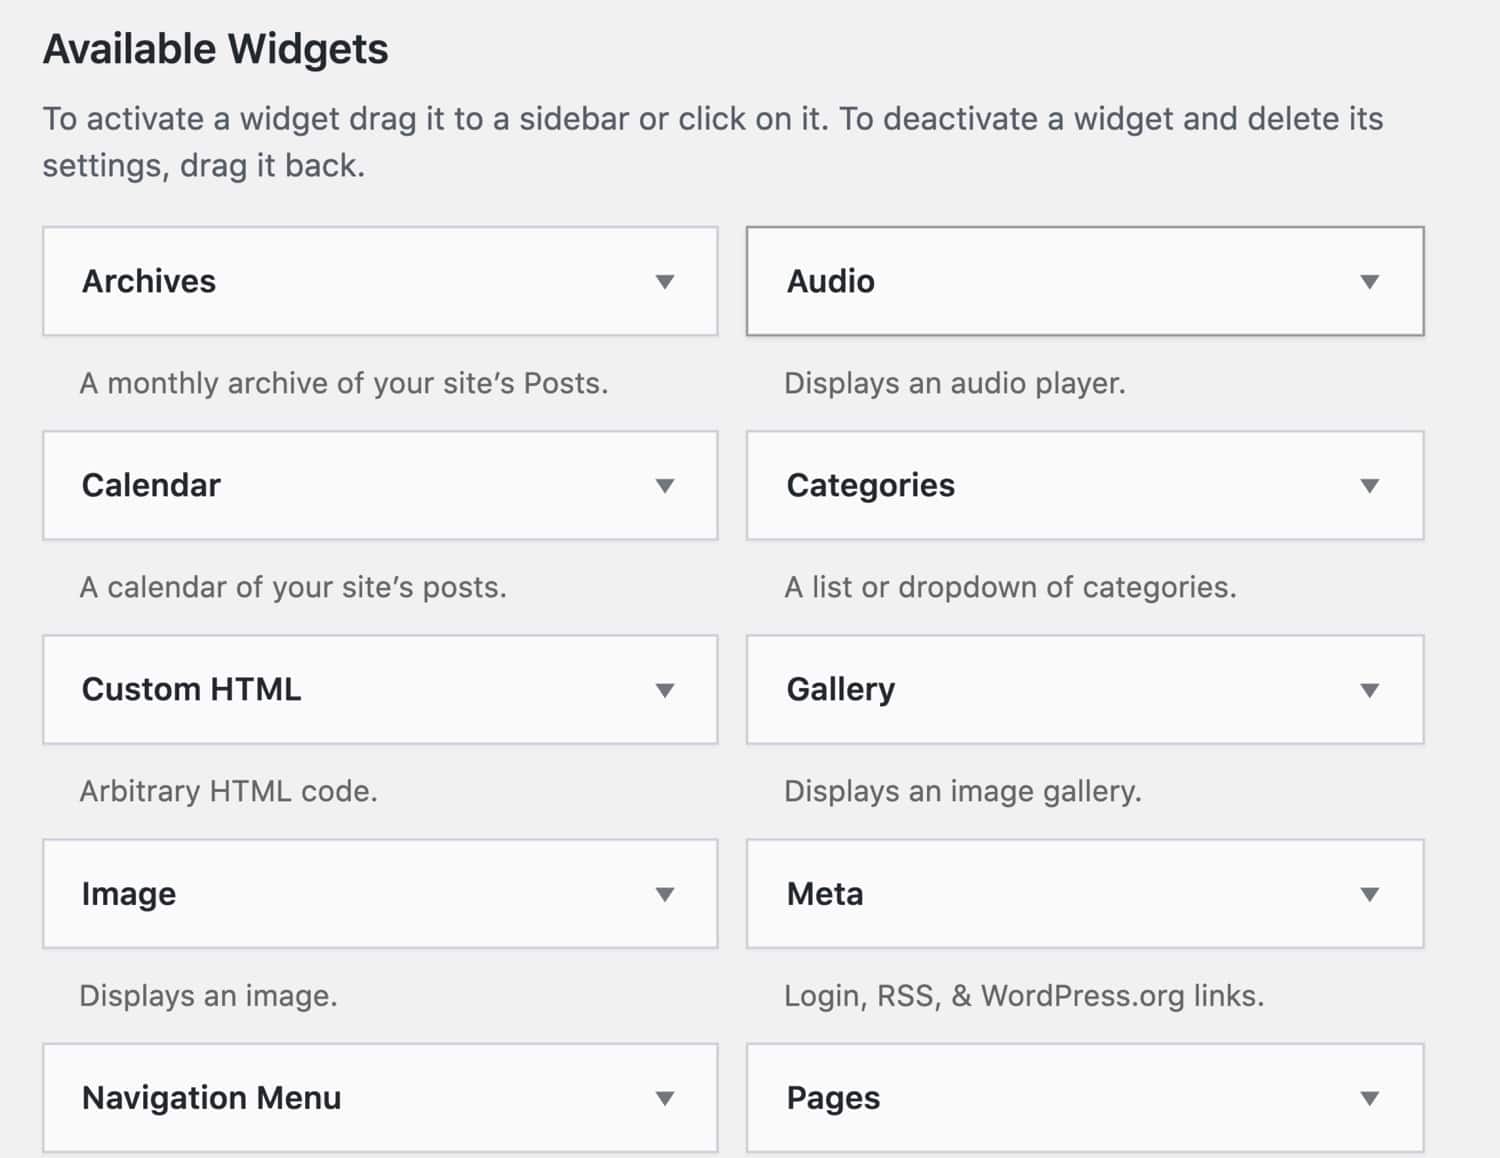
- Browse the list of available widgets (like Audio, Calendar, Gallery or Text).
- Drag the widget you want into a widget area (for example, Sidebar or Footer).
- Reorder items by dragging them up or down within the list.
- To remove a widget but keep its settings, move it to Inactive Widgets.
- Click the widget to open its settings, then update what you need (title, menu selection and so on).
- Click Update/Save if your theme requires it, then check your site to confirm it looks right.
How to manage widgets using the WordPress Customizer?
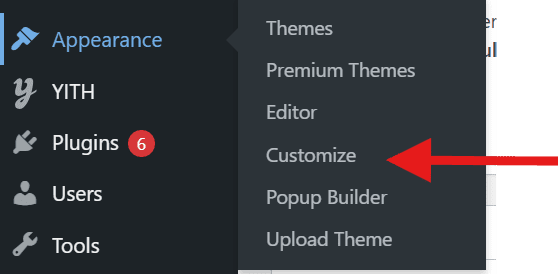
The Customizer is your visual widget manager for classic themes, letting you preview changes before they go live. Modern block themes use the Site Editor instead, where widgets function as blocks. To check which you have, look for “Customize” under Appearance in your dashboard.
Here’s how to manage widgets using the Customizer:
- Go to Appearance > Customize in your WordPress dashboard.
- Click Widgets in the customization panel.
- Select the widget area you want to edit (Sidebar, Footer, etc.).
- Click Add a Widget and choose your desired widget.
- Configure the widget settings – add titles, content or adjust options.
- Drag widgets up or down to reorder them within the area.
- Preview your changes in real-time on the right side.
- Click Publish to activate your WordPress widget once configured correctly.
Can’t find “Customize” or “Widgets”? Your theme likely uses the block-based Site Editor – navigate to Appearance > Editor instead. Also check that you have Editor or Administrator permissions. Some themes hide the Customizer entirely, preferring the newer block editing experience for managing all site elements including widget areas.
Installing new widgets
While the default selection covers the basics, you can add more widgets by installing plugins from the WordPress widgets repository. Many plugins (social media tools, forms, SEO plugins and more) add their own widgets automatically after installation.
The “Text” or “Custom HTML” widget is also very useful because it can hold text, shortcodes or HTML.
To add content to a text widget:
- Drag the Text (or Paragraph/Custom HTML) widget to your desired location.
- Click to edit the widget.
- Type your content, paste HTML or insert a shortcode.
- Click Save/Update to publish the changes.
Managing themes and widgets
Widgets are tied to theme locations. If you switch themes, your new theme might not have the same widget areas, so widgets may disappear from the live site. Most of the time, WordPress moves them into the Inactive Widgets section rather than deleting them.
To restore WordPress widgets after switching themes:
- Go to Appearance > Widgets.
- Scroll down to Inactive Widgets.
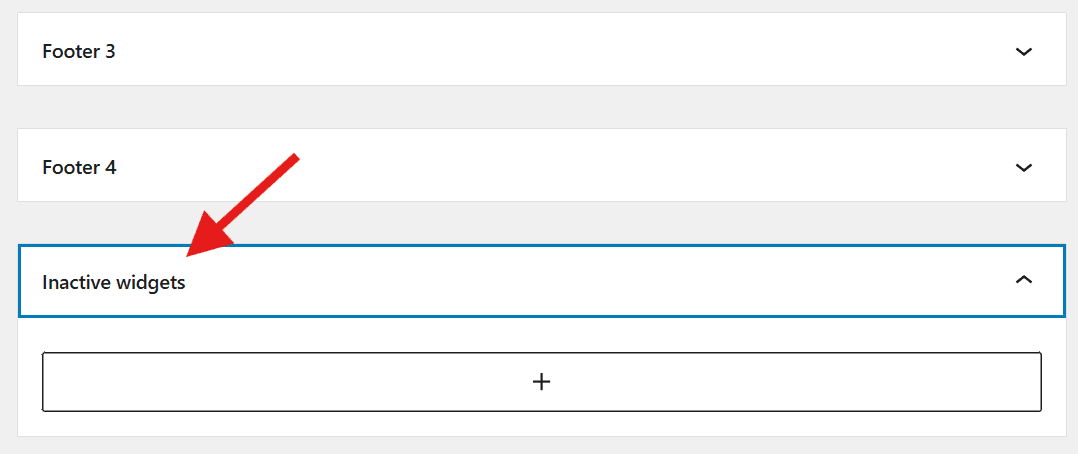
- Drag the widgets back into the active widget areas of your new theme.
- Rearrange them to fit your new layout.
How to edit WordPress widgets?
Editing is simple:
- Go to Appearance > Widgets (or use the Customizer/Editor if your theme supports it).

- Find the widget you want to change.
- Click the widget to expand its settings.
- Update the text, links or options.
- Click Update/Save, then verify the change on your live site.
How to remove widgets on WordPress?
To remove a widget you no longer need:
- Go to Appearance > Widgets.
- Locate the widget in its widget area.
- Click it to open options.
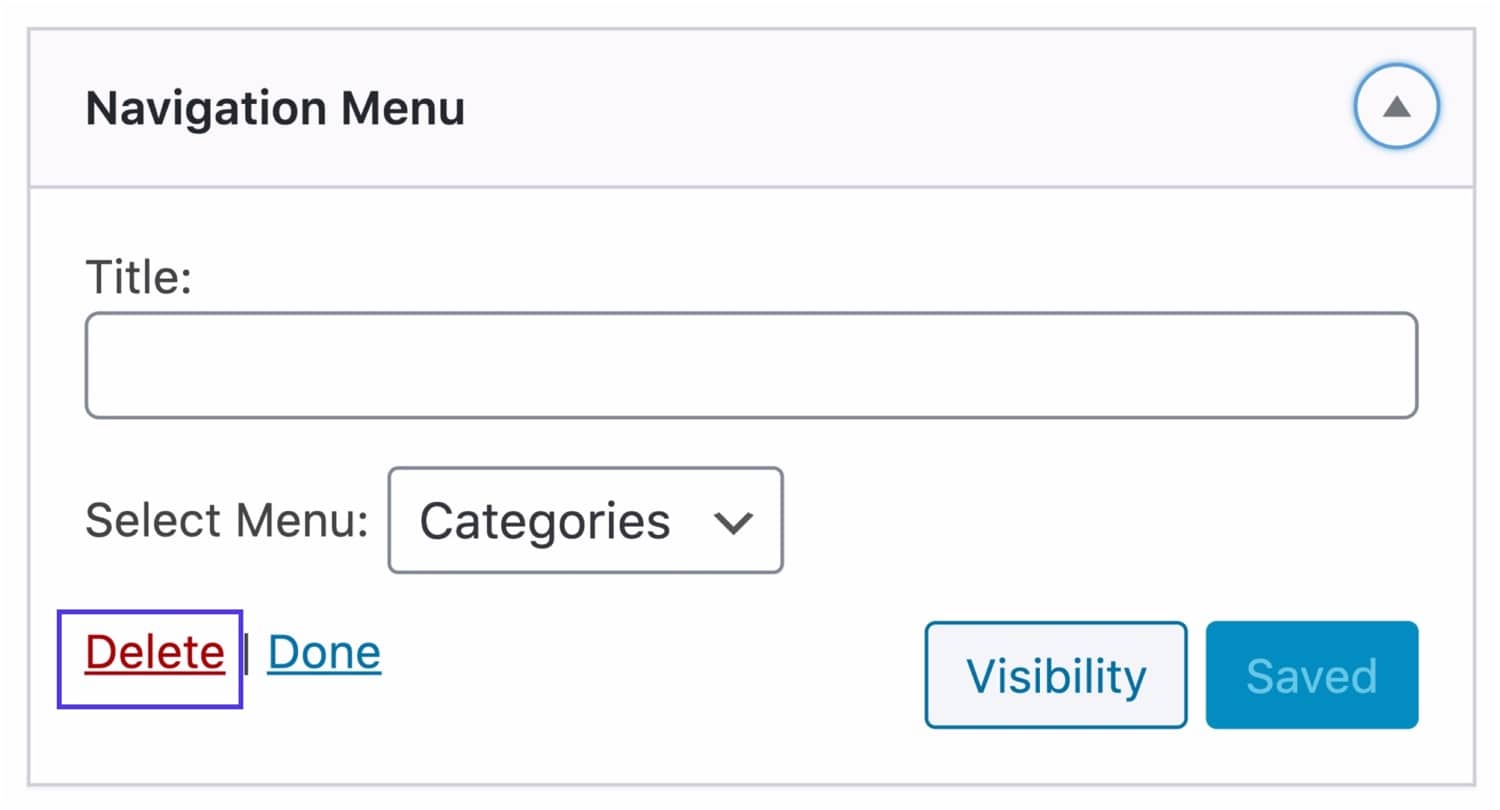
- Click Delete/Remove (or move it to Inactive Widgets to keep settings saved).
How to show a WordPress widget on a specific post or page?
By default, widgets show on every page that uses that widget area. If you want a widget to appear only in specific places:
- Install a visibility plugin (for example, “Widget Options”) or use Jetpack’s visibility module if available.
- Go to your widget settings.
- Look for the new Visibility options.
- Set rules (for example, “Show only on Category: News” or “Hide on Front Page”).
- Save your WordPress widget settings
Using the Legacy Widget block in the Block Editor
If you are using a modern block theme but want classic widgets, the Legacy Widget block helps.
- Open the editor for the template or page area you are customizing.
- Click the + button to add a new block.
- Search for and select Legacy Widget.
- Pick your classic widget from the dropdown.
- Configure the settings and click Save.
What kinds of widgets are available for WordPress?
There is a vast ecosystem of widgets available. Some are built-in and many come with plugins. You can also find widgets for third-party services like Twitter feeds or Mailchimp signups.
Common types of WordPress widgets
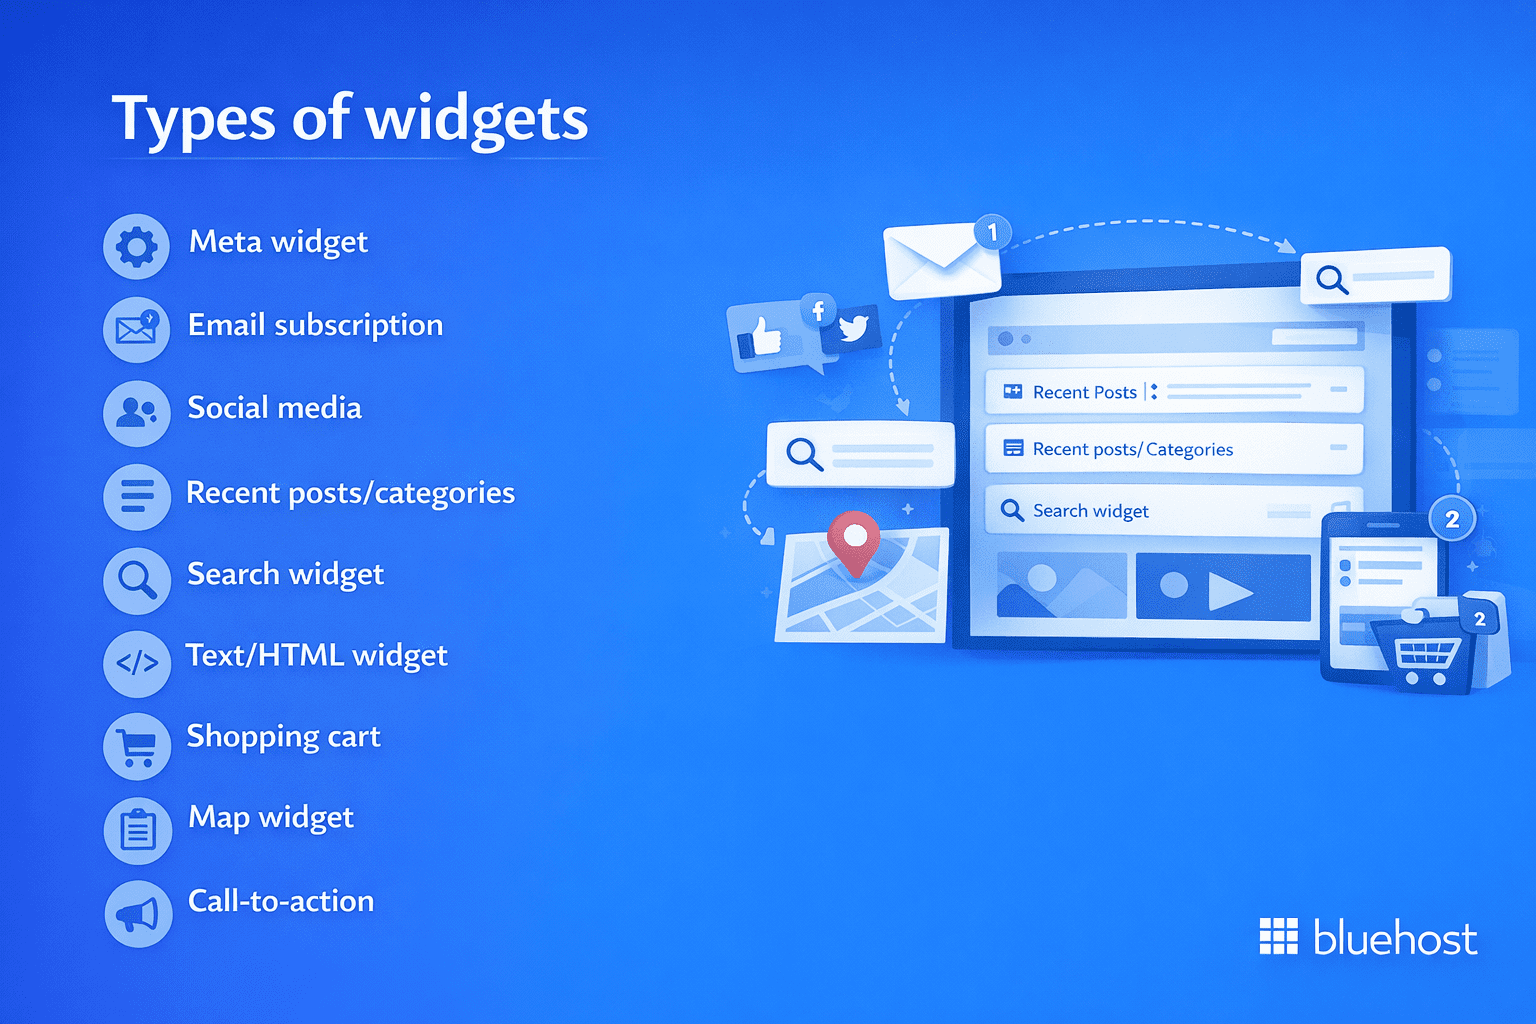
- Meta widget: Links for login/logout, RSS feeds and WordPress.org info.
- Email subscription: Forms to collect subscriber emails for newsletters.
- Social media: Icons and feeds connecting visitors to your social profiles.
- Recent posts/categories: Lists helping users discover more of your content.
- Search widget: A search bar enabling users to find specific topics.
- Text/HTML widget: A flexible block for custom text, code or shortcodes.
- Shopping cart: Displays cart contents for eCommerce stores.
- Map widget: Embeds Google Maps to show your physical location.
- Form widget: Displays contact forms or surveys.
- Call-to-action: CTA buttons or banners prompting user action.
Popular WordPress widget examples and use cases
Understanding which widgets to use and where to place them helps you build a more functional and user-friendly site. Here are ten popular WordPress widget examples with practical applications and optimal placement recommendations.
- Search: Lets visitors quickly find specific content on your site. Place in the sidebar or header area for easy access across all pages.
- Recent Posts: Displays your latest blog entries to keep readers engaged with fresh content. Works best in the sidebar to encourage continued browsing.
- Categories: Organizes content by topic, helping visitors navigate to areas of interest. Ideal for sidebar placement on blog-heavy sites.
- Tag Cloud: Shows popular content tags in a visual format. Add to the sidebar or footer to improve content discoverability.
- Navigation Menu: Creates custom menus for specific page sections. Perfect for footer areas to provide secondary navigation options.
- Social Media Icons: Links to your social profiles and displays social feeds. Place in the header, sidebar or footer to boost social engagement.
- Newsletter Signup: Captures email subscribers directly from your site. Most effective in the sidebar or as a footer widget for visibility.
- Custom HTML: Adds custom code, text or embed content like videos. Use in any widget area for flexible content placement.
- Recent Comments: Showcases latest visitor interactions to encourage community participation. Works well in the sidebar below post content.
- Shopping Cart: Displays cart contents and checkout options for online stores. Essential in the header or sidebar for eCommerce sites.
Registering your custom WordPress widget
For developers building a custom WordPress widget, registration is the first step. You need to tell WordPress that your widget exists via the functions.php file.
- Open your theme’s functions.php file.
- Create a function hooked to widgets_init.
- Use the register_widget() function to load your widget class.
- Once registered, your new tool will appear in the dashboard alongside standard WordPress widgets.
How to create a custom WordPress widget?
Sometimes you need functionality that no plugin offers. Creating WordPress custom widgets involves extending the WP_Widget class in PHP.
The basic process involves:
- Defining the class: Extend WP_Widget and set up the ID, title and description.
- Creating the backend: Build the form that appears in the admin dashboard so users can configure it.
- Handling the frontend: Define how the widget outputs HTML on the live site.
Create the widget plugin file
Instead of editing your theme’s functions.php file, creating a dedicated plugin for your custom WordPress widget is a safer approach. Theme files can be overwritten during updates, potentially losing your widget code. A plugin keeps your custom WordPress widget independent from your theme and makes it portable across different designs.
To get started, create a new PHP file in your wp-content/plugins/ directory – name it something descriptive like my-custom-widget.php. At the top of this file, add a standard WordPress plugin header comment that includes the plugin name, description and version number. This header tells WordPress your file is a plugin it should recognize.
Before making any changes, back up your site and consider testing on a staging environment first. Keep your initial plugin file simple – just the header comment and basic structure – then add your widget class code in the next steps.
Using your custom WordPress widget
Once you register your custom widget, navigate to Appearance > Widgets to confirm it appears in the available widgets list. Drag your new widget into the desired widget area (sidebar, footer, etc.) and click to expand its settings panel. Configure any custom options your widget provides, such as titles, display preferences or data fields, then save your changes.
Before going live, test your widget thoroughly. Check the front-end display to ensure content renders correctly, verify styling matches your theme’s design and test on mobile devices for responsive behavior. Clear your site’s cache (if using a caching plugin) to see the most current version. If the widget doesn’t display as expected, review your widget code for errors and confirm the widget area is properly called in your theme template.
Prerequisites for creating custom widgets
Before coding a custom WordPress widget, you should have a basic understanding of PHP and HTML. You will need access to your site’s files via an FTP client or the Theme File Editor.
Always back up your site before editing code. A syntax error in your widget code can take your site offline.
Creating new widget areas
If your theme lacks a sidebar or footer area you need, you can register a new one manually.
- Edit your functions.php file.
- Use the register_sidebar() function inside a widgets_init hook.
- Give it a name, ID and HTML wrapper elements.
- Call dynamic_sidebar(‘your-sidebar-id’) in your template file (like footer.php) where you want it to appear.
How to customize WordPress widgets with CSS?
You can style widgets using CSS.
- Right-click a widget on your site and select Inspect.
- Find the class (for example, .widget) or ID (for example, #search-2).
- Go to Appearance > Customize > Additional CSS.
- Add your custom CSS rules.
- Publish your changes to make them live.
Example CSS to style a widget box:
.widget { background: #fff; border: 1px solid #ddd; padding: 20px; }
.widget-title { font-size: 1.2em; font-weight: bold; }
Optimizing WordPress widgets for mobile devices
Since many users browse on phones, ensure your widgets stack correctly and don’t overflow. Most responsive themes handle this automatically, but large widgets (like maps) may need small CSS adjustments.
Test your site on different screen sizes to ensure no content is cut off or misaligned.
Adding custom styles to specific widgets
To style one widget without affecting others, use its unique ID:
- Inspect the widget to find its ID (for example, #text-5).
- Open the Additional CSS panel.
- Target that ID specifically.
Example:
#text-5 { background-color: #f0f0f0; }What to do if your WordPress widget is not showing
If a widget fails to appear, follow this checklist:
- Check the location: Did you add it to the correct sidebar or footer area?
- Clear cache: Clear your browser and site cache to see the latest version.
- Plugin conflicts: Deactivate plugins temporarily to see if one is interfering.
- Theme settings: Ensure your theme allows sidebars on the page you are viewing.
What are the tips for managing WordPress widgets?
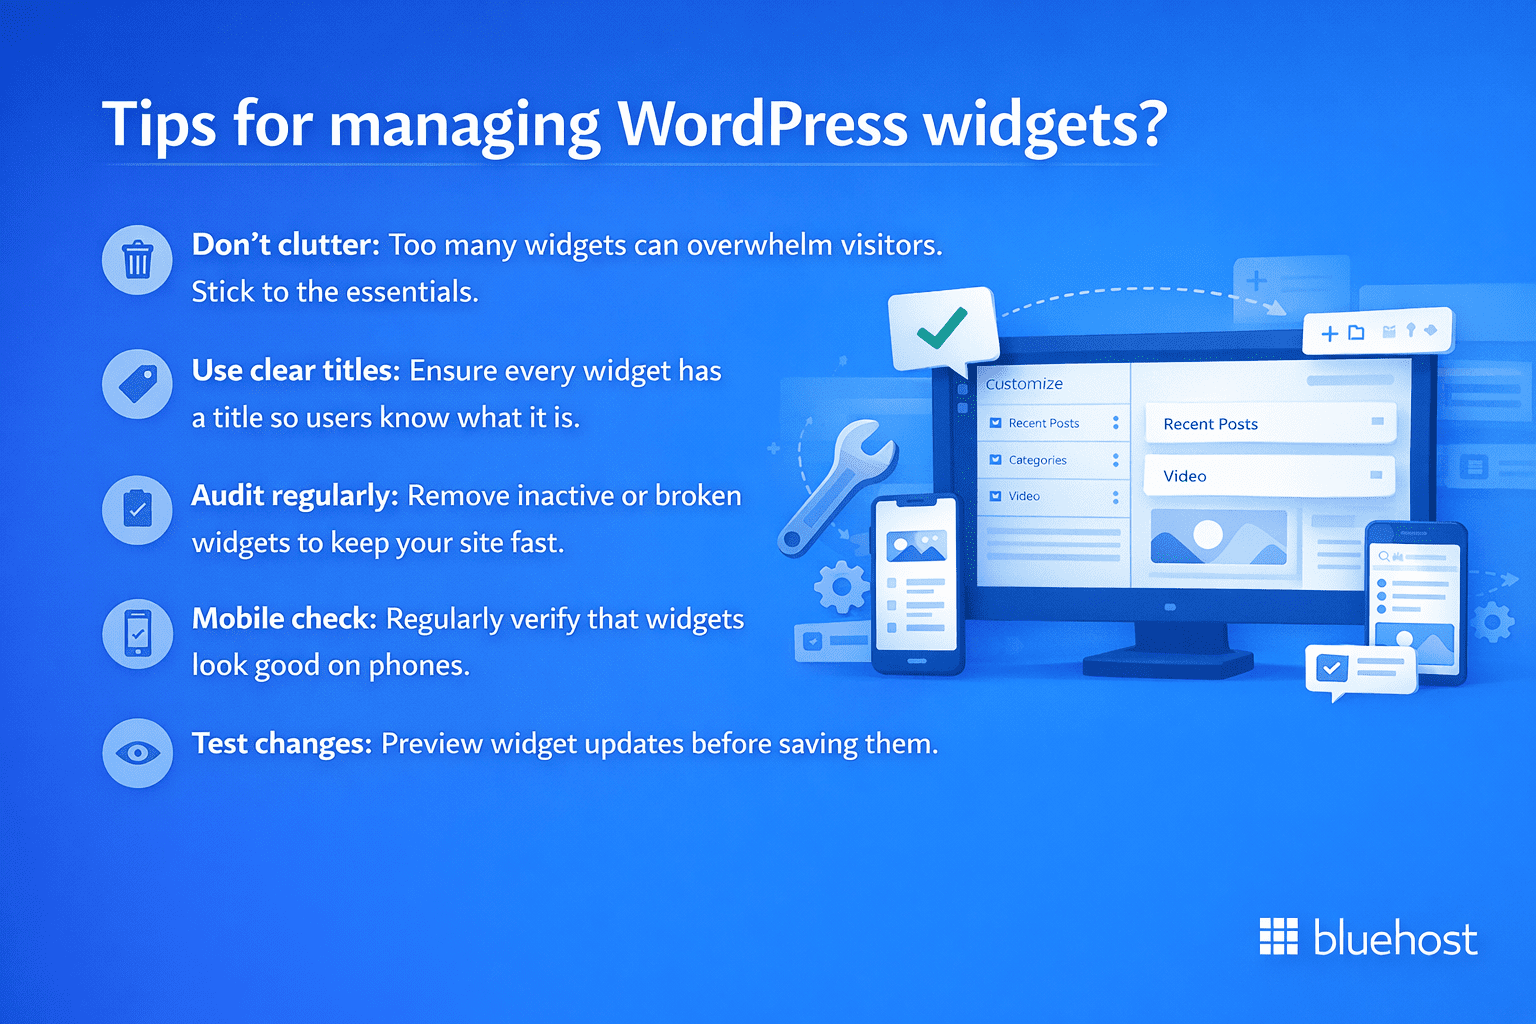
In short to manage WordPress widgets:
- Don’t clutter: Too many widgets can overwhelm visitors. Stick to the essentials.
- Use clear titles: Ensure every widget has a title so users know what it is.
- Audit regularly: Remove inactive or broken widgets to keep your site fast.
- Mobile check: Regularly verify that widgets look good on phones.
- Test changes: Preview widget updates before saving them.
Advanced strategies for using WordPress widgets
Use conditional logic plugins to show specific WordPress custom widgets only to logged-in users or on specific categories. You can also stack multiple widgets to create richer sidebars and a better user journey.
Another strategy is using shortcodes within text widgets to embed dynamic content like contact forms or pricing tables directly into your sidebars.
Using WordPress widgets with Bluehost WordPress hosting
Widget-rich sites place real demands on your hosting environment. Every social feed, signup form and product filter makes a database or API call. On underpowered hosting, that means slower page loads and degraded user experience – especially under traffic spikes.
Get expert guidance over a call
📞 Call 888-401-4678Bluehost WordPress hosting is built on NVMe SSD storage running on Oracle Cloud Infrastructure. That combination reduces server response time and keeps interactive widgets – forms, live feeds, dynamic content – loading reliably even as your site grows.
Here is what matters specifically for widget-heavy sites:
- WordPress pre-installed: Start configuring widget areas immediately after signup.
- NVMe storage: Faster read/write speeds support dynamic widgets like product filters and social feeds without load time penalties.
- Free SSL on eligible plans: Critical for form widgets that collect subscriber or payment data.
- Managed WordPress updates: Theme and plugin updates happen automatically. Your widget library stays current.
- Backup tools on managed plans: Test new widget layouts or switch themes without risking your live site.
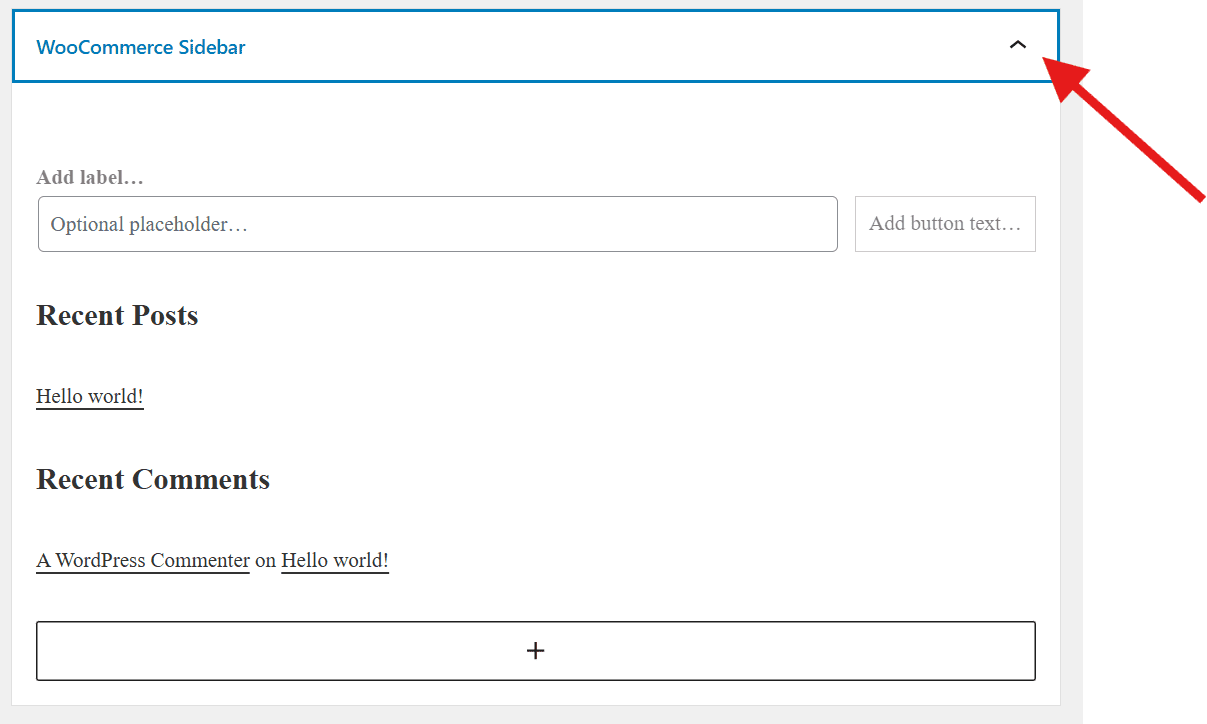
- eCommerce-focused plans available: eCommerce Essentials and eCommerce Premium include shopping cart and WooCommerce widgets pre-configured.
Your focus stays on which widgets to show, where to place them and how they serve your visitors – not on whether your server can handle the load.
Final thoughts
In summary, WordPress widgets are powerful, user-friendly tools that let you build a functional and engaging website. Whether you’re using built-in options or coding a custom WordPress widget, these blocks give you the flexibility to design a site that serves your audience effectively and enhances your site’s functionality.
Ready to take your WordPress site to the next level? Get started with Bluehost WordPress hosting and enjoy automatic WordPress installation, built-in performance optimization and expert 24/7 support. Power your website with reliable hosting designed specifically for WordPress users.
FAQs
Wondering what is a WordPress widget? It’s a pre-built content or feature block – such as a search bar, navigation menu, recent posts or email signup form – that you can easily drag and drop into widget-ready areas of your WordPress site, including the sidebar, footer or header, without writing any code.
Understanding what is a WordPress widget is essential before adding one to your site. To add a WordPress widget, navigate to Appearance > Widgets in your WordPress dashboard and drag the desired widget into an available widget area such as your sidebar or footer. Once placed, click the widget to configure its settings, save your changes and the widget will display on your live site instantly.
Widgets are located under <strong>Appearance > Widgets</strong> in your WordPress dashboard. In block themes, you may need to access them through <strong>Appearance > Editor</strong> instead. Your active theme determines which widget areas are available for use.
Check that you placed the widget in the correct widget area and cleared your site cache. Verify your theme supports sidebars on that page type. Plugin conflicts can also prevent widgets from displaying- try deactivating plugins temporarily to identify the issue.
Widgets are modular elements placed in specific theme locations like sidebars, while blocks are building units used throughout the block editor for page content. Modern WordPress merges these concepts- classic widgets can function as blocks using the Legacy Widget block.
Navigate to <strong>Appearance > Widgets</strong>, locate the widget you want to remove, click it to open settings, then click <strong>Delete</strong>. You can also drag it to <strong>Inactive Widgets</strong> to preserve its configuration for future use.

Write A Comment