Key highlights
- Solve “Maximum size exceeded” errors when uploading large WordPress themes or plugins.
- Connect directly to your server using this free FTP client, bypassing WordPress upload limits.
- Secure your file transfers with SFTP on port 22 for enhanced protection.
- Use the user-friendly dual-panel interface to drag and drop files between your local computer and remote server.
- Save multiple server profiles in Site Manager for quick and easy connections.
[“File upload failed. Maximum size exceeded.”]
If you’ve ever tried uploading a large file like a premium theme or plugin to WordPress, you’ve probably seen this frustrating error message. You’re not alone – 74% of WordPress users hit these file size limits, often at the worst possible moments.
Professional web developers have used a simple solution for years that will solve this problem for you. The solution is FileZilla, a powerful yet easy-to-use FTP client. Understanding how to use FileZilla allows you to transfer files directly to your website’s server.
No more dealing with upload limits or frustrating errors. FileZilla gives you full control over your website files – even when your dashboard is inaccessible. In this tutorial, you’ll learn exactly how to use FileZilla to easily manage your WordPress website files without any limitations.
But first, let’s understand what FileZilla is.
What is FileZilla?
The FileZilla FTP client is a free, open-source FTP (File Transfer Protocol) client that helps you transfer files between your local computer and your website’s server. Your WordPress dashboard offers many file management options, but sometimes you need deeper access. This is where the FileZilla FTP client becomes essential.
Most WordPress users discover FileZilla FTP client’s value when they need to migrate websites, install custom code or fix issues that can’t be resolved through the standard dashboard. The visual user interface makes moving files intuitive, even for beginners.
Understanding how to use FileZilla to transfer files will save you time and frustration in these situations.
Also read: What is FTP? An Introduction to File Transfer Protocol
How to download and install FileZilla?
Before you start using the FileZilla FTP client to transfer files, you need to download and install it on your PC. The process varies slightly depending on your operating system, but it is straightforward.
Follow these steps to get the FileZilla FTP client up and running.
Finding the official download page
The first thing you must do is download the FileZilla FTP client from the official website to avoid potentially harmful software. Follow these steps:
- Go to filezilla-project.org
- You’ll see two options: FileZilla Client (for personal use) and FileZilla Server (for hosting your own server).
- Click the “Download FileZilla Client” button.
- Choose the appropriate version for your operating system (Windows, mac OS or Linux).

Pro tip: Always download the FileZilla FTP client from the official site. Third-party download sites sometimes bundle unwanted software with legitimate programs.
Windows installation steps
Installing the FileZilla FTP client on Windows is straightforward:
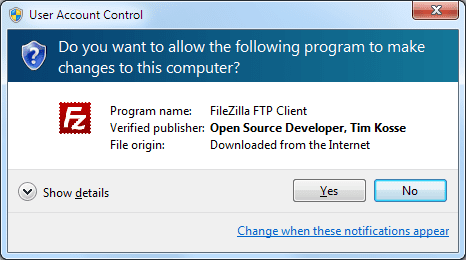
- Open the downloaded .exe file and respond to any Windows security prompts by clicking “Yes.”
- Select your preferred language, then click “OK” and “Next” on the welcome screen.
- Accept the license agreement by selecting “I Agree.”

You’ll need to decide whether to install it for all users or just yourself. The default installation components work well for most users.
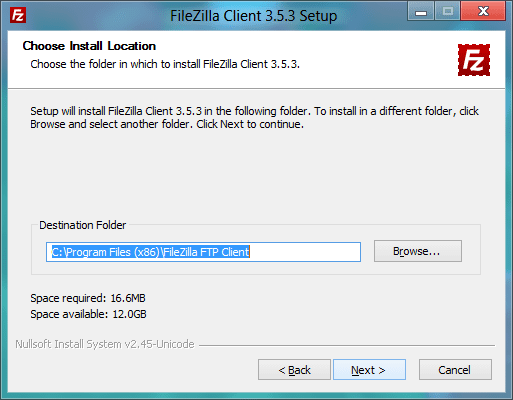
You can keep the default installation location or choose a different directory if preferred.
- Select where you want to install the program and click “Next.”
- Now, select whether you want to create shortcuts and click “Install.”
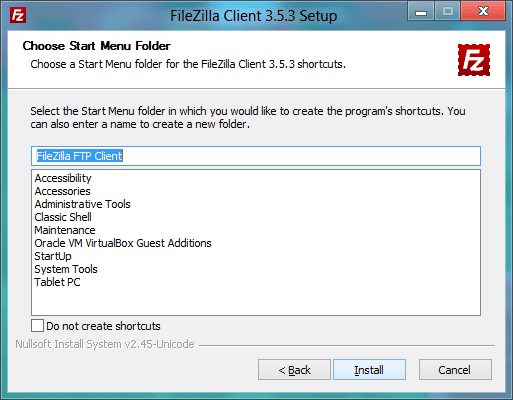
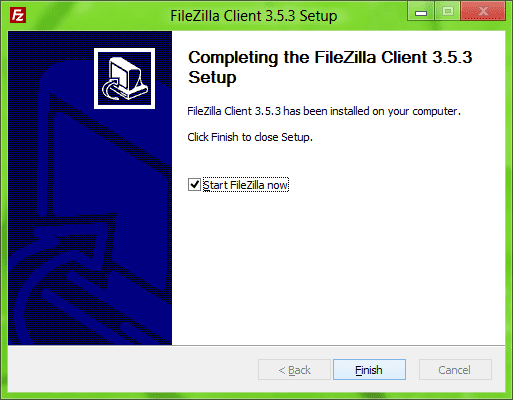
- Once complete, click “Finish” to launch FileZilla.
macOS installation steps
Mac users will find the installation process equally straightforward. Here’s how it goes:
- Open your Downloads folder by selecting Go > Downloads from the file menu.

- Find the FileZilla installation file (typically named something like FileZilla_macosx-x86.app.tar.bz2).
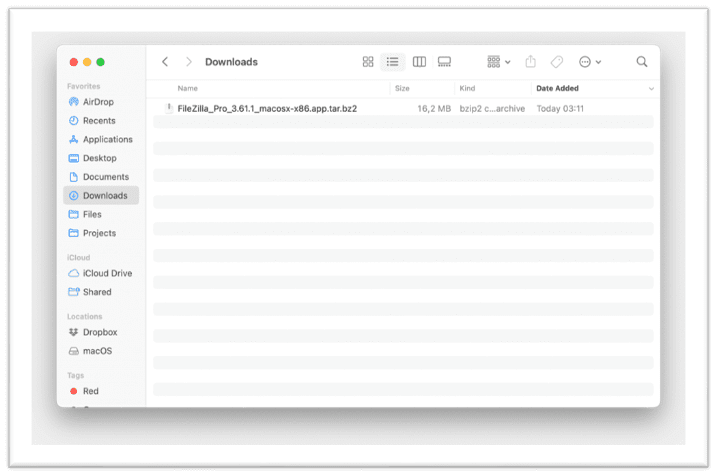
- Double-click on the installation file to unzip it.
- Drag the FileZilla icon to the Dock (referred to as “taskbar” in the documentation) for easy access.
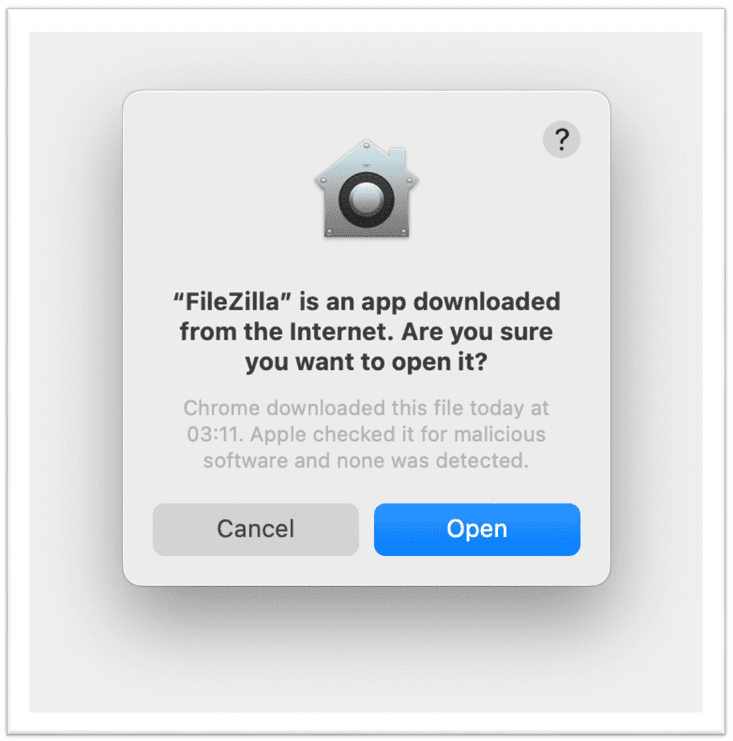
You might see a security prompt about downloading from the internet – this is normal for non-App Store applications. Click “Open” again to confirm. FileZilla will now launch on your Mac and be ready for use.
First-time setup considerations
The first time you open the FileZilla FTP client, you’ll see several setup options. You can choose whether to enable anonymous usage statistics to help improve the program. FileZilla also checks for updates automatically, ensuring you always have the most secure version.
A welcome screen presents quick tips for beginners – these are worth reading if you’re new to FTP clients. The interface may look complex at first glance, but don’t worry. Once you learn how to use FileZilla to transfer files, the process becomes second nature.
Also read: The 6 Best FTP Clients To Develop Your Website in 2025
Understanding the FileZilla interface
At first glance, FileZilla’s interface may look overwhelming with multiple panels and buttons. However, once you understand its layout, navigating the software becomes intuitive. Here’s a breakdown of the main sections you’ll use to manage file transfer tasks efficiently:
- Toolbar: Contains buttons for common actions like connect, disconnect, refresh and site manager
- Quick connect bar: Allows fast connection to servers without saving details
- Status window: Shows connection messages and transfer status
- Directory windows: Left side shows your local directory tree, right side shows server files on remote directory
- Transfer queue: Bottom section displays ongoing and completed file transfers
The left panel shows files on your computer, while the right panel displays list of files on your website server after connecting. This side-by-side view makes transferring files intuitive and helps you quickly navigate both environments.
How to connect to your website via FTP?
When you connect to FTP server through the FileZilla FTP client, you establish a secure tunnel between your computer and your website’s files. This connection allows you to transfer files with FileZilla in both directions – uploading from your computer or downloading from your server.
To upload and download files, you need to know how to connect to FTP server using FileZilla. This requires specific login information that you can retrieve from your hosting provider. Let’s go over how to locate your FTP credentials and set up a connection.
1. Locating FTP credentials in Bluehost
Before connecting, you need your FTP credentials from your web hosting provider. Most hosting companies make these credentials available through their account dashboard.
As a leading WordPress hosting provider, Bluehost offers easy access to your FTP credentials through our intuitive dashboard. You can quickly locate all the necessary connection details for both new and existing websites in just a few clicks.
Your Bluehost FTP credentials include:
- FTP port (21 for standard FTP, 22 for SFTP)
- FTP hostname (usually your domain name or server IP address)
- FTP username (often your primary cPanel username)
- FTP password (the same password you use for hosting login)
Here’s how you can locate them:
- Log in to your Bluehost account.
- Go to “Hosting” in the left sidebar.
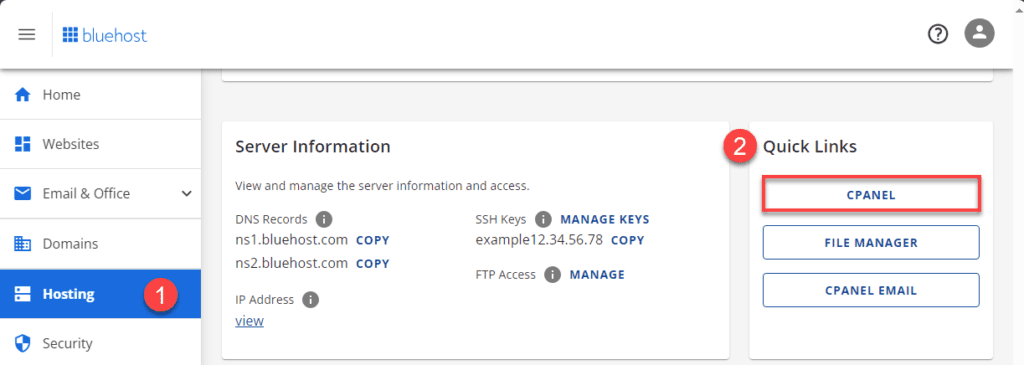
- Select cPanel and click “FTP Accounts.”
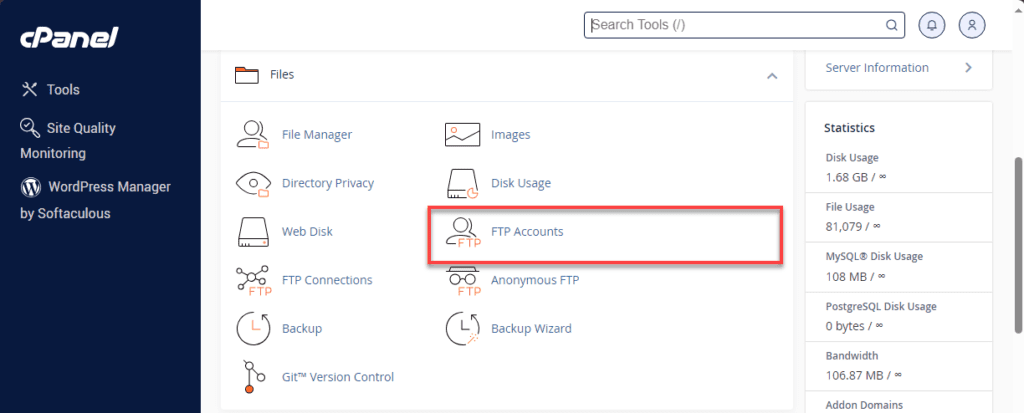
- Here you’ll find your existing FTP users or can create a new one.
- Note down three crucial pieces of information:
- FTP hostname (usually ftp.[yourdomain].com)
- FTP username
- FTP password
If you’ve forgotten your password, you can reset it from this screen. For security, we recommend creating specific FTP users with limited access rather than using your main account credentials.
Unlike many hosts that require support tickets for FTP setup, Bluehost gives you instant access to unlimited FTP accounts, one-click credential resets and clear documentation – all from your intuitive dashboard. Spend less time on setup and more time building your site.
2. Setting up a new connection
FileZilla offers two ways to connect: Quick Connect for one-time access or Site Manager for saved connections. For your Bluehost WordPress site, the FileZilla Site Manager is better since you’ll likely connect regularly.
To create a saved connection in Site Manager:
- Click the Site Manager icon (first icon on the toolbar) or press Ctrl+S.
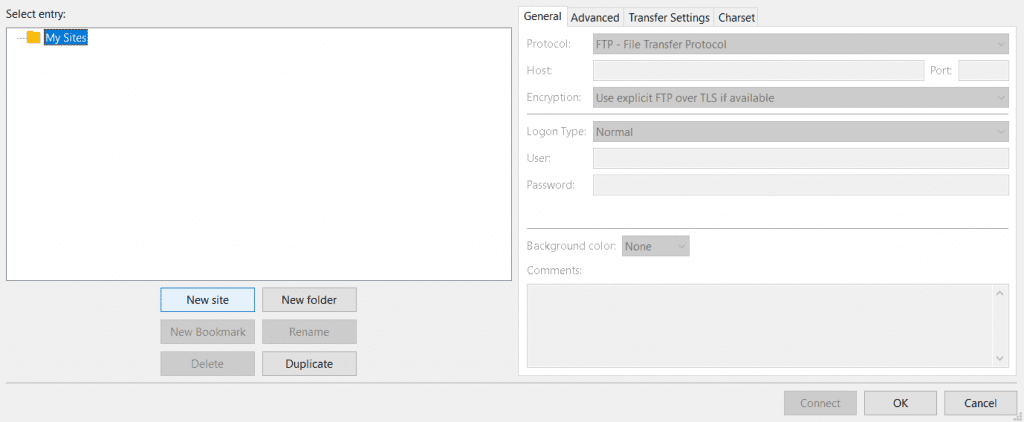
- Click “New Site” and name it something recognizable like “My Bluehost WordPress Site.”
- On the General tab, enter your server details:
- Host: Your FTP hostname from Bluehost (for example, ftp.[yourdomain].com)
- Port: Leave blank for default (21)
- Protocol: Choose FTP or SFTP (see below)
- Encryption: Choose “Use explicit FTP over TLS if available” for better security
- Logon Type: Choose “Normal” to save your password
- User: Your FTP username from Bluehost
- Password: Your FTP password
- Click “Connect” to connect immediately or “OK” to save without connecting
This setup takes just a minute but saves you from entering your credentials each time you need to access your Bluehost site. Learning how to use FileZilla server properly starts with these basic connection settings.
3. FTP vs SFTP connection options
FileZilla supports both FTP and SFTP connections:
- FTP (File Transfer Protocol): The standard protocol, usually on port 21
- SFTP (SSH File Transfer Protocol): A more secure option, usually on port 22
For Bluehost accounts, always use SFTP when possible. It enables secure file transfers to protect your data and login credentials. To connect to FTP server using SFTP with Bluehost:
- Select “SFTP – SSH File Transfer Protocol” from the Protocol dropdown.
- Change the port to 22 (or the port specified by your host).
- Your other settings remain the same.
We specifically recommend using SFTP over regular FTP for improved security. Bluehost VPS and Dedicated Server plans support SFTP connections out of the box.
For Shared Hosting plans, SFTP is available but requires you to enable SSH Access first, and only the main cPanel username can use SFTP (additional FTP accounts won’t work for SFTP).
Also read: How to Connect WordPress Website Using SFTP
4. Saving site manager profiles
Once you’ve set up your Bluehost FTP connection, the FileZilla FTP client saves it in Site Manager. To connect in the future:
- Open Site Manager (first icon or Ctrl+S).
- Select your saved Bluehost site profile.
- Click “Connect.”
If you manage multiple WordPress websites on Bluehost or other hosting providers, you can save profiles for each one. This feature is particularly helpful for developers and agencies managing several client sites.
How to use FileZilla to transfer files?
Now that you’re connected to your website, you can start transferring files. FileZilla provides an intuitive way to upload, download and manage your site’s content. You can transfer files with FileZilla using multiple methods, from drag-and-drop to right-click menus.
1. Uploading files to your FTP server
After connecting to your Bluehost account, uploading files to your WordPress site is straightforward:
- Connect to your server using your saved Bluehost profile.
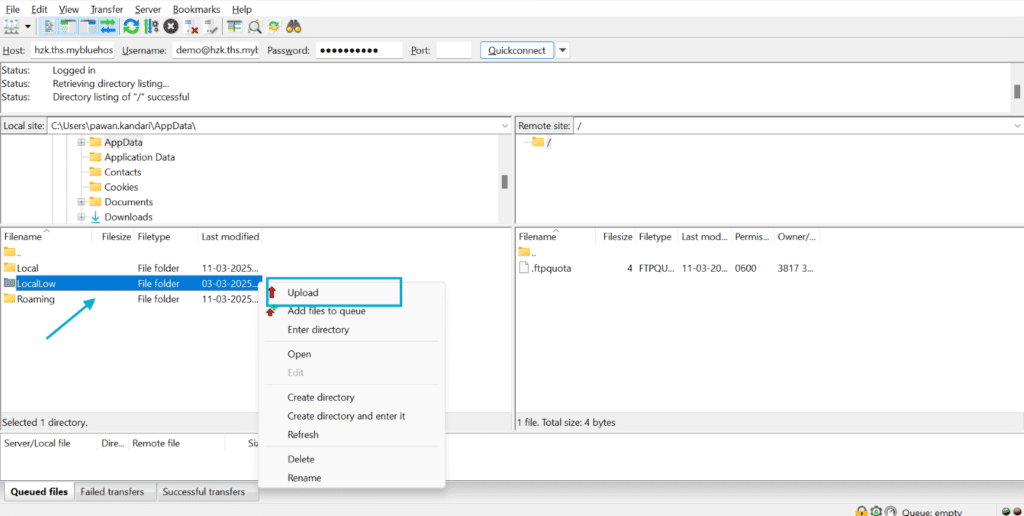
- In the left panel, navigate to the files on your computer you want to upload.
- In the right panel, navigate to the destination folder on your Bluehost server.
- Select the files or folders you want to upload from the left panel.
- Right-click and select “Upload” or simply drag them to the right panel.
For Bluehost WordPress sites, you’ll typically upload files to specific directories. The most common locations include:
- /wp-content/themes/ for custom theme files
- /wp-content/plugins/ for adding plugins manually
- /wp-content/uploads/ for media files like images and documents
When installing a new theme, upload it to the themes directory and then activate it through your WordPress dashboard.
2. Downloading files from your server
Downloading files from your Bluehost account works similarly:
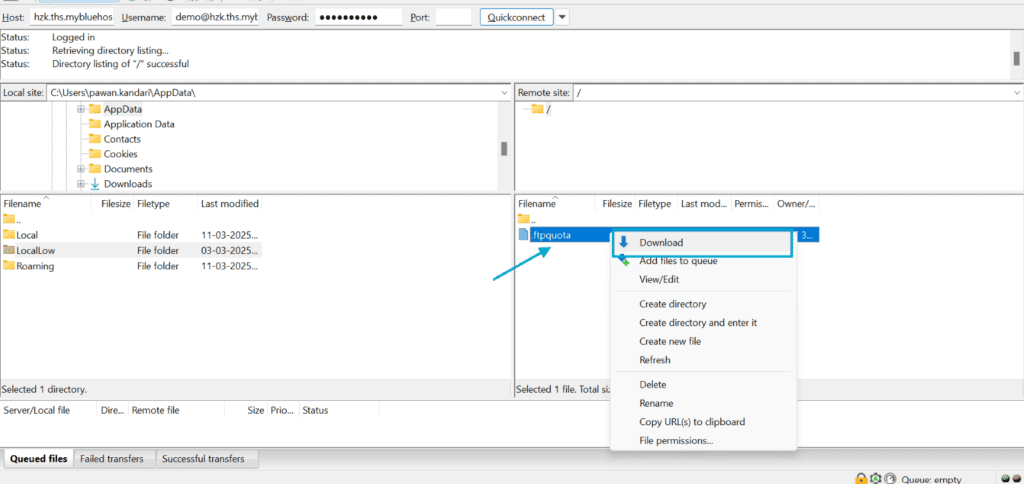
- Navigate to the files you want to download in the right server panel.
- Select the files or folders you need.
- Right-click and select “Download” or drag them to the left panel.
This process is especially useful for creating manual backups of your WordPress site. While Bluehost provides automated weekly backups on all plans as a basic feature, downloading a complete copy of your site provides additional peace of mind before making major changes.
Also read: Handy Guide to Backing Up Your WordPress Website
3. Drag-and-drop file management
TThe simplest way on how to use FileZilla to transfer files between your computer and Bluehost server is through FileZilla’s intuitive drag-and-drop interface:
- Select one or multiple files in either panel.
- Drag them from the source panel to the destination panel.
- FileZilla starts the transfer automatically.
You can also navigate through folders by double-clicking them in either panel, just like you would in your regular file manager. This drag-and-drop method is why many developers prefer to transfer files with FileZilla rather than using the WordPress dashboard or cPanel File Manager.
4. Managing file permissions
Sometimes you need to modify file permissions on your WordPress site. Bluehost uses standard Linux permissions that you can change through FileZilla:
- Right-click the file or folder on your Bluehost server.
- Select “File permissions.”
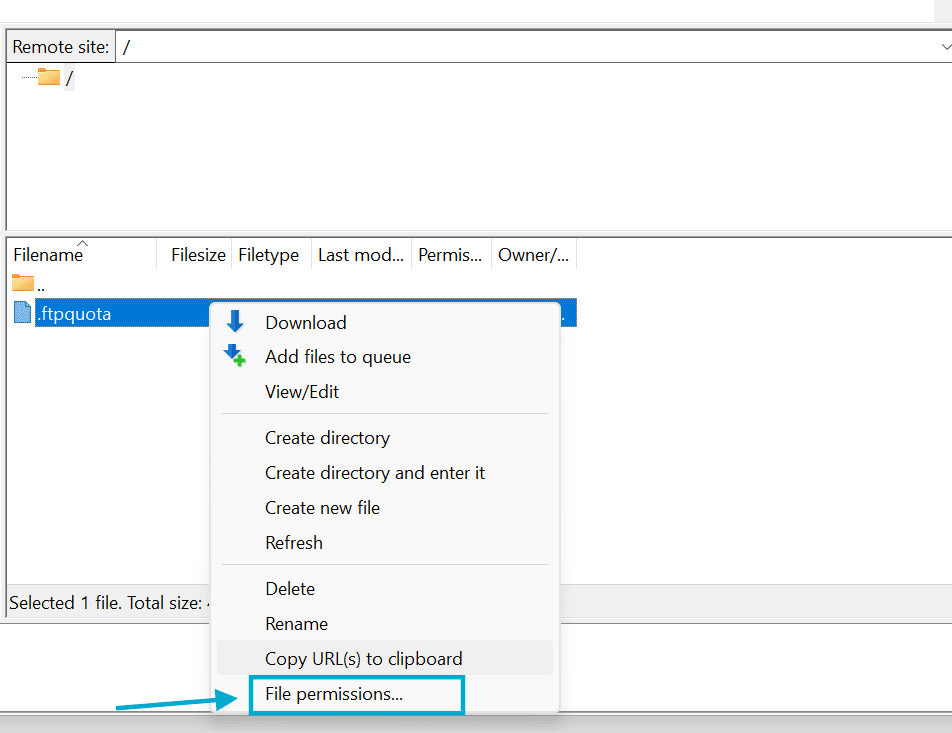
- A dialog appears with checkboxes for different permissions.
- Alternatively, enter a numeric value like 755 or 644.
- Click “OK” to apply the changes.
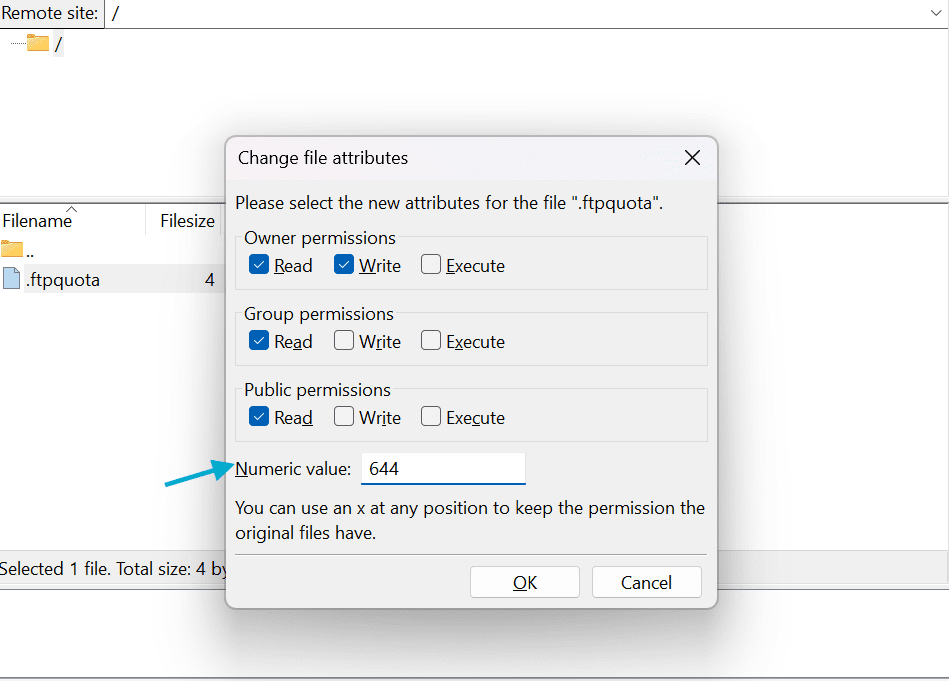
For Bluehost WordPress sites, follow these permission guidelines:
- Folders: 755 (owner can read/write/execute, others can read/execute)
- Regular files: 644 (owner can read/write, others can read)
- wp-config.php: 600 (only owner can read/write for maximum security)
Incorrect permissions can cause security issues or prevent WordPress from functioning properly. If you’re unsure, contact Bluehost support before making significant permission changes.
5. Transfer settings and best practices
To optimize file transfers with your Bluehost account:
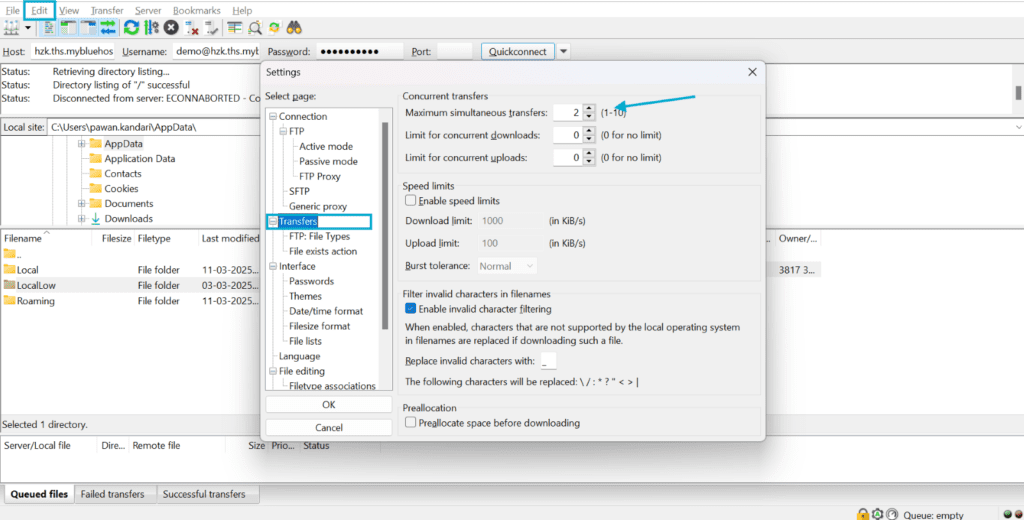
- Go to Edit > Settings > Transfers.
- Set “Simultaneous transfers” to 2-3 for shared hosting plans.
- Enable “Limit number of simultaneous connections” for better stability.
When transferring WordPress files on Bluehost:
- Always create a full backup before making major changes.
- Avoid modifying core WordPress files as they’ll be overwritten during updates.
- Use the WordPress dashboard for plugin and theme updates when possible.
- Schedule large file transfers during off-peak hours for better performance.
Following these best practices will help ensure smooth file transfers and maintain the stability of your Bluehost WordPress site.
Common FileZilla errors and how to fix them
Even experienced users occasionally run into connection issues with the FileZilla FTP client. Here are solutions to the most common problems you might encounter when you connect to FTP server using FileZilla:
1. Connection failure solutions
If you see “Could not connect to server” error when trying to connect to your hosting account:
- Double-check your FTP credentials in your hosting account dashboard.
- Verify the hostname is correct (typically ftp.[yourdomain].com).
- Try using your main hosting username instead of an FTP-specific username.
- Reset your FTP password if necessary.
- Make sure your internet connection is working properly.
- Temporarily disable your firewall or add an exception for FileZilla.
If the error message mentions “EAI_NONAME – Neither nodename nor servname provided,” try using your server’s IP address instead of the domain name. You can find your server IP in your hosting dashboard under domain settings.
2. Timeout errors and settings
“Connection timed out” errors are common when working with shared hosting services:
- Go to Edit → Settings → Connection in FileZilla.
- Increase the timeout value to 120 seconds.
- Enable “Reconnect automatically” and set attempts to 3.
- Reduce simultaneous connections in Transfer Settings if you’re on a shared hosting plan.
Many shared hosting providers limit the number of concurrent connections. If you experience frequent timeouts, try limiting FileZilla to 1-2 connections at a time in your settings.
3. Permission denied errors
When uploading or modifying files, you might see “Permission denied” messages such as:
- Check if you have the correct access level for your FTP account.
- Some directories in managed WordPress hosting are restricted for security.
- For WordPress sites, focus on the wp-content directory for your customizations.
- Contact your hosting provider if you need temporary access to restricted directories.
Permission errors often occur when trying to modify files or folders that your FTP user doesn’t have access to. This is especially common in managed WordPress environments where certain directories are protected.
4. Failed to retrieve directory listing
If you connect successfully but can’t see any files or folders:
- Check if you’re using active or passive transfer mode.
- Go to Edit → Settings → Connection → FTP → Transfer Mode.
- Try switching from “Default” to “Passive” (most common for modern servers).
- If passive mode doesn’t work, try “Active” instead.
- Some firewalls block the ports needed for directory listings.
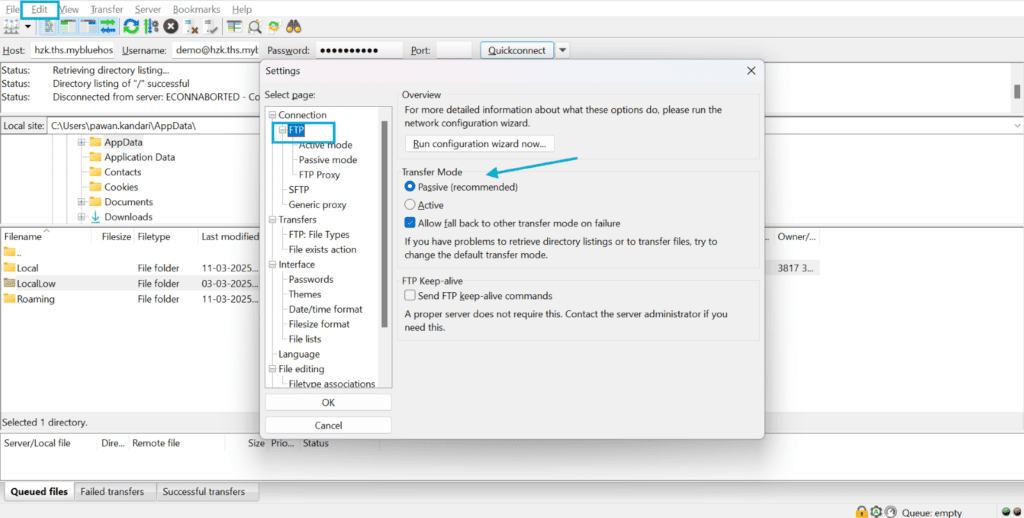
Passive mode is generally recommended for most connections, but some server configurations require active mode instead.
5. Secure connection errors
If you receive TLS/SSL errors when attempting a secure connection:
- Go to Edit → Settings → Connection → FTP.
- Try changing your encryption setting from “Explicit” to “Implicit” (or vice versa).
- If secure connections fail consistently, try “Only use plain FTP” as a temporary solution.
- Contact your hosting provider to confirm their SSL configuration.
Also read: How to Get Free SSL Certificate in 2025: A Complete Guide
While unencrypted FTP works as a fallback, always use secure connections when possible to protect your login credentials and transferred data.
Final thoughts
FileZilla provides a reliable way for managing website files when you need more direct access than the dashboard offers. It bridges the gap between your computer and your hosting account, giving you greater control over your site’s files.
With FileZilla, you can upload custom themes, install plugins manually and troubleshoot issues that can’t be resolved through the WordPress user-friendly interface. The ability to download a complete backup of your site adds an extra layer of protection to your website.
As you become more comfortable with how to use FileZilla server, you’ll find it’s an essential addition to your WordPress toolkit.
Ready to take control of your WordPress website?
Visit Bluehost today and get access to powerful tools, 24/7 support and seamless FTP access to manage your files with confidence.
FAQs
FileZilla is a free, open-source FTP client used for transferring files between your computer and web server. It’s primarily used for uploading large WordPress files that exceed dashboard limits, downloading site backups, managing file permissions and editing server files directly. FileZilla bypasses browser upload restrictions and handles files of any size.
To use FileZilla with WordPress:
(1) Download FileZilla from filezilla-project.org
(2) Get your FTP credentials from your hosting provider
(3) Connect using Site Manager with your hostname, username and password
(4) Navigate to /wp-content/ folders to upload themes, plugins or media files.
Bluehost provides instant FTP access through your dashboard for quick setup.
Yes, FileZilla is safe to use with WordPress when downloaded from the official website. For maximum security, always use SFTP (port 22) instead of regular FTP to encrypt your connection. Back up your site before making changes to files and avoid modifying core WordPress files unless necessary.
FTP transfers files without encryption, while SFTP uses SSH encryption to protect your data and login credentials. SFTP is more secure and recommended whenever available from your host. In FileZilla, you simply select SFTP instead of FTP in the protocol dropdown and typically use port 22.
Connection issues with Bluehost usually stem from incorrect credentials, firewall restrictions or network problems. Double-check your hostname (ftp.[yourdomain].com), username and password. Bluehost supports both FTP (port 21) and SFTP (port 22). If problems persist, contact Bluehost support for assistance – our 24/7 team specializes in FTP troubleshooting.
Increase the timeout settings in FileZilla by going to Edit > Settings > Connection and setting a higher timeout value (120 seconds recommended). Also check if your host restricts the number of simultaneous connections. Using the Site Manager to limit connections can help if your host has restrictions. Reduce simultaneous transfers to 2-3 for shared hosting plans.
FileZilla doesn’t include a built-in editor but supports remote file editing through external editors. Right-click a file on the server, select “View/Edit,” and FileZilla will download the file, open it in your default editor and upload it automatically when saved. To set up your preferred editor, go to Edit > Settings > File editing > Use custom editor.

Write A Comment