 ChatGPT,
  Claude,
  Gemini,
  Grok — all four for
 Bluehost Professional Email: How to Schedule an Email
Professional Email allows you to schedule emails to be sent automatically at a future date and time. This feature helps you plan communications in advance, send messages during business hours, and have emails sent at the date and time you choose. You can schedule new emails or replies and make changes before they are sent.
Log In to Professional Email Webmail
Option 1: Use the Login to Webmail Button
- Log in to your Bluehost Portal.
- From the left-hand navigation menu, click on the Email tab.
- Optional: In Professional Email, if multiple plans are listed, click Manage for the plan you want to use.
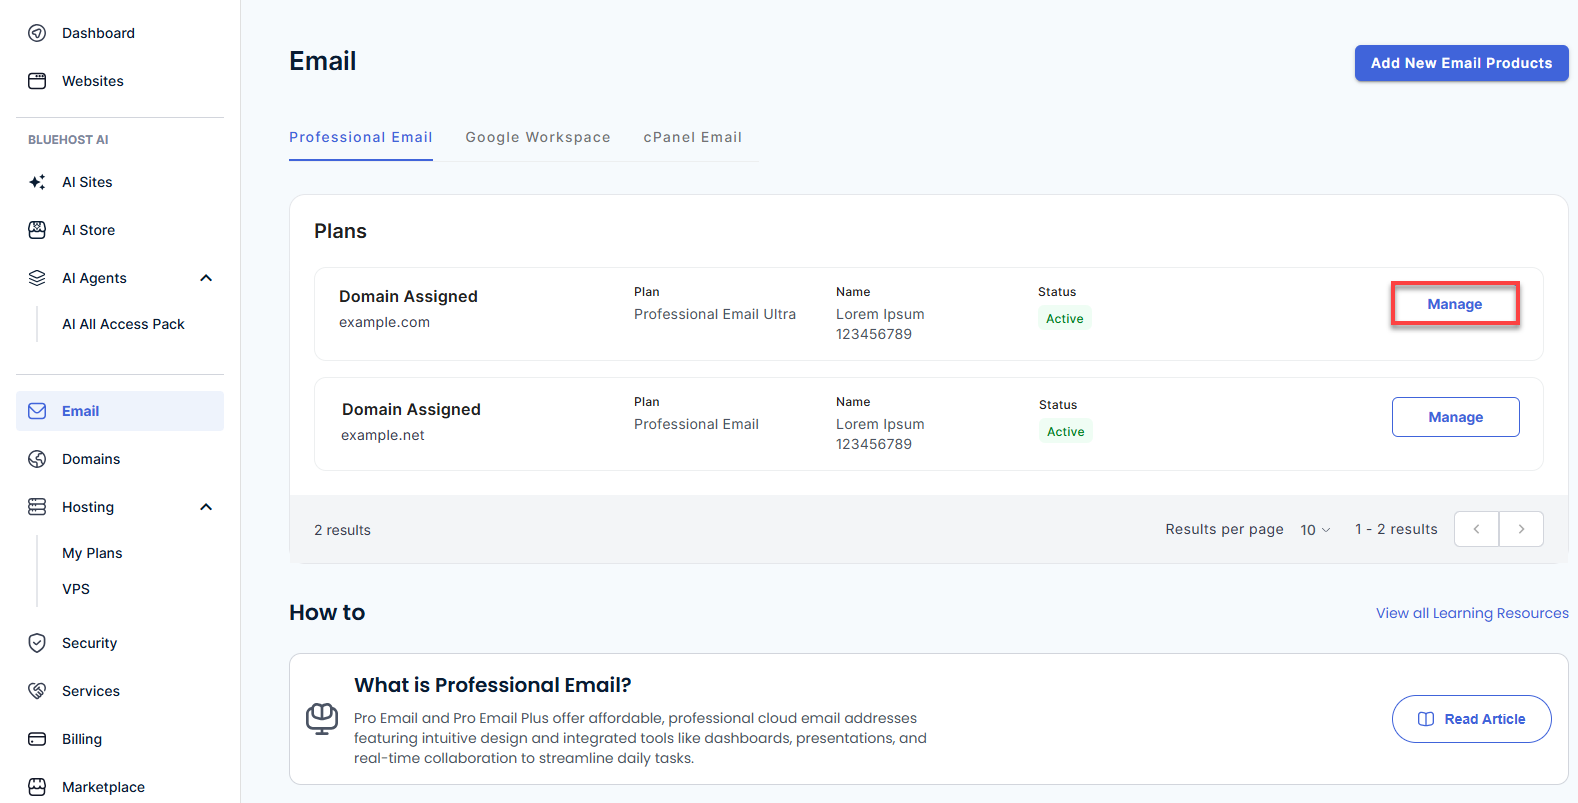
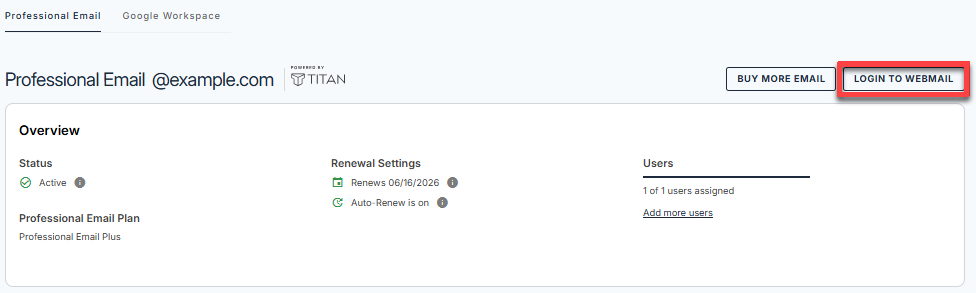
- You’ll be automatically redirected to the Email Management page, where you can manage your email settings and subscriptions.
- Click the Login to Webmail button.
- Enter your Professional Email username and password.
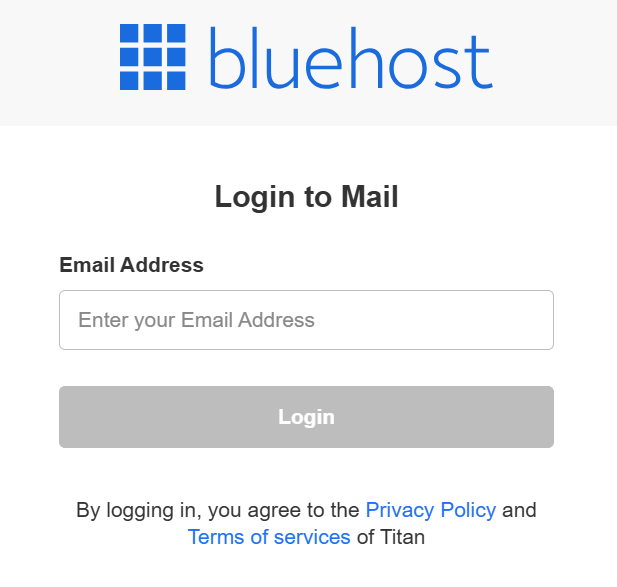
- Click Login.
Option 2: Use the Direct Login Link
- Go to the Professional Email login page.
- Enter your Professional Email username and password.
- Click Login.
Schedule an Email in Webmail
- Compose a new email or reply to an existing message.
- Click the dropdown arrow next to Send.
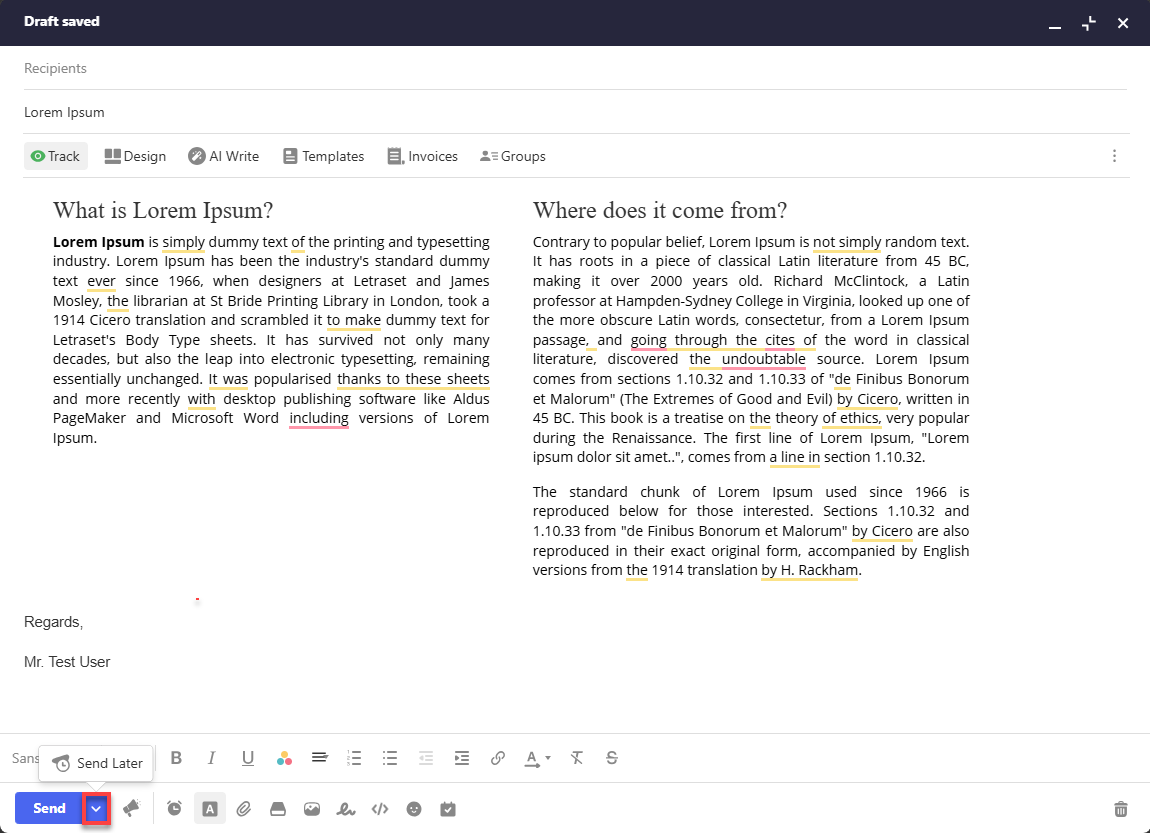
- Select Send Later.
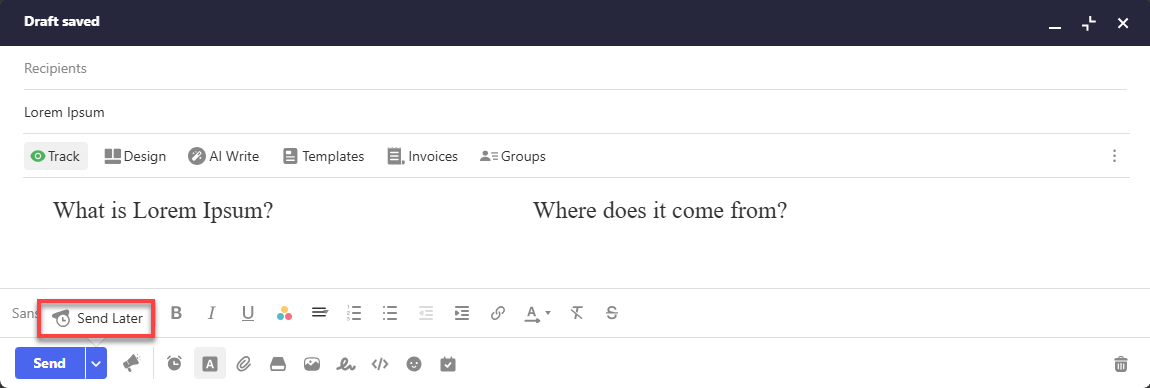
-
Choose one of the available scheduling options.
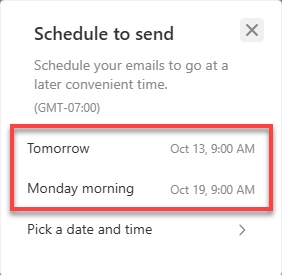
or
Select the Pick a date and time option.
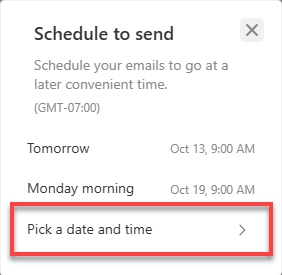
- If using a custom schedule, select the desired date and time.
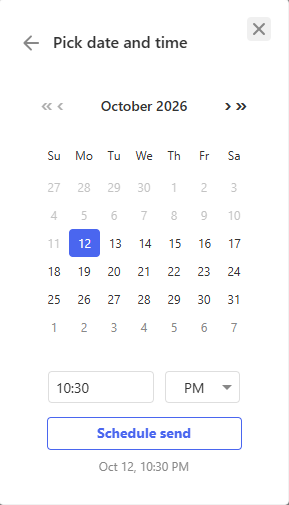
- If using a custom schedule, select the desired date and time.
- Click Schedule Send.
The email will remain in the Scheduled folder until it is sent.
Edit a Scheduled Email
- Open the Scheduled folder.
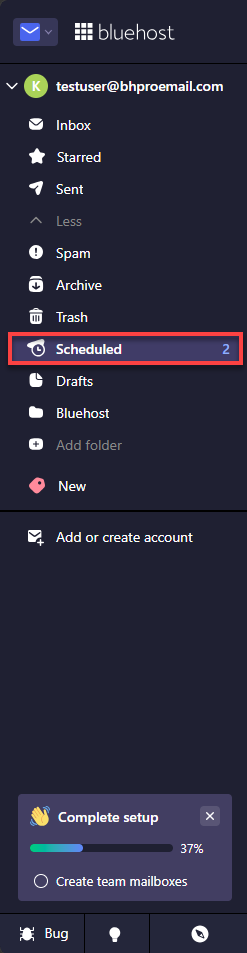
- Select the email you want to modify.
- Click Edit.
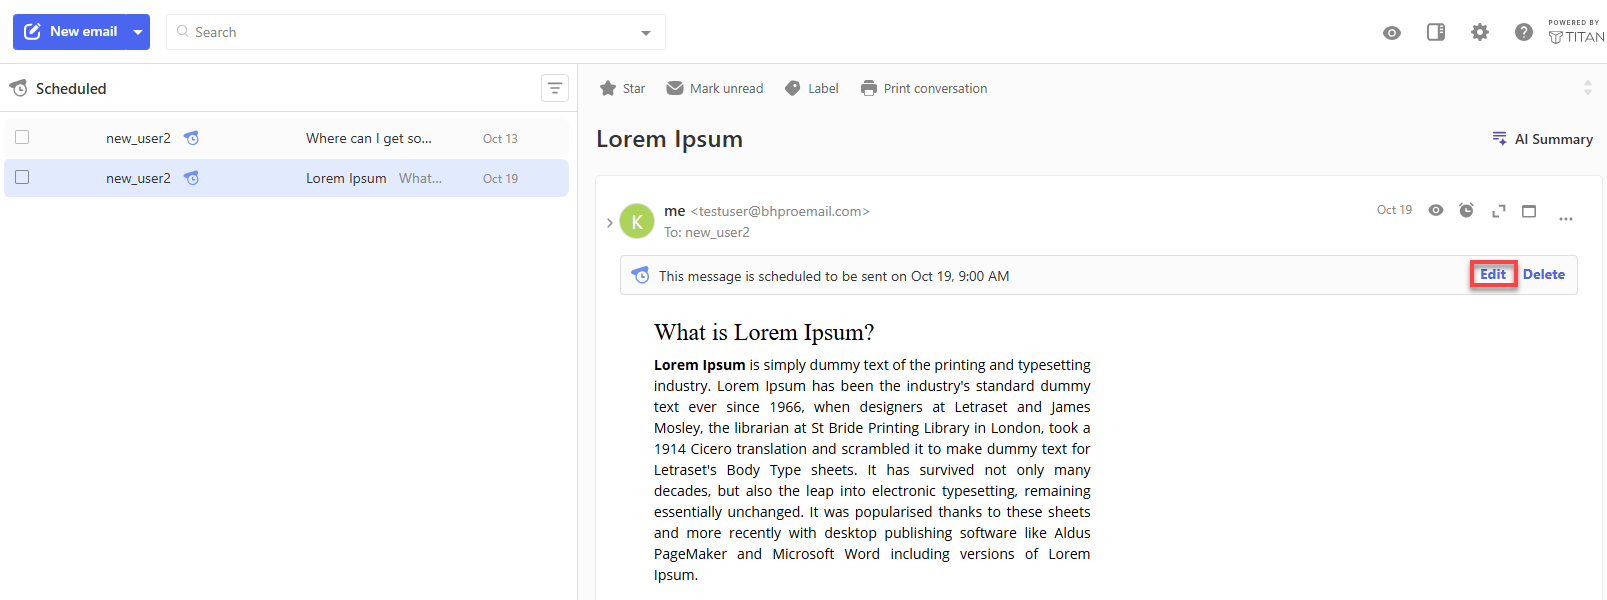
- Make your changes.
- Send the email immediately or select Send later to reschedule it.
Delete a Scheduled Email
- Open the Scheduled folder.
- Open the scheduled email you want to delete.
- Click Delete.
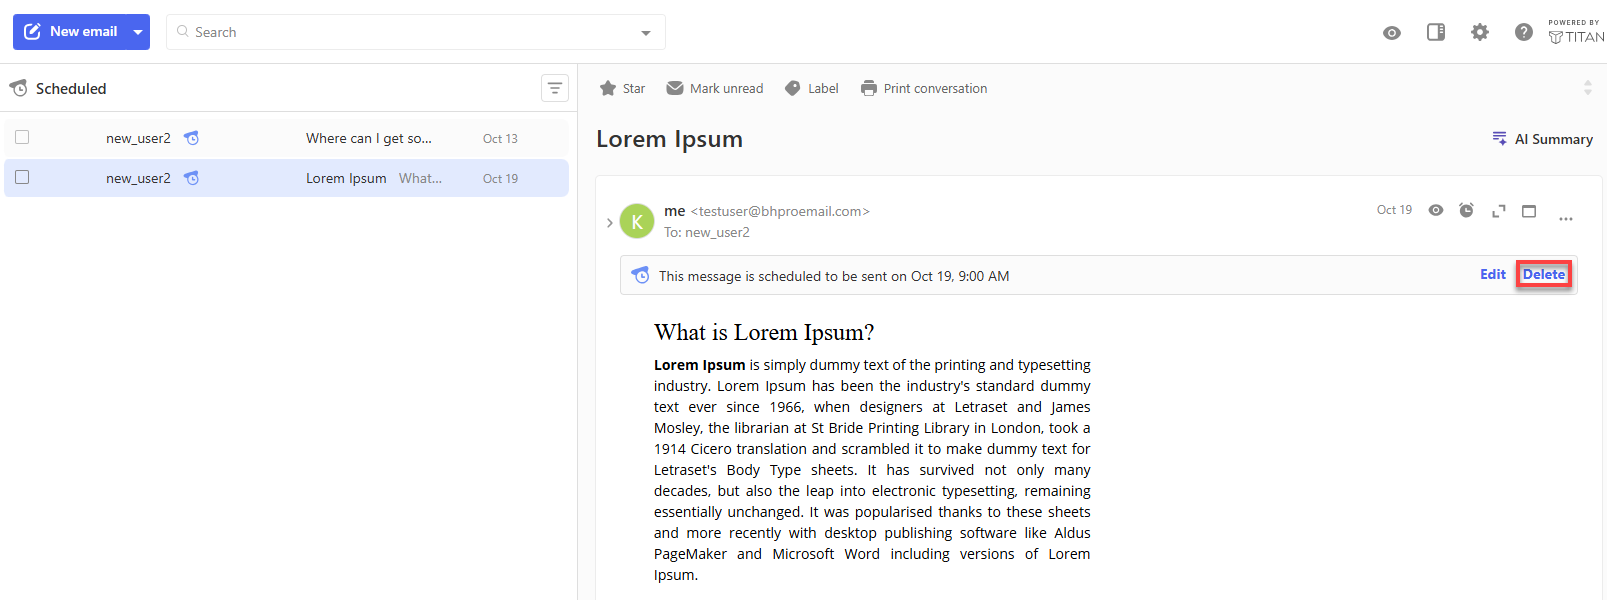
The scheduled email will be removed and will not be sent.
Schedule an Email on Android
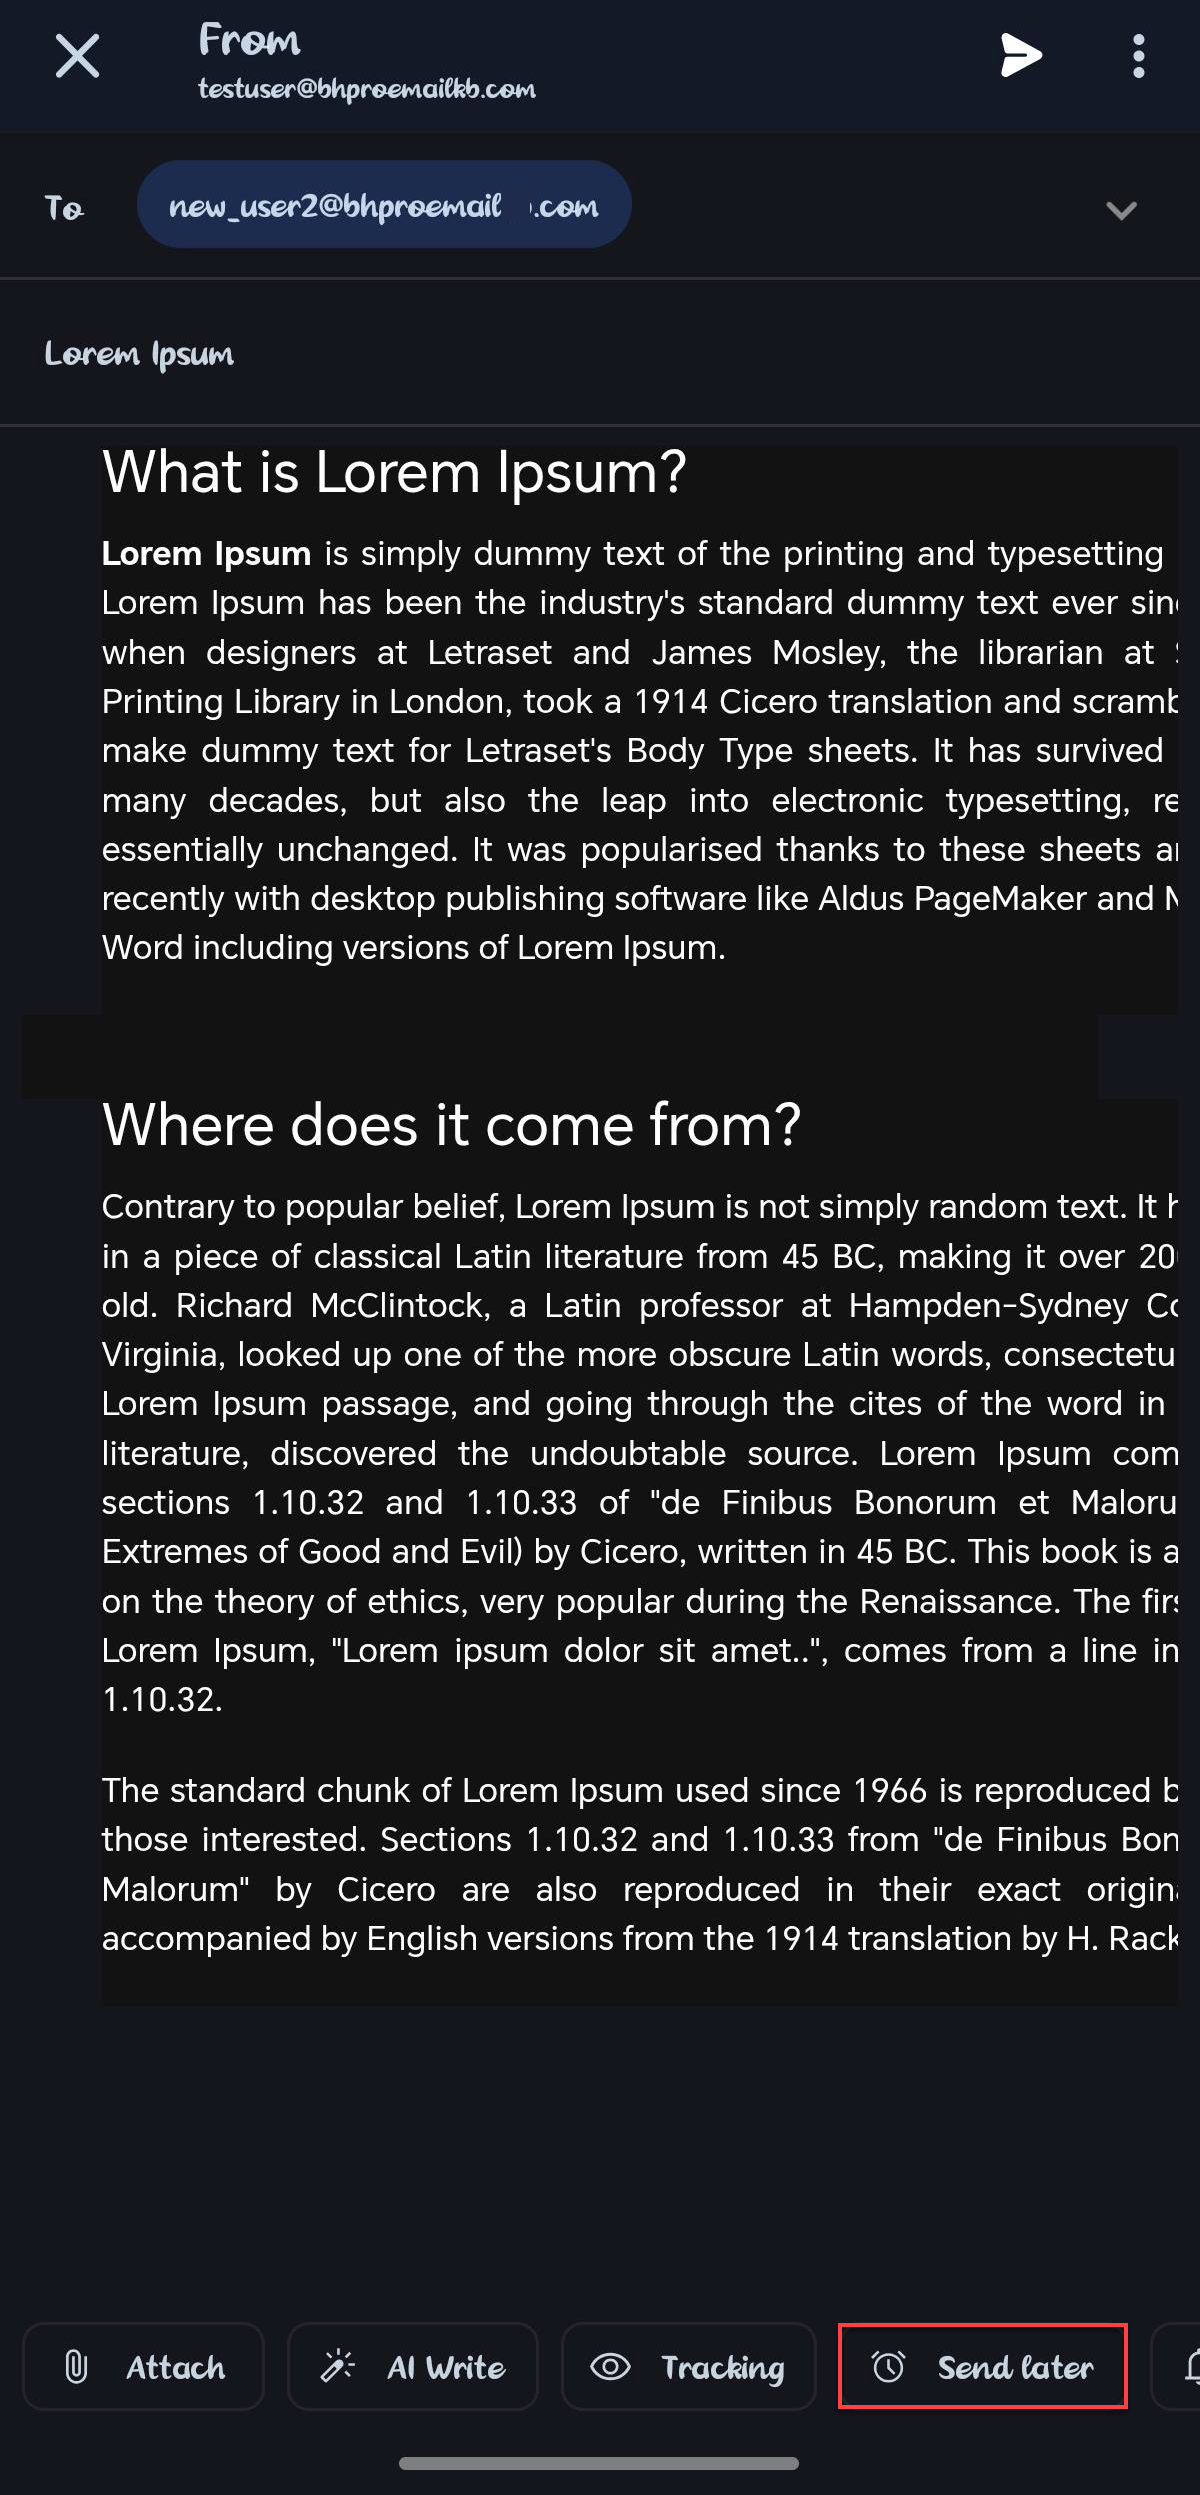
- Compose a new email or reply to an existing message.
- Click Send later at the bottom of the compose screen.
-
Choose one of the available scheduling options.
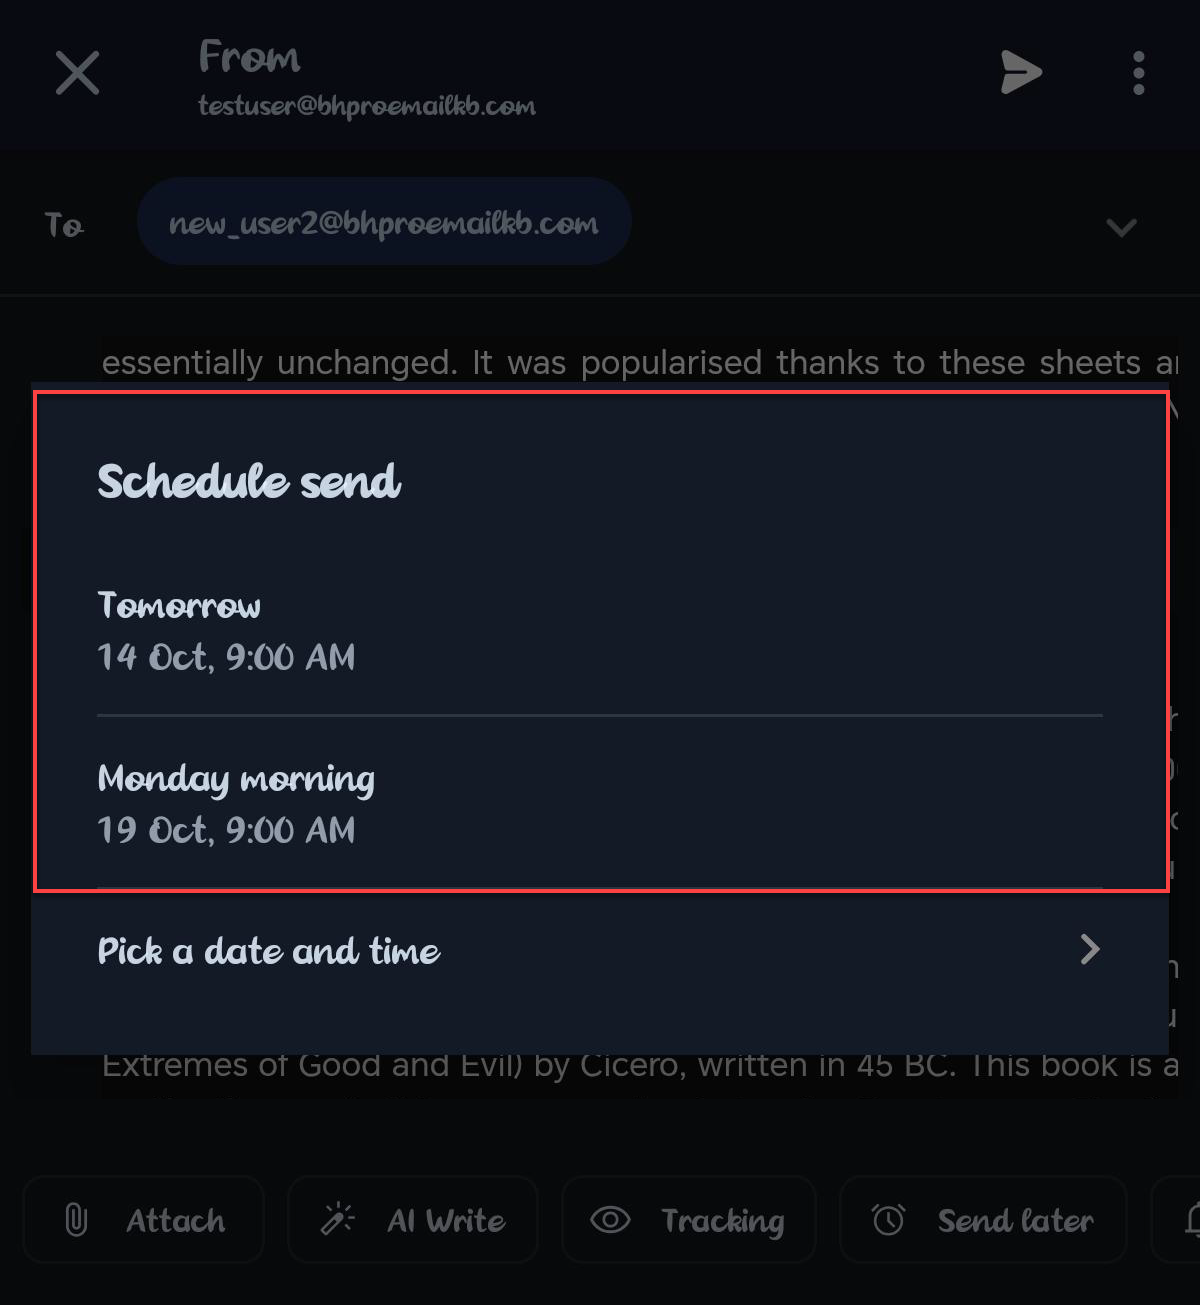
or
Select the Pick a date and time option.
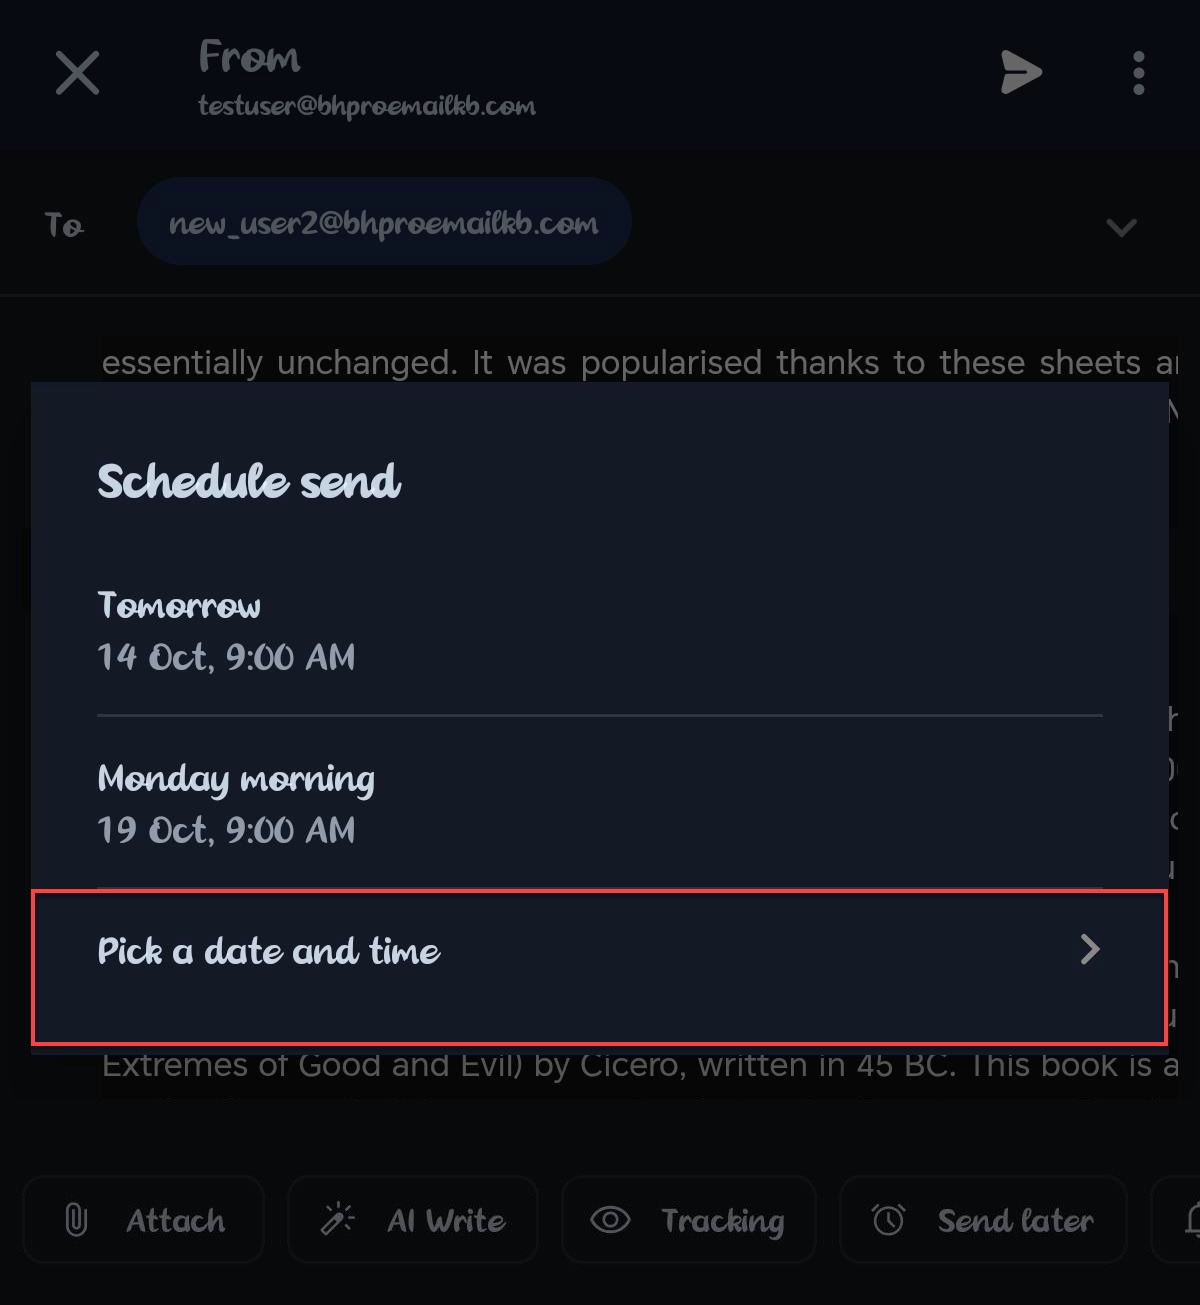
- If using a custom schedule, select the desired date and time.
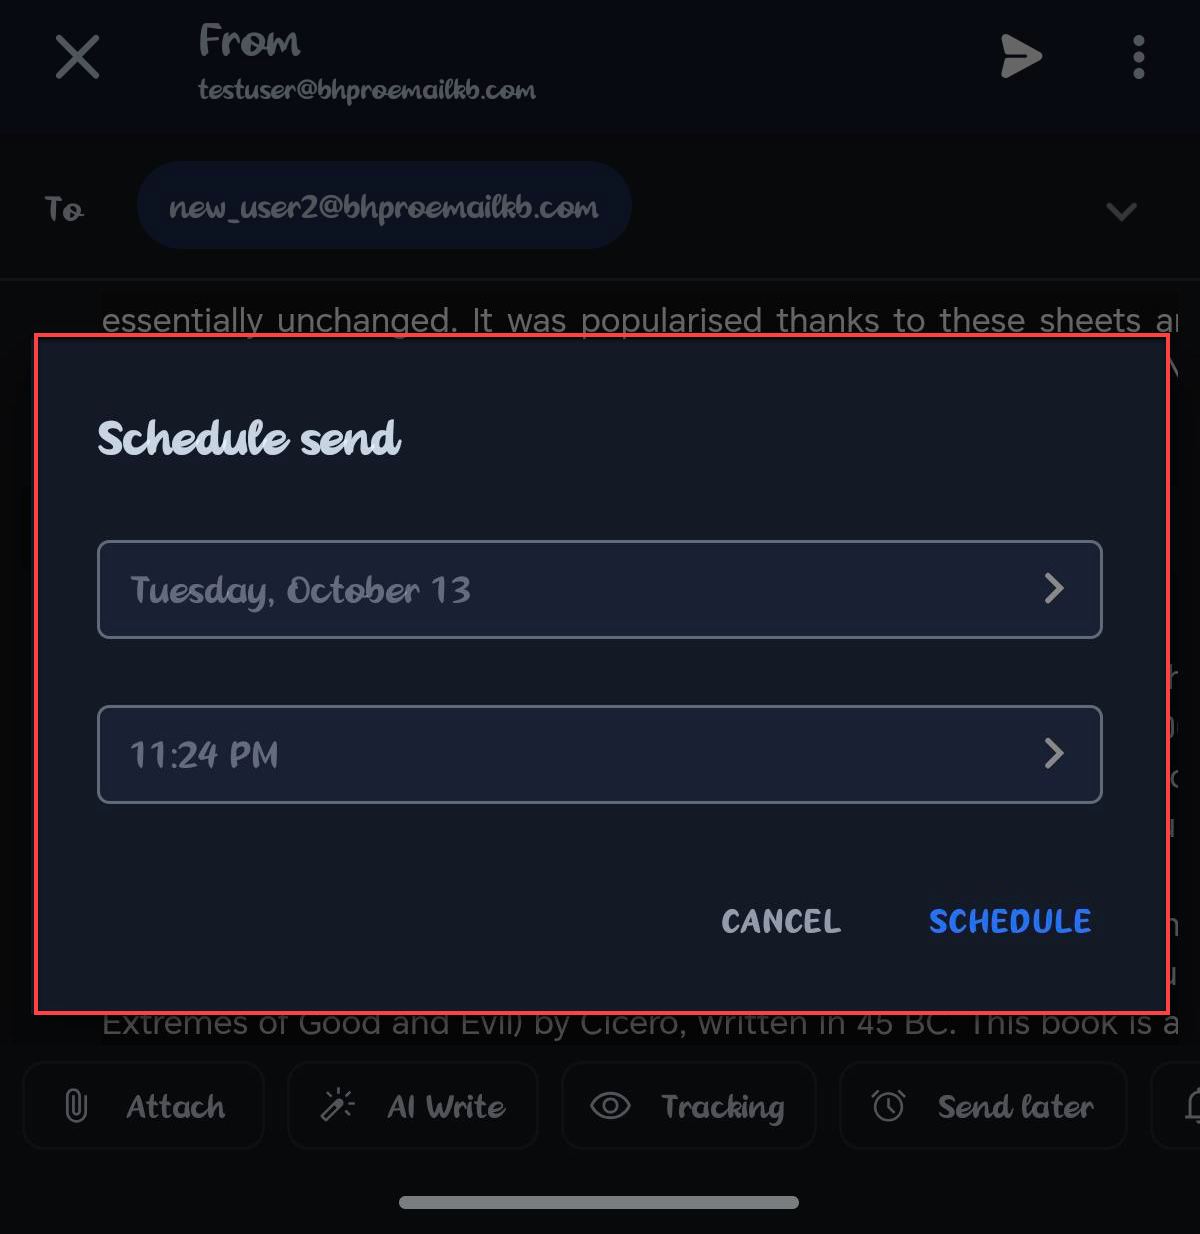
- If using a custom schedule, select the desired date and time.
- Click Schedule to confirm.
Your email will be scheduled for delivery at the selected time.
Edit a Scheduled Email
- Open the Scheduled folder.
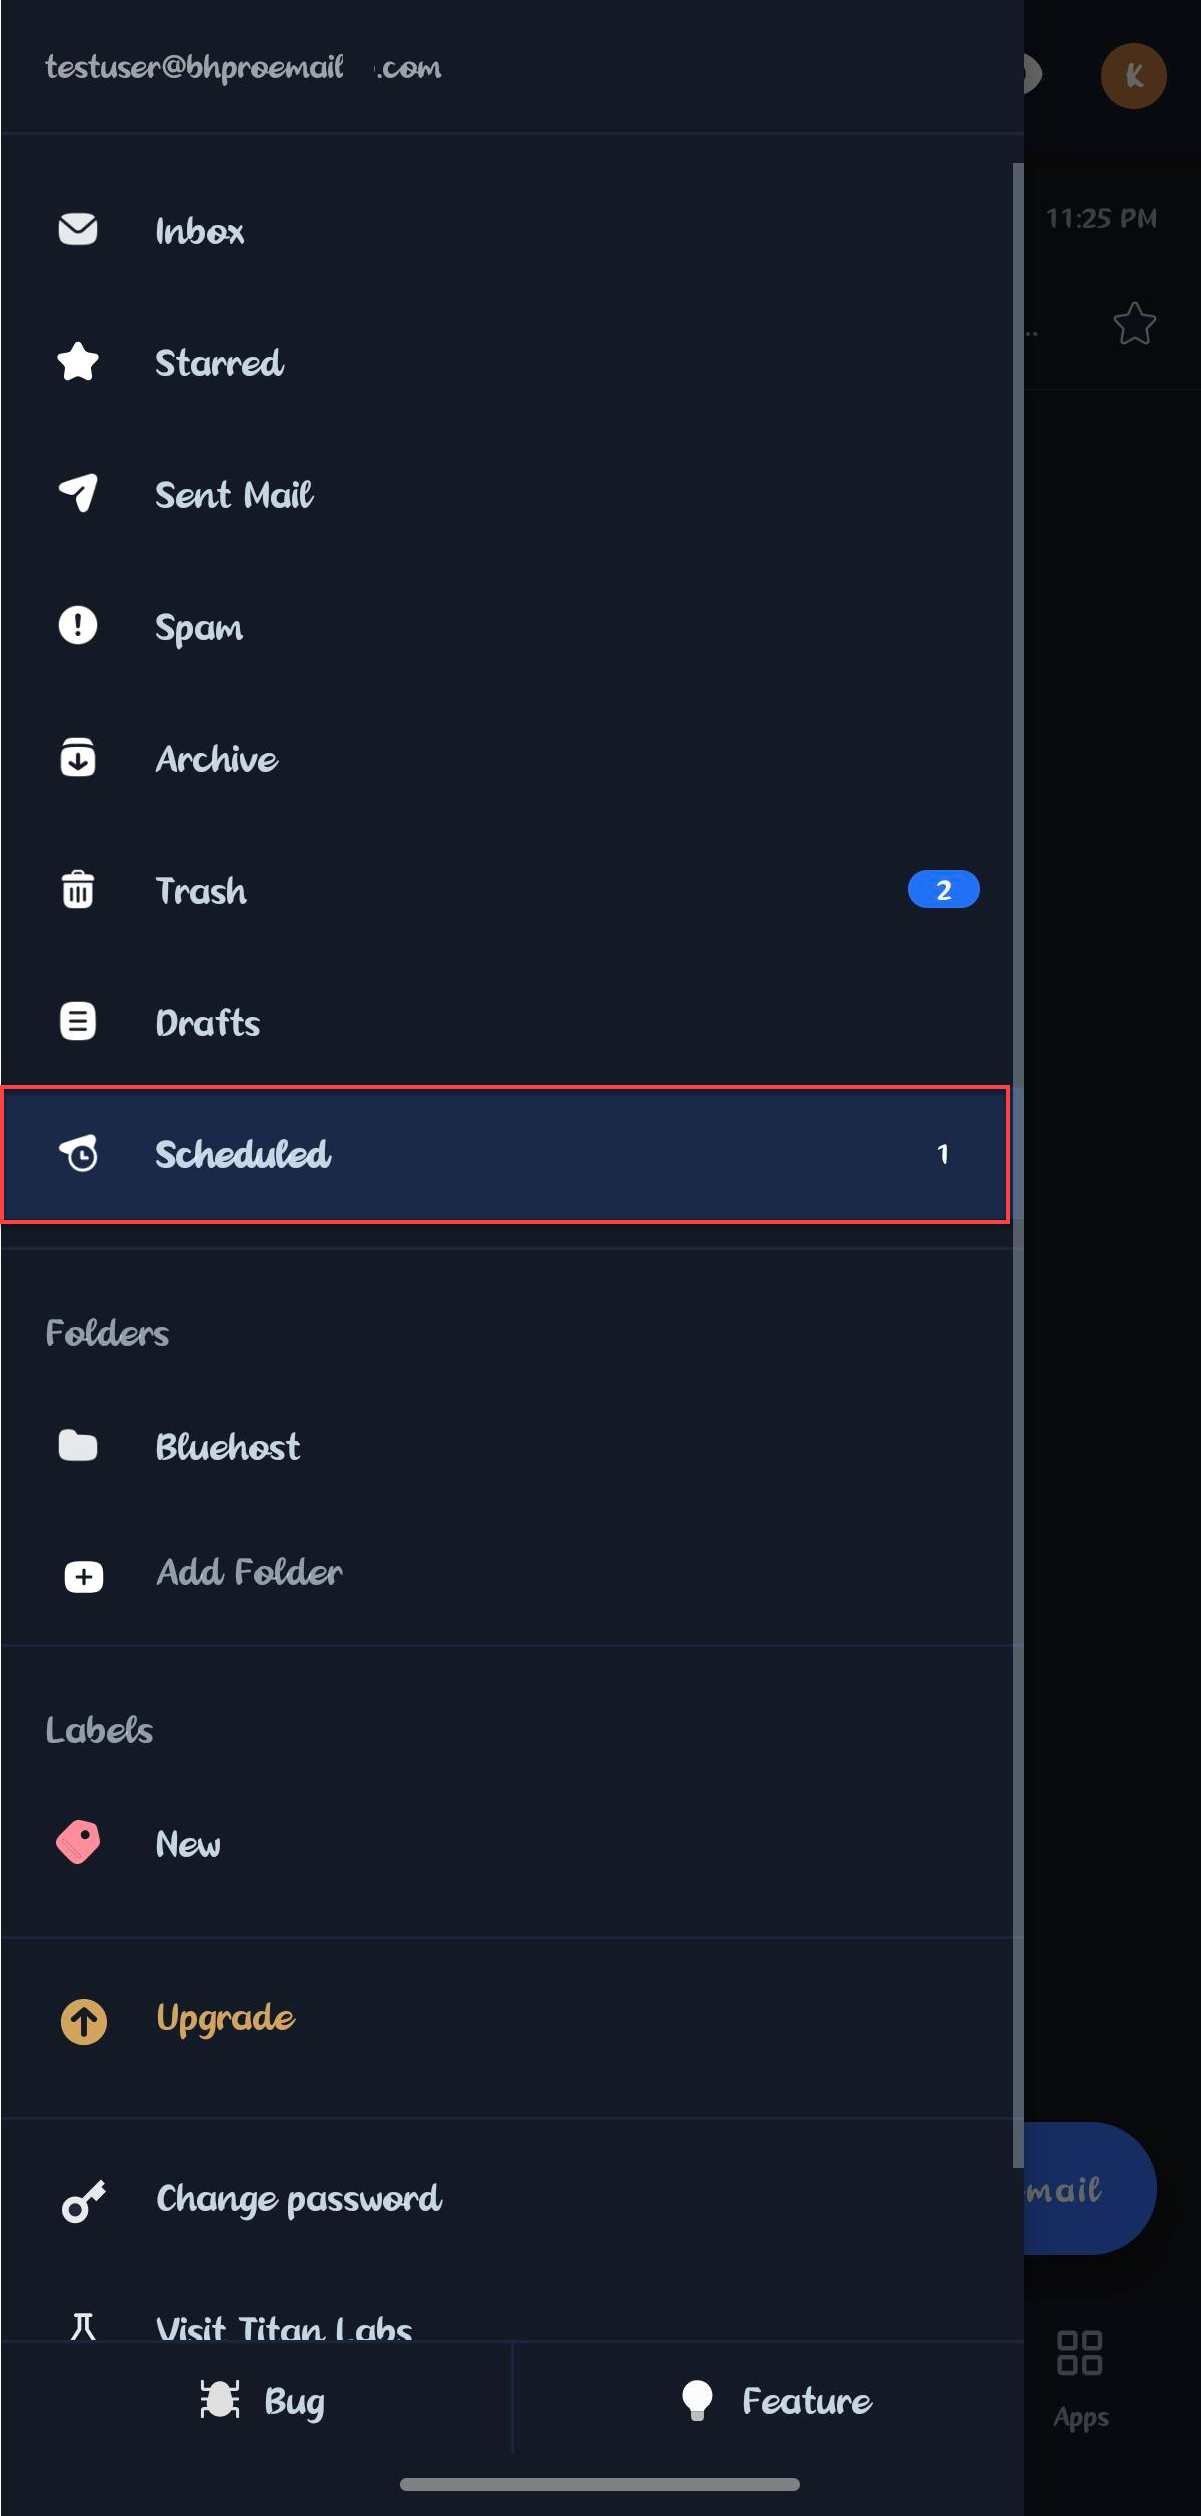
- Select the scheduled email you want to edit.
- Click Edit.
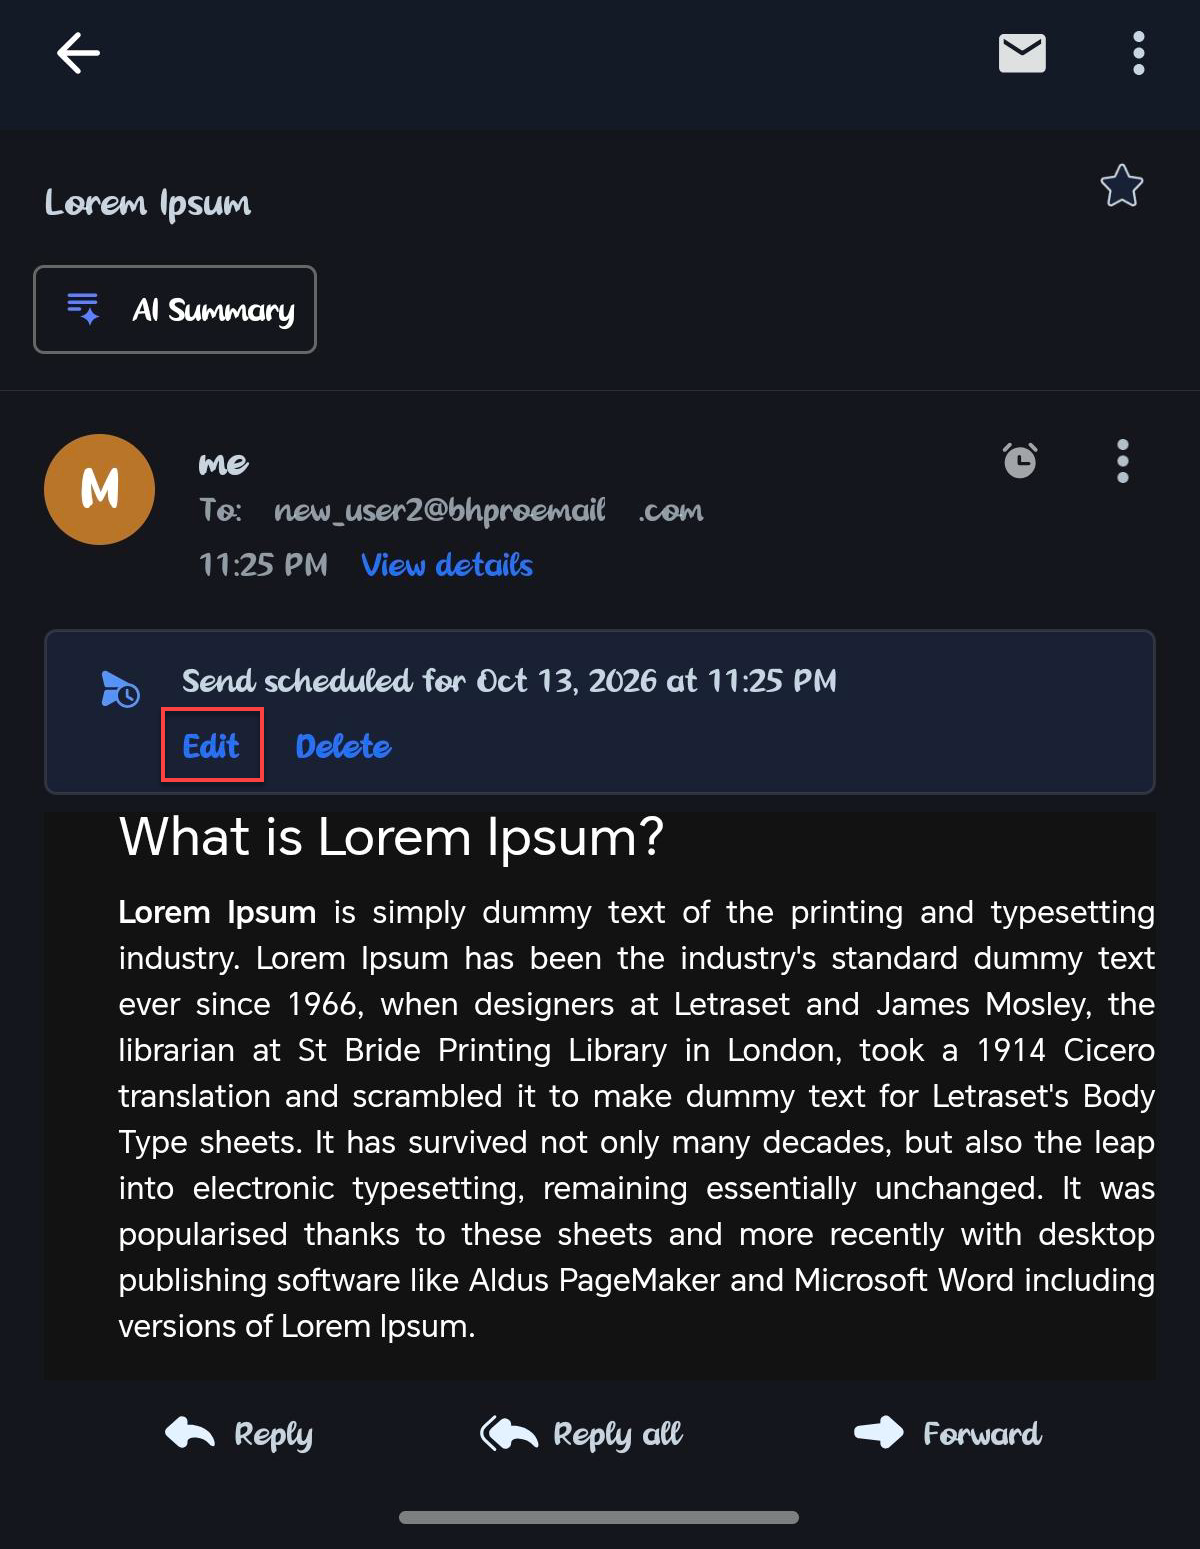
- Make any necessary changes.
- Send the email immediately or select Send later to reschedule it.
Delete a Scheduled Email
- Open the Scheduled folder.
- Select the scheduled email you want to delete.
- Click Delete.
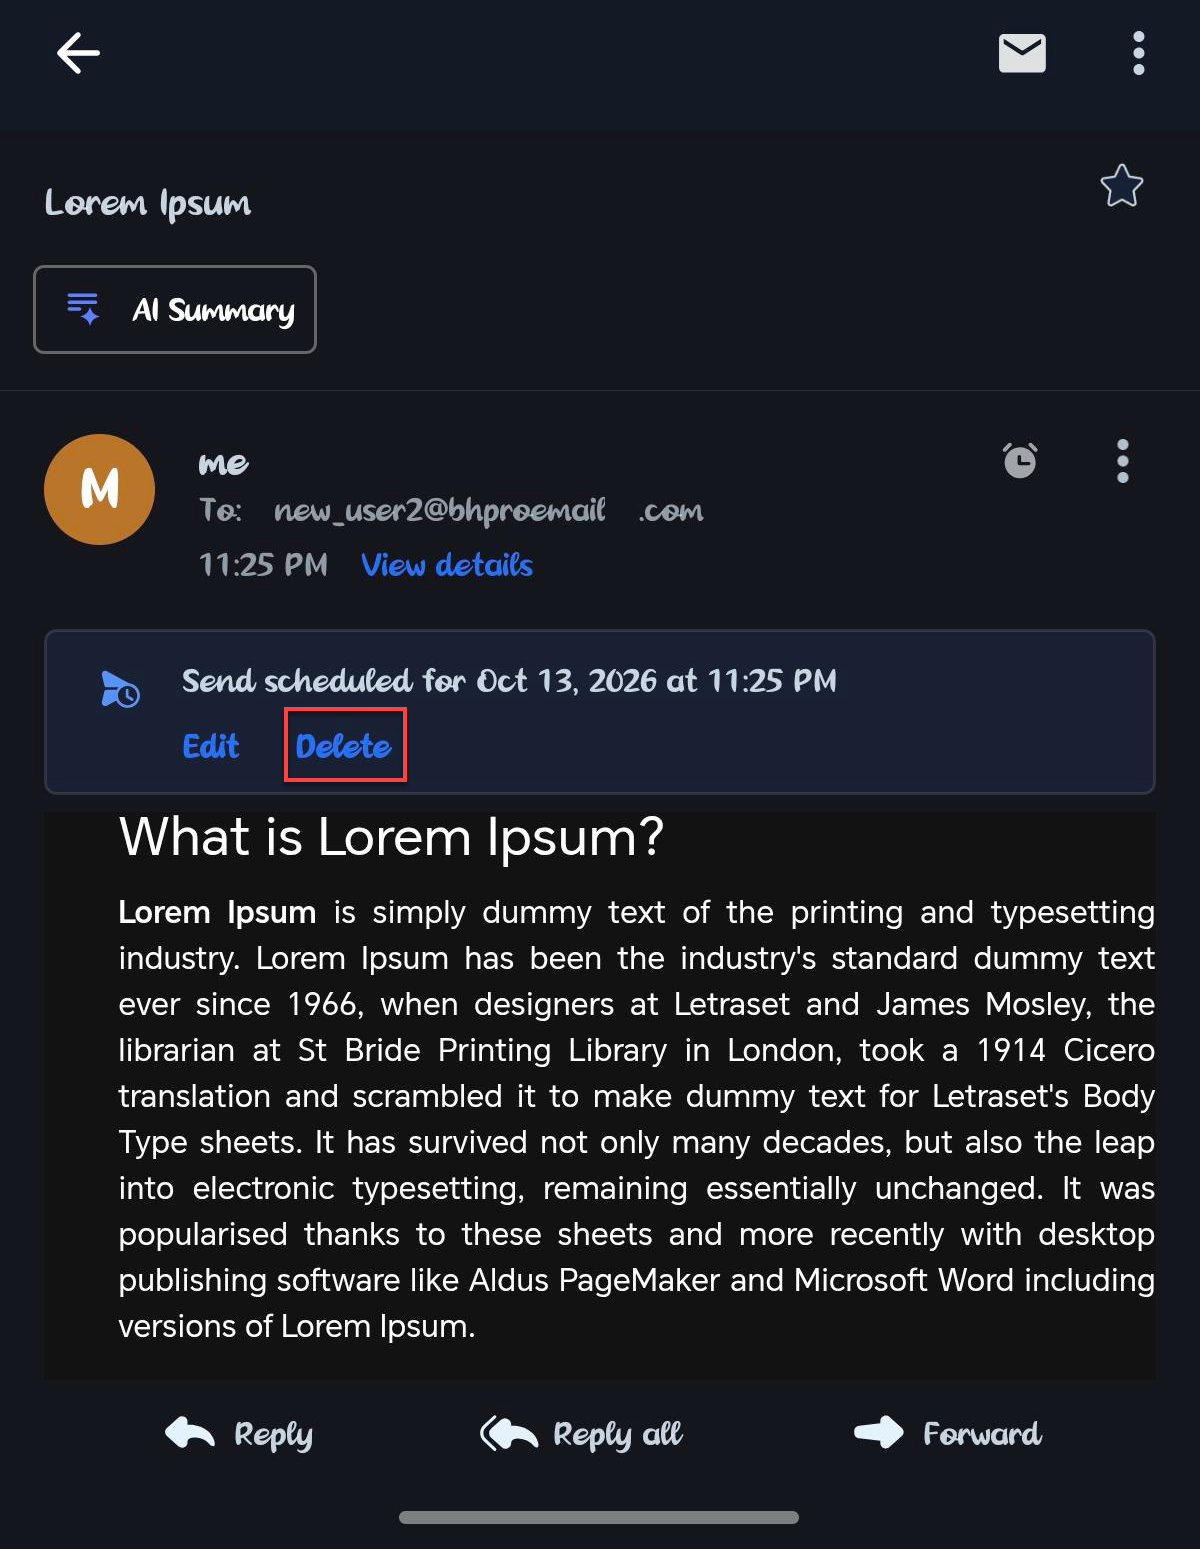
- In the confirmation pop-up, click Discard to permanently delete the scheduled email.
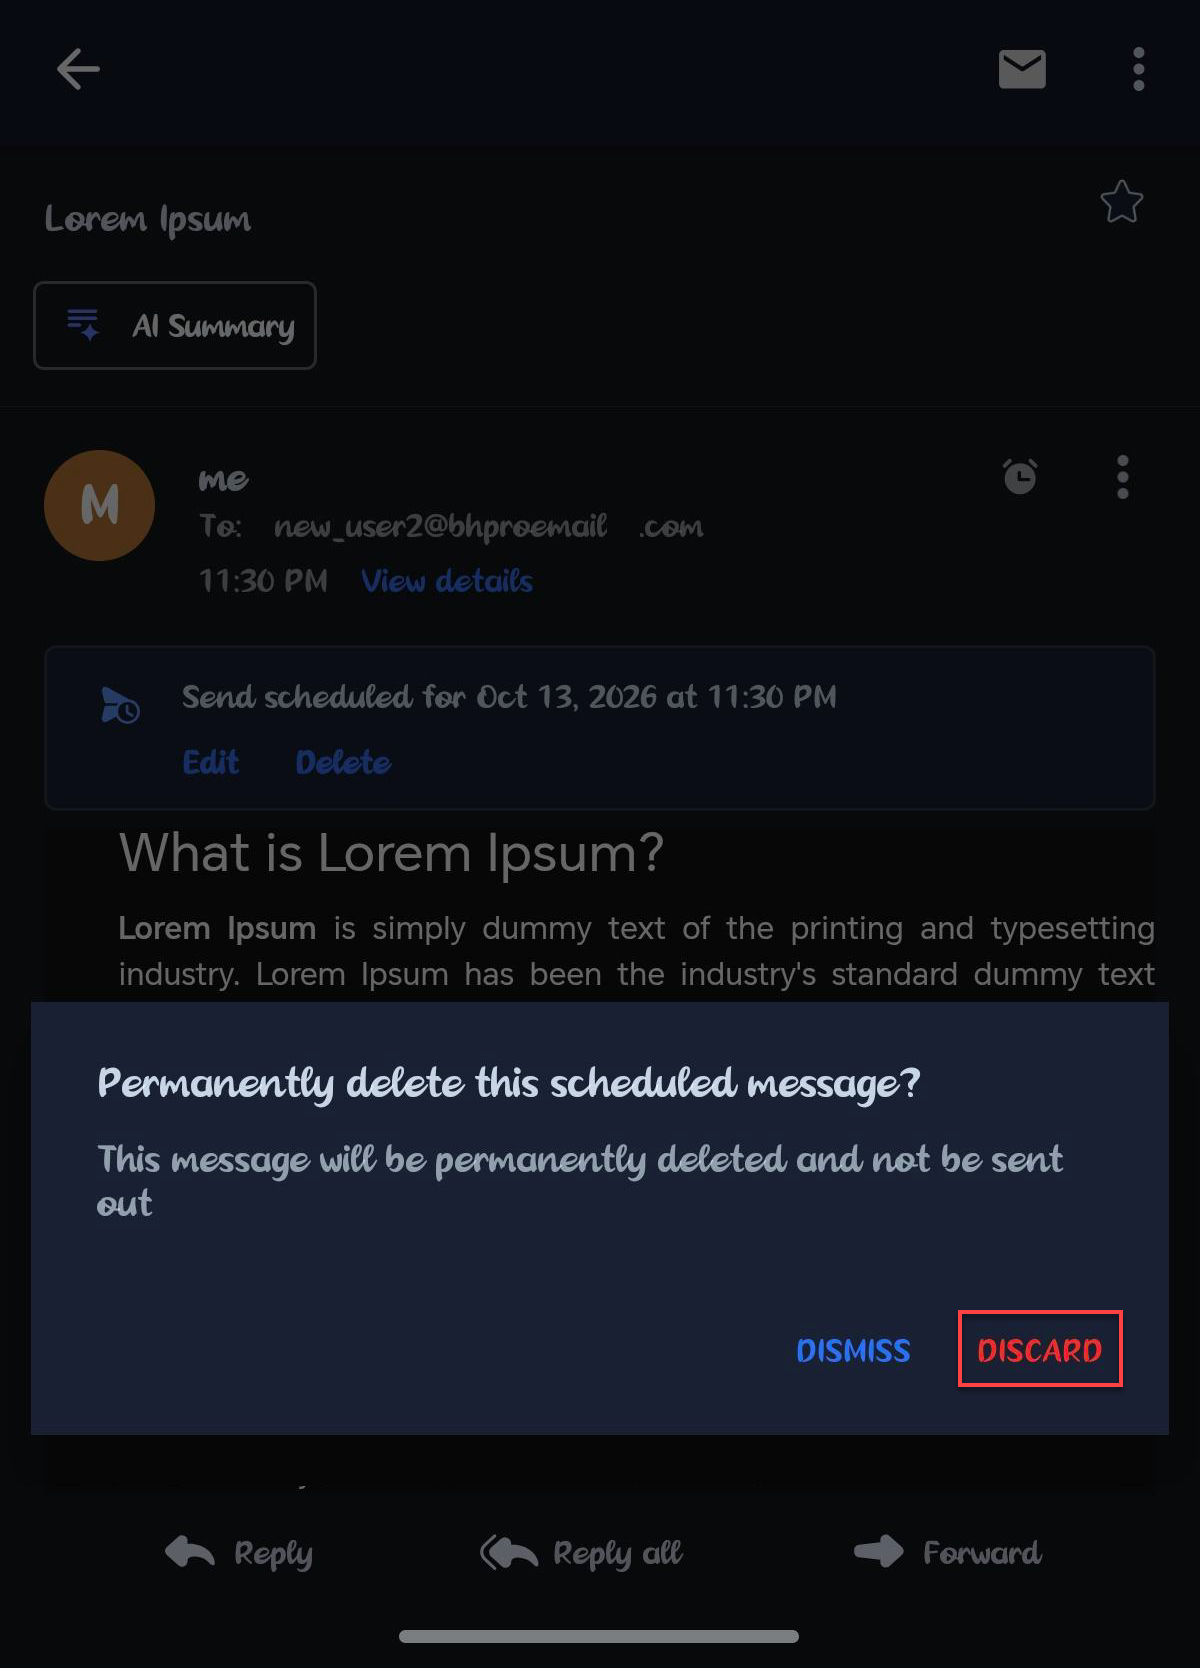
The scheduled email will be removed and will not be sent.
Schedule an Email on iOS
- Compose a new email or reply to an existing message.
- Click Send Later at the bottom of the compose screen.
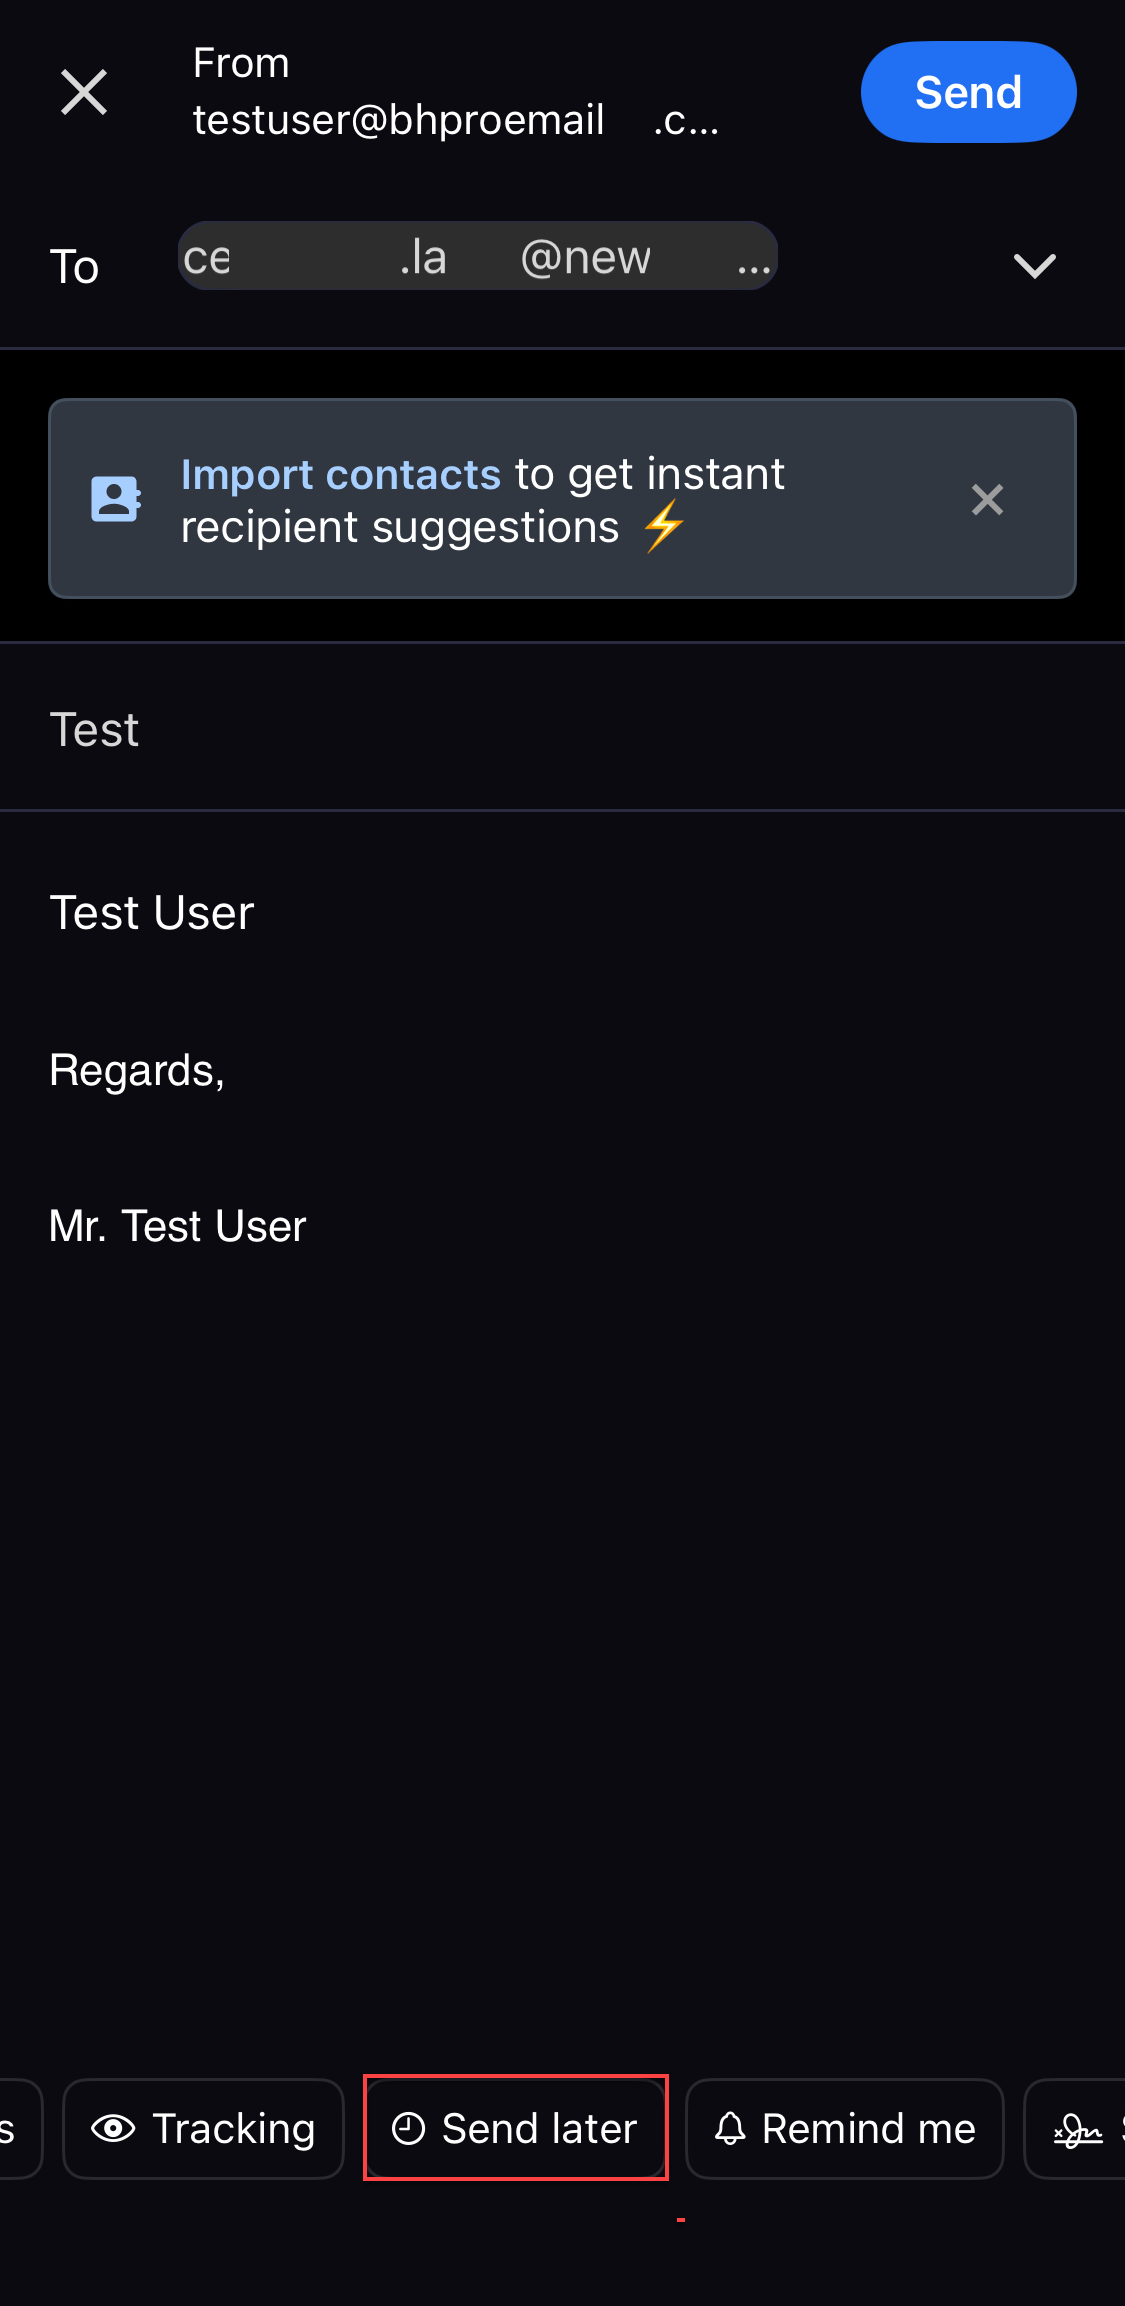
-
Select one of the available scheduling options.
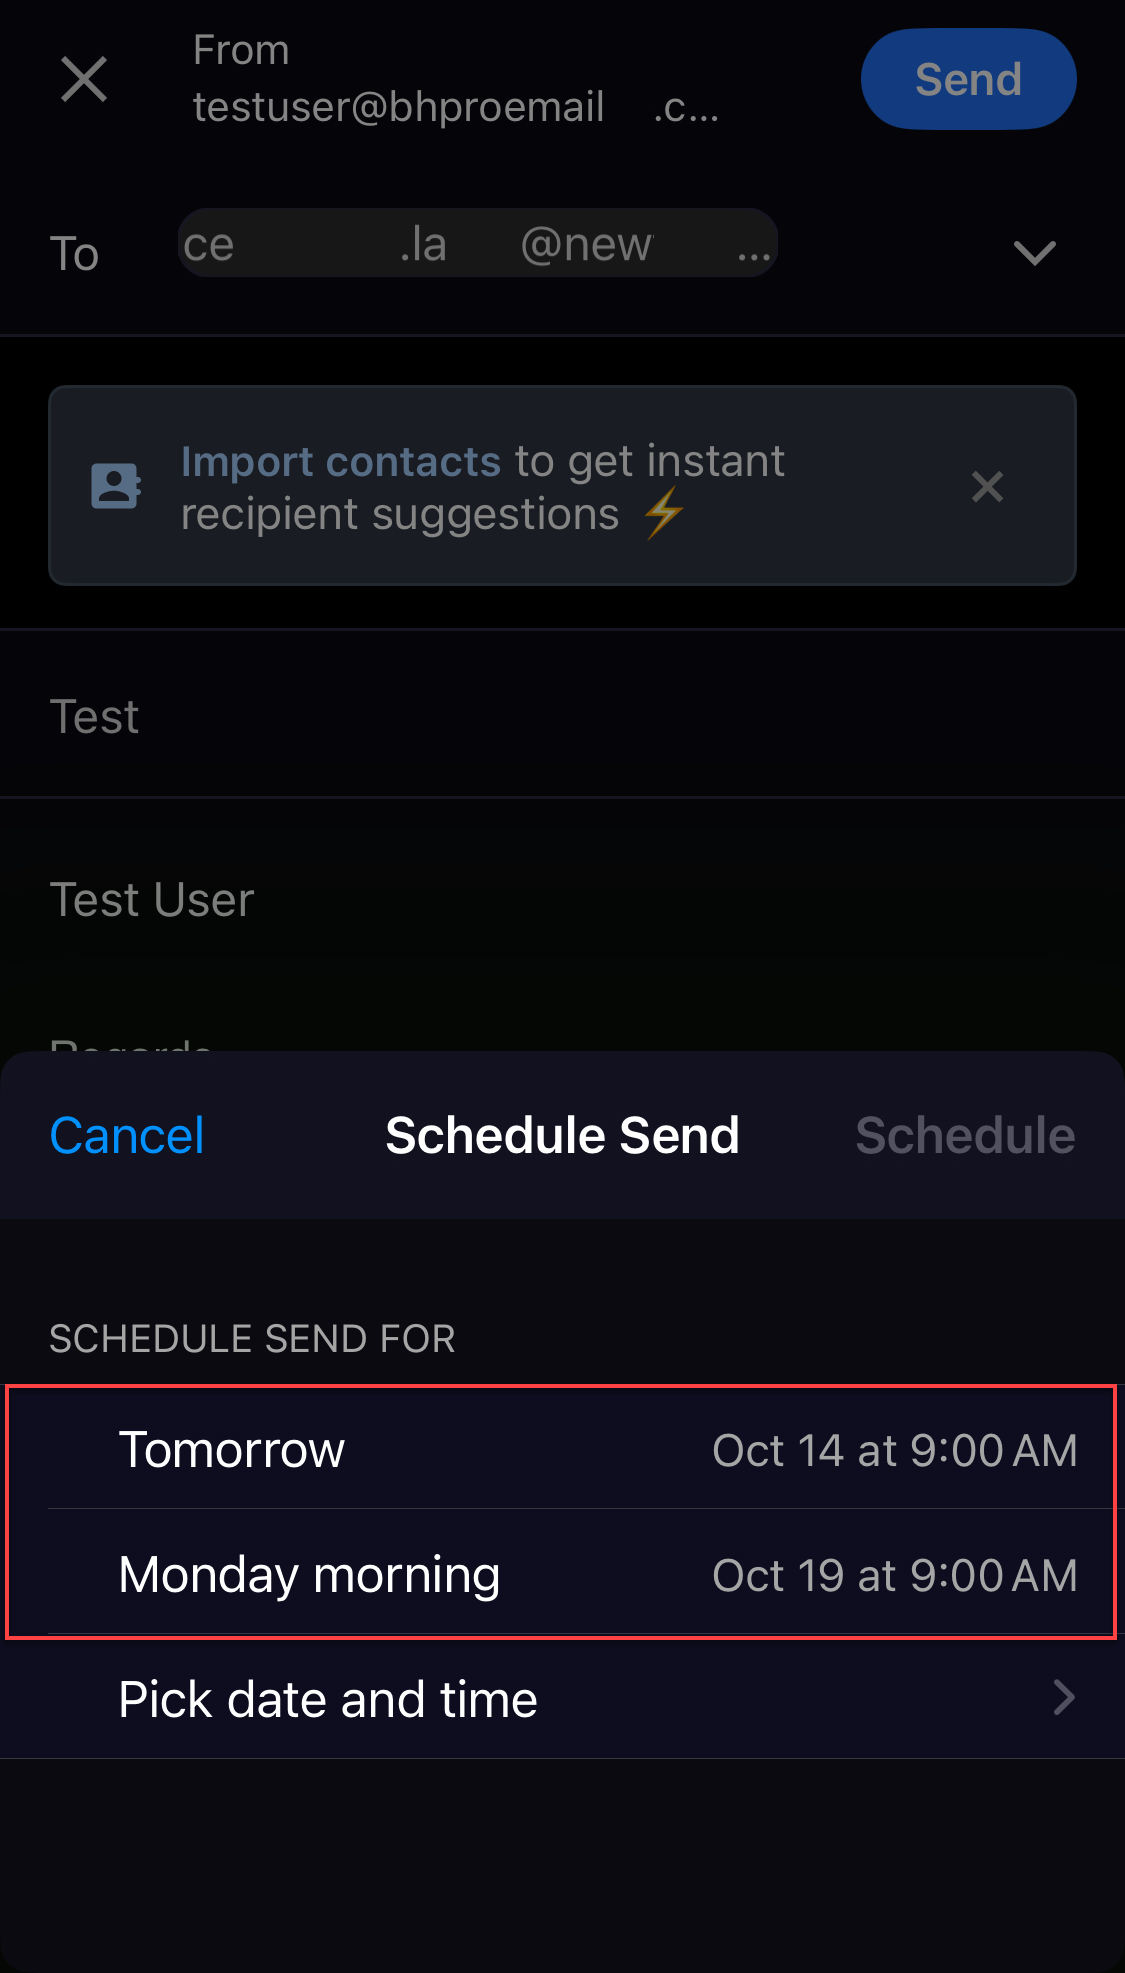
or
Choose the Pick a date and time option.
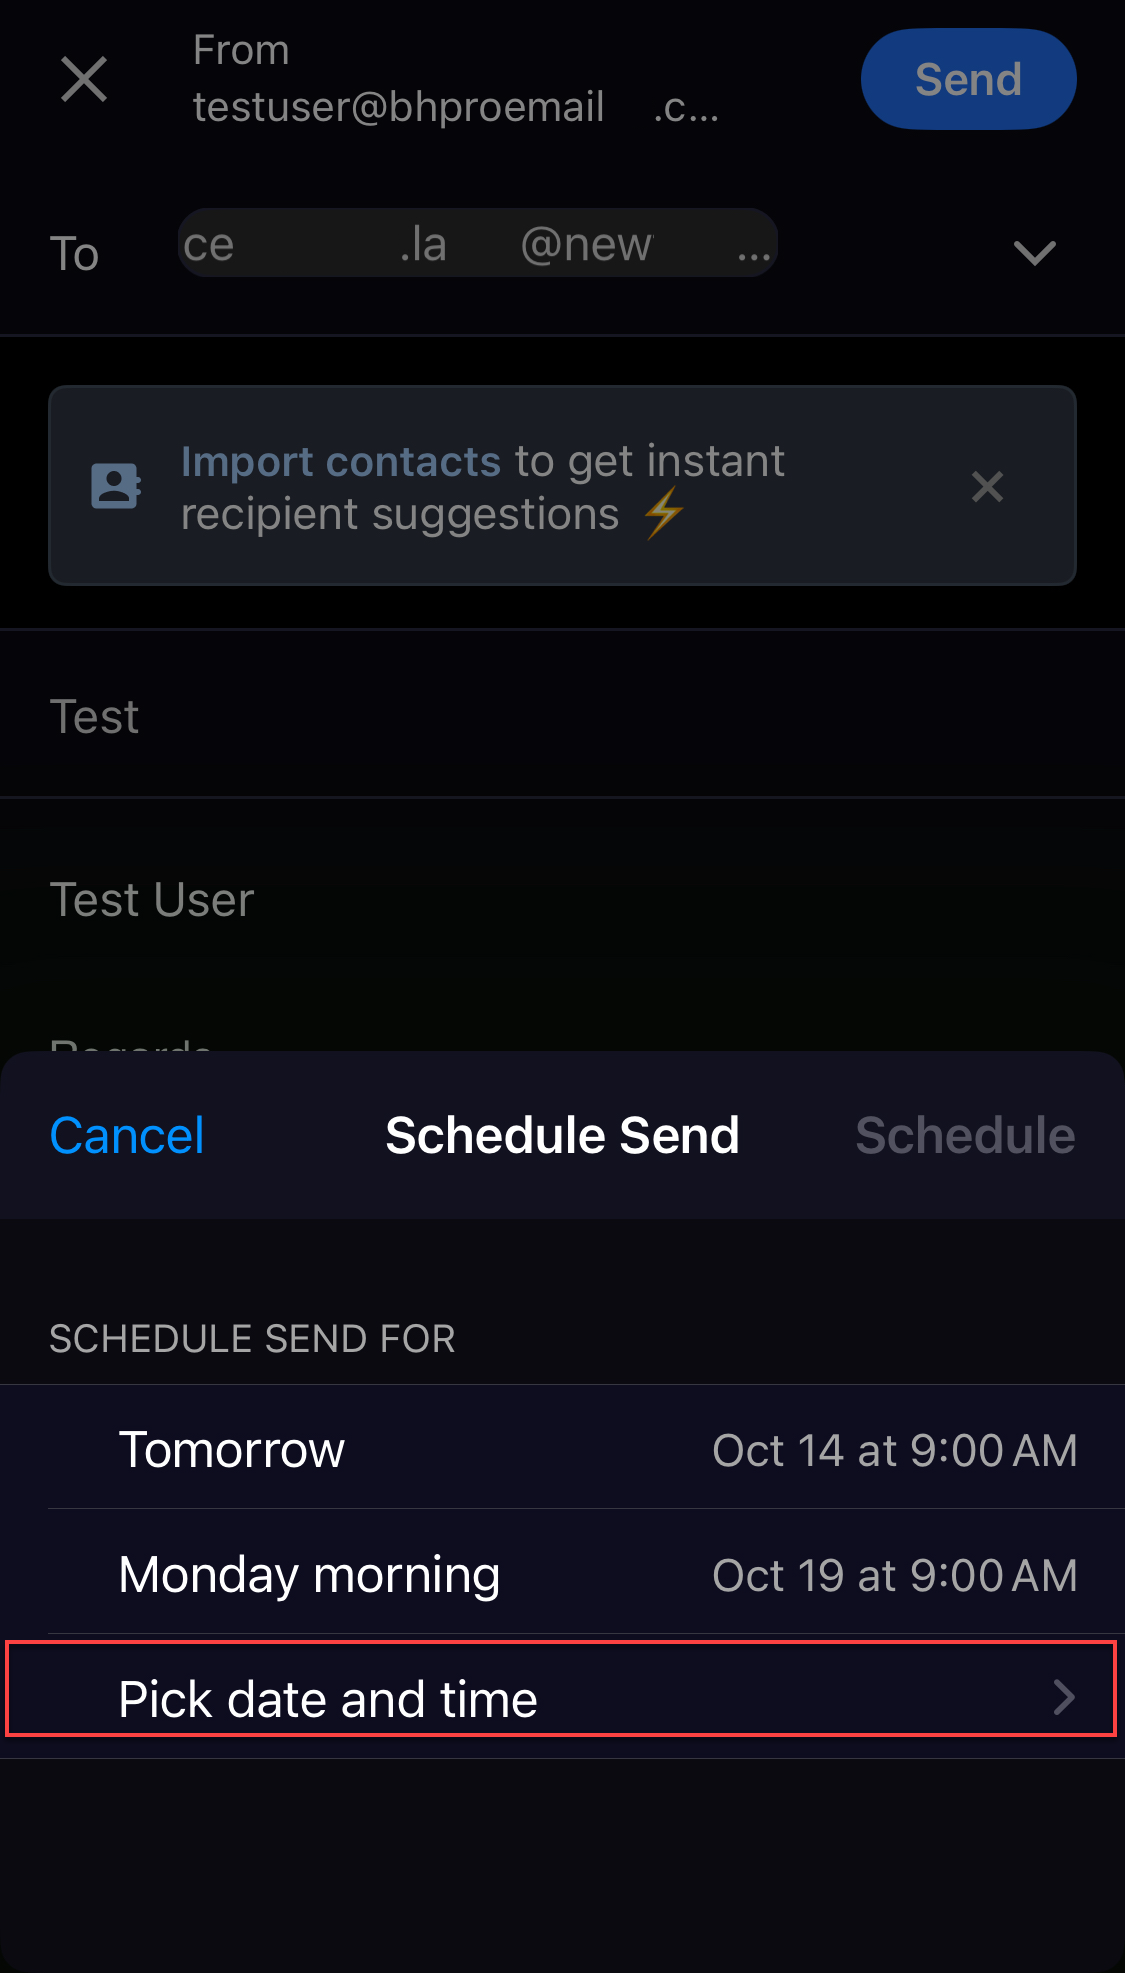
- If using a custom schedule, select the desired date and time.
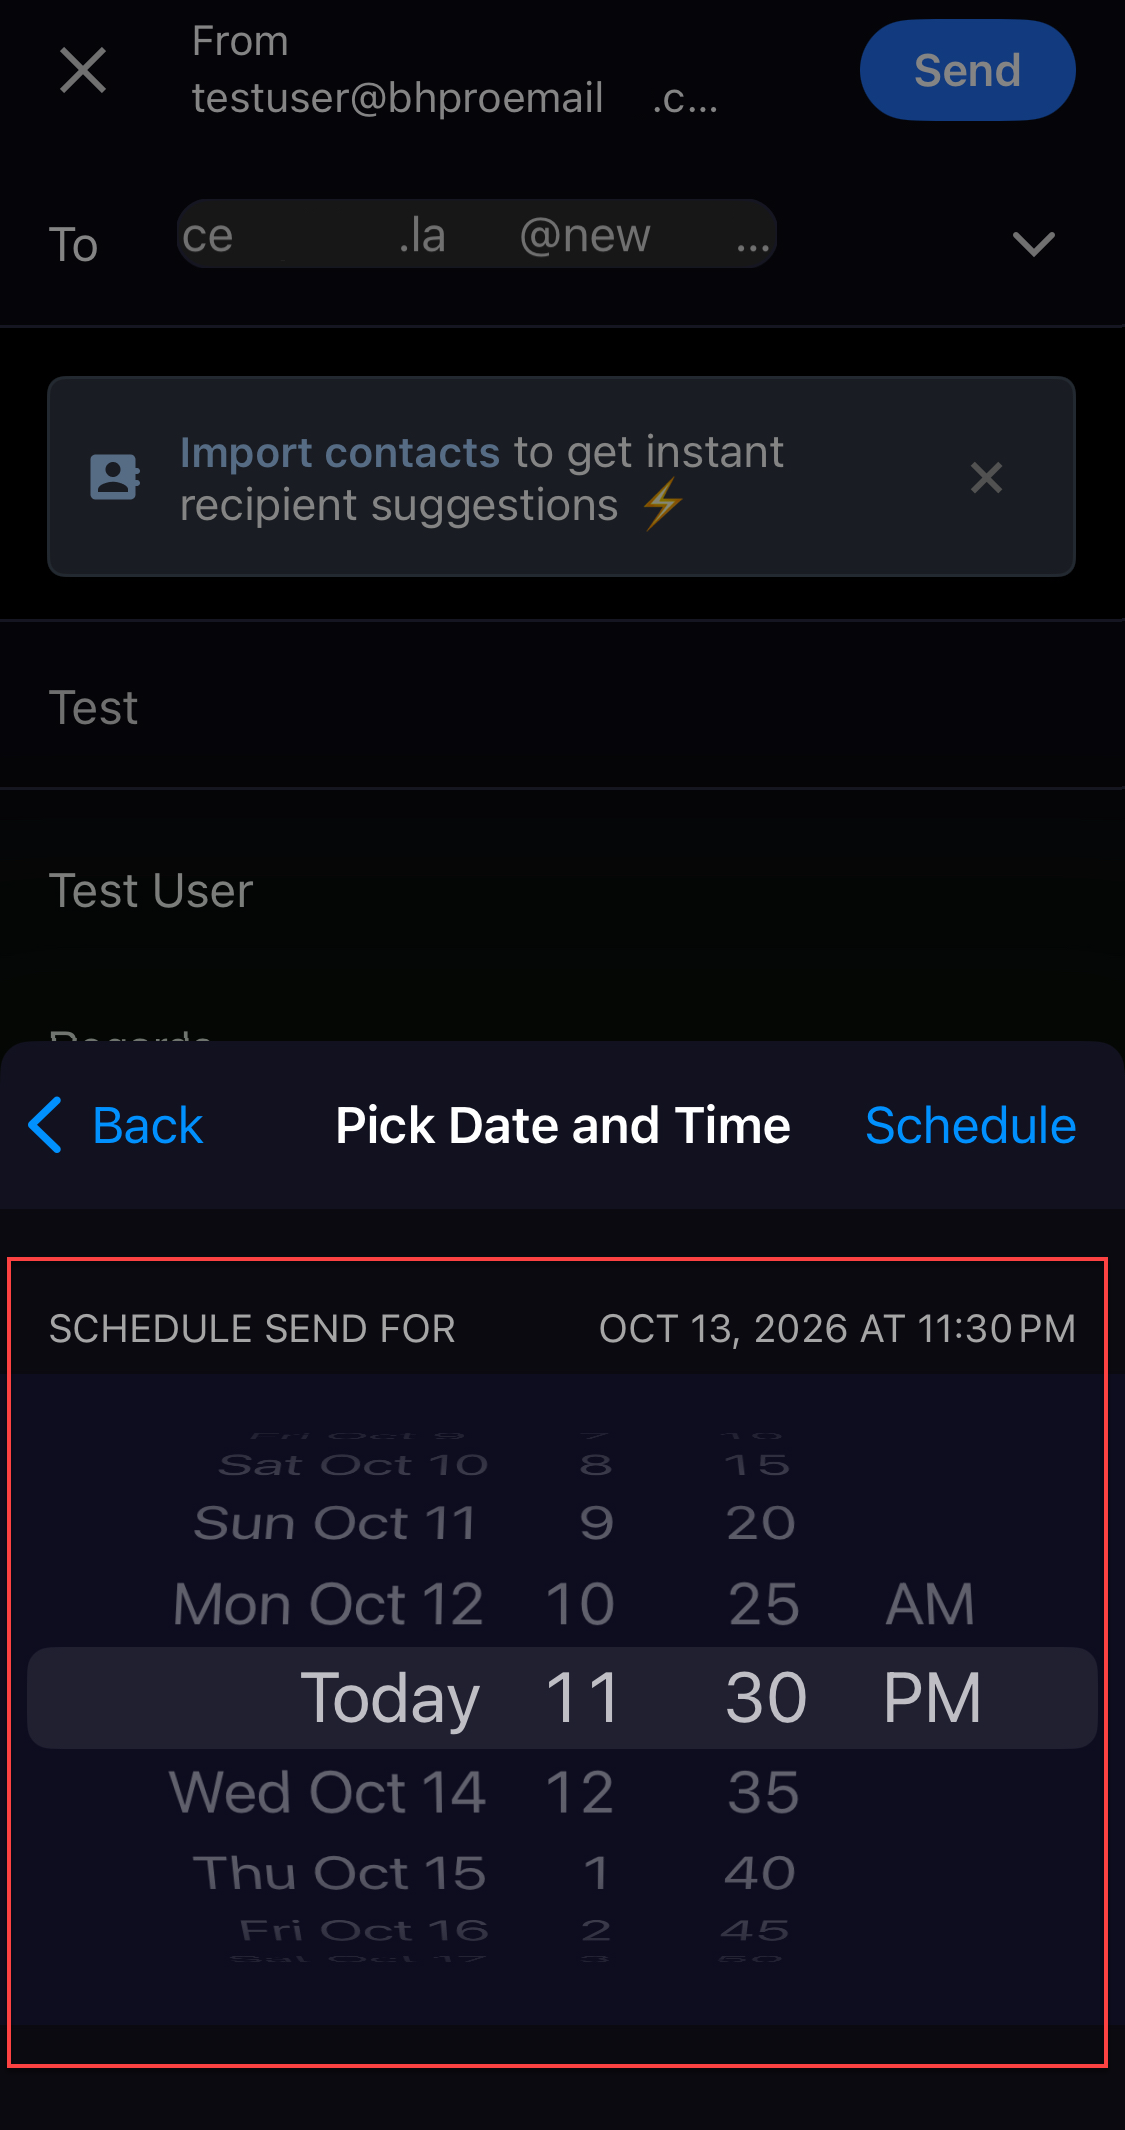
- If using a custom schedule, select the desired date and time.
- Click Schedule to confirm
Your email will be scheduled for delivery at the selected date and time.
Edit a Scheduled Email
- Open the Scheduled folder.
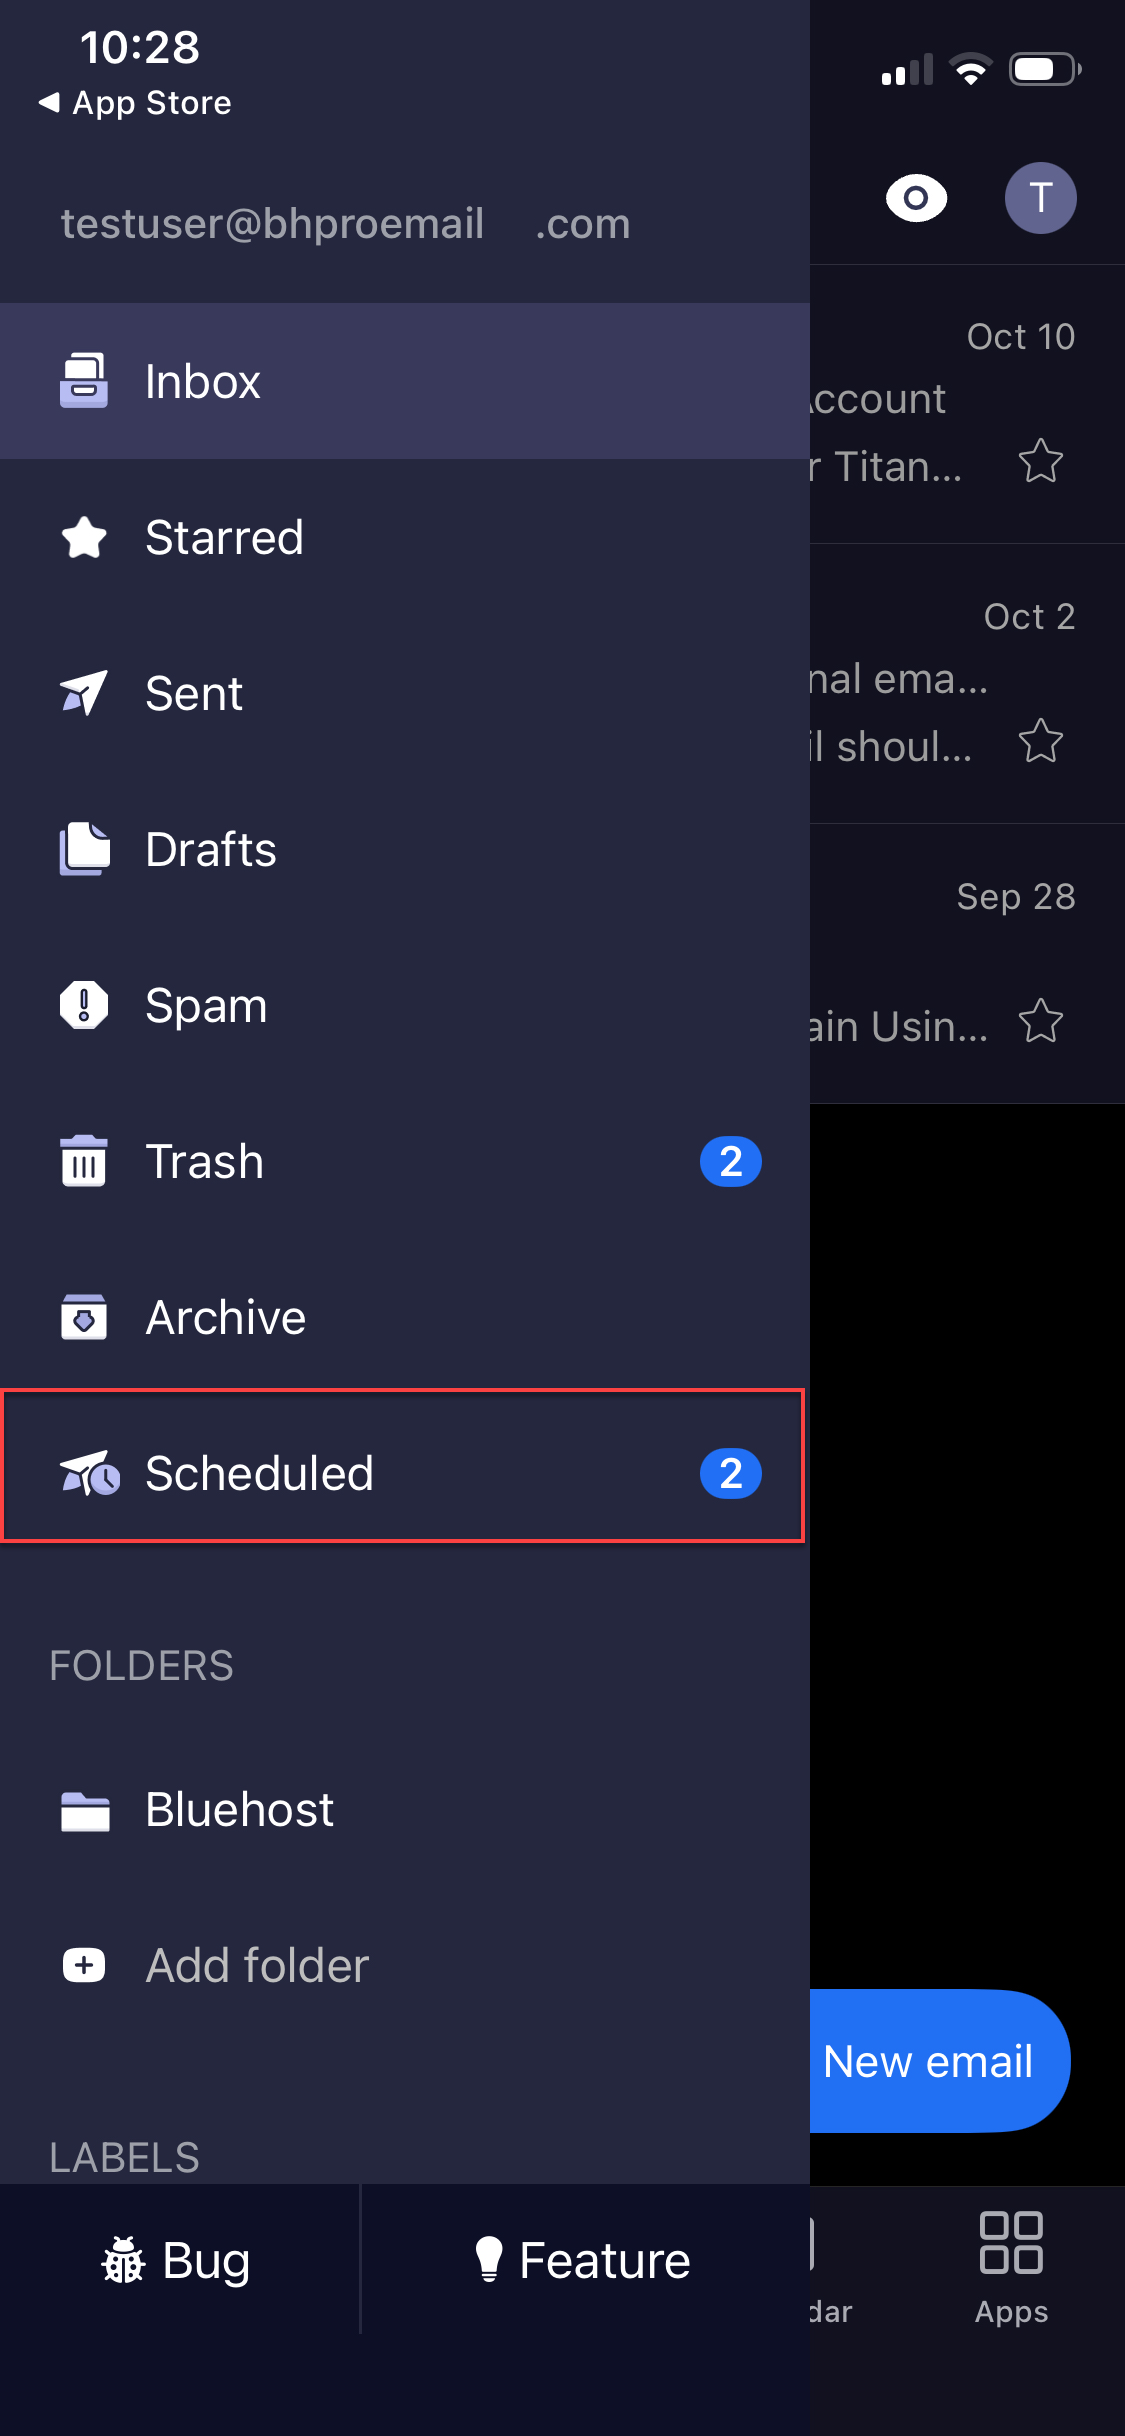
- Select the scheduled email you want to edit.
- Click Edit.
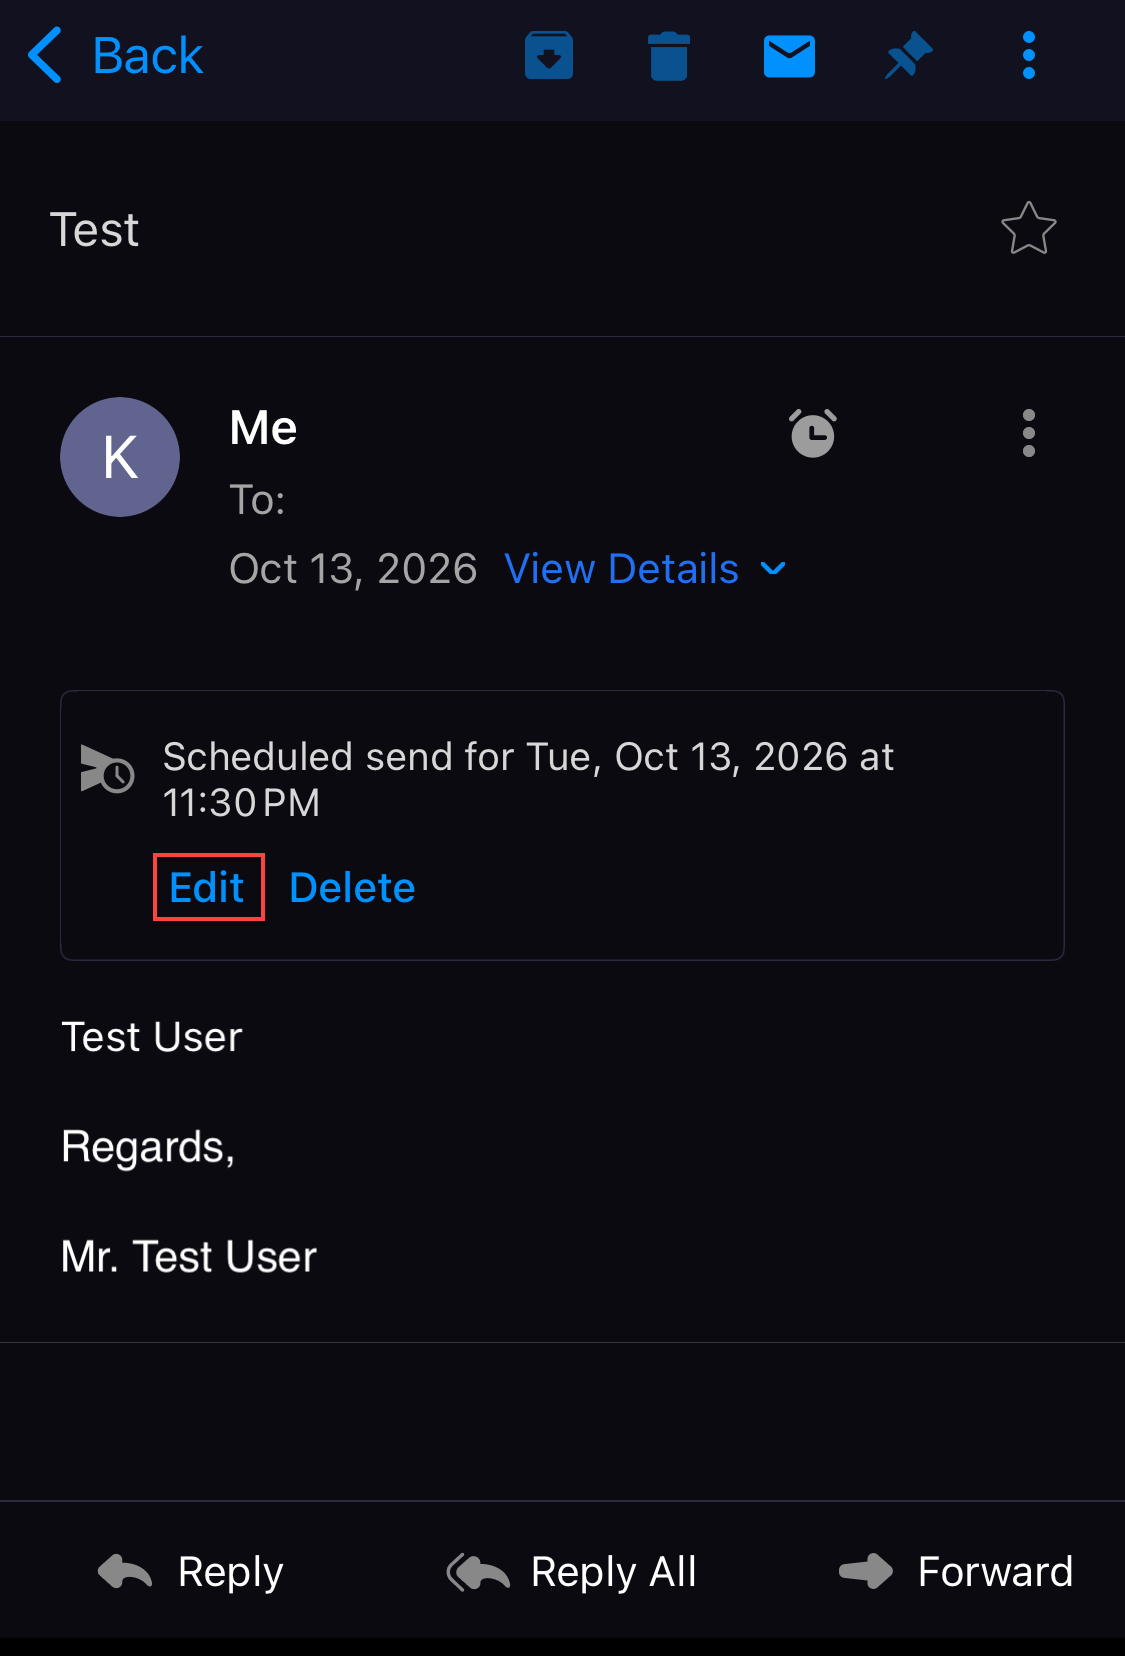
- Make the necessary changes.
- Send the email immediately or select Send Later to schedule it for a new date and time.
Delete a Scheduled Email
- Open the Scheduled folder.
- Select the scheduled email you want to delete.
- Click Delete.
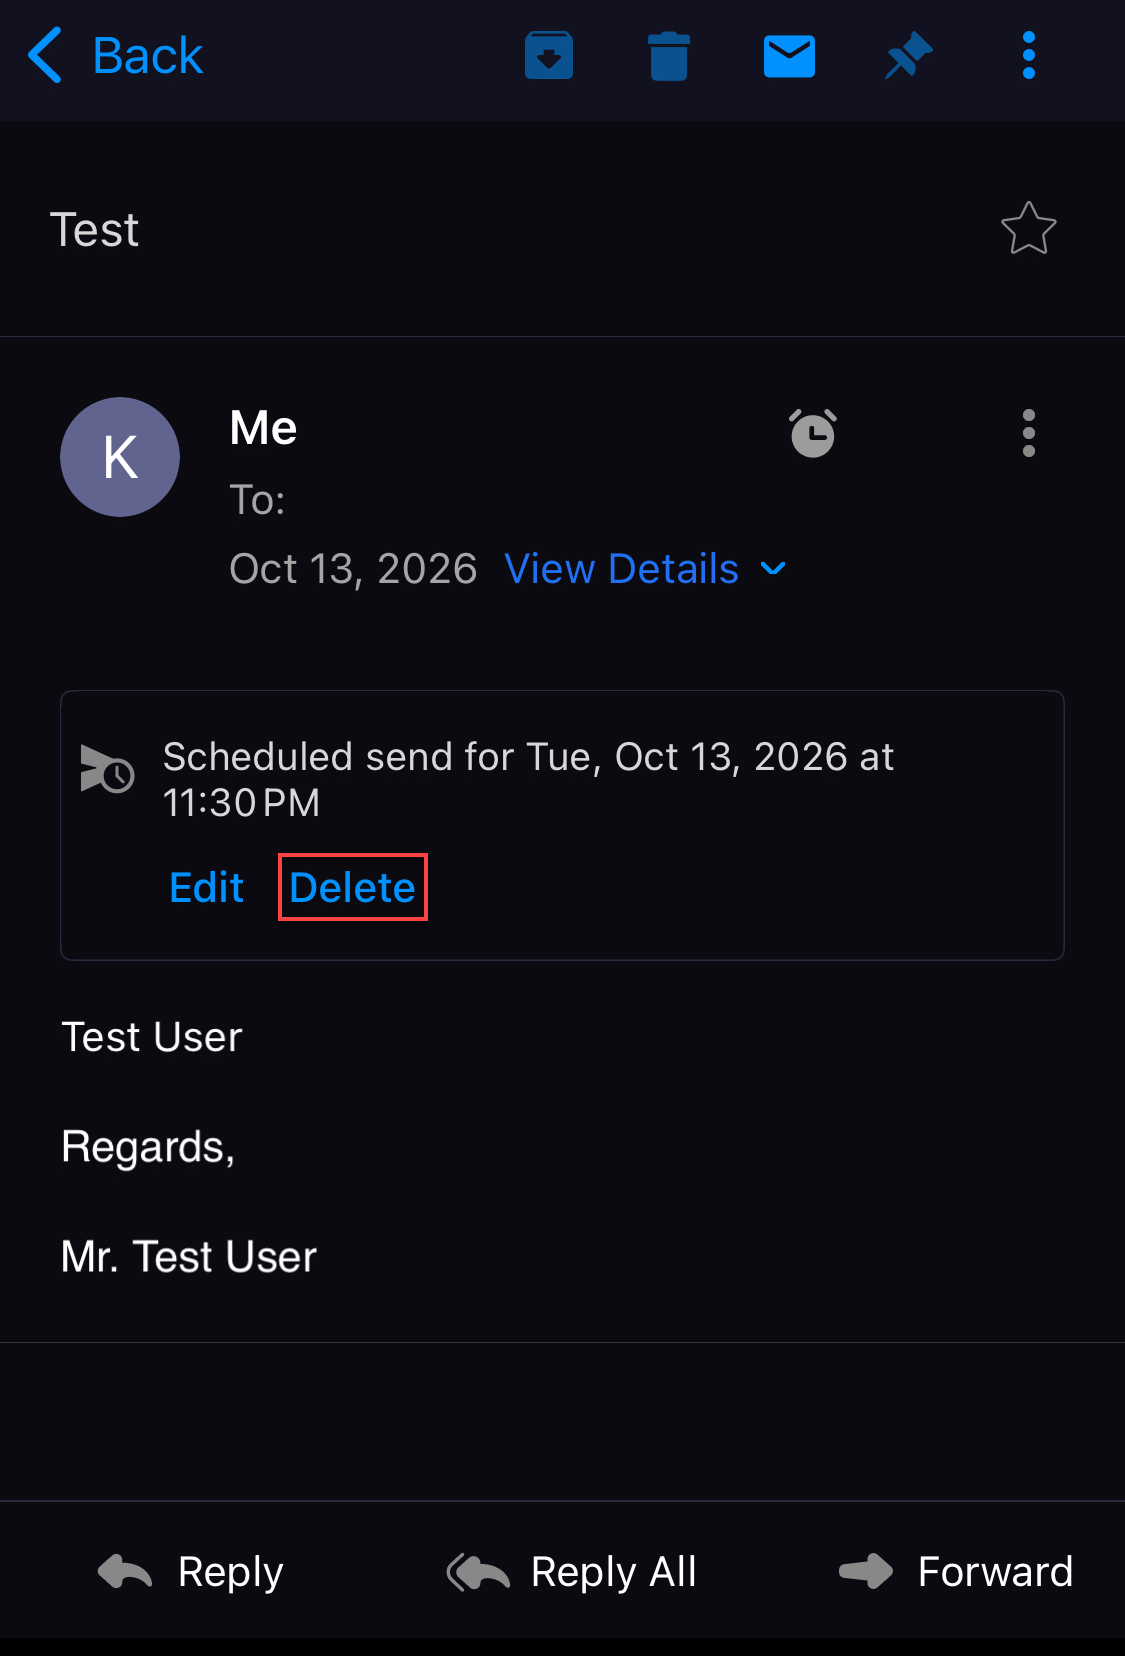
- In the confirmation pop-up, click Discard to permanently delete the scheduled email.
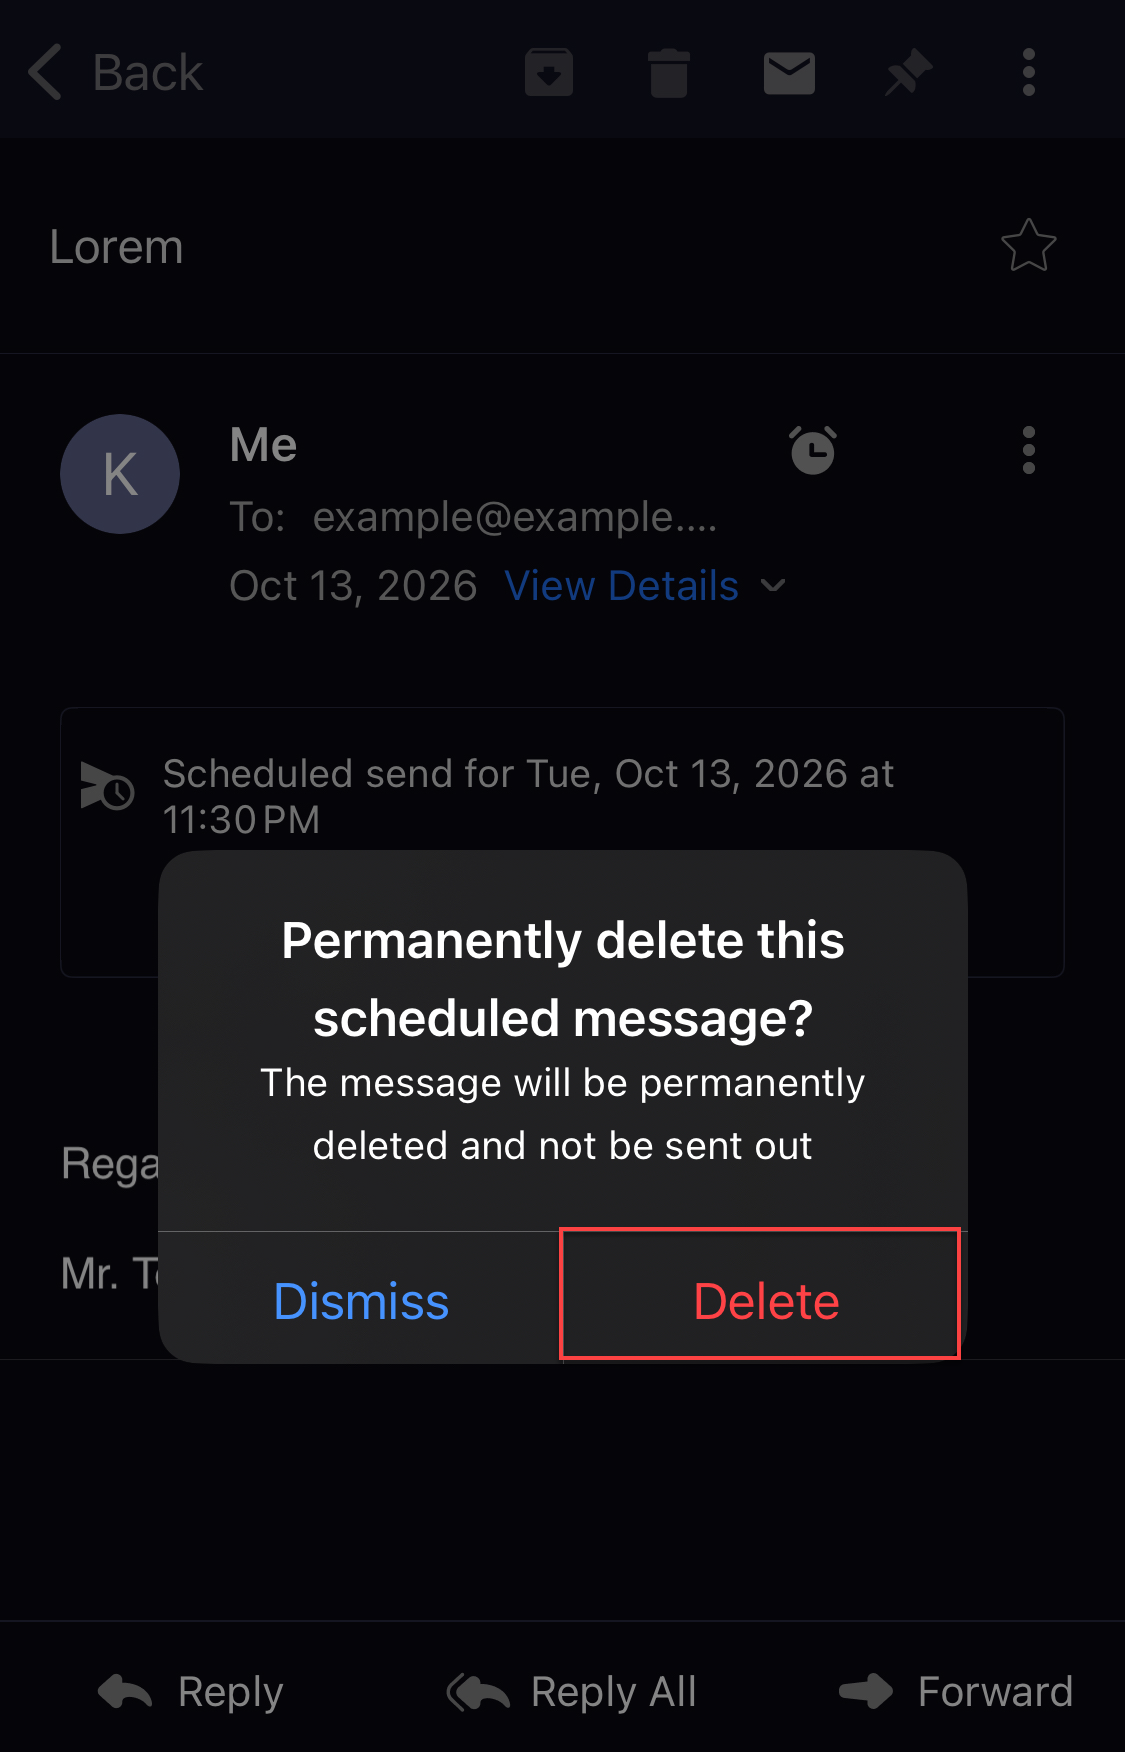
The scheduled email will be removed and will not be sent.
Summary
Professional Email Send Later feature lets you compose emails in advance and automatically deliver them at a later date and time. Whether you're using webmail, Android, or iOS, you can schedule, edit, reschedule, or cancel emails before they are sent, giving you greater control over your email communications.
If you need further assistance, Bluehost Chat Support is available 24 hours a day, 7days a week while Bluehost Phone Support is available 7 days a week from 7 am-12 midnight EST.
- Chat Support - While on our website, you should see a CHAT bubble in the bottom right-hand corner of the page. Click anywhere on the bubble to begin a chat session.
- Phone Support -
- US: 888-401-4678
- International: +1 801-765-9400
You may also refer to our Knowledge Base articles to help answer common questions and guide you through various setup, configuration, and troubleshooting steps.