 ChatGPT,
 Claude,
 Gemini,
 Grok — all four for
Does your domain use Cloudflare for DNS? Then you need to add your Bluehost Professional Email records in Cloudflare yourself. This guide shows you how, step by step.
Use this guide if your domain's nameservers point to Cloudflare (they look like ada.ns.cloudflare.com). If your domain uses Bluehost nameservers, your email records are usually set up for you automatically, so you can skip this guide. To check or manage those records, see Guide to the DNS Tab in the Bluehost Portal.
Note: Bluehost Professional Email is powered by Titan, so the record values in this guide end in titan.email. That's expected.
Before You Begin
Have these ready before you change any DNS records. You need:
- An active Bluehost Professional Email plan, with your domain added.
- A login to your Cloudflare account.
- A login to your Bluehost Portal, or to the Professional Email Control Panel (
manage.titan.email) if you're an admin of your email accounts.
Important: Use only one email provider at a time. If you use another provider now, such as Google Workspace, you'll remove its MX records in Step 1.
Warning: Add your Professional Email records in Cloudflare, not in Bluehost. While your domain points to Cloudflare, records you add in Bluehost won't work.
Professional Email DNS Records
Your email needs a few DNS records to work. New to DNS? Read What Are DNS Records? Understanding the Basics.
Add the first three records so you can send and receive email. Add DKIM to help keep your email out of spam folders. DMARC is optional.
| Type | Name | Value | Priority | Needed? |
|---|---|---|---|---|
| MX | @ | mx1.titan.email | 10 | Yes |
| MX | @ | mx2.titan.email | 20 | Yes |
| TXT (SPF) | @ | v=spf1 include:spf.titan.email ~all | — | Yes |
| TXT (DKIM) | Copy from Email Reputation | Copy from Email Reputation | — | Recommended |
| TXT (DMARC) | _dmarc | v=DMARC1; p=none; rua=mailto:[email protected] | — | Optional |
You can leave TTL set to Auto for every record.
Copy Your DKIM Record
Professional Email creates a unique DKIM record for your domain. Copy the record details before you start in Cloudflare, using one of these methods.
Method 1: From the Email Control Panel
If you're an admin of your email accounts, get your record from the Email Control Panel. For step-by-step instructions, see Professional Email: How to Add DKIM Record.
Method 2: From the Bluehost Portal
Don't have access to the Email Control Panel? You can also get your DKIM record details from the Professional Email page in your Bluehost Portal.
- Log in to your Bluehost Portal.
- From the left-hand navigation menu, click on the Email tab.
- Optional: In Professional Email, if multiple plans are listed, click Manage for the plan you want to use.
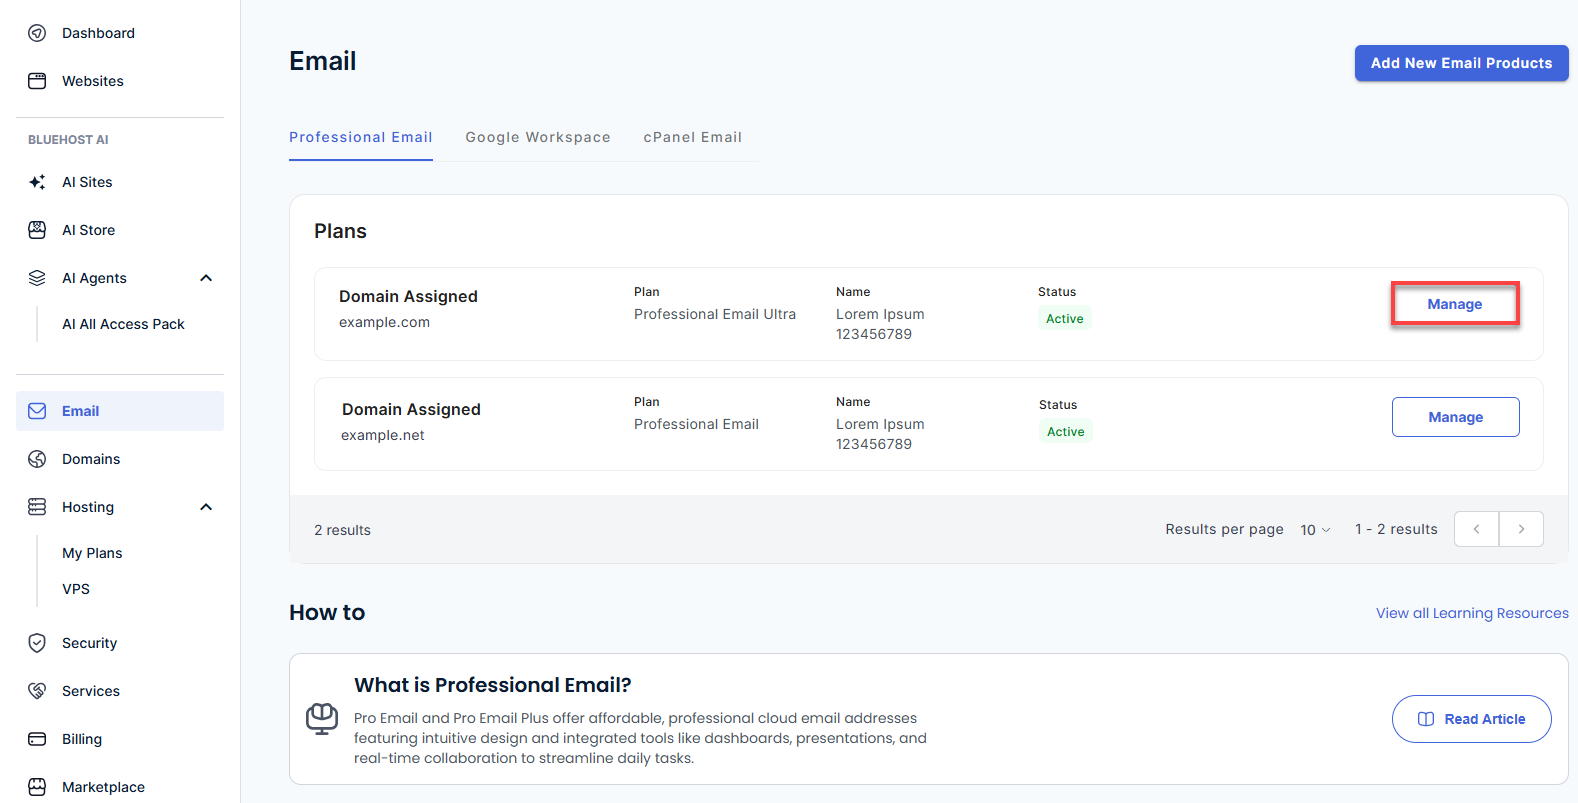
- You’ll be automatically redirected to the Email Management page, where you can manage your email settings and subscriptions.
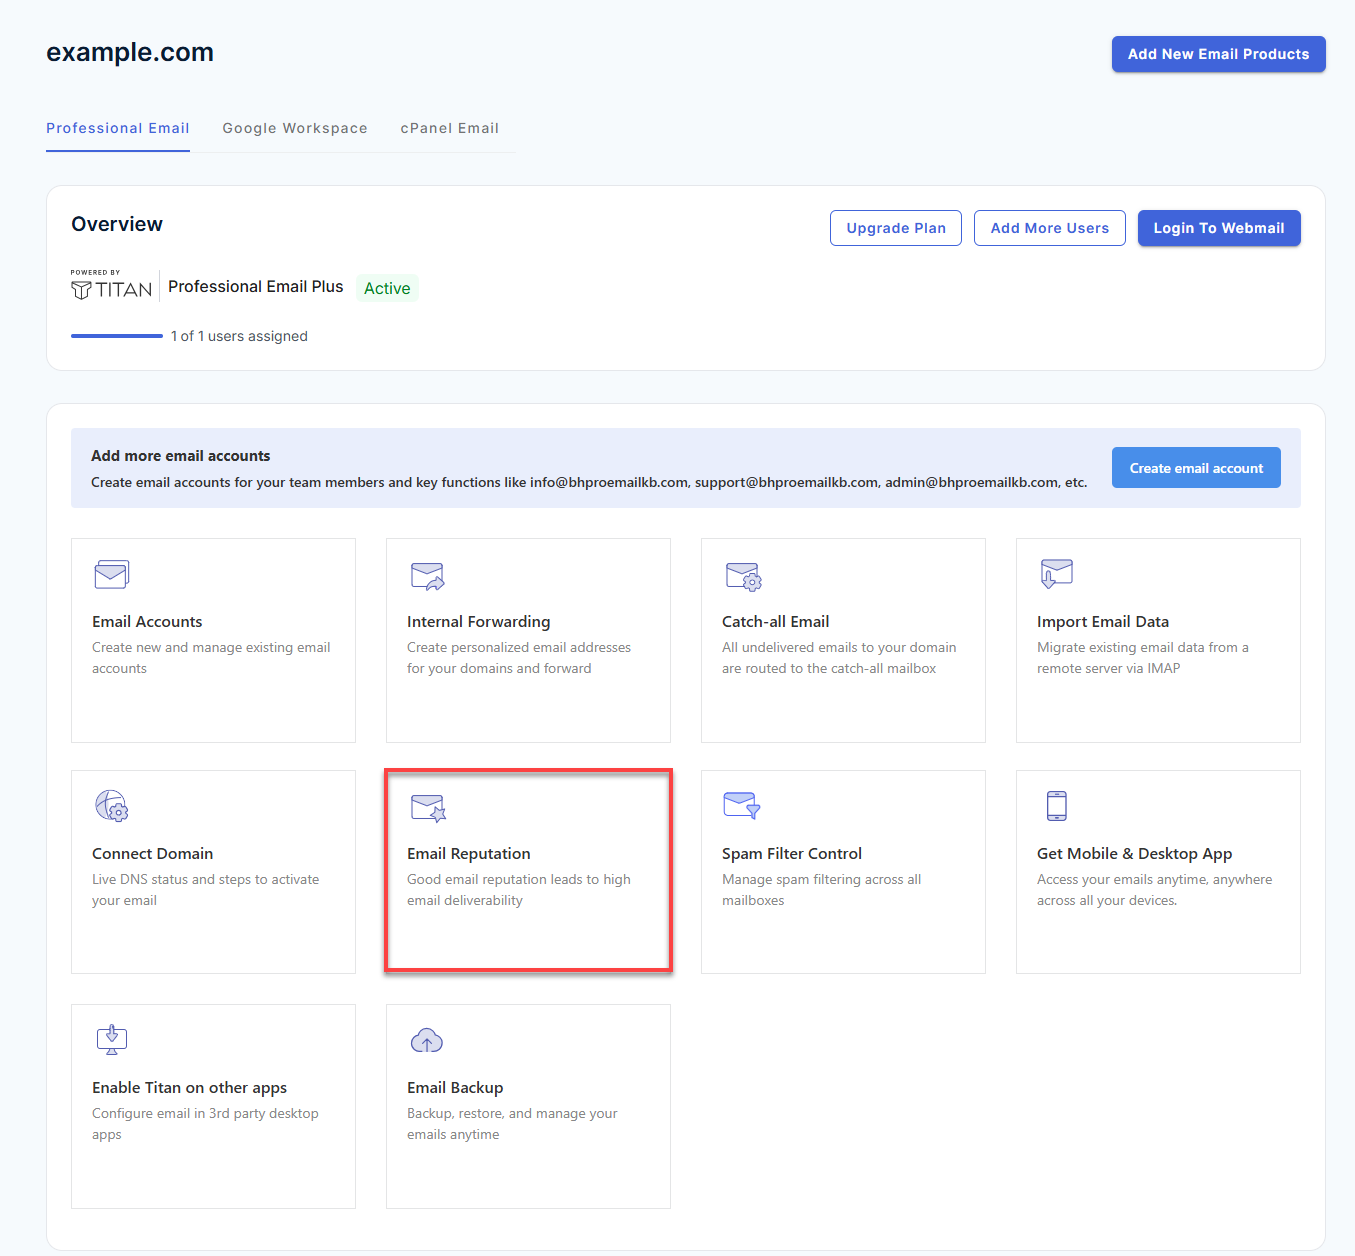
- Click Email Reputation.
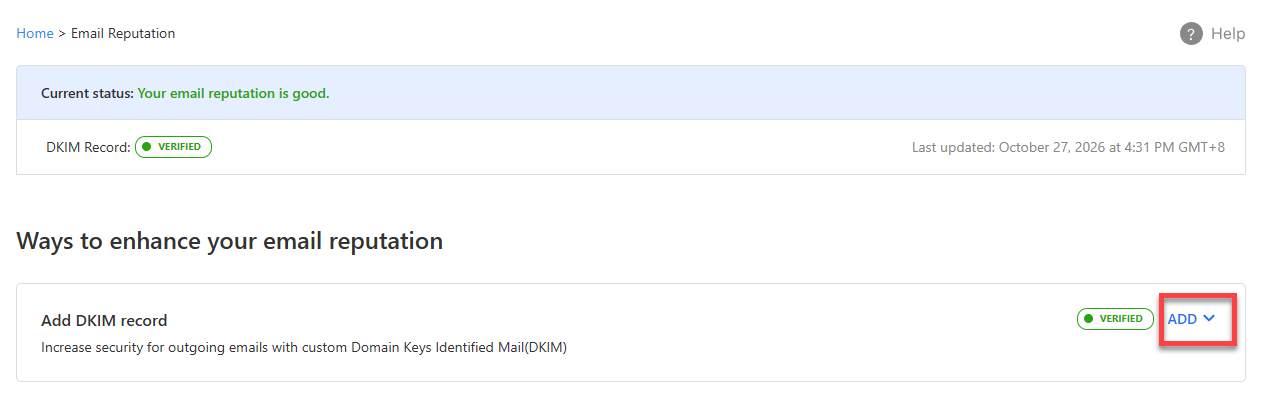
- Next to Add DKIM record, expand the Add option.
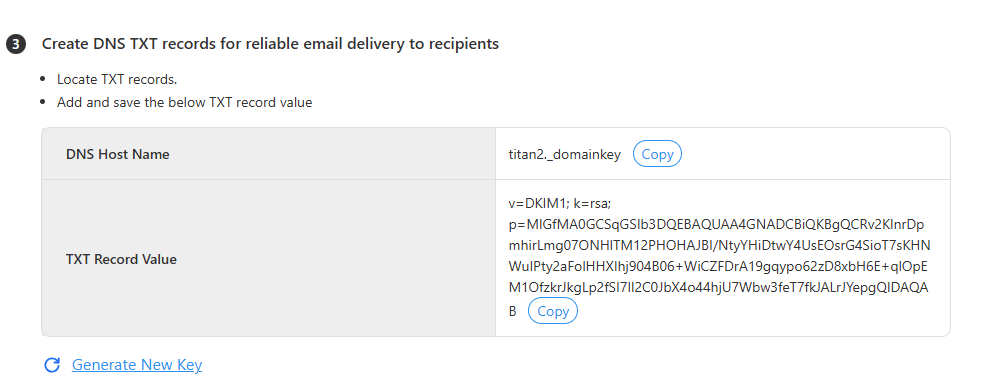
- Under Create DNS TXT records for reliable email delivery to recipients, copy the DNS Host Name and the TXT Record Value. Keep this page open, since you'll come back to verify the record.
Add the Records in Cloudflare
Follow these steps in your Cloudflare dashboard, in order.
Step 1: Remove Old Email Records
Clear out your old email provider's records so they don't conflict with Professional Email.
- Log in to Cloudflare and select your domain.
- Go to DNS > Records.
- Write down your current MX records, and then delete them.
- Find the TXT record at
@that starts withv=spf1. Delete it, unless another service also sends email for your domain. In that case, edit it in Step 3.
Warning: When you delete the old MX records, your old email provider stops receiving mail. Back up or move any email you want to keep first.
Important: Is Cloudflare Email Routing turned on? Turn it off first. Go to Email > Email Routing > Settings, disable it, and then delete its MX records.
Step 2: Add the MX Records
MX records tell other mail servers where to deliver your email. To learn more, see How to Edit MX Records.
- Click Add record.
- Choose MX as the type.
- Enter
@as the name,mx1.titan.emailas the mail server, and10as the priority. - Click Save.
- Add a second MX record:
@,mx2.titan.email, priority20.
Step 3: Add the SPF Record
An SPF record tells other servers that Professional Email can send email for your domain. To learn more, see SPF Records.
- Click Add record and choose TXT.
- Enter
@as the name andv=spf1 include:spf.titan.email ~allas the content. - Click Save.
Tip: Your domain can have only one SPF record. If another service sends email for you, combine them into one record. Example: v=spf1 include:spf.titan.email include:_spf.example.com ~all
Step 4: Add the DKIM Record
A DKIM record adds a digital signature to your email, so receiving servers know it really came from you.
- Click Add record and choose TXT.
- Paste the DNS Host Name you copied into Name. Leave out your domain name, because Cloudflare adds it for you.
- Paste the TXT Record Value you copied into Content.
- Click Save.
- Go back to the Email Reputation page where you copied the record. Select the option confirming that you've added the TXT record, and then click Verify changes.
Note: For more information about DKIM records, see Professional Email: How to Add DKIM Record.
Step 5 (Optional): Add the DMARC Record
A DMARC record tells receiving servers what to do with email that fails SPF or DKIM checks.
- Click Add record and choose TXT.
- Enter
_dmarcas the name. - Enter
v=DMARC1; p=none; rua=mailto:[email protected]as the content. Replace the email address with one you check. - Click Save.
Tip: p=none watches your email but blocks nothing. It's a safe place to start.
Check That It Works
Your changes usually work within 1 to 4 hours. In rare cases, they take up to 48 hours.
- On the Email Reputation page, check that your records show Verified, including DKIM.
- Send an email from another account, such as Gmail, to your Professional Email address.
- Reply from your Professional Email account and make sure your message arrives.
Success: If you can send and receive email, you're all set.
Fix Common Problems
Most setup problems come from a missing, duplicate, or mistyped record. Find your issue below.
Your Records Aren't Verified
Wait up to 4 hours. Make sure you added the records in Cloudflare, not Bluehost.
Email Still Goes to Your Old Provider
Delete every MX record except the two Professional Email MX records. Turn off Cloudflare Email Routing. For help, see How to Edit MX Records.
Your Email Lands in Spam
Check that your SPF value matches the table exactly. Finish DKIM verification on the Email Reputation page.
Your SPF Check Fails
Make sure you have only one SPF record. Combine any extras into one. For help, see SPF Records.
DKIM Won't Verify
Paste the host name again without your domain, and paste the full value. Keep only one DKIM record.
Note: For help using the Cloudflare dashboard, contact Cloudflare support. We can help you confirm which email records you need.
Summary
To use Bluehost Professional Email with Cloudflare, copy your DKIM record from the Email Control Panel or your Bluehost Portal, delete your old email records, and then add the MX, SPF, and DKIM records in Cloudflare. Verify them on the Email Reputation page and send a test email to make sure everything works.
Related Articles
If you need further assistance, Bluehost Chat Support is available 24 hours a day, 7days a week while Bluehost Phone Support is available 7 days a week from 7 am-12 midnight EST.
- Chat Support - While on our website, you should see a CHAT bubble in the bottom right-hand corner of the page. Click anywhere on the bubble to begin a chat session.
- Phone Support -
- US: 888-401-4678
- International: +1 801-765-9400
You may also refer to our Knowledge Base articles to help answer common questions and guide you through various setup, configuration, and troubleshooting steps.