How to Install WordPress - WordPress Manual Installation
WordPress is one of the most popular tools for creating a website or blog. This article will help guide you through the process of installing WordPress manually. Manual installation or one-click installation can suit different needs. The manual WordPress install method is usually for special scenarios or advanced WordPress users.
Step 1: Download WordPress
- Download the WordPress package from https://wordpress.org/download/ to your local computer.
- On your local computer, make sure to unzip the downloaded file to a folder.
You can extract or unzip files with your File Manager by following the steps in this guide: How to Extract Files - Zip, Tar, GZip, and Zip Tar Archive.
Step 2: Upload WordPress
You have three ways to upload your WordPress site to your hosting account. After you unzipped the file in Step 1 above, it will create a folder named ‘WordPress’, and the contents of the folder you uploaded must be in your hosting account's file manager.
Once you log in to your Bluehost Portal.
- Upload via FTP - See FTP General FTP Settings for more information.
- Upload via File Manager - See File Manager - How to Upload Files for instructions.
- Upload via SSH - See SSH Access for instructions.
Step 3: Create a MySQL Database for WordPress
Databases are essential for managing a large amount of data efficiently and are a part of a WordPress website.
- Accessing Your Database Management Panel - See How to Access Your Database Management Panel for instructions.
- Create MySQL Database - See How to Create MySQL Database for instructions.
- Create Database User - See How to Access Create Database User for instructions.
- Add User to the Database - See How to Add User to the Database for instructions.
Step 4: Configure wp-config.php File
The wp-config.php file contains the database information and tells WordPress which database to pull data from. This step is essential to properly connecting the correct database to the corresponding WordPress installation.
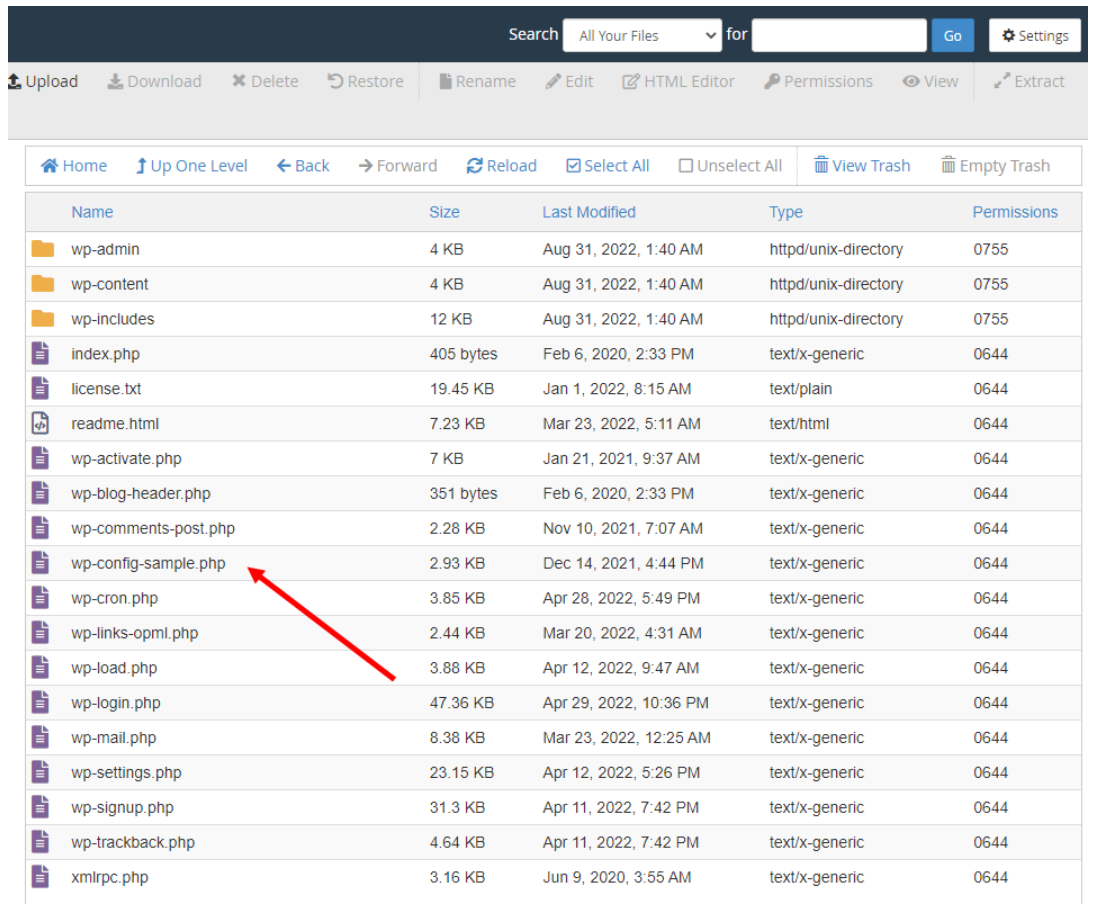
Manual WordPress installations typically require you to locate the file wp-config-sample.php and rename it to wp-config.php.
Access the File Manager and locate the wp-config-sample.php file.
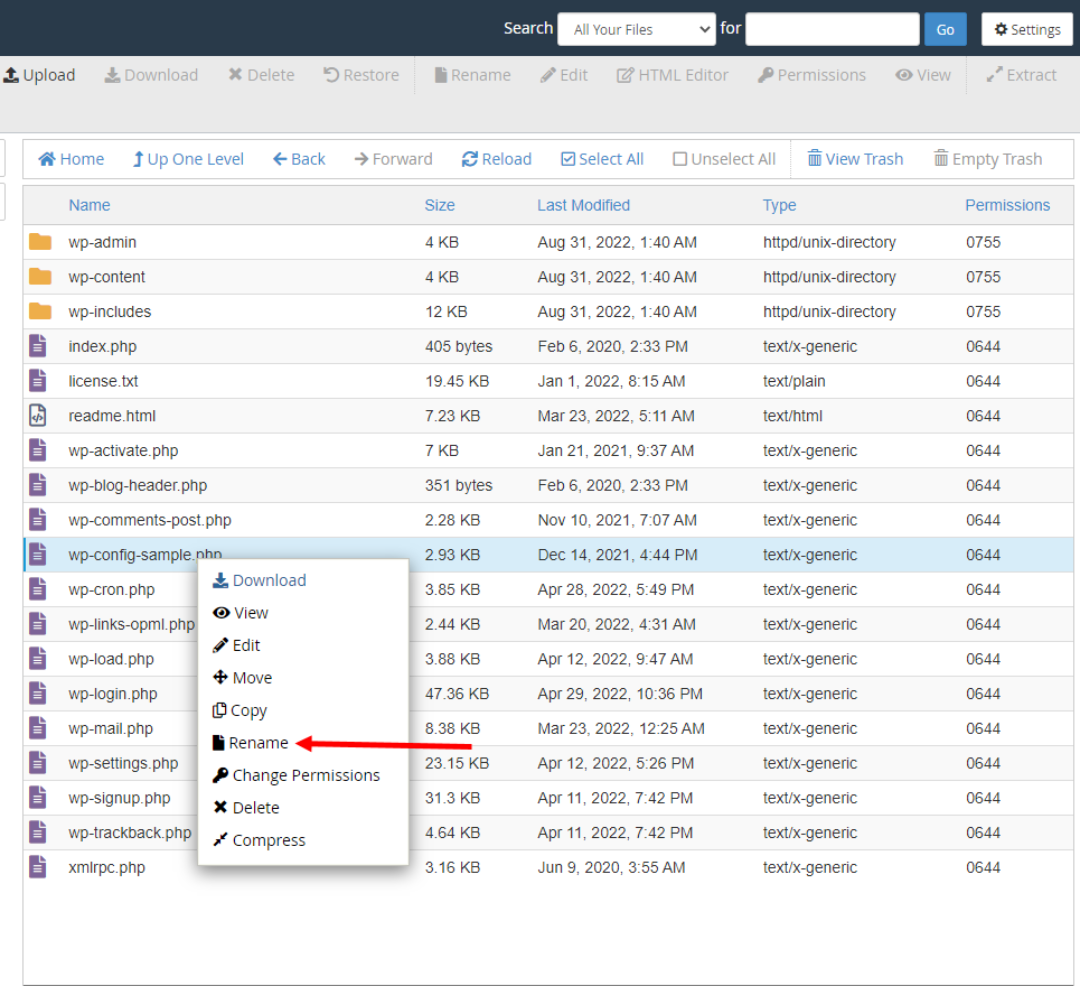
- Once you locate the file wp-config-sample.php, it is time to rename it. Simply right-click on the file name, and a pop-up will appear. Select Rename. Modify the file's name. Ensure the name of the file is wp-config.php.
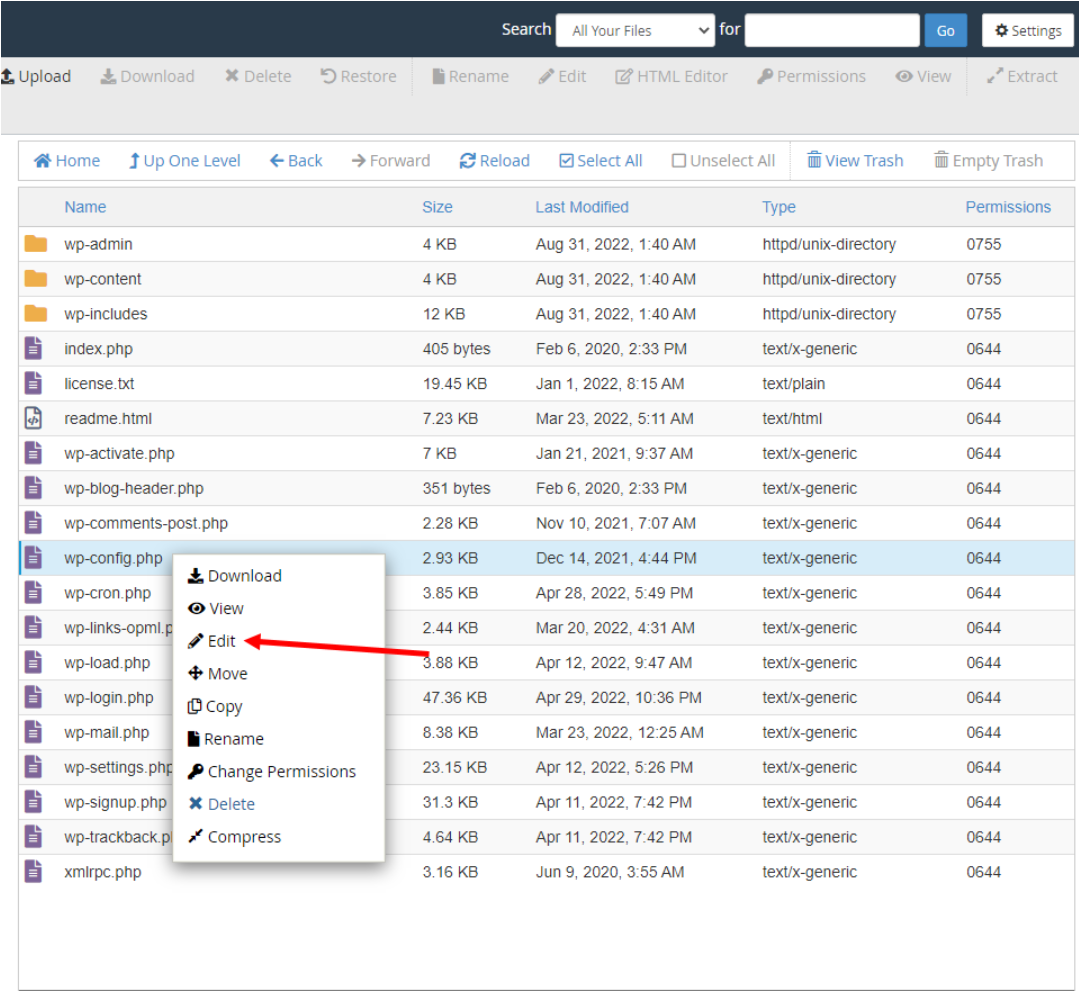
- Right-click the file again, and options will pop up. Select the Edit option. Enter the new database information, including the database name, user, and password.
- After making the necessary updates, save the changes by clicking the Save Changes button.
- Locate the wp-config-sample.php file.
- Right-click this file, then choose the Rename option.
- Rename the file to wp-config.php.
- Right-click the new wp-config.php file.

- Right-click this file, then choose the Edit option.
- New windows appear. Click the Edit button again.
- A new pop-up window will appear. Select the Edit option.
- Look for the following information when the file opens.
/** The name of the database for WordPress */ define( 'DB_NAME', 'database_name_here' ); /** MySQL database username */ define( 'DB_USER', 'username_here' ); /** MySQL database password */ define( 'DB_PASSWORD', 'password_here'' ); /** MySQL hostname */ define( 'DB_HOST', 'localhost' );- Change database_name_here with the name of the database and user you created in the steps above.
- Change username_here with the username of the database you created.
- Change password_here with the password of the database that you created.
Ensure there are no spaces before or after your database name, username, and password. - After completion, click the Save Changes button in the upper right corner, followed by Close to exit and return to the File Manager.
Step 5: Run the WordPress Installer
Launch a new browser or tab to run the installation script and enter your domain. Depending on where you installed your script, you will be redirected to the following URL.
https://example.com/wp-admin/install.php
https://example.com/yoursubfolder/wp-admin/install.php
- If you uploaded WordPress to your main domain’s (root directory) folder, you will automatically be routed to the following URL:
- If WordPress is uploaded to a subfolder of your main domain’s directory, the following URL will appear:
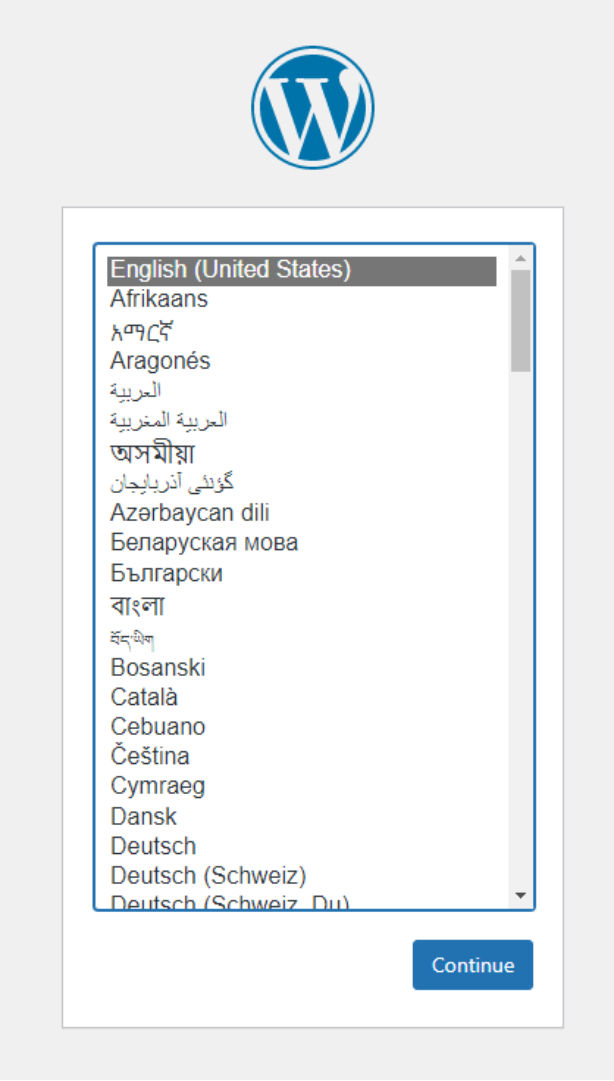
- When you navigate to your correct WordPress URL in a browser, you will be asked to select your preferred language. Choose your preferred language and then press the Continue button.
- You should now see a welcome page titled "Welcome to WordPress." Before getting started, you should consider the following item:" Click Let's Go!"
- Enter the database name and user you previously created, and then click Submit.
If you see a message that says, "The file wp-config.php already exists. If you need to reset any configuration items in this file, please delete it first. You may try installing now." Continue by clicking the Install Now link.
Step 6: Finalize the WordPress Setup
- Navigate to the right WordPress URL in a browser, and it will prompt you to select your preferred language. Select your preferred language and then click the Continue button.
- Once you are on the Welcome page, fill out the following fields under the Information needed section:
- Site Title: This can be changed at any time.
- Username: This is the site's admin username. We strongly advise against using 'admin' because it can pose a security risk.
- Password: A strong password will be generated for you automatically, but you can create your own. The password strength indicator will tell you how secure your password is.
- Your Email: This is where your login credentials will be sent. Make sure to put an email address that you can access.
- Search Engine Visibility: Place a check mark if you want to be visible in the engine results. Uncheck if you don't want your site to be indexed.
- Click the Install WordPress button, and you will be routed to the final screen that says, "WordPress has been installed; thank you, and enjoy!" It will show the username you selected on the previous page and a placeholder for your password.
- Success! You can now log in to your WordPress site.
Additional Resources
- WordPress Overview and elevate WordPress with these 9 Tips
- How to Fix the Error Establishing a Database Connection in WordPress
- Free vs. Premium WordPress Themes
- How to Install a New WordPress Theme from the Admin Dashboard
- How to Create and Edit a Page in WordPress
- How to Create a WordPress Blog Post and Edit or Remove WordPress Posts
- WordPress Navigation Menu and Widgets
- Using WordPress Block Editor or Website Builder for WordPress
- Install and Activate WordPress Plugins
- Build an Online Store with easy E-commerce WordPress Plugins with WooCommerce
- Marketing Packages and Plans for SEO (Search Engine Optimization)
- Digital Marketing Services
Summary
Want or need a guide on how to install WordPress manually to create, migrate, or rebuild your website to ensure WordPress functions properly? The process involves a few steps. When the following are performed: downloading WordPress, uploading WordPress to your hosting account or server, creating a MySQL database and user, configuring wp-config.php, and running the installation, these measures ensure a complete installation of WordPress manual installation.
If you need further assistance, Bluehost Chat Support is available 24 hours a day, 7days a week while Bluehost Phone Support is available 7 days a week from 7 am-12 midnight EST.
- Chat Support - While on our website, you should see a CHAT bubble in the bottom right-hand corner of the page. Click anywhere on the bubble to begin a chat session.
- Phone Support -
- US: 888-401-4678
- International: +1 801-765-9400
You may also refer to our Knowledge Base articles to help answer common questions and guide you through various setup, configuration, and troubleshooting steps.