
Key highlights:
- Understand that MySQL doesn’t offer a direct rename command, requiring a copy-and-drop approach instead
- Create comprehensive backups before attempting any database renaming procedure
- Navigate phpMyAdmin’s interface efficiently to locate and execute database operations
- Update user permissions and access rights after renaming your MySQL database in phpMyAdmin
- Troubleshoot common errors when renaming a database in phpMyAdmin, such as access denied and unavailable rename options
- Follow MySQL database naming conventions and best practices when learning how to rename a database in phpMyAdmin
Managing databases effectively requires you to understand how to perform essential operations such as renaming. If you’re working with MySQL databases through phpMyAdmin, you might discover that renaming a database isn’t as straightforward as you’d expect. Unlike renaming files or folders, renaming a database in phpMyAdmin involves specific steps and considerations that can impact your website’s functionality if not handled correctly.
This comprehensive guide will walk you through the entire process of renaming a MySQL database in phpMyAdmin, from preparation to completion. Whether you’re reorganizing your database structure, correcting naming conventions or preparing for a website migration, understanding these procedures will help you manage your MySQL database more effectively. We’ll cover everything from accessing the phpMyAdmin control panel to handling potential complications that might arise during the process.
TL;DR: Rename a MySQL database in phpMyAdmin
- Back up your existing database before making any changes to protect your data.
- Create a new database with your desired name through the phpMyAdmin interface.
- Export all tables from the old database and import them into the newly created database.
- Update your website’s configuration files to point to the new database name.
- Test your website thoroughly to ensure all connections work properly.
- Delete the old database once you’ve confirmed everything functions correctly.
- For reliable MySQL database hosting with easy phpMyAdmin access, explore Bluehost hosting solutions.
Why Renaming a Database in phpMyAdmin Needs Care?
Database renaming in MySQL environments requires careful planning because of how the underlying system handles data storage and relationships. Unlike simple file operations, changing a database name affects multiple system components and can break application connections if not executed properly.
To truly understand why this process demands caution, let’s explore the technical foundation of how MySQL handles database names at the system level.
What does “rename” really mean under the hood?
MySQL doesn’t provide a direct rename database command at the database level. This limitation exists because databases in MySQL are essentially directories containing table files and the system doesn’t support atomic directory renaming operations that would be safe for all storage engines.
When you attempt to change the MySQL database name, the system must:
- Create a new database with the desired name
- Copy all tables and their data to the new database
- Preserve table structures, indexes and constraints
- Transfer stored procedures, functions and triggers
- Remove the original database once the copy is complete
This process means that renaming large databases can take considerable time and requires sufficient disk space to hold both the original and copied data simultaneously. The MySQL database renaming process also involves updating any applications or scripts that reference the old database name.
Now that you are aware of the technical details, let us look at how phpMyAdmin’s interface makes database renaming simple.
How does phpMyAdmin handle the rename?
The phpMyAdmin interface streamlines the complex rename operation by automating the copy-and-drop sequence. When you use phpMyAdmin’s rename function, it performs several operations behind the scenes to ensure data integrity throughout the process.
PhpMyAdmin’s approach to database renaming includes:
- Validating the new database name against MySQL database naming conventions
- Creating the target database with appropriate character sets and collations
- Systematically copying table structures and data into the new database
- Recreating indexes, foreign keys and other constraints
- Copying stored procedures, functions, triggers and events
- Dropping the original database only after successful verification
This automated process reduces the risk of human error but still requires proper preparation and understanding of potential complications. The phpMyAdmin database management interface provides visual feedback during the operation, helping you monitor progress and identify issues that may arise during the MySQL database rename process.
Understanding these underlying mechanisms prepares you for the next crucial phase of implementing proper safety measures before beginning the actual rename operation.
Before You Start: Safety Checklist
Proper preparation prevents data loss and minimizes downtime during database operations. Before attempting to rename any database, following a comprehensive safety checklist ensures you can recover from unexpected issues and maintain system stability.
The first critical step in your pre-rename safety checklist is to secure a complete copy of your database. This backup serves as your insurance policy against any potential issues during the renaming process.
1. Take a fresh backup or export first
A full database backup serves as your most important protection against data loss. Even though phpMyAdmin’s rename function is generally reliable, hardware failures, network interruptions or permission issues could corrupt the process.
To create a proper backup through phpMyAdmin:
- Navigate to your target database in the phpMyAdmin dashboard
- Click the “Export” tab in the main interface
- Select “Custom” export method for maximum control
- Choose “SQL” format for complete structure and data preservation
- Ensure “Structure” and “Data” options are both selected
- Include “Add DROP TABLE / VIEW / PROCEDURE / FUNCTION / EVENT / TRIGGER statement” for clean imports
- Download the export file to a secure local location
For larger databases, consider using command-line tools like mysqldump for more reliable backup creation. The database backup before renaming should include all tables, stored procedures, triggers and user-defined functions to ensure complete restoration capability if needed.
Once your backup is safely stored, the next essential preparation step is documentation. Recording all relevant database information helps you track dependencies and update configurations after the rename.
2. Write down the current database name, DB user and where the name is used
Documentation prevents confusion and helps identify all locations requiring updates after the rename. Create a comprehensive list that includes:
Database Connection Information:
- Current database name and proposed new name
- Database username and associated privileges
- Host connection details and port numbers
- Character set and collation settings
Application References:
- Configuration files (wp-config.php, .env, config.json)
- Connection strings in application code
- Scheduled scripts and cron jobs
- Backup scripts and maintenance routines
- Documentation and deployment guides
This documentation becomes crucial when updating application configurations and troubleshooting connection issues after the rename process is completed.
Before proceeding with the database rename, take a moment to inventory all components within your MySQL environment. This proactive verification step helps identify potential complications arising from non-standard elements in your setup.
3. Check for “extra” database objects you may need to validate later
Beyond standard tables, modern databases often contain additional objects that require special attention during rename operations. These elements might not transfer correctly or could cause issues if not properly handled.
Make note of these database components:
- Views: Virtual tables that might reference the old database name in their definitions
- Stored Procedures: Custom functions that could contain hardcoded database references
- Triggers: Automatic actions that might break if the database context changes
- Events: Scheduled tasks that could fail with incorrect database names
- Foreign Key Constraints: References between tables that must maintain integrity
- User-Defined Functions: Custom MySQL functions specific to your database
Use phpMyAdmin’s interface to explore these objects by checking the “Routines,” “Events,” and “Triggers” tabs within your database structure. Document any complex dependencies that might require manual verification after the rename process.
With your database inventory complete, the final preparation step is to establish a consistent naming standard for your new database. Choosing the right naming convention prevents compatibility issues and ensures smooth operation.
4. Pick a clean naming convention
Following MySQL database naming conventions ensures compatibility and prevents future issues. Proper naming standards also improve database management and reduce confusion in multi-database environments.
When naming your database, keep these best practices in mind:
- Use lowercase letters to avoid case-sensitivity issues across different operating systems
- Replace spaces with underscores for consistent parsing
- Avoid special characters except underscores and numbers
- Keep names descriptive but concise (under 64 characters)
- Use consistent prefixes for related databases
- Avoid MySQL reserved words and keywords
Examples of good database names: company_website_2024, ecommerce_production and blog_content_main
These database names follow MySQL naming best practices by using lowercase letters, underscores instead of spaces and descriptive names that clearly indicate the database purpose. They avoid special characters and reserved SQL keywords, making them compatible with phpMyAdmin and reducing the risk of errors during queries or database operations.
Examples to avoid: My Database!, test123, database a select
These examples should be avoided because they violate MySQL naming conventions. Names with spaces and special characters like exclamation marks require backticks in queries and can cause errors in phpMyAdmin. Generic names like “test123” or “database” lack clarity about their purpose, while “select” is a reserved SQL keyword that will create conflicts and should never be used as a database name.
In short, these preparation steps provide the foundation for a successful database rename operation, ensuring you can proceed confidently with the actual renaming in phpMyAdmin. Now that you’ve completed these essential preparations, let’s walk through the exact steps to rename your database in phpMyAdmin.
Also read: How to Repair and Optimize a Database in Account Manager
Step 1: Open phpMyAdmin and Find Your Database
Accessing phpMyAdmin and locating your target database requires understanding your hosting environment and navigation options. Different hosting providers offer various methods for accessing the phpMyAdmin interface, but the core functionality remains consistent across installations.
Method 1. If you use Bluehost, open phpMyAdmin from your Account Manager
For Bluehost customers, the process begins in your account dashboard, where you can easily navigate to phpMyAdmin without separate login credentials. Bluehost users can access phpMyAdmin through their hosting control panel with these steps:
- Log in to your Bluehost Account Manager.
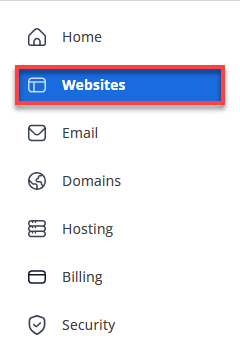
- In the left-hand menu, click Websites.
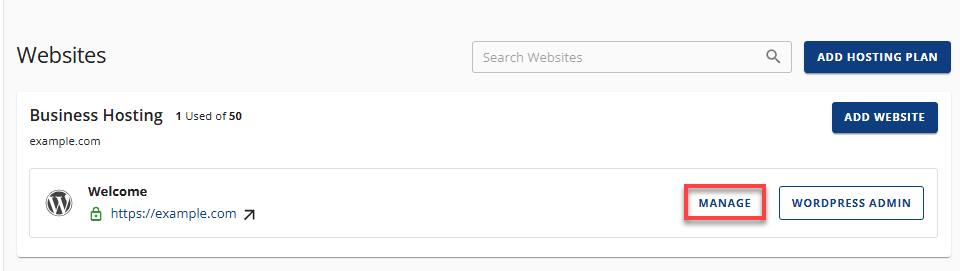
3. Click the MANAGE button located next to the website you want to manage.
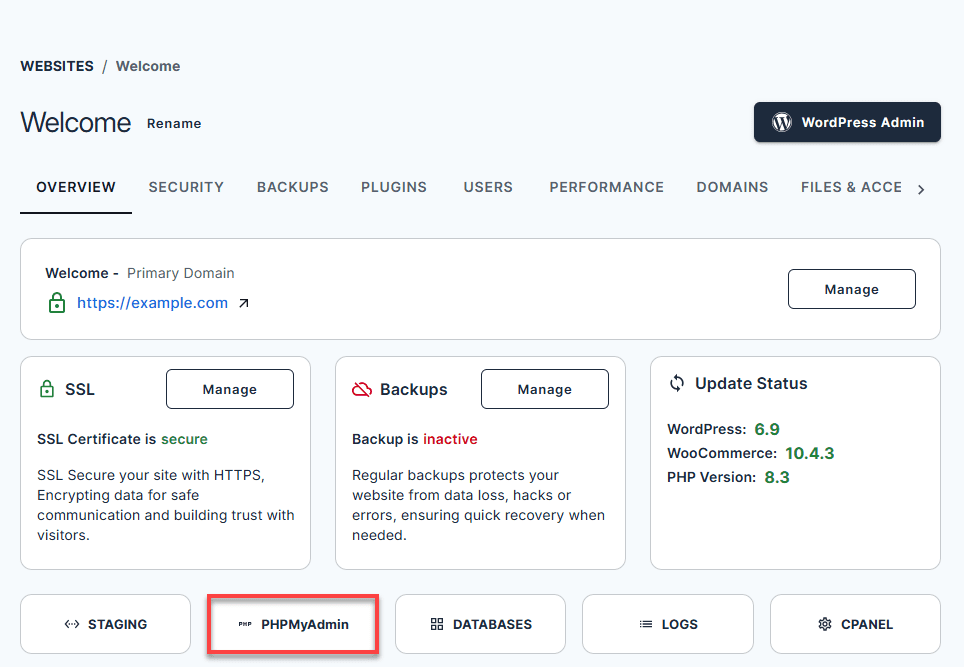
4. In the Overview tab, scroll down and click phpMyAdmin.
5. In the left sidebar, click on the database you want to search.
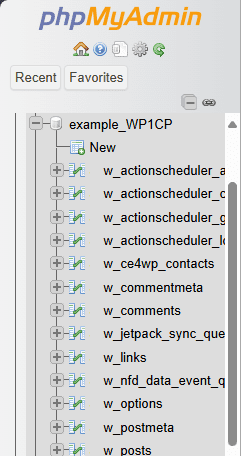
Once phpMyAdmin loads, you’ll see a list of databases associated with your hosting account. Bluehost typically prefixes database names with your account username, so look for databases following the pattern username_databasename. The phpMyAdmin login process through Bluehost handles authentication automatically, eliminating the need for manual credential entry.
Bluehost integrated phpMyAdmin interface makes database management straightforward, even for users without extensive technical expertise. This seamless integration is just one of the many features that simplify WordPress site management. So, get started with Bluehost hosting today and enjoy automatic phpMyAdmin access with every plan.
Method 2. If you use cPanel, open phpMyAdmin from Databases
For cPanel-based hosting platforms, accessing phpMyAdmin follows a different workflow. Once you know where to navigate in the control panel, the process becomes quick and simple.
- Log in to your cPanel dashboard using your hosting credentials
- Scroll to the “Databases” section
- Click on the “phpMyAdmin” icon
- A new window or tab will open with the phpMyAdmin interface
- Your databases will appear in the left sidebar
CPanel installations often organize databases by user and you might need to expand database categories to find your specific database. Database server management through cPanel provides additional tools for creating users and managing permissions, which become relevant after completing the rename process.
With this understanding of the database structure, let’s proceed to the steps to rename your database in phpMyAdmin.
Also read: How to Search MySQL Databases in phpMyAdmin
Step 2: Rename using the phpMyAdmin UI
If your phpMyAdmin version includes a built-in rename feature, the process becomes straightforward. However, this functionality depends on your version and server configuration.
To begin the database renaming process in phpMyAdmin, you’ll first need to access the database you want to rename.
Step 2.1. Select the database in the left sidebar
- Click on your target database name in the left navigation panel.
- The database will be highlighted and its structure will be displayed in the main interface.
- Verify you’ve selected the correct database before proceeding.
Once you’ve selected your database, the next step is to access the rename functionality.
Step 2.2. Go to the Operations tab and find “Rename database to”
- Navigate to the Operations tab and locate the “Rename database to” section.
- If this option isn’t visible, your phpMyAdmin version may not support this feature or your account may lack the necessary privileges.
After locating the rename option, enter your desired database name.
Step 2.3. Enter the new name and click Go
- Type your new database name in the input field.
- Before clicking Go, verify the name follows MySQL naming conventions and doesn’t conflict with existing databases.
- The operation may take several minutes for large databases.
Before the renaming process begins, phpMyAdmin will ask you to confirm your action.
Step 2.4. Confirm the process
- phpMyAdmin will display a confirmation dialog explaining that the operation creates a new database, copies all data and drops the original.
- Review the details carefully, then click OK to proceed.
- Monitor the progress and avoid closing your browser during the operation.
- Upon completion, the new database name will appear in the left sidebar.
The built-in rename feature offers the quickest solution, but what if it’s not available in your phpMyAdmin version? Let’s look at the alternative approach you can take.
Step 3: What to Do if phpMyAdmin’s Rename Option is Missing?
Many phpMyAdmin installations don’t include the direct rename feature due to version limitations or administrative restrictions. When the rename option isn’t available, you’ll need to use alternative approaches that achieve the same result.
There are two reliable methods to rename your MySQL database when the direct rename option is unavailable. Choose the method that best fits your comfort level and specific requirements.
Method 1: Export, create a new database and import
This export-import approach provides complete control over the renaming process and automatically creates a backup during the operation. Follow these consolidated steps to rename your database using this method:
- Select your source database from the left sidebar and click the “Export” tab.
- Choose “Custom” export method, ensure all tables are selected and select “Structure and data” to include both schema and content.
- Select “SQL” as the export format, enable “Add DROP TABLE statements” for clean imports and download the export file to your local system.
- Click “New” in the phpMyAdmin home screen, enter your desired database name and select the appropriate character set. (usually utf8_general_ci)
- Select the newly created database, click the “Import” tab, choose your exported SQL file and verify that the character set matches your database settings.
- Click “Go” to begin the import process and wait for confirmation that the data has been successfully transferred.
This method ensures complete data transfer while maintaining full control over each step. Once you’ve verified the new database contains all your data, you can safely remove the original database.
Also read:How to Import or Export a MySQL Database using phpMyAdmin
Method 2: Copy the database and remove the original
Many phpMyAdmin installations include a “Copy database to” feature that streamlines the renaming process by combining creation and copying into a single operation. This method is often faster than the export-import approach:
- Select your source database and navigate to the “Operations” tab.
- Find the “Copy database to” section, enter the new database name and select both “Structure and data” and “CREATE database before copying” options.
- Click “Go” to initiate the copy process and wait for the operation to complete.
- Verify that all the data is transferred correctly to the new database by checking tables, indexes and running a few sample queries.
- Once you’ve confirmed everything is working properly, return to the original database and use the “Drop” option in the Operations tab to remove it.
This method provides a quicker workflow when the copy feature is available. However, it’s important to verify the new database thoroughly before removing the original.
After successfully renaming your database using one of the methods above, the next critical step is to ensure your website or application can access it properly.
Step 4: Reconfigure User Permissions
After renaming a database, existing user permissions do not automatically carry over. Before your website or application can connect again, you need to reassign access to the renamed database.
There are multiple ways to configure database permissions and the method you choose depends on your hosting environment. Let’s start with the most common approach for managing database users.
Step 4.1. Update permissions in phpMyAdmin
Follow these steps if you manage database users directly through phpMyAdmin:
- Identify the database user your application uses. (you can find this in your site’s configuration file)
- Open phpMyAdmin.
- Select the renamed database from the left sidebar.
- Click the Privileges tab.
- Locate the user in the user accounts list and click Edit Privileges next to their username.
- Select the appropriate permissions for your application (such as SELECT, INSERT, UPDATE, DELETE, CREATE, DROP) or choose Check All to grant all privileges.
- Click Go or Save to apply the changes.
- Verify the permissions have been updated by checking the Privileges tab again.
Alternatively, if you prefer working through your hosting control panel rather than phpMyAdmin, you can achieve the same result using a different interface.
Step 4.2. Update permissions from your hosting control panel
In some hosting environments, database users and permissions are managed through the control panel rather than phpMyAdmin. Follow these steps to grant access to your renamed database:
- Open your hosting control panel
- Go to MySQL Databases or Database Management
- Locate the database user
- Add the renamed database to the user
- Assign the appropriate privileges
- Save the changes
After completing the permission updates using your chosen method, you’re now ready to proceed to the final verification step.
Step 4.3. Finish by verifying database access
Once permissions are updated, confirm that everything works as expected before moving on:
- Check that your application connects without errors
- Test basic read and write actions
- Ensure all required tables are accessible
Since you’ve successfully verified database access and confirmed all permissions are working properly, you’re now ready to update your application’s configuration files to point to the new database name.
Also read:How to Create and Delete MySQL Databases and Users
Step 5: Update your application configuration
Once your database is renamed and permissions are restored, the next step is to update all applications that connect to it. Until this is done, your site or app will continue to try to access the old database name and will fail to connect.
Start by locating the main configuration file your application uses to store database settings.
For WordPress, open wp-config.php in your site’s root directory and update the database name:
define( 'DB_NAME', 'your_new_database_name' );
For Laravel, open the .env file and update:
DB_DATABASE=your_new_database_name- After saving, clear the configuration cache so the change takes effect.
For other CMS platforms, update the primary configuration file where database credentials are defined, such as:
The main database config file for your platform
settings.php (Drupal)
configuration.php (Joomla)
After updating the primary configuration file, take a moment to check for additional references to the old database name. Some applications store database values in multiple locations.
- Search your project files for the old database name
- Check environment files and custom scripts
- Review any automated jobs or backup scripts that connect to the database
Once all references are updated, test your application to confirm the changes were applied correctly.
- Load the website or application without errors
- Perform a basic action that writes data, such as submitting a form
- Confirm scheduled tasks or background jobs run as expected
If everything works normally, your application is now fully connected to the renamed database and ready for final verification.
Step 6: Verify the rename and prepare a rollback plan
After updating your application configuration, confirm that the database rename completed successfully. These final checks help you catch issues early and recover quickly if something doesn’t work as expected.
Step 6.1. Verify the database
Begin by checking the database itself to ensure all data and structures are intact before testing at the application level.
- Open phpMyAdmin and select the renamed database
- Browse a few tables to confirm data is present
- Run a simple query or preview rows to ensure data loads correctly
Step 6.2. Test your application
Once the database appears correct, test how your website or application behaves when connected to the renamed database.
- Load the site without database connection errors
- Test a basic read action, such as viewing a page
- Test a write action, such as submitting a form or saving a change
- Log in and out to confirm authentication works
Step 6.3. Know when and how to roll back
If testing reveals critical issues that cannot be resolved quickly, having a rollback plan helps you restore normal operation without extended downtime. You should consider rolling back if:
- Database connection errors persist
- Tables or data appear missing
- Core features stop working
If you feel that a rollback is necessary, you can restore your previous database configuration by following these steps. To roll back safely:
- Drop the renamed database if needed
- Recreate the database using the original name
- Import your backup
- Reassign user permissions
- Restore the original application configuration
After completing the rollback process, verify that your site loads correctly and that all core functionality has been restored. Test database connections, check that your data is intact and ensure all features that rely on the database are working properly.
Moreover, despite following the steps carefully, you may still encounter challenges when renaming a database in phpMyAdmin. Understanding these common issues and their solutions can help you troubleshoot effectively.
Also read:How to Restore a MySQL Database
Common Problems and Fixes
Database rename operations can encounter several predictable issues that affect functionality and require specific troubleshooting approaches. Understanding these common problems and their solutions helps you resolve issues quickly and maintain system stability.
1. “Access denied” after rename
This is the most common issue after a database rename and usually appears immediately when your application tries to reconnect. It happens because user permissions are not automatically reassigned to the new database name.
Common signs
- “Access denied for user” error messages
- Application fails to connect to the database
- Backup jobs fail with permission errors
How to fix
- Open phpMyAdmin using an admin account
- Go to User accounts
- Edit privileges for the affected user
- Add the renamed database under database-specific privileges
- Grant the required permissions
- Remove permissions for the old database if it no longer exists
Once you’ve resolved permission issues, the next challenge often involves updating your application’s configuration files to point to the new database name.
2. “Unknown database” error
This error indicates that your application is still trying to connect to the old database name. Even if the rename succeeds, outdated configuration files will prevent the connection.
Common signs
- “Unknown database” errors in logs
- phpMyAdmin shows the new database, but the app fails
How to fix
- Search your project files for the old database name
- Update the primary configuration file (
wp-config.php,.env, etc.) - Clear application or framework caches if applicable
- Restart the application or web service if required
While configuration errors are straightforward to address, you may also encounter situations where the rename operation cannot be completed due to restrictions in the hosting environment.
3. Rename option missing or rename fails
In some hosting environments, database renaming is restricted or disabled for security reasons. When this happens, the rename option may be missing or fail without completing.
Common causes
- Limited database privileges
- Shared hosting restrictions
- Older phpMyAdmin versions
How to fix
- Use the export and import method described earlier
- Create a new database and import your backup
- Update permissions and application configuration
- Contact your hosting provider if rename access is required
Beyond these configuration and permission challenges, incomplete data transfers can lead to even more critical issues affecting your database integrity.
4. “Table not found” errors
This problem usually means the application is connecting to the wrong database or the rename process did not fully copy all tables. It often appears only after certain features are used.
Common signs
- Errors referencing missing tables
- Application partially loads or breaks
How to fix
- Confirm all tables exist in phpMyAdmin under the renamed database
- Compare table counts with your backup
- Verify the application is pointing to the correct database
- Re-import missing tables from backup
- Restore the full database if multiple tables are missing
Also read:How to Rename Database Tables in phpMyAdmin
In a nutshell, these troubleshooting steps resolve most database renaming issues in phpMyAdmin. By following the methods outlined above, you should be able to successfully rename your MySQL database without data loss or complications.
If you continue to experience problems after trying these solutions, don’t hesitate to reach out for expert assistance. Database management can be complex and sometimes you need professional guidance to resolve specific configuration issues.
At Bluehost, our expert support team is available 24/7 via phone, chat and email to assist you with MySQL and phpMyAdmin configurations. Whether you’re facing permission errors, syntax issues or hosting-specific challenges, we’ll guide you step-by-step to resolve them efficiently so you can focus on your website while we handle the technical side. Just reach out anytime and we’ll be ready to support you!
Final thoughts
Renaming a MySQL database in phpMyAdmin requires careful planning and thorough verification. While it may seem straightforward, the process involves more than just changing the database name; you must also update user permissions, application configurations and system dependencies to maintain seamless operations.
Remember that MySQL doesn’t support true database renaming. Instead, the process creates a new database copy and drops the original. This means you need adequate disk space and should carefully plan your operation timing, especially in production environments.
For critical databases, consider using command-line tools such as mysqldump or direct SQL queries. These methods provide greater control and reliability than phpMyAdmin’s interface, though phpMyAdmin works well for routine tasks.
Always prioritize data safety through comprehensive backups and testing. The time invested in proper preparation far outweighs the potential costs of data recovery. With these practices in place, database rename operations become manageable routine procedures.
FAQs
To rename a database in phpMyAdmin, start by creating a complete backup of your existing database. Then select the database from the left sidebar, open the Operations tab and look for the “Rename database to” option. Enter the new name and confirm the change.
If the rename option is not available, use this alternative approach:
1. Export the database as an SQL file
2. Create a new database with the desired name
3. Import the SQL file into the new database
4. Drop the original database after verification
After the rename, remember to update user permissions and your application’s configuration files so everything connects correctly.
MySQL doesn’t provide a direct command to rename databases. Instead, you must create a new database, copy all tables and data from the original database and then drop the old database.
This can be accomplished through phpMyAdmin’s interface, command-line tools such as mysqldump or SQL commands that create and copy tables individually. The process requires careful attention to user permissions, stored procedures, triggers and application configurations that reference the database name.
Yes. Unlike database renaming, renaming a single table in phpMyAdmin is a quick, direct operation. To do this:
1. Select the table you want to rename
2. Open the Operations tab
3. Use the “Rename table to” option, enter the new name and click Go
Table renaming is a direct operation and does not involve copying data, which makes it faster and more reliable than renaming a database. However, after renaming the table, you must still update any application code, queries or stored procedures that reference the old table name.

Write A Comment