 ChatGPT,
  Claude,
  Gemini,
  Grok — all four for
 Bluehost AI Store: How to Create, Edit, and Delete a Product
The Products tab in the Bluehost AI Store serves as your central hub for managing your store's inventory. From this section, you can add new products, update existing listings, organize product details, and manage what customers see in your online store.
This article explains how to create, edit, and delete products in your Bluehost AI Store. It also includes a short video that walks you through managing products in your AI Store.
To learn more about the AI Store interface and navigation, visit the Bluehost AI Store: Navigating the AI Store Dashboard article.
Creating a Product
Follow these steps to create products in your AI Store dashboard.
Step 1: Access the Bluehost AI Store
- Log in to your Bluehost Portal.
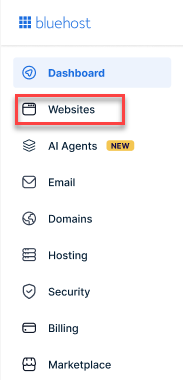
- From the left-hand menu, click the Websites tab.
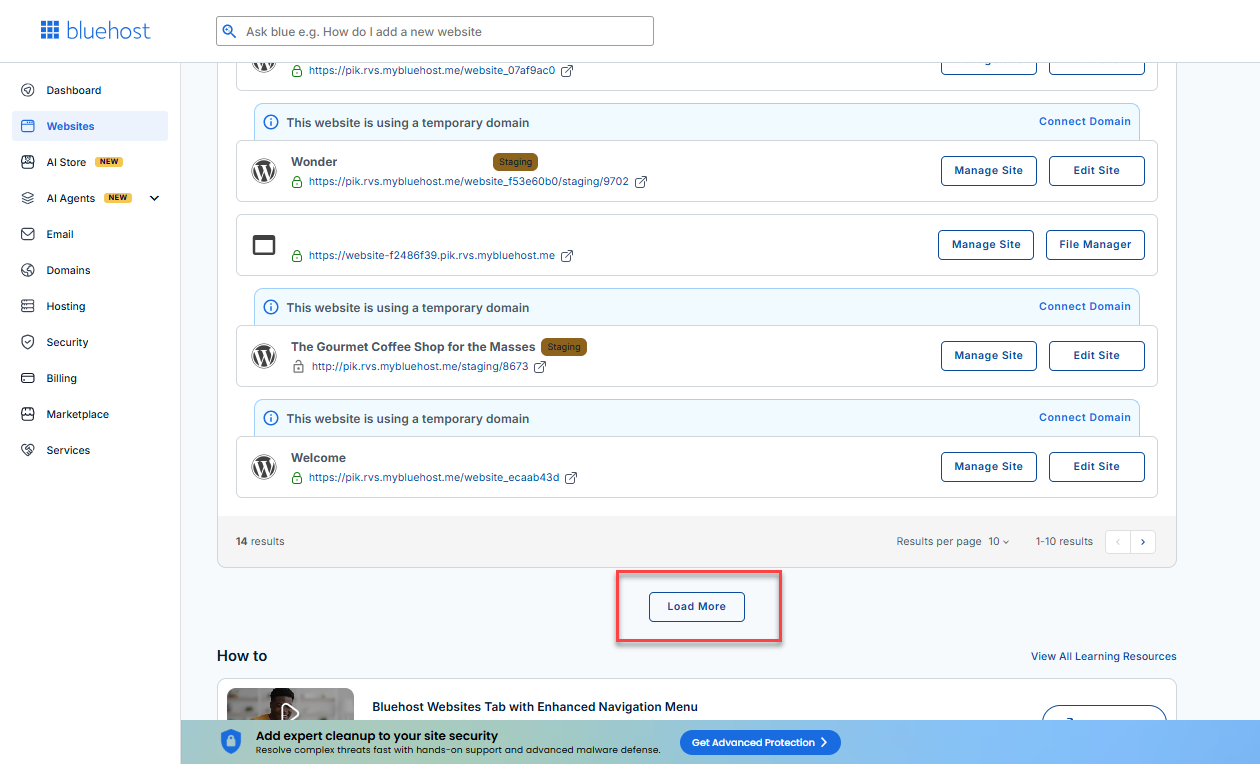
- Locate your Sell Online plan. If you have multiple websites, you need to scroll down and click the Load More link.
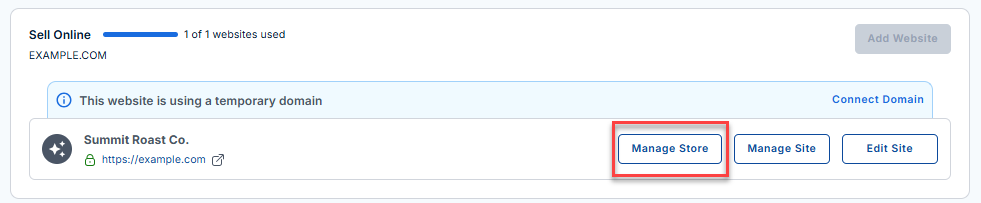
- Click the Manage Store button next to your site.
- You will be redirected to your Bluehost AI Store Dashboard.
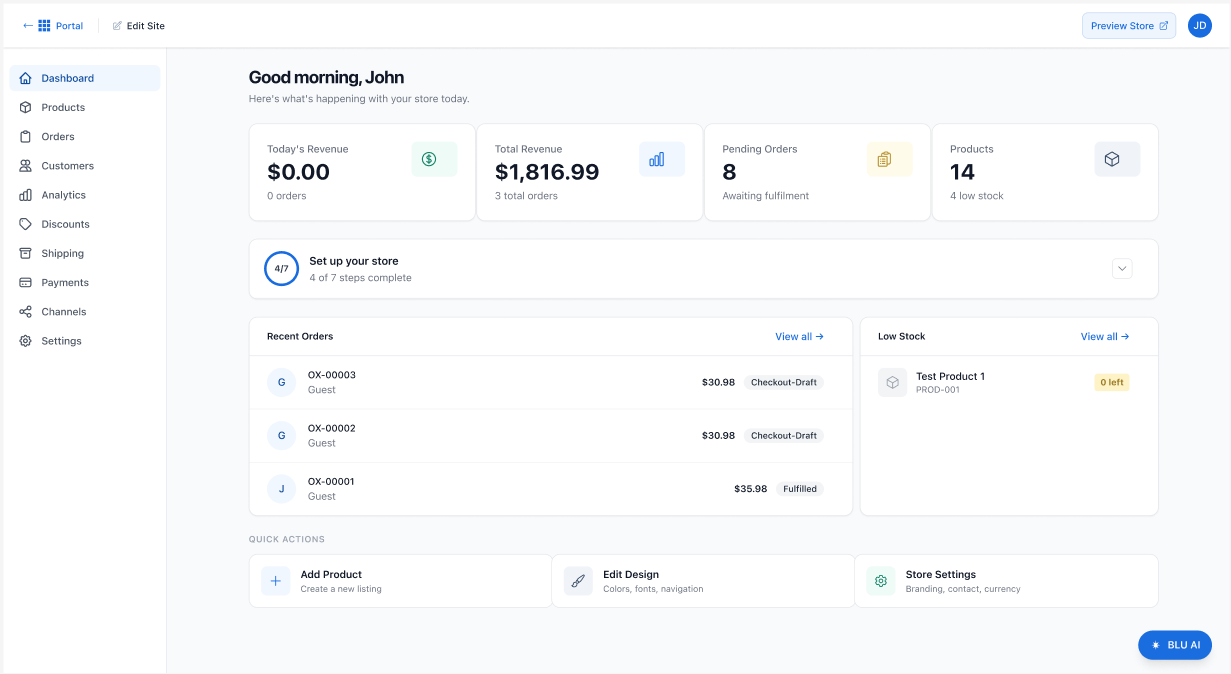
- Click the Products tab in the left-hand menu.
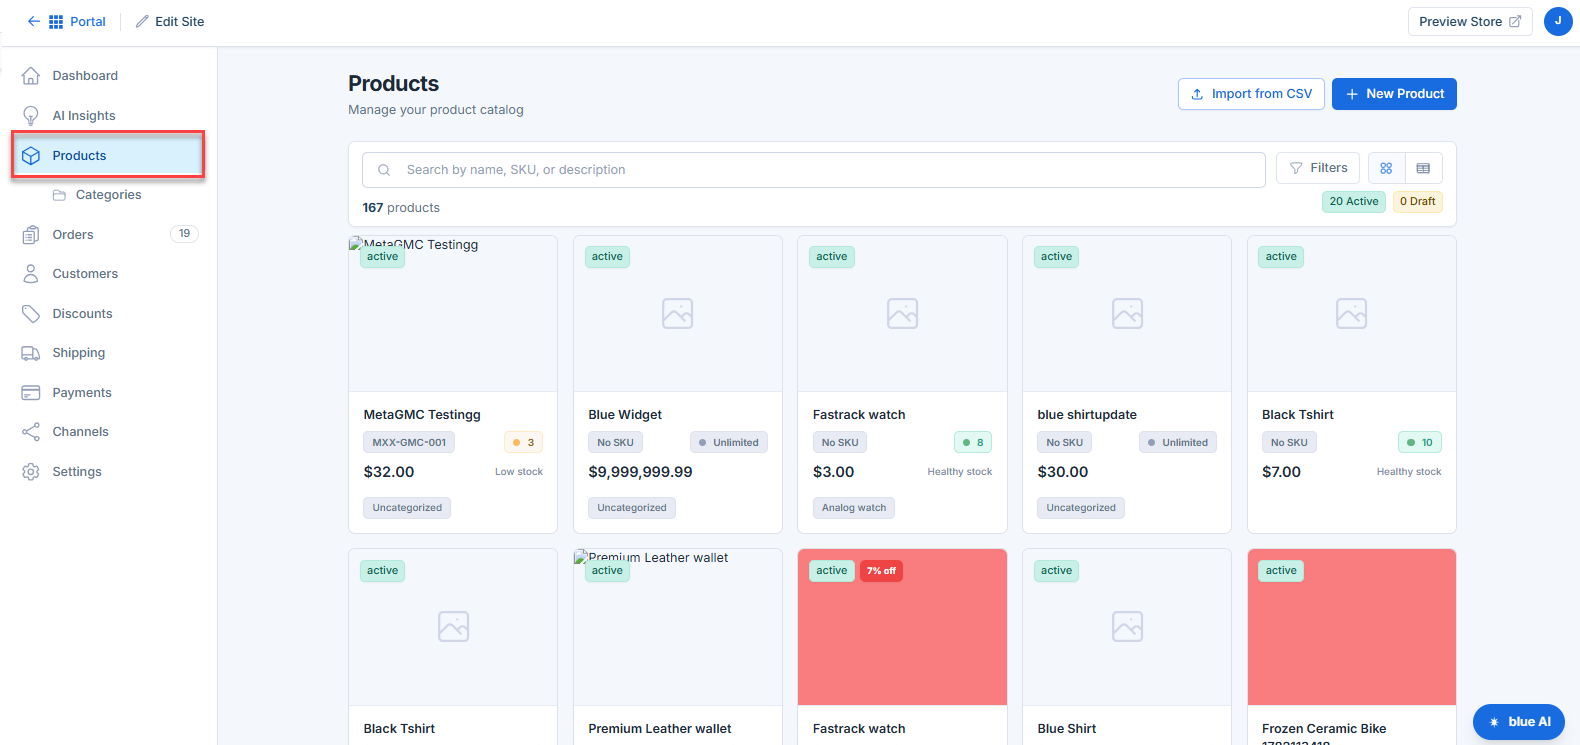
- The Products page will display all products currently available in your store.
To learn more about the Products tab, visit the Bluehost AI Store: Products Tab article.
Step 2: Create a New Product
- Click the + Product button.
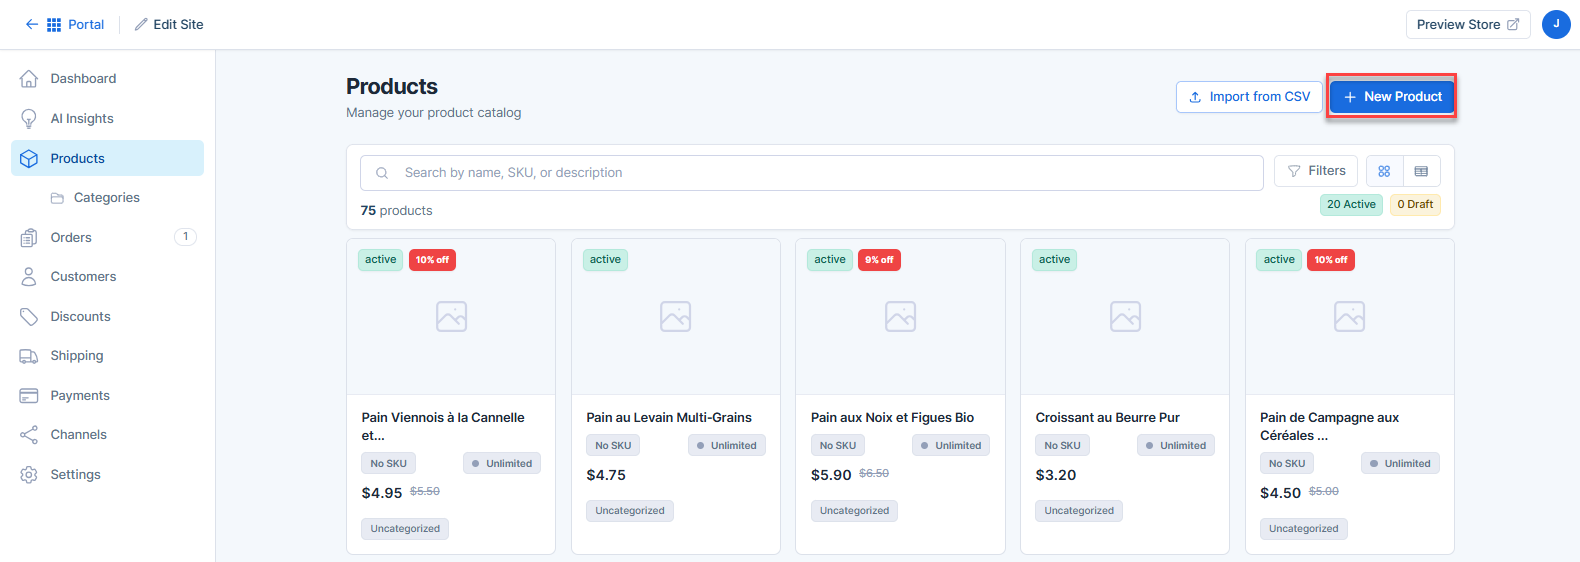
- The Product page will open, where you can configure your product details.
Basic Information
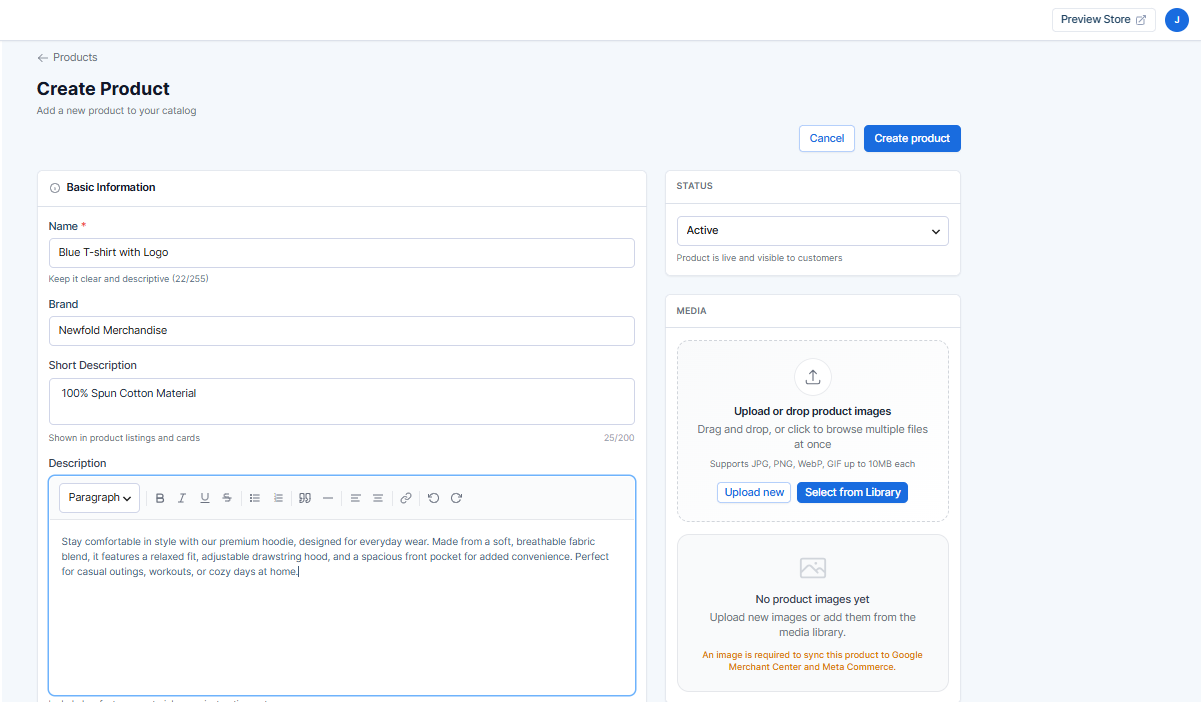
- Product Name - Enter the name of the product, brand, and short description as it will appear to customers.
- Description - Provide a detailed description that highlights the product's features, benefits, and important information.
- Status - Configure whether the product is live and visible to customers.
- Media - Upload one or more images to showcase your product. High-quality images can help improve customer engagement and sales.
Options and Variants
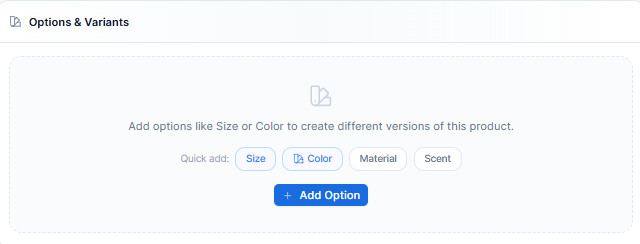
If your product comes in different versions, you can create variants based on the following attributes:
- Size
- Color
- Material
- Scent
Creating variants allows customers to select the option that best fits their needs. To learn more about product variants, see the Bluehost AI Store: Managing Product Variants article.
Pricing and Profitability
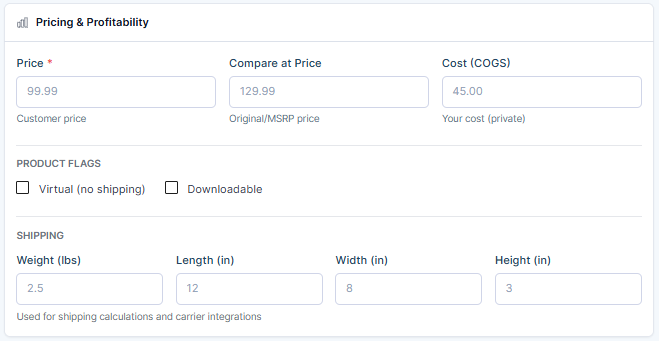
Before publishing your product, review the pricing information to ensure it aligns with your business goals and profitability targets.
Price
- Price - product's unit price
- Compare at Price
- Cost (COGS)
Product Flags
You can define additional product settings, including:
- Virtual Product – Enable this option if the product is not physically shipped.
- Downloadable Product – Enable this option if customers will receive a downloadable file after purchase.
Shipping
Configure shipping rates based on weight and product dimensions.
Inventory
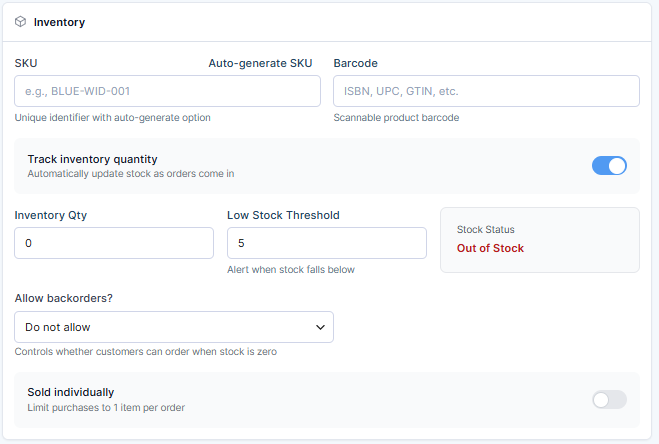
Configure inventory details to help track and manage stock levels.
- SKU - Create a unique Stock Keeping Unit (SKU) for easier product identification and inventory management.
- Barcode - Assign a barcode if applicable.
- Inventory Tracking - Enable inventory tracking to monitor product quantities automatically.
- Backorders - Configure backorder settings to allow customers to purchase products that are temporarily out of stock.
- Sold Individually - Limit the purchase quantity per order.
Organization
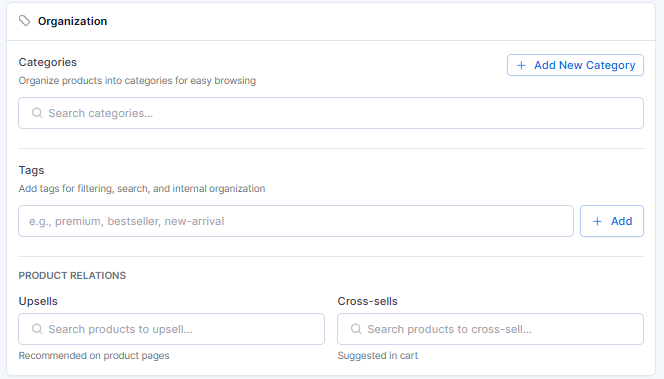
Keep your store organized by categorizing and grouping products.
- Categories - Create and assign product categories to help customers browse your catalog more easily.
- Tags - Add tags to improve product filtering and search functionality.
- Product Relationships - Increase sales opportunities by setting up the following:
- Upsells – Recommend premium or upgraded products.
- Cross-sells – Suggest related products that customers may also be interested in purchasing.
To learn more about product categories, visit the Bluehost AI Store: How to Create, Edit and Delete a Category article.
Channel Listings
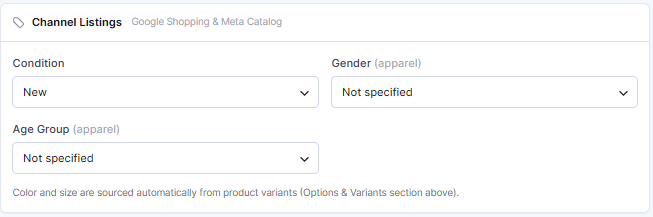
Expand your product visibility by listing products on supported sales channels, including:
- Google Shopping
- Meta Catalog
This helps showcase your products across additional platforms and reach more potential customers.
Step 3: Create Your Product
Once you have completed all product information, including product details, variants, pricing, inventory, organization, and channel listings, click the Create Product button in the upper-right corner of the page.
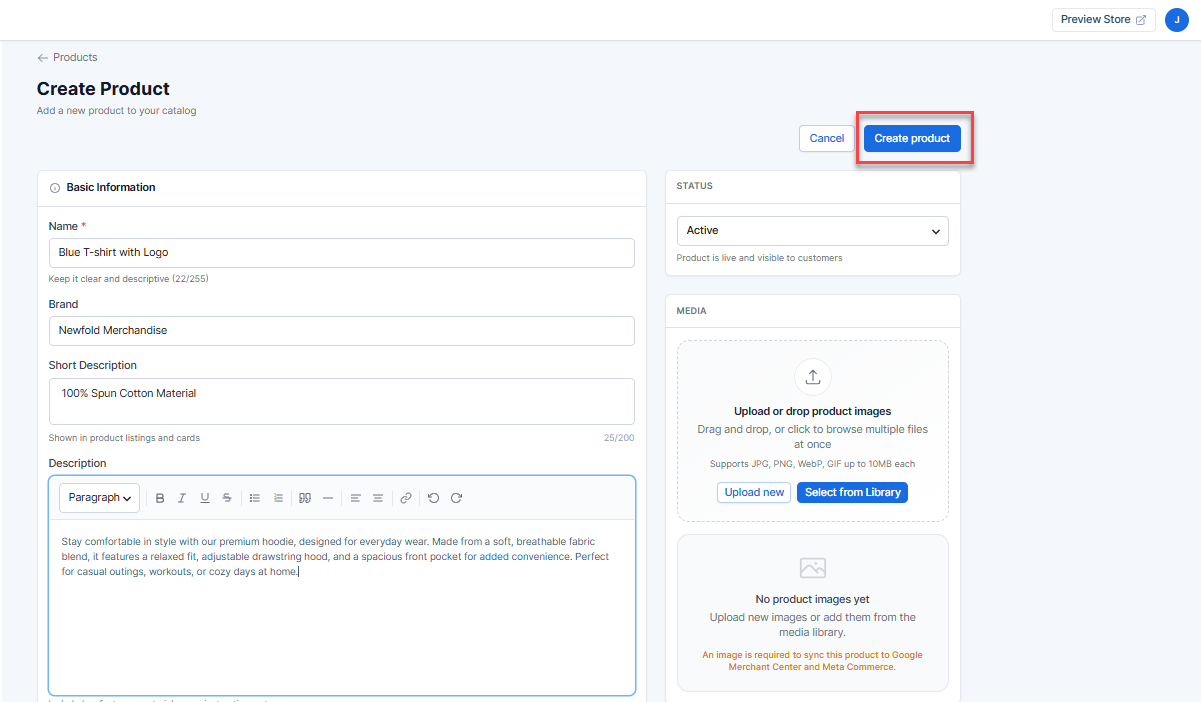
Your product will then be added to your Bluehost AI Store and become available for further management and publishing.
Editing a Product
Follow these steps to update an existing product in your Bluehost AI Store.
- In the AI Store dashboard, click the Products tab in the left-hand menu.
- The Products page will display all products currently available in your store.
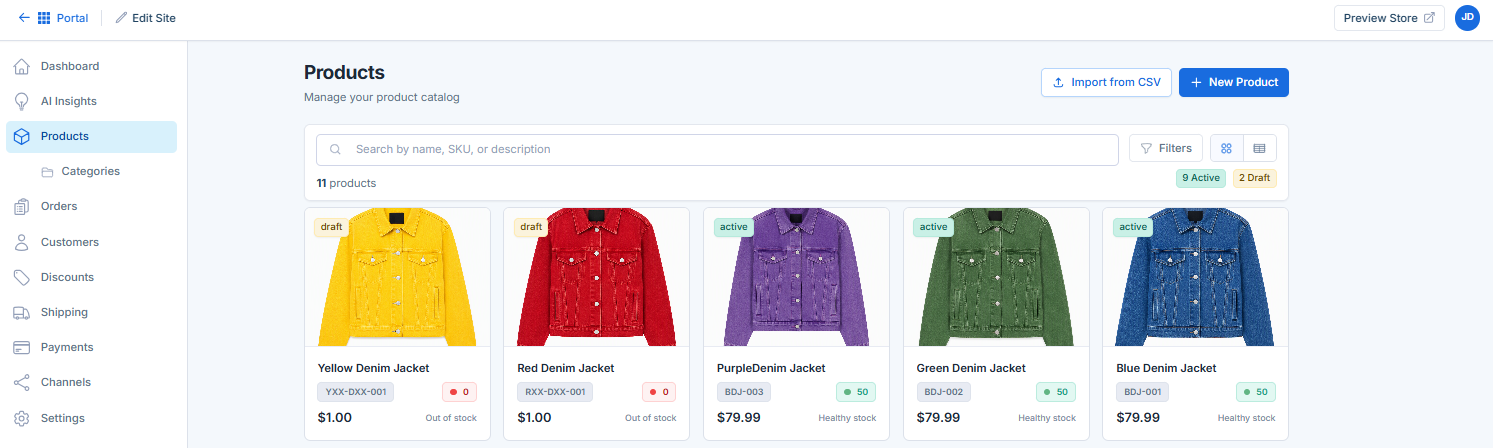
- Locate and select the product you want to edit.
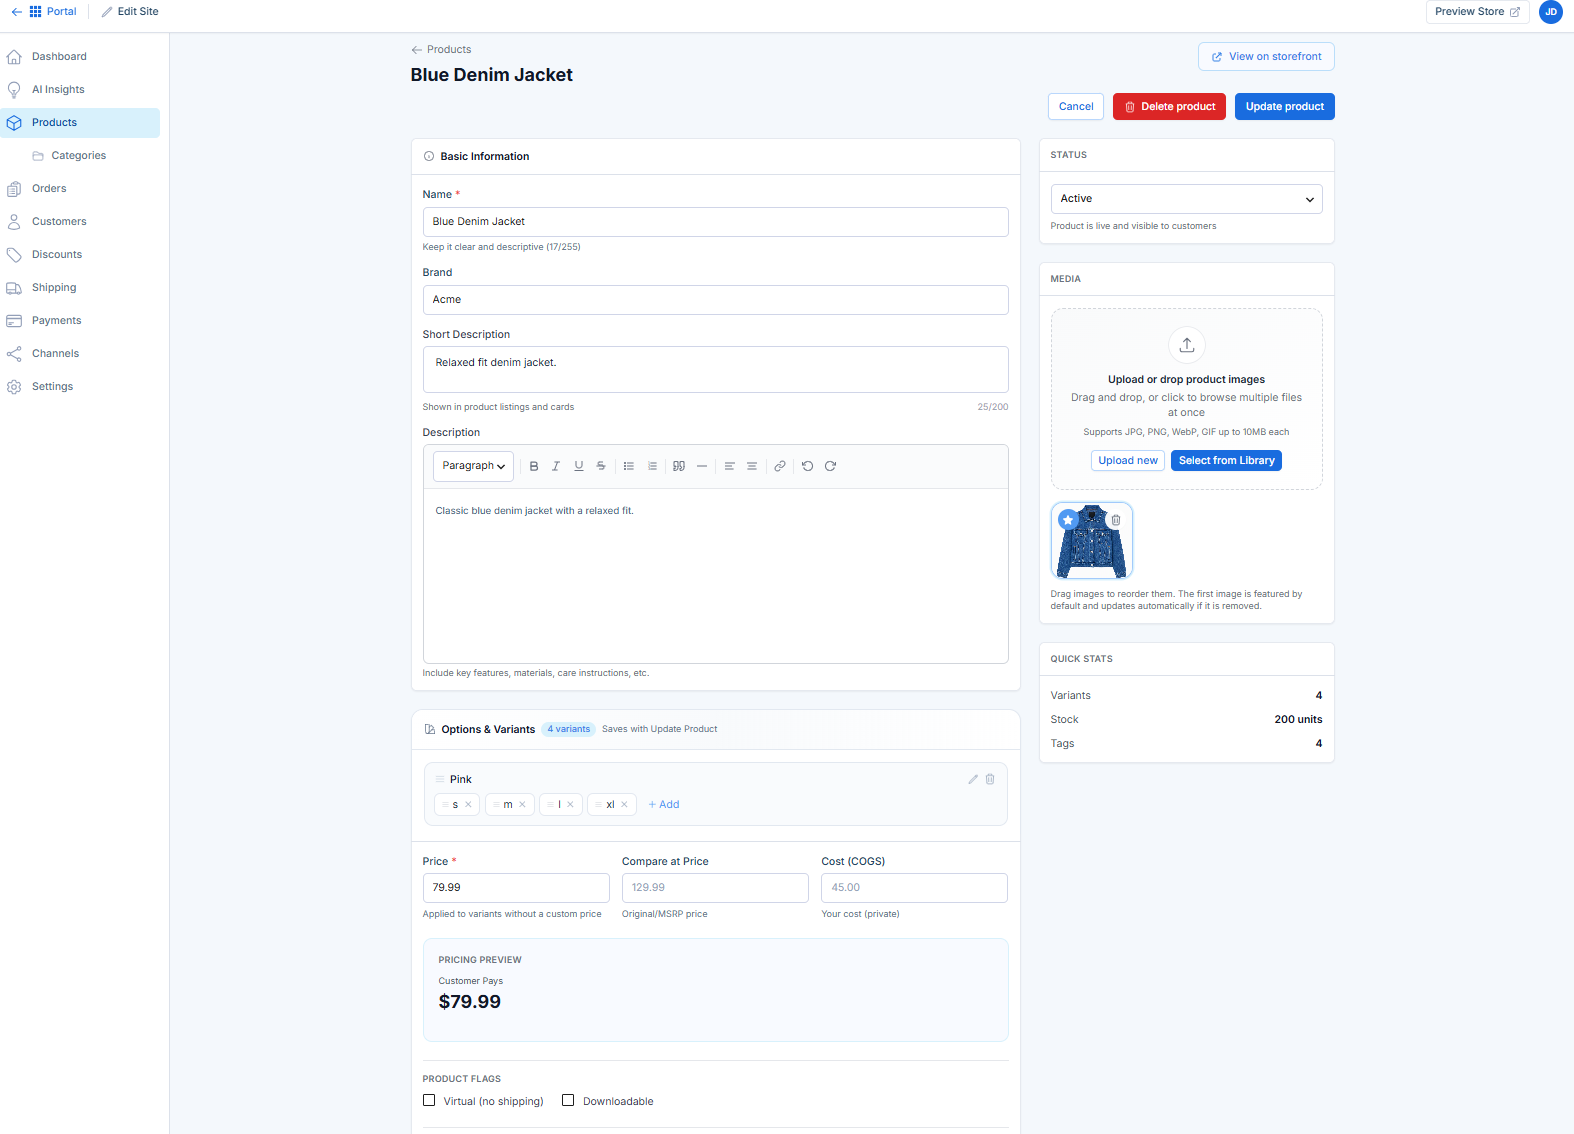
- Update the product information as needed. You can modify details such as:
- Product name and description
- Product images
- Pricing and profitability settings
- Inventory and stock management
- Product variants and options
- Categories, tags, and product relationships
- Channel listings
- Once you have finished making changes, click the Update Product button in the upper-right corner of the page.
- Your changes will be saved and immediately reflected in your Bluehost AI Store.
Deleting a Product
Deleted products are removed from your online store catalog and product listings. To keep your inventory organized and up to date, be sure to review the selected product carefully before confirming deletion.
- In the AI Store dashboard, click the Products tab in the left-hand menu.
- The Products page will display all products currently available in your store.
- Locate and select the product you want to delete.
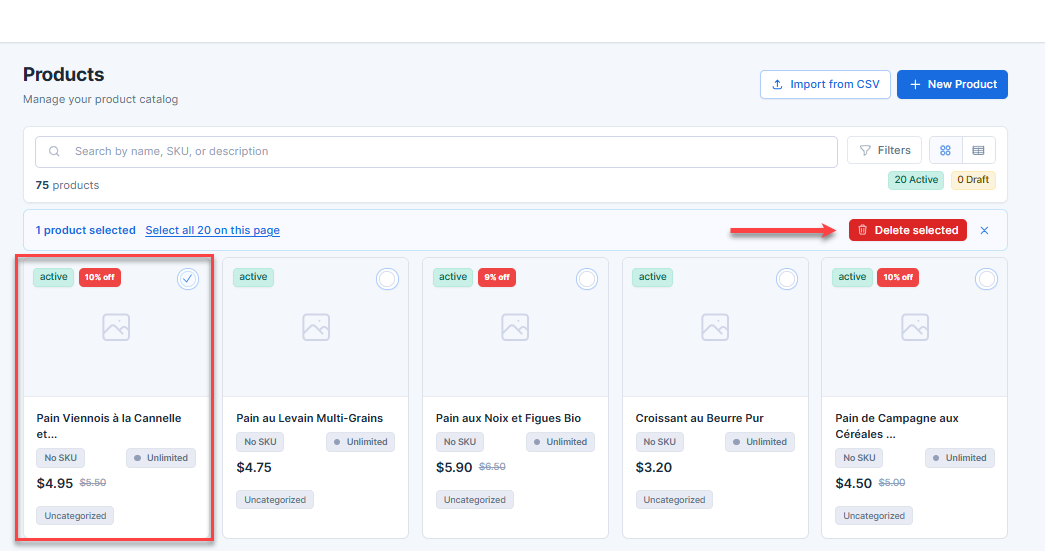
- Click Delete Selected.
The selected product will be deleted from your product list.
To learn more about configuring your online store, see the Bluehost AI Store: Setting Up the AI Store Dashboard article.
Summary
Learn how to create, edit, and delete products in the Bluehost AI Store. This article covers adding product details, configuring variants, setting pricing and inventory, organizing products with categories and tags, enabling channel listings, and deleting products from your store.
If you need further assistance, Bluehost Chat Support is available 24 hours a day, 7days a week while Bluehost Phone Support is available 7 days a week from 7 am-12 midnight EST.
- Chat Support - While on our website, you should see a CHAT bubble in the bottom right-hand corner of the page. Click anywhere on the bubble to begin a chat session.
- Phone Support -
- US: 888-401-4678
- International: +1 801-765-9400
You may also refer to our Knowledge Base articles to help answer common questions and guide you through various setup, configuration, and troubleshooting steps.