How to Fix the WordPress 429 Too Many Requests Error
The 429 Too Many Requests error appears when your website sends too many requests within a short period. The server or a protection layer (e.g., web server rules, WAF, CDN) rate-limits requests to safeguard resources.
This guide walks you through root-cause diagnosis and step-by-step fixes to restore site stability and performance.
Symptoms of a 429 Error in WordPress
You may experience one or more of these:
- Your website shows a “429 Too Many Requests” message
- The website loads very slowly or doesn’t load at all sometimes
- Things work, then suddenly stop working
- You notice your hosting account showing high resource usage
Common Causes
Here are the most common reasons:
- A plugin is acting up or is outdated
- A theme is sending too many requests
- Bots or strangers are trying to open your WordPress login page repeatedly (
/wp-login.php,/wp-admin/) - Your site has HTTP/HTTPS mix-ups, causing endless redirects
- A plugin is exceeding API request limits (social feeds, SEO audits, backups)
- Your hosting server sets a limit on how many requests your site can make at once
Fix WordPress 429 Too Many Requests
- Step 1: Deactivate All Plugins
- Step 2: Switch to a Default WordPress Theme
- Step 3: Change Your WordPress Login Page
- Step 4. Fix Mixed Content (HTTP vs. HTTPS Issues)
- Step 5: Review API Request Limits in Plugins
- Step 6: Check the WordPress Debug Log
- Step 7: Restore a Backup (If the Issue Started Recently)
- Step 8: Turn On Caching
- Step 9: Block Bots or Limit Crawlers
- Ensure you have Bluehost Portal, WordPress Dashboard, and SFTP/FTP access
- Make a full backup (database + files)
- Note recent changes (new plugins, updates, CDN/WAF rules)
Step 1: Deactivate All Plugins
Most of the time, a plugin is the cause. You can turn off plugins in multiple ways:
- Option A: Bluehost Portal
- Option B: WordPress Dashboard
- Option C: File Manager, SFTP/FTP, and/or phpMyAdmin
Option A: Bluehost Portal
Bluehost Portal lets you disable plugins:
- Log in to your Bluehost Portal.
- In the left-hand menu, click Websites.
- Click the Manage Site button located next to the website you want to manage.

- In the website's management page, click Plugins in the top navigation menu.
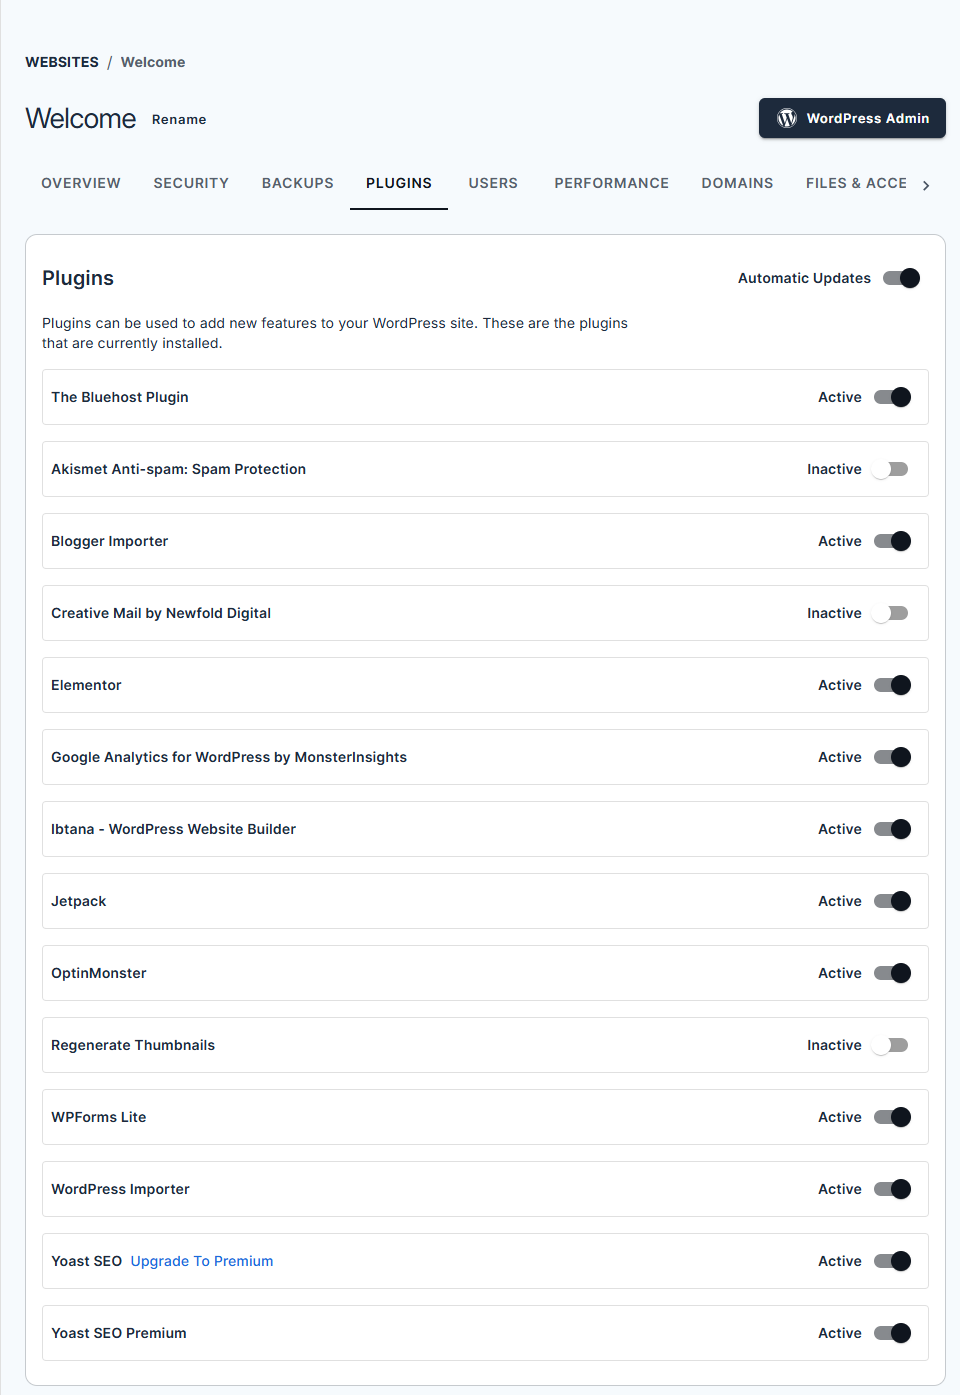
- Toggle the switch beside each plugin to deactivate it.
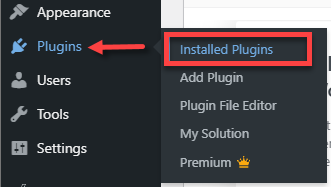
Option B: WordPress Dashboard
- Log in to your WordPress dashboard.
- Go to Plugins, then Installed Plugins.
- Select all plugins.
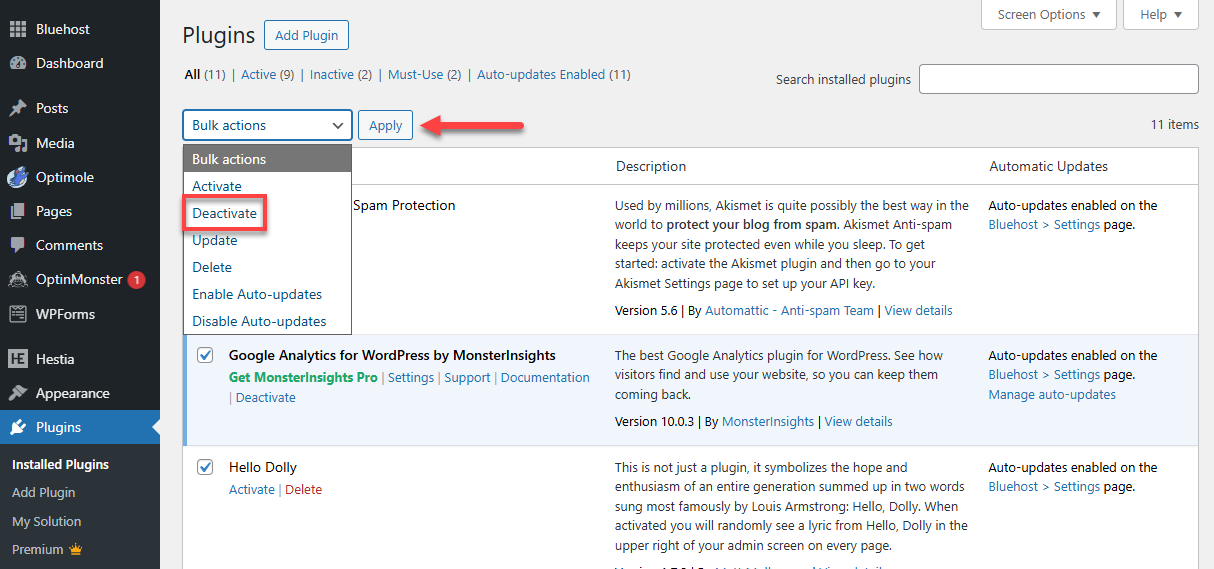
- Choose Deactivate and click Apply.
Option C: File Manager, SFTP/FTP, and/or phpMyAdmin
For additional ways to deactivate plugins — such as using File Manager, SFTP/FTP, or phpMyAdmin — refer to the following articles for complete instructions:
- Alternative Ways to Deactivate or Delete a Plugin
- Disable a Broken WordPress Theme or Plugin Using Database
What to do next
Refresh your website, if it works:
- Turn on each plugin one at a time.
- When the error returns, you’ve found the problem plugin. You may need to:
- Update the plugin.
- Replace it with another one.
- Contact the plugin developer for support.
Step 2: Switch to a Default WordPress Theme
Themes can also cause too many requests. You can switch themes in multiple ways:
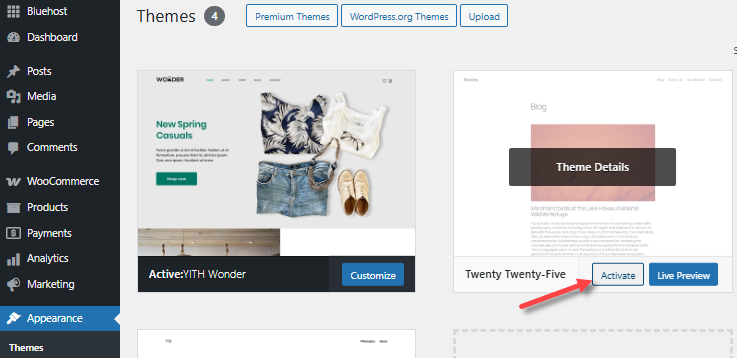
Option A: WordPress Dashboard
- Log in to your WordPress dashboard.
- Click Appearance, then select Themes.
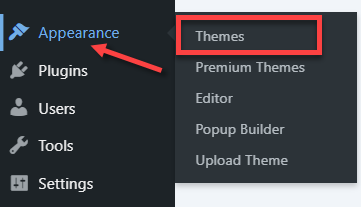
- Activate a default theme such as Twenty Twenty-Five.
Option B: File Manager, SFTP/FTP, and/or phpMyAdmin
For additional ways to switch your site to a default WordPress theme — including methods that use File Manager, SFTP or FTP, and phpMyAdmin — review the following guides:
- Alternative Ways to Deactivate or Delete a Theme
- Disable a Broken WordPress Theme or Plugin Using Database
What to do next
Refresh your website. If it works, your theme may need:
- An update
- Fixing by the theme developer
Step 3: Change Your WordPress Login Page
Bots (automatic scripts) sometimes keep trying to enter your site, causing too many requests.
To change your login URL:
- Log in to your WordPress dashboard.
- Go to the Plugins section and select Add Plugin.
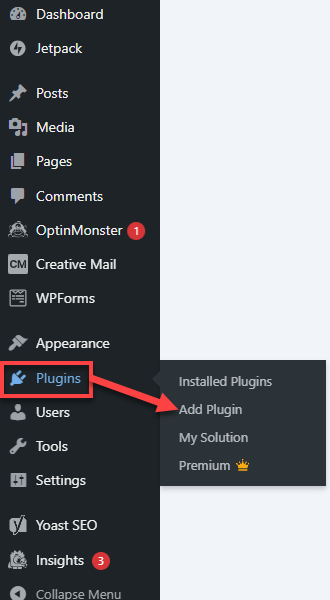
- Search for WPS Hide Login.
- Install and activate it.
- Go to Settings and choose General.
- Scroll to the WPS Hide Login section.
- Choose a new login address (example:
/my-admin-login). - Save changes.
This instantly reduces bot traffic.
Step 4. Fix Mixed Content (HTTP vs. HTTPS Issues)
If your site loads some files as HTTP instead of HTTPS, it may cause constant redirect loops.
Easy way to test
Use the Why No Padlock checker (free online tool).
Enter your website URL and check for “insecure content.”
If you see insecure items
- Make sure your SSL Certificate is active.
- Force your site to use HTTPS (automatic fix).
The easiest way to force HTTPS everywhere is by using a plugin like Really Simple SSL. - Change your WordPress site address to HTTPS. You can do this inside the WordPress dashboard:
- Go to Settings, then select General
- Update both fields:
- WordPress Address (URL): change
http://yourdomain.comtohttps://yourdomain.com - Site Address (URL): change it to HTTPS as well
- WordPress Address (URL): change
- Save changes
Your site now prefers HTTPS.
- Update old HTTP links inside pages and images.
The easiest fix is to use a search-and-replace plugin such as Better Search Replace. - Fix insecure images, CSS, or scripts (if any remain).
This stops the extra redirects that cause the 429 error.
Step 5: Review API Request Limits in Plugins
Some plugins connect to other websites (API calls). If they do it too often, your site may hit a request limit.
These plugins include:
- Social media feeds
- Backup plugins
- SEO scanners
- Security scanners
What to do:
- Reduce how often the plugin refreshes (example: from every 5 minutes to every hour)
- Turn on caching inside that plugin’s settings
- Temporarily turn the plugin off to confirm
Step 6: Check the WordPress Debug Log
This helps you find if something is looping in the background.
To check the log for repeating errors:
- Open your File Manager.
- Find and edit wp-config.php.
- Scroll down and look for a line with the
'WP_DEBUG'code snippet.
- The default value
'WP_DEBUG'is false. Make sure to change it to true.define( 'WP_DEBUG', true ); - Save the file.
- Visit your website once.
- Go to wp-content, then debug.log.
Enabling the Debug Mode (WP Debugging) shows what is causing repeated actions.
Step 7: Restore a Backup (If the Issue Started Recently)
If the 429 error started after an update, restoring a recent backup usually fixes it quickly.
You can restore a backup from
- Bluehost Backup Tool
- CodeGuard
- Jetpack
-
A plugin like UpdraftPlus
-
Go to Settings, then UpdraftPlus Backups.
- Choose a backup from before the issue.
- Click Restore.
- Follow the on-screen steps.
- Confirm restoration success and test your site.
-
Step 8: Turn On Caching
Caching makes your website load much faster and reduces the number of requests it sends. There are multiple ways to enable caching.
Option A: Bluehost Portal
To manage caching, clear cache, or enable Cloudflare:
- Log in to your Bluehost Portal.
- In the left-hand menu, click Websites.
- Click the Manage Site button located next to the website you want to manage.
- Open the Performance tab.
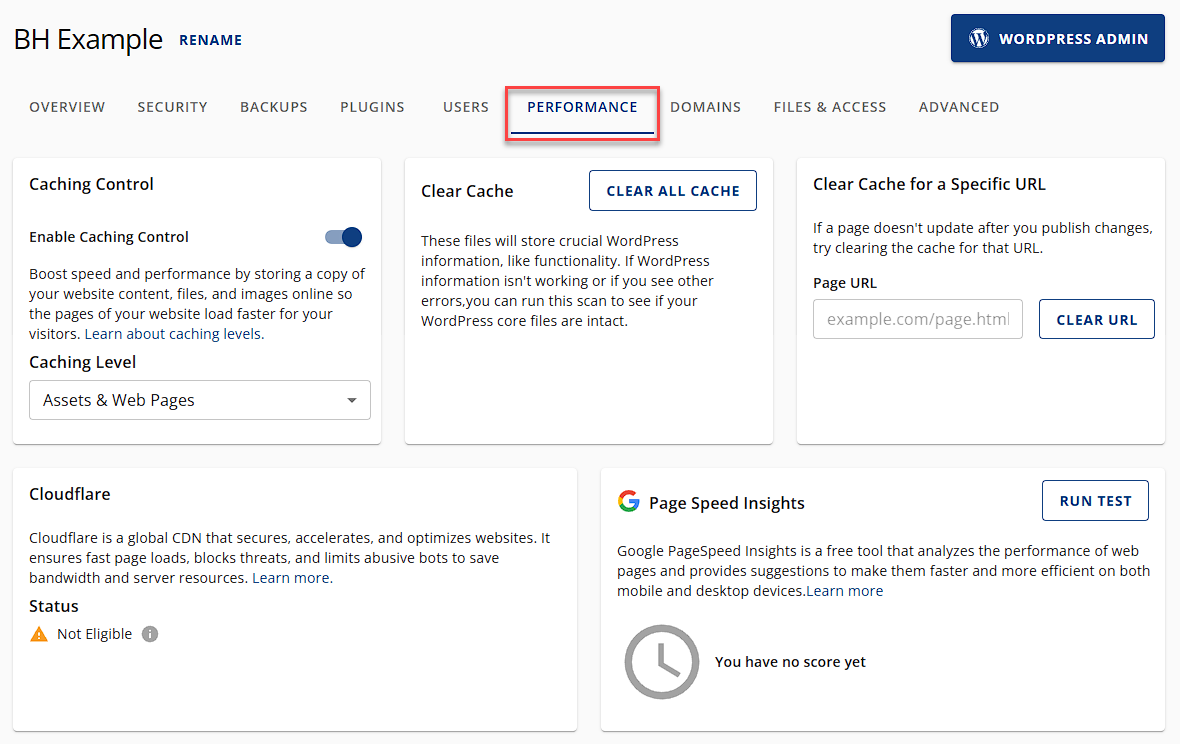
- From here you can:
- Clear cache
- Adjust caching settings
- Assets Only (best for frequently updated sites like e-commerce)
- Assets & Web Pages (good for blogs and educational sites
- Assets & Web Pages – Extended (ideal for portfolios or sites updated monthly)
- Enable Cloudflare
-
(Optional) Switch Object Caching ON
Option B: In the WordPress Dashboard (Plugin)
You can also install plugins like:
Just install, activate, and turn on page caching.
Step 9: Block Bots or Limit Crawlers
Some bots ignore rules and send too many requests. Here are two easy ways:
Option A: Use robots.txt
Create or edit your robots.txt file in the root directory of your website (e.g., https://www.yoursite.com/robots.txt).
Example rules:
To block all bots from crawling your entire site:
User-agent: *
Disallow: /
To allow all bots full access:
User-agent: *
Disallow: /
To block bots from specific folders:
User-agent: *
Disallow: /foldername/
To block a specific crawler (e.g., Googlebot) from a folder:
User-agent: Googlebot
Disallow: /example-subfolder/
Test your robots.txt file using Google Search Console’s robots.txt tester to ensure it works correctly.
Option B: Block Bots Using .htaccess
This method actually blocks unwanted bots.
- Access your .htaccess file in the public_html directory.
- Add code to block specific user agents (bots) by inserting this sample code:
RewriteEngine On
RewriteCond %{HTTP_USER_AGENT} ^BadBotName1 [OR]
RewriteCond %{HTTP_USER_AGENT} ^BadBotName2 [OR]
RewriteRule ^.* - [F,L]
Replace BadBotName1, BadBotName2 with the actual bot user agent names you want to block.
- Save the .htaccess file.
- Monitor your site to ensure the unwanted bots are blocked, and your site functions normally.
- robots.txt works as a polite request; some malicious bots may ignore it.
- .htaccess blocking is more forceful but requires careful editing to avoid site issues.
- Googlebot and Bingbot crawl rates can be managed via their respective Webmaster Tools, as they may not fully respect robots.txt crawl-delay directives.
Additional Recommendations
- Always update your WordPress, plugins, and theme.
- Use a caching plugin.
- Change your login URL to prevent bots from attacking it.
- Use a security plugin to reduce unwanted traffic.
- Keep regular backups.
Summary
A 429 error happens when your site sends too many requests in a short time. Fixes usually involve deactivating faulty plugins or themes, reducing bot traffic, correcting HTTPS issues, adjusting API limits, enabling caching, and restoring backups if needed. Keeping WordPress, plugins, themes, and security measures updated helps prevent the error from returning.
If you need further assistance, Bluehost Chat Support is available 24 hours a day, 7days a week while Bluehost Phone Support is available 7 days a week from 7 am-12 midnight EST.
- Chat Support - While on our website, you should see a CHAT bubble in the bottom right-hand corner of the page. Click anywhere on the bubble to begin a chat session.
- Phone Support -
- US: 888-401-4678
- International: +1 801-765-9400
You may also refer to our Knowledge Base articles to help answer common questions and guide you through various setup, configuration, and troubleshooting steps.