 ChatGPT,
 Claude,
 Gemini,
 Grok — all four for
Bluehost AI Builder: Build and Publish Your First Website and App
After you start the AI Builder plan, you'll be redirected to the Bluehost AI Builder editor. Your prompt is already submitted, and AI Builder uses it to begin building.
Bluehost AI Builder can create a website, an app, or both in one project. In this guide, you'll build both: a website for a cleaning service with a built-in booking app, published to a live web address. Customers will be able to choose a service, pick a date and an open start time, and book online. They pay after the clean.
Important: The prompt, answers, and steps in this guide are an example. You'll follow one path from start to finish: one prompt, a few quick questions, one small edit, and Publish. Every choice is made for you, so you can focus on learning how AI Builder works. AI Builder's results can vary, so the labels, menus, and wording you see may differ slightly from this guide. If you're building only a website, only an app, or something for a different business, your questions and screens will look different, but the overall steps are the same.
Note:
- About the free plan: The AI Builder Free plan has no end date, though inactive free workspaces are subject to the Bluehost Terms of Service. It includes 5 credits per day, up to 30 credits per 30-day period. Requests that create or change your website or app use 1 credit each. In this guide, the first build and the change in Step 5 each use 1 credit. Answering the questions AI Builder asks before your first build doesn't use credits, and neither do messages that don't change your website or app, such as questions. These free messages are limited to prevent abuse. For current plans and pricing, visit https://www.bluehost.com/ai-builder.
- About payments: Bluehost AI Builder doesn't support online payments or selling products at this time. To sell products online, use AI Store.
Step 1: Check Your Prompt
Your prompt appears as the first message in the chat. In this example, the prompt is:
Sample Prompt
Create a cleaning service booking app to manage service requests, appointment slots, client details, and job status.
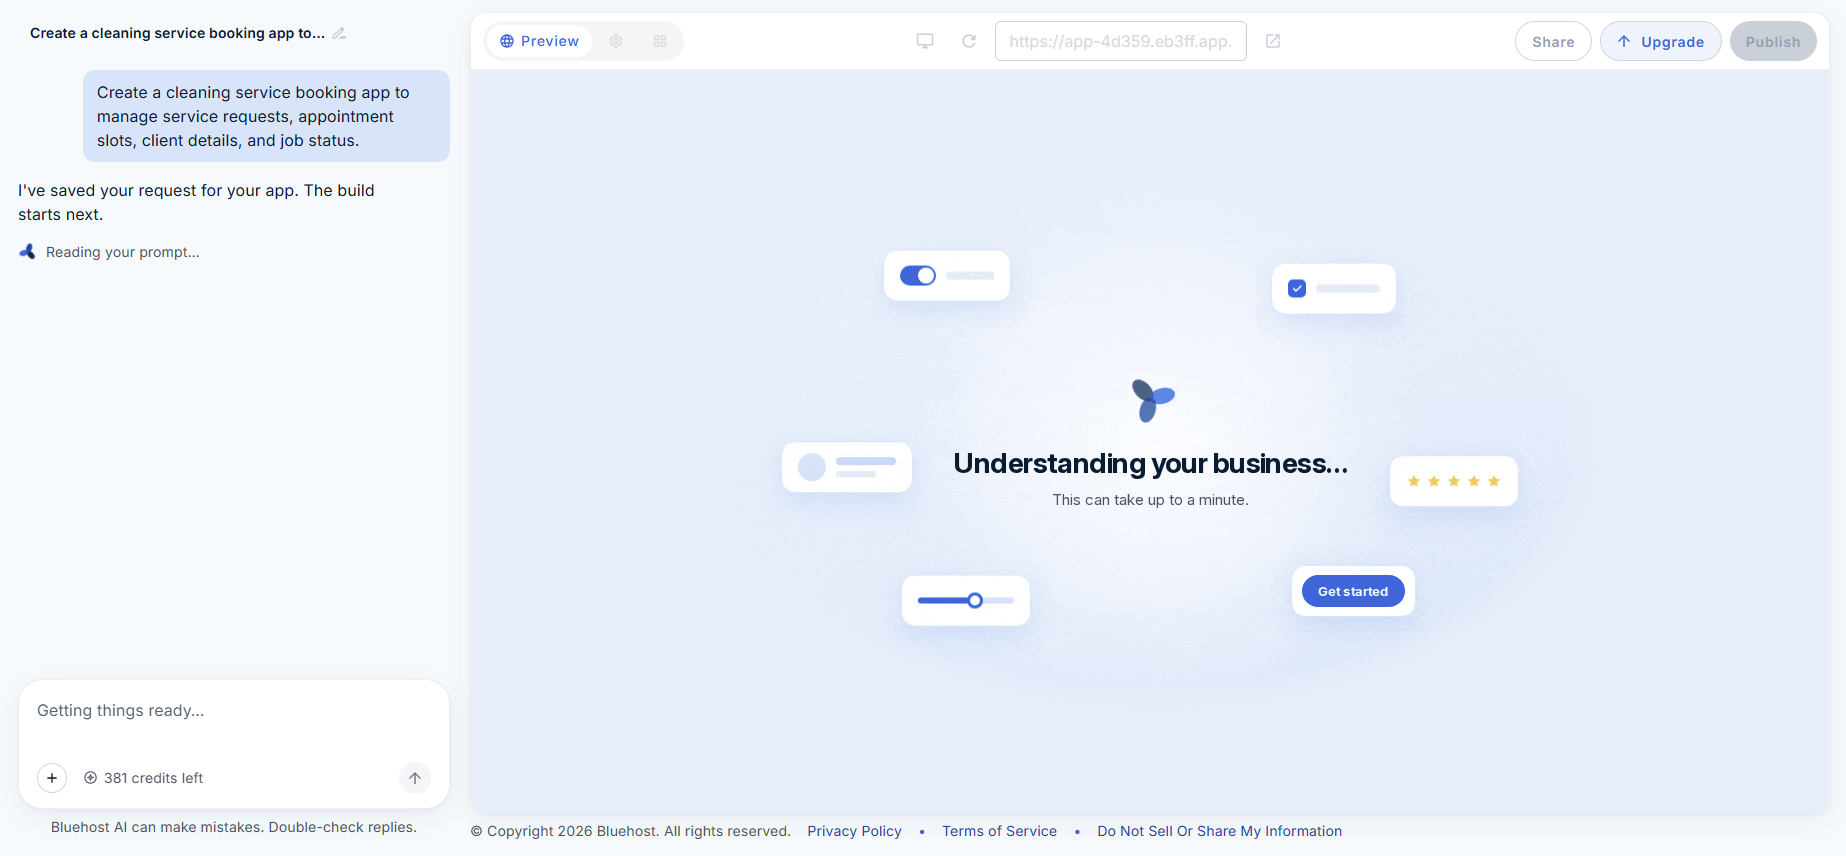
AI Builder confirms that it saved your request, then asks a few questions before it starts building. Until you answer them, the preview on the right shows Answer a few questions to start.
Step 2: Answer the Follow-up Questions
AI Builder asks three questions in the chat, one at a time. In this example, choose these answers:
| Question | Answer to choose |
|---|---|
| When do clients pay for a cleaning? | After the job is done |
| Who signs in to the app? | Only my team; clients just book |
| Do new bookings need your approval? | Yes, I confirm each one |
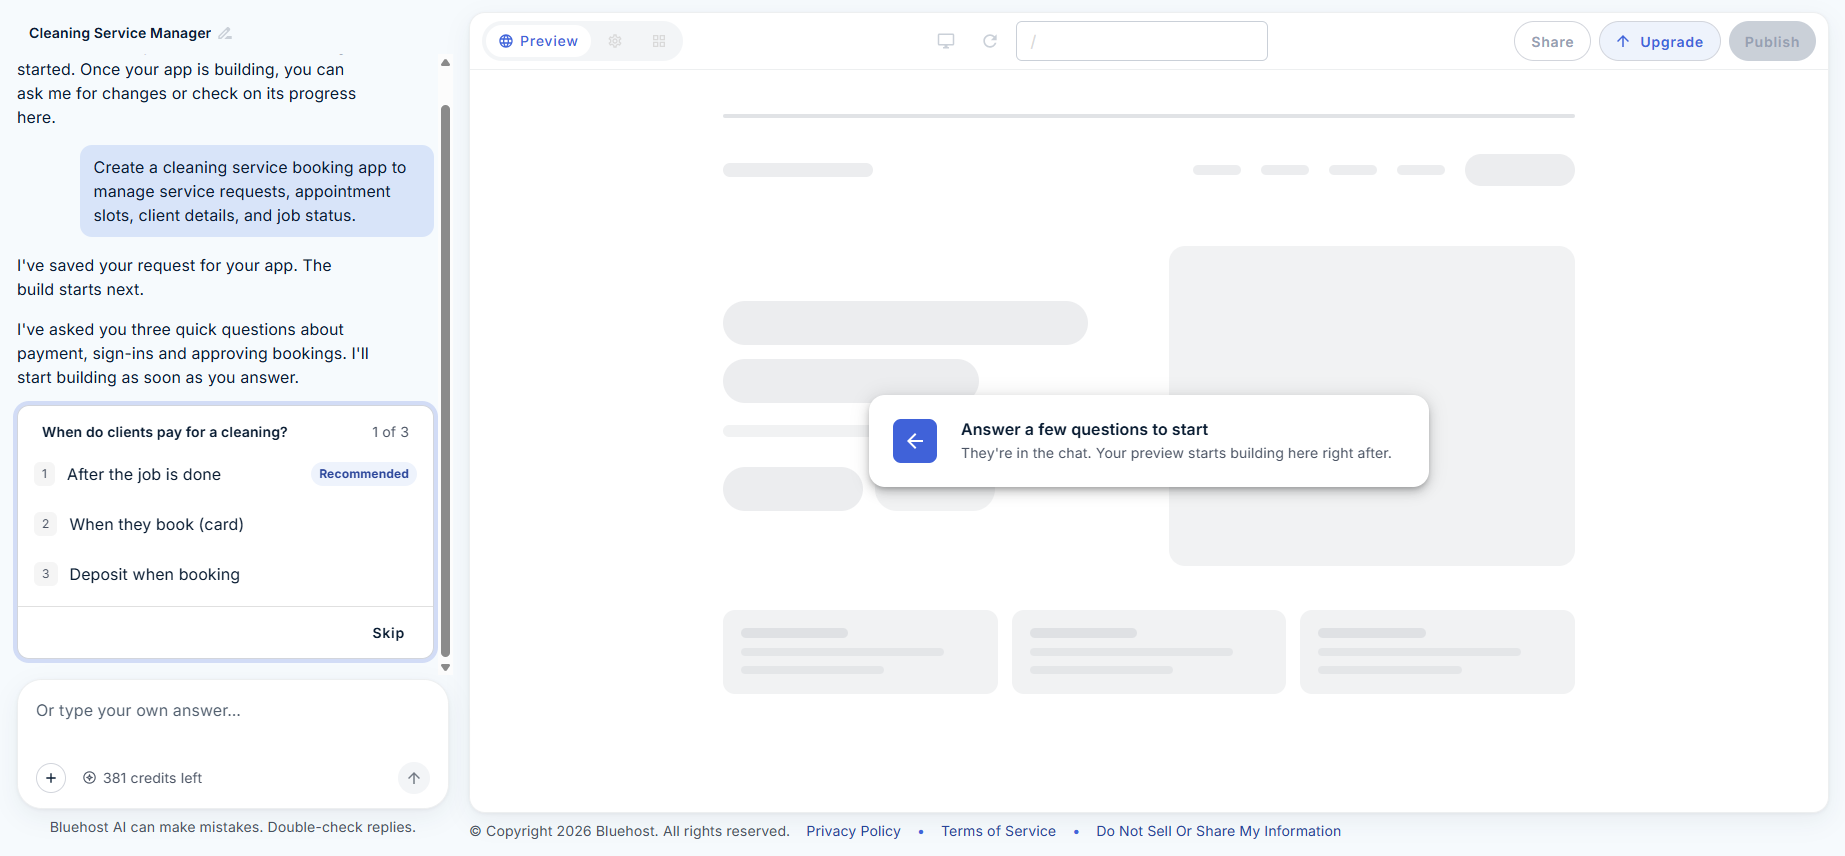
You can also type your own answer in the chat box, or click Skip. After you answer, AI Builder confirms that it sent your answers to the builder, and the build starts.
Note: You may see additional questions during setup. These questions help customize the tips and next steps shown later. Depending on the type of app or website you're creating, the additional questions may be different or may not appear at all.
Examples of additional questions include:
- Which best describes you?
- What industry are you in?
- How many people work at your business?
- What would you like to focus on?
Step 3: Wait for the Build to Finish
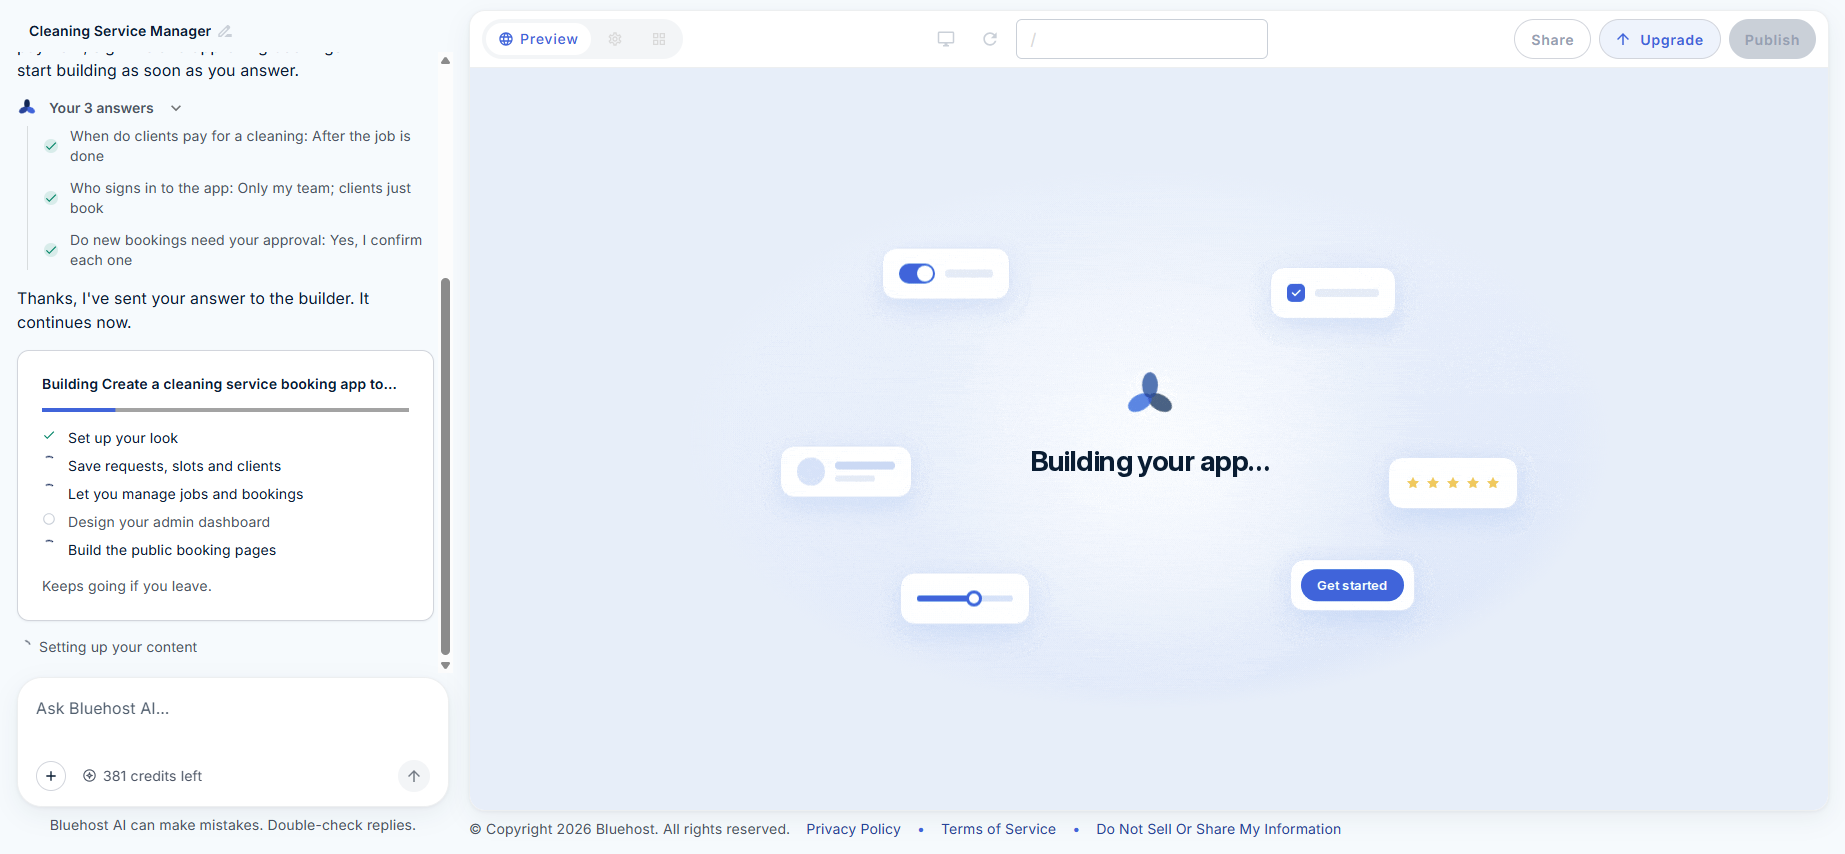
While AI Builder works, the preview shows status messages such as Understanding your business… and Planning your app…. Each can take up to a minute. Then the preview shows Building your app…
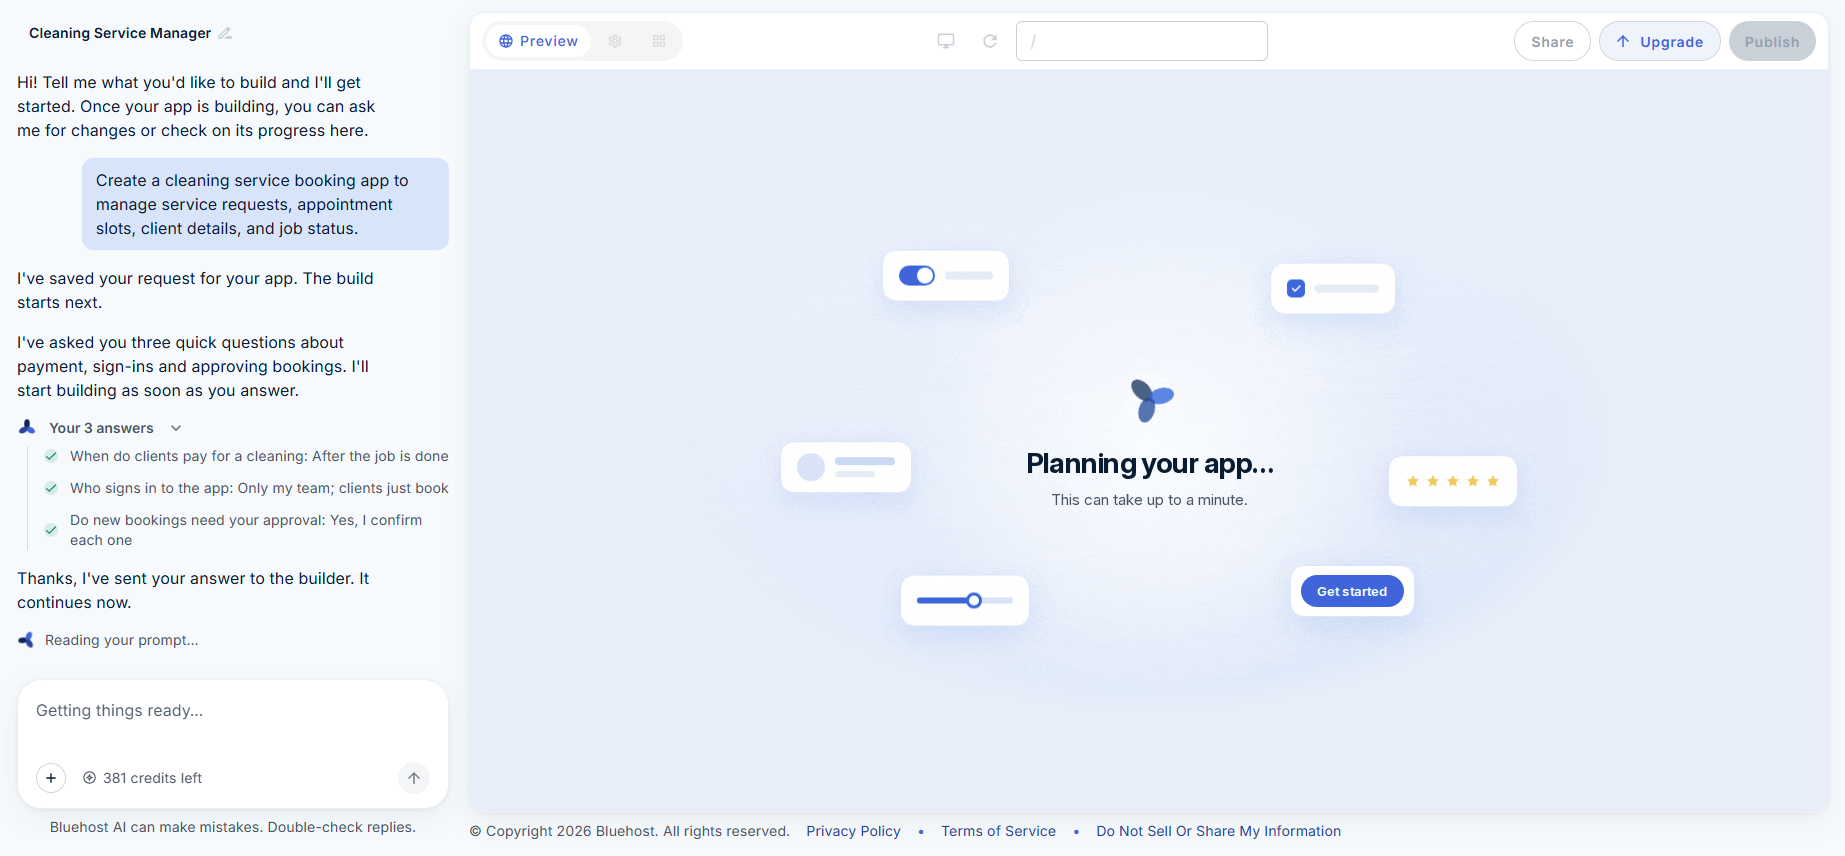
In the chat, a build card shows a checklist of steps, such as Set up your look, Save requests, slots and clients, Let you manage jobs and bookings, Design your admin dashboard, and Build the public booking pages. The build keeps going if you leave the page.
When the build is done, your app appears in the preview, and the Publish button turns blue. In the chat, AI Builder summarizes:
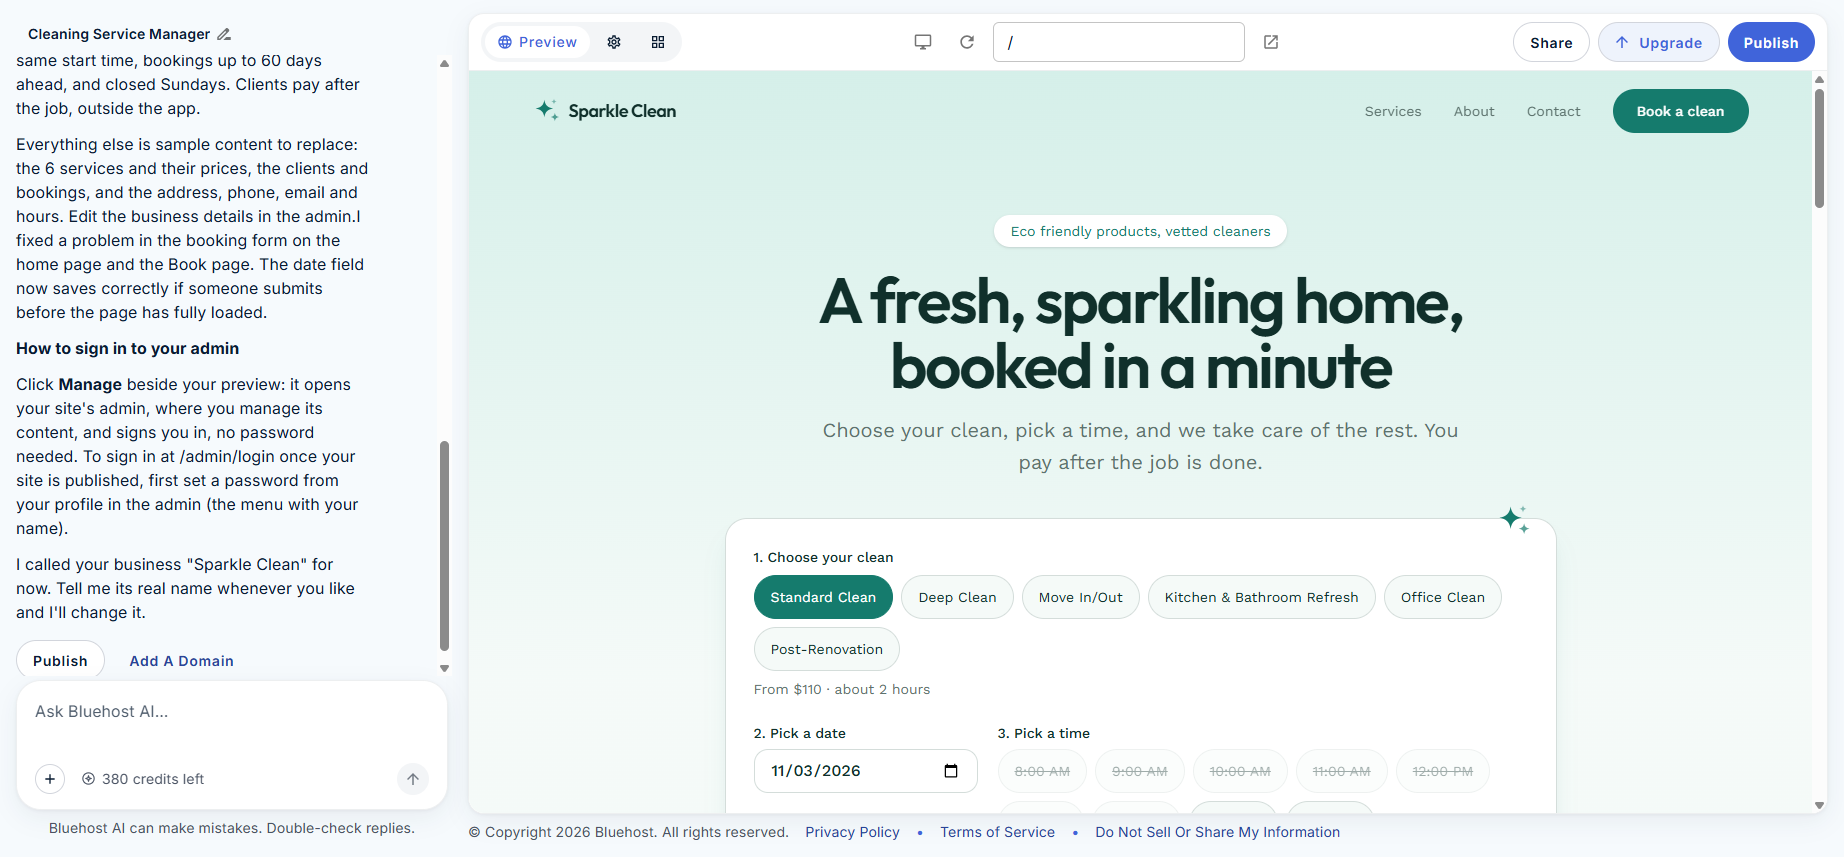
- What it built, such as the booking pages and your app's admin.
- The booking rules it chose, such as how far ahead clients can book. You can ask AI Builder to change any of them.
- Which details are samples to replace.
- How to sign in to your app's admin.
Step 4: Review Your App
Click through the menu at the top of your app. In this example, the menu shows Services, About, and Contact, plus a Book a clean button. Your menu may include different items.
Then try a booking from the booking form on the home page:
- Under Choose your clean, select a service.
- Under Pick a date, choose a date.
- Under Pick a time, choose an open time.
- Continue to enter the booking details.
The business name, services and prices, address, phone, email, hours, cleaners, clients, bookings, hero photo, and the headlines and taglines on your pages are sample content. AI Builder picks a sample business name, such as Sparkle Clean. You'll change the name in the next step.
Step 5: Make One Change
In the chat box at the bottom of the chat panel, send this request, using your own business name:
Sample Prompt
Change the business name to [your business name], and update the logo to match.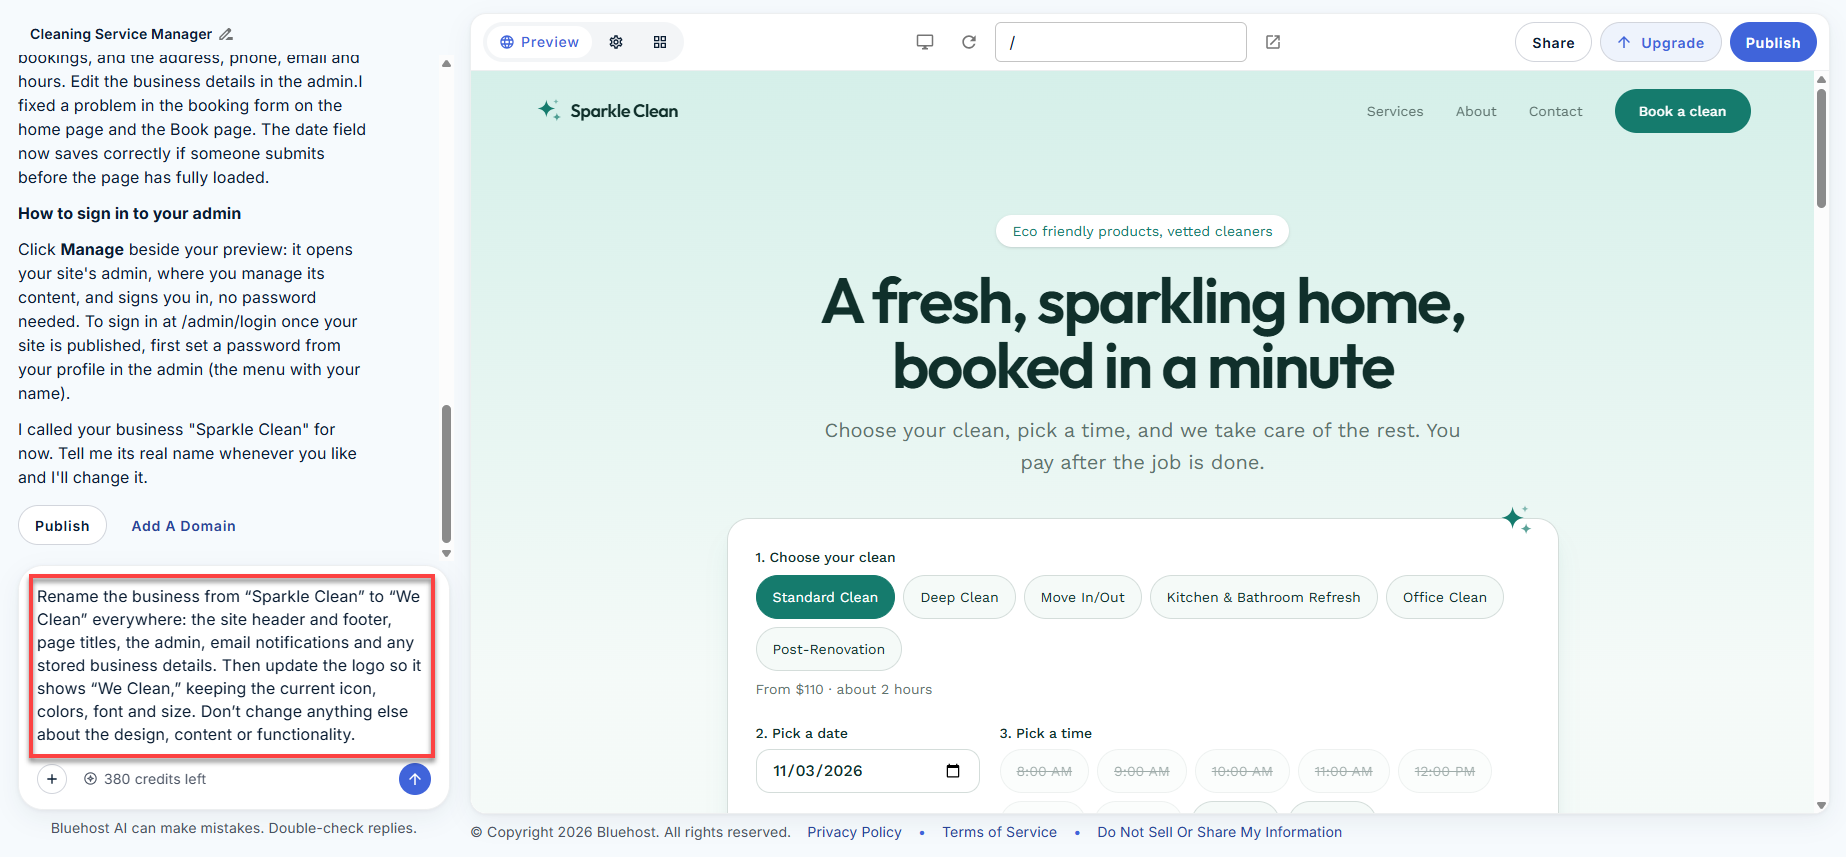 AI Builder updates the business name and logo, then confirms the change in the chat. Your new business name and logo appear in the top-left corner of your app. Changes like these usually show in the preview right away. If you don’t see the change, ask AI Builder in the chat to check it.
AI Builder may also tell you which sample details still use the old name, such as sample email addresses. You can change those in your app's admin.
Step 6: Publish Your App
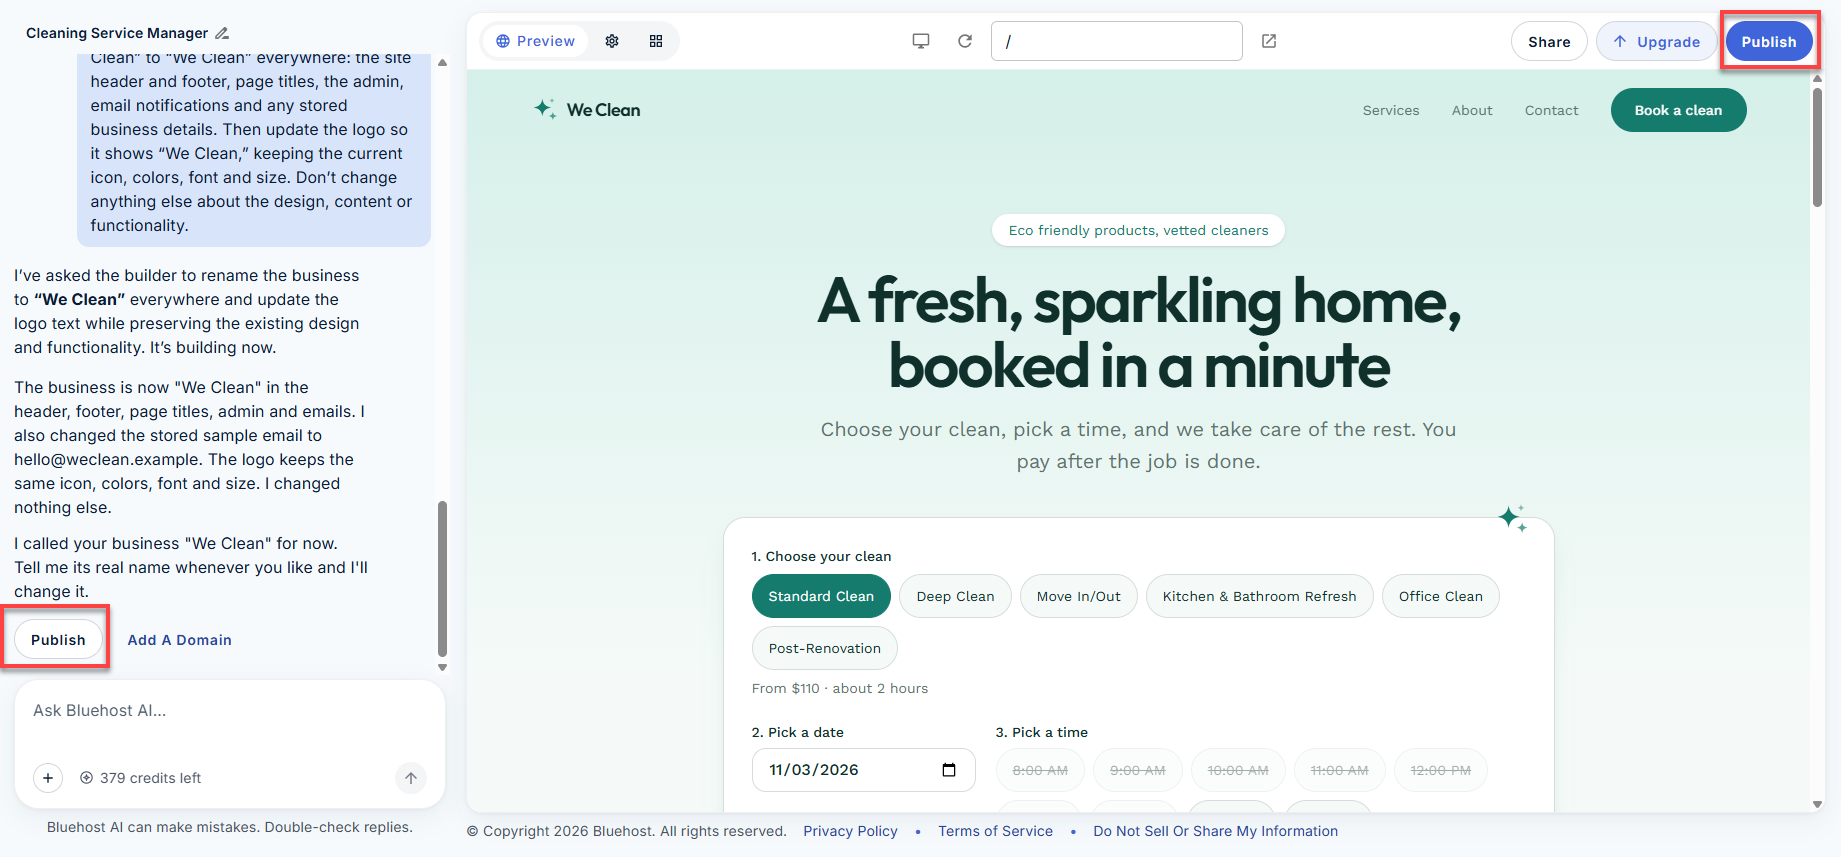
- Click Publish. You can use either Publish button:
- The Publish button in the upper-right corner, above your app.
- The Publish button in the chat, below AI Builder's latest reply.
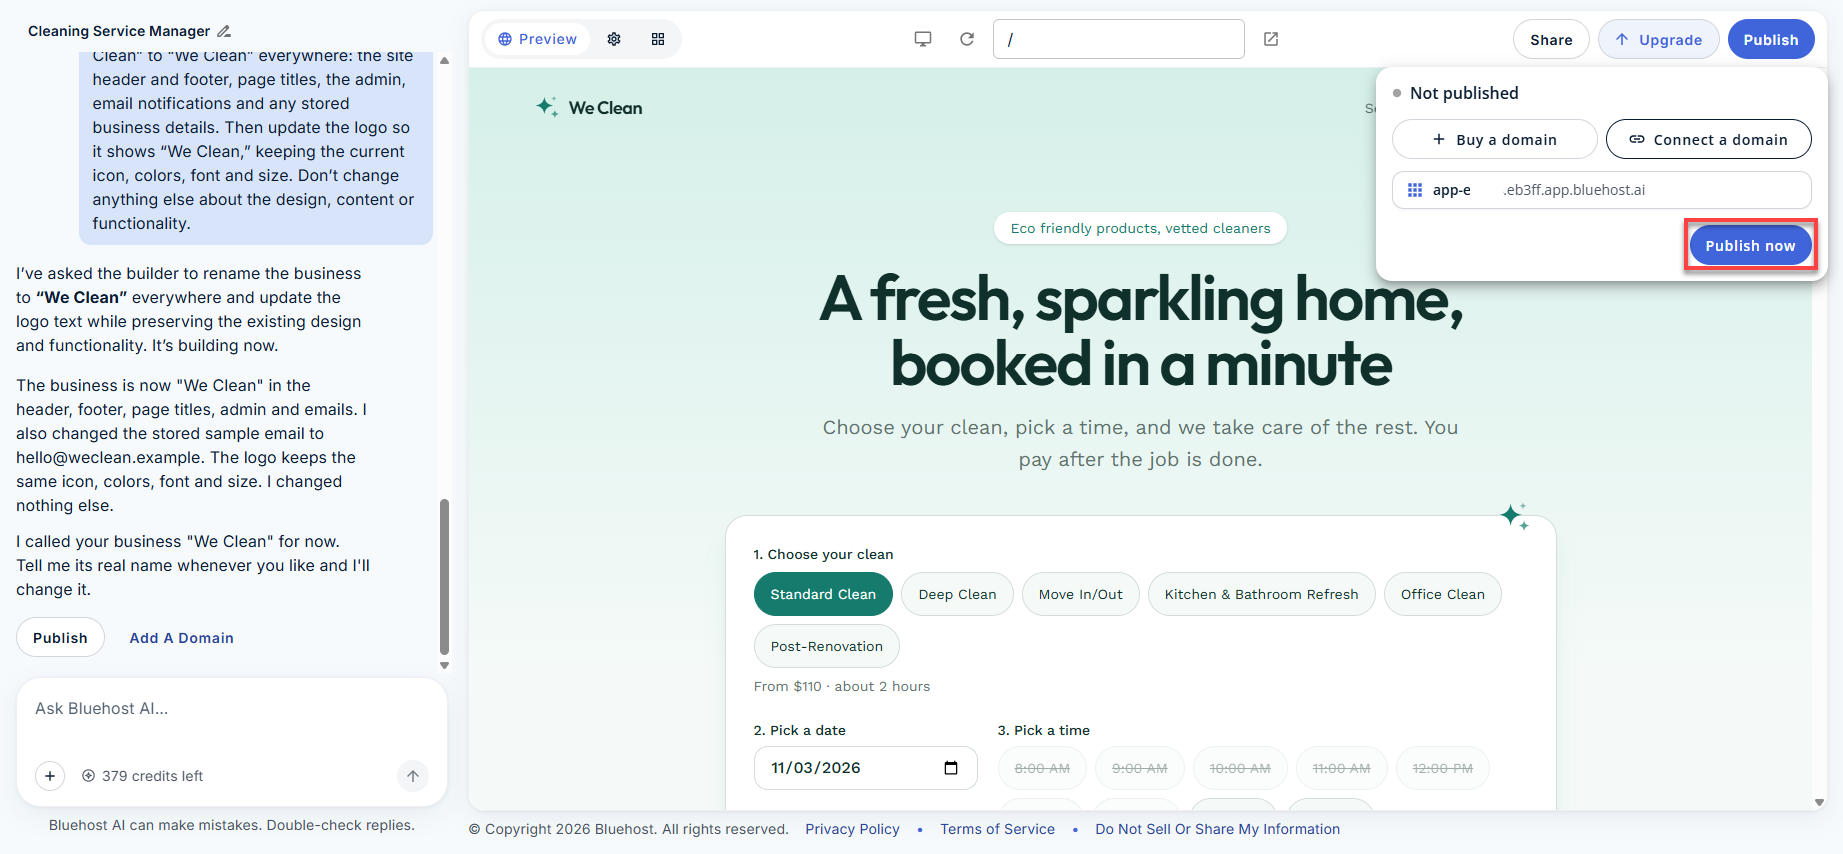
- In the Publish window, check your free web address. It ends in .app.bluehost.ai. Then click Publish now.
Wait while the status shows Publishing. When it finishes, your website and app are live at that address.
Note: On the AI Builder Free plan, AI Builder publishes your website and app to a free, automatically generated web address ending in .app.bluehost.ai. You don't need to purchase a domain to publish your project. Your free address can't be changed, and it isn't indexed by search engines. The Publish window also shows Buy a domain and Connect a domain. To connect your own domain, you'll need to upgrade to a paid plan.
To use your own domain or upgrade from the free plan to a paid plan, see Bluehost AI Builder: Publishing Your App and Connecting a Domain.
Before You Share Your App With Customers
Complete these steps before you share your app:
- Replace the sample content. Your app still shows sample services and prices, address, phone, email, hours, cleaners, clients, bookings, and a stand-in hero photo. You can ask AI Builder to make the changes, or open your app's admin and edit them, for example, under Business details.
- Review headlines and claims. AI Builder writes sample headlines and taglines, such as "Eco-friendly products, vetted cleaners." Remove or change any claim that doesn't apply to your business.
- Delete your test bookings. Preview and your live app share the same data, so test bookings appear as real bookings until you delete them in your app's admin.
- Review new booking requests. Because you chose to confirm each request first, new bookings wait for your approval. Confirm each request in your app's admin.
- Set up email. Connect your own Resend or Postmark account in Settings > Email notifications. Until you do, booking confirmations and notices won't send, though bookings still appear in your app's admin. Resend and Postmark are third-party services, and their own terms and pricing apply.
- Add a privacy policy. Your app collects clients' names and contact details. Add a privacy policy that explains how you use this information.
- Set an admin password. When you open your app's admin from your AI Builder workspace, it signs you in without a password. To sign in at /admin/login on your live site or from another device, set a password from your profile in the admin (the menu with your name).
Next Steps
- Write better prompts: Bluehost AI Builder: How to Write Effective Prompts.
Shows how to describe your website or app so you get closer to what you want on the first try. - Keep improving your app: Bluehost AI Builder: How to Make Changes After Build.
Covers adding features, testing updates, and republishing.
Summary
In this walkthrough, you created a cleaning service website with a built-in booking app using Bluehost AI Builder and followed the process from idea to publication. You checked your prompt, answered the follow-up questions, reviewed the generated app, made one change, and published it online.
Now that you've built your first website and app, you can keep improving them as your needs change.
If you need further assistance, Bluehost Chat Support is available 24 hours a day, 7days a week while Bluehost Phone Support is available 7 days a week from 7 am-12 midnight EST.
- Chat Support - While on our website, you should see a CHAT bubble in the bottom right-hand corner of the page. Click anywhere on the bubble to begin a chat session.
- Phone Support -
- US: 888-401-4678
- International: +1 801-765-9400
You may also refer to our Knowledge Base articles to help answer common questions and guide you through various setup, configuration, and troubleshooting steps.